Architectural Photography Primer for the Somewhat Uninitiated
By James Klotz
You know why I like this site? Because Steve has done a great job of presenting information about gear and photography without boring test charts or MTF graphs. After all, it’s all about the picture, isn’t it? The rest is simply a means to get there. I think often times we get too caught up discussing the merits or faults of a particular piece of equipment, when what we should be focusing on (no pun intended) is our most important piece of equipment we own, our “eye”. That being said, Steve has offered me the daunting task of taking a highly technical aspect of photography, architecture, and asked me to present it in a “real world”, non technical way. I agreed, and promised I’d do the best I could. So here goes:
Let’s start with the basic question that so few seem to be able to answer. What is good architectural photography? For starters, it is generally free from perspective distortion (more on that in a sec) . It’s generally in focus, with a long depth of field, it is well composed, often times taking into consideration not just the subject itself, but how that subject effects it’s surroundings as well. Just like most street shooters have studied Henri Cartier-Bresson, I find it helpful to study the masters of the subject. If you haven’t already, take a look at the work of Julius Shulman , Ezra Stollar
and Henry Blessing. Those were the guys who practically invented the genre of modern architectural photography, and they deserve to be studied.
So What’s It Take?
Steve and I both Love the M9, but let’s face it, that is not a good camera for shooting architecture. The difficulty of wide angle viewing and lack of a reasonable tilt/shift lens options pretty much rule that one out. We’ll see why in a sec. So that leaves us with a DSLR or large format camera. My personal choice is a large format camera with a digital back, but unless you shoot professionally, it’s difficult to justify the expense. When I do shoot with a DSLR, I find the Canon 5DII to be as good as any, and the new tilt/shift lenses are much better than the predecessors. The live view is awesome for nailing focus, there’s tons of resolution and the files look great. If you are on a budget, the original 5D might be a good option, and they can be found for a lot less money these days. (You’ll have to forgive me, I’m not a Nikon guy, so I don’t know what the Nikon equivalent would be). I see no reason to use a IDs Mk III, as the IQ and functionality are no better than the 5DII, unless, of course you a) already own it or b) plan to shoot in the rain and need the weather sealing. Full frame cameras are a huge benefit, as most of this type of work utilizes wide angles, and cropped sensors cut out part of the view.
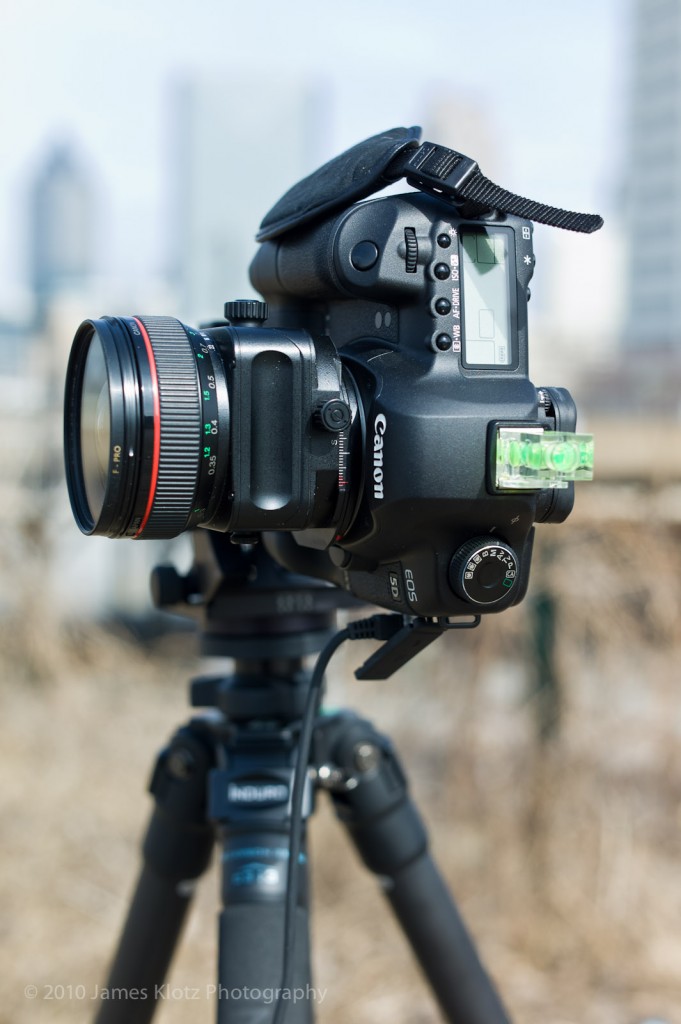
Regardless of which camera you’ll be using, there are 3 things that you must have: 1) you’ll need a hot shoe mounted bubble level, 2) a cable release of some sort and 3) a good tripod and head. I find a geared tripod head, such as the Manfrotto 410, to be a benefit, although not necessary. (for the ultimate tripod head, see the Arca Swiss Cube) I’m also a big fan of the carbon fiber tripods, because of the decreased weight and improved damping characteristics (when compared to aluminum or metal), although they do tend top be a little more fragile than the metal ones. Most of you probably already own a tripod that is sufficient.
If you plan to get serious about photographing architecture, you’ll probably want some sort of perspective control lens sooner or later. These can get expensive, and difficult to find used. For my students’ assignments, I usually recommend they rent them, as they are readily available from most rental houses at a reasonable cost. If you have a full frame camera, you probably will be well served with a Canon TS-E 24mm f/3.5 L II, (the “I” version of that lens can be had for much cheaper, but it’s not as good) and if you are using a cropped sensor camera, you might want to consider the Canon TS-E 17mm f/4 L. Again, it will probably be more cost effective to rent these lenses than buy them, depending on how much you plan to use it.
So What’s Perspective Distortion Anyway?
Ever look at a structure or building and notice how the corners of it are straight up and down? A lot of design, planning and construction expertise went into making it that way. Ever notice how a lot of people who photograph said structure don’t have the verticals even close to being straight? Practically zero photography expertise went into making it that way. Let’s take a look at why:
Point your camera up at a tall building. See how the lines of the building converge to the top of the frame? That’s an extreme case of perspective distortion. For a shot like that, sometimes it looks cool. But back up a good bit, zoom out, and try to shoot the entire building. More times than not, you’ll notice the verticals are not perfectly straight. It’s extremely difficult to get it right handholding the camera and trying to guess. That’s because in order to have no perspective distortion, you have to have the capture plane, be it film or digital sensor, parallel and plum with the building.
What To Do About It
It’s pretty simple to fix actually. Remember the bubble level I told you to get? Let’s put that in the hotshoe and make sure the camera is level and plum. Bingo. Problem solved. Sort of. OK you say, now I’ve got the building plum and square with the camera’s capture plane, and the perspective distortion is gone, but now the camera doesn’t show the part of the frame I want. If I point it up to show the entire building, now I’m not level anymore and I’ve got distortion again? Enter the tilt/shift lens.
There is a lot of misunderstanding about tilt/shift lenses. Basically, it’s a lens that projects an image circle much larger than the frame it intends to cover. Then, it is allowed to be moved independently of the camera body to anywhere within the projected image circle.
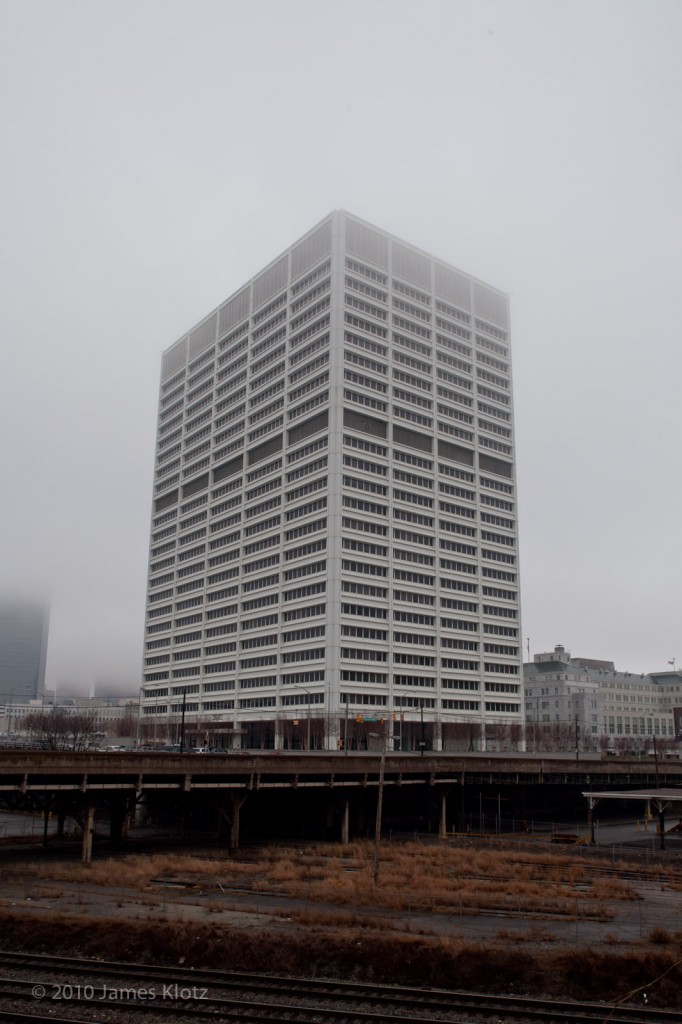
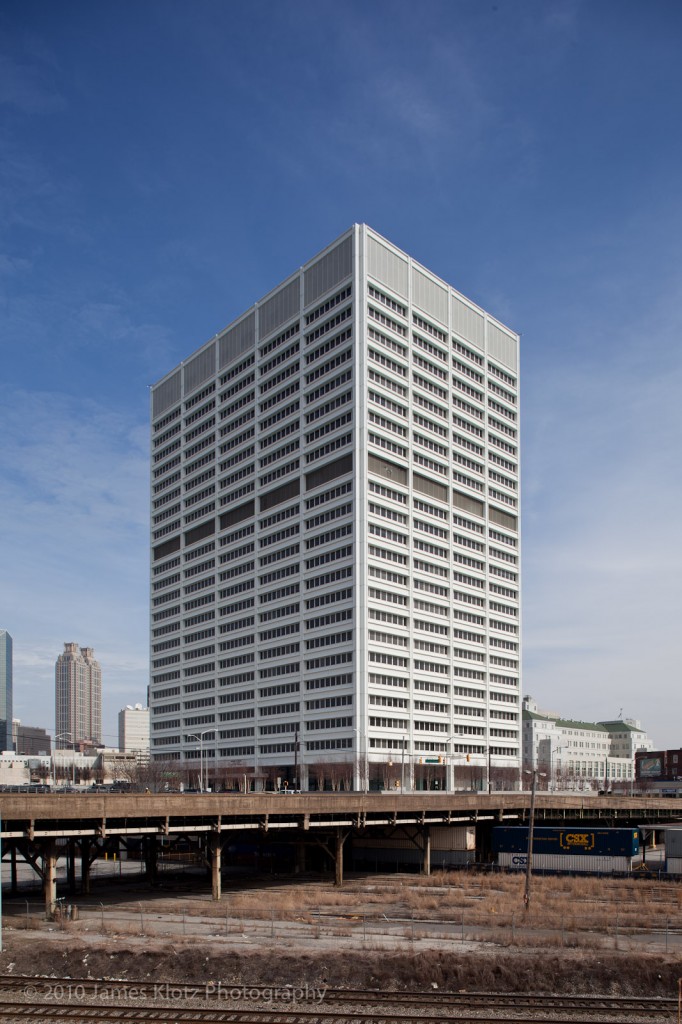
For instance, look at these three photographs. 1st is my attempt to shoot the building with the camera handheld. Notice the perspective distortion?
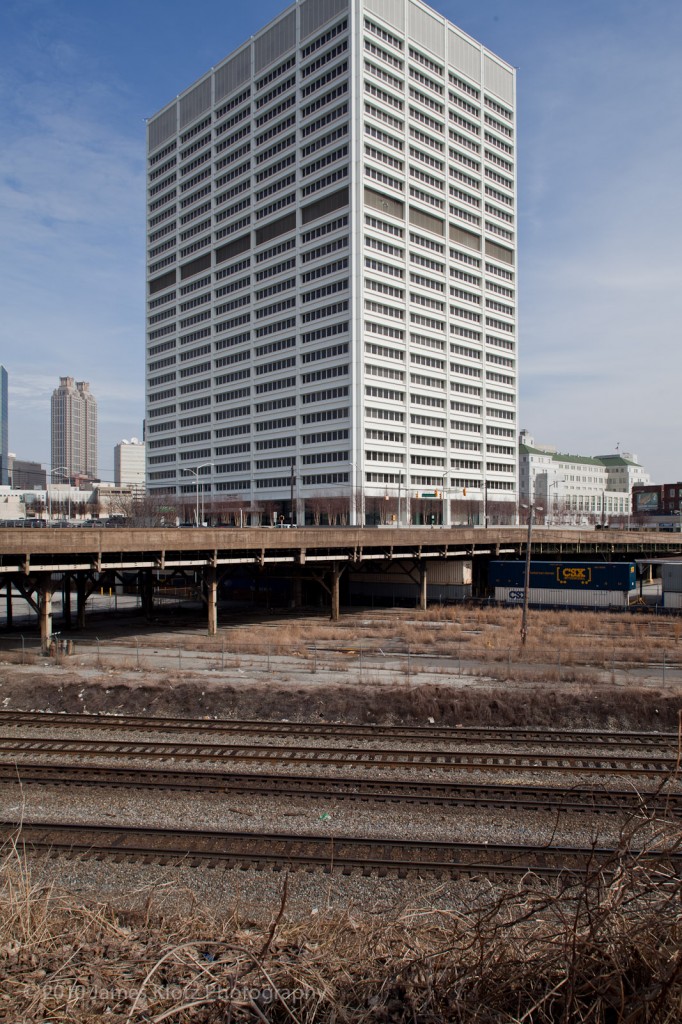
2nd: I’ve tripod mounted the camera, used my bubble level and now the perspective distortion is gone. Problem is now I’m looking at the ground for half the frame.
3rd shot: I adjust the tilt/shift lens up, leaving the camera level, and valla! Problem solved.
Now these lenses do have some downsides and limitations. 1st, they are expensive (what in photography is not these days?) Secondly, they are manual focus only. From what I understand, there is no way to get the lens to be able to move, and still be able to insert the autofocus motor. Third, if you like to auto meter, shift even a few mm’s and it will be way off. That means a manual exposure for most applications. Fourth, they are typically slow lenses (which for our application, doesn’t really matter). And last, as with all moveable lenses, you need to be aware of loss of sharpness and vignetting as you get close to the outer edges of the image circle they produce.
Yea, but Can’t I Correct It In Post?
The short answer is yes, you can. However, you should be aware of the limitations of doing so. If you go into photoshop, go under the filter menu, select “distort”, then select “lens correction”, a window will pop up and you will have the option to adjust for vertical perspective. The problem with doing it that way is twofold; 1st, if your intention is to render the structure accurately, it is very difficult to do so from memory. Yes, the perspective distortion might be gone, but now the proportions of the structure will not be correct. Personally, I can’t do it. Maybe some can. Secondly, you will loose quite a bit of micro contrast when doing so. Let me explain; say you shoot a brick wall, pointing the camera up, so there is perspective distortion. When we look at that image, there is, say 100 bricks across the bottom. There is also 100 bricks across the top of the frame, but they are squished together. So we correct for that distortion in post. We expand the top of the frame, cropping it until we have equal distance between the bricks on the top and the bottom. What we have done is ask the computer to interpolate that data that didn’t exist before and add it to the expanded section. The ability to do this has improved significantly over the years, but it’s nowhere near the resolution and detail you’ll get if you shoot it properly to begin with.
Proper Technique
Generally speaking, when shooting architecture, you are going to be at the native ISO of the camera (100 for Canon users, 200 for Nikon), somewhere between f11 and f16, tripod mounted, leveled and plum with the structure. We are going to meter the subject and set the camera to manual. (You can use a light meter, your in-camera meter before shifting, or go old school and use the sunny 16 rule) Next, we’re going to manually focus the camera. If you’re shooting digital, take a test shot, play it back and zoom in beyond 100%. Adjust the fine focus, repeat, until you are sure you have the focus nailed. Since we are typically shooting pretty wide, depth of field is pretty long to begin with, but still keep in mind 1/3 of the focus plane will be in front of the camera, and 2/3 will be behind, so pick your point of focus accordingly.
Next, we’ll go into the camera’s menu and set it for mirror lockup (provides the sharpest image possible), attach a cable release if you haven’t already, and take a shot. (using mirror lockup, you will have to hit the shutter release twice, as the 1st time will raise the mirror and the second will take the shot) Now play back that image in the cameras viewfinder (or do what I do and shoot tethered to a laptop where you can REALLY see what’s going on) and adjust accordingly. Adjust your exposure with the shutter speed, and leave the aperture set. Oh, and here’s a tip for you; all this monkeying around with the camera is almost sure to knock you out of level to some degree. I always recheck level after almost every step in the process. If you are shooting in the evenings, or at twilight (my favorite time to shoot), keep in mind your shutter speeds will typically be between 4 and 30 seconds. That’s fine – don’t be tempted to raise the iso to compensate.
Time is on Your Side
A building or house can look very different depending on the time of day you shoot. Typically the guys who do well with landscapes and understand how the light changes throughout the day make good architectural shooters as well. A compass can be a handy tool for an architectural photographer. Depending on how I want that structure to look, and which direction it faces will determine weather I’ll be shooting in the early morning or early evening. I almost never shoot in the middle of the day. The light is way too flat and harsh, and the shadows way too dark.
My favorite time of day to shoot is what’s called “civil twilight”. According to the U.S. Naval Observatory, civil twilight is defined to begin in the morning, and to end in the evening when the center of the Sun is geometrically 6 degrees below the horizon. Basically, this means just after sunset. That’s when you get the color in the sky if you are lucky enough to be facing West, or that pretty cobalt blue if you are facing East. A mistake I see with a lot of beginning photographers is that they will set out with the intentions of shooting a gorgeous sunset shot, only to get back and find the contrast too high, the sky blown out a little and the landscape or building too dark. They didn’t wait long enough! The best shooting is 5 to 10 minutes AFTER the sun sets! So take your shots, bracket your exposures, but, by all means, wait it out!
That’s about enough for now. Thanks for reading. Be sure and check back in a few days for installment 2, where I’ll discuss composition, large format options and HDR.
James Klotz is a professional architectural photographer located in Atlanta, GA. For more information about James, please see his website www.jamesklotz.com




If you use PaintShopPro, on the side menu is ‘Perspective correction’ which works significantly differently to the horizontal and vertical perspective controls found in the ‘Effects’ drop-down menu. You are presented with a frame on your image with ‘handles’ in each corner, so you position the frame around the edges of the object/s that need ‘correcting, and then just double-click within the frame. Note, you will find some cropping occurs, and the odds are the x:y ratios of the image will have changed, so you then go to ‘Resize’ and set these back to the usual frame sizes of your digital image. Obviously, if you don’t want the sides and top completely squared up, you position the frame accordingly. Holding down the Shift key whilst adjusting the angle of one the edges, also make life easier as it ‘locks down’ the other side, so it doesn’t also move.
I come from a 4×5 / 8×10 view camera and film background with decades of experience photographing buildings and interiors, and then with decades more experience with post processing. There are different ways of approaching this kind of work, and they all have limitations. In terms of image quality, digital capture rarely compares with 8×10 transparencies. But that is irrelevant in today’s world, where ease and speed of use trump quality if you want to make a living rather than spend a fortune for your own pleasure.
Vantage point is one of the major determinants in making a “formal portrait” of a building, so I have made extensive use of rooftops, cranes, hydraulic lifts, and ladders. It takes more work, but shooting from vantage points higher than ground level makes all the difference in creating a more interesting foreground, it allows me to get close enough to avoid distracting objects, and it reduces the need for convergence correction with the unnatural stretching of structures. I always use the least wide lens that will cover the necessary field of view (which also may need to take into account post correction and/or vignetting).
A good tilt-shift lens does much of what a view camera can do, but the cost is high and the focal length is fixed. Most architecture shots can be done with ultra wide or wide non-shift lenses and a suitably large high-res sensor, using post correction and cropping, but it takes a wide enough lens and careful leveling / composition to avoid cutting out important detail, and it takes more time in post to get it right. Nevertheless, shots that require the maximum field of view are best done with stitching using a shift lens or a shift adapter with compatible lens, the latter being hard to find.
I used to own 6 lenses for 4×5 format ranging from ultra wide to moderately wide. I routinely carried around 50 lbs. of gear, which is one reason why I suffer from back pain. Now we have it easy: that entire range can now be covered with a single Nikon 14-24mm lens, since Hartblei has come out with a tilt-shift adapter and modified Nikon 14-24 lens with the hood cut off, which offers the full range with 5-10mm shift and tilt with unimpeded rotation as well, fitting on the Sony A7r or A7 camera. I consider this to be the ultimate solution for architectural photography that is currently available, so I aim to acquire this setup. It’s more expensive than a camera + shift lens, but it is far more versatile. It’s called the HCAM Master TS 14-24mm.
The most important correction of a tilt & shift lens cannot be done post, as James illustrated – shift is the ‘miracle’ feature of these lenses. As for perspective control, you lose resolution and need loads of cropping space around your image if you’re going to rely on post to ‘resolve’ perspective from a ‘standard’ lens. The ‘fix it later’ approach also means that what you see isn’t what you get – and to my mind photography is about practicing and perfecting your ‘art’ there and then, not spending time in front of a computer. Makes more sense if you’re earning money from your work too… get it right first time, get on with the next job.
I guess most people reading this are not that serious about architectural photography… if that’s the case dear reader, buy a 17-40 and polish up on Photoshop, but don’t be critical of doing things the right way, simply because you’re not prepared to make the necessary investment.
Wow, Emily. Imagine reading a four-year-old instructive thread and posting pure nonsense as you did here.
Most of these corrections can be done later with a special software! So one should think about whether or not to make such an Investment!
meh I’ll just stick to the m9 the tilt shift is just overhyped. That’s not how you brain sees it and it just looks fake like a bad drawing. Forget spending that much money just for a lens to warp your images. ALl you examples suck too. You would only need this for interior real estate shots.
Just got my A7r and the 55mm FF 1.8 and have learned so much from your experience. Thank you. I can’t wait to get started. The manual seems a bit too confusing but I will get this worked out. Also planning to use some Leica R lenses I have. Am waiting for the adaptor.
” 3rd shot: I adjust the tilt/shift lens up, leaving the camera level, and valla! Problem solved.” …Great article, just correcting I think …You wanted to use the french expression Et Voilá , so it’s Voilá, not Valla.
James, Thanks for the article. Have you written anything about the business side of Architectural photography? I’m thinking about how to create a portfolio of interiors (obviously I can’t just go into buildings and starting taking shots of interiors)? How to get know to potential clients? I think it would be a great article.
I totally agree with this comment. The corrected photo above looks un-natural and incorrect. As an architect maybe I am to used to looking at perspective this way.
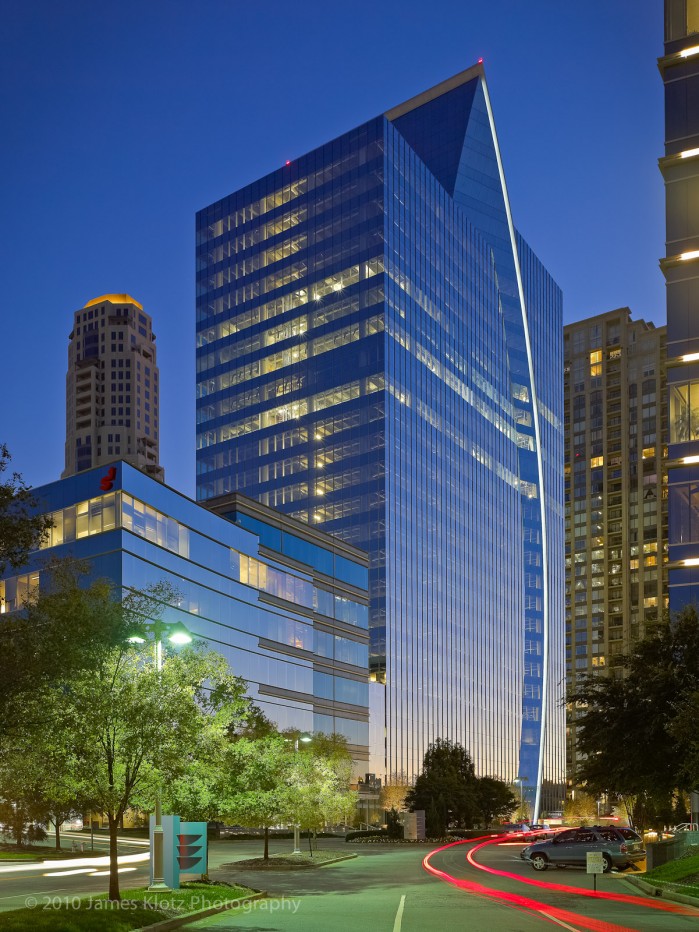
if anyone know where that shoot of the first three buildings where shot at…..can you please let me know it is really important for me to find out where they are located at…please someone =)
thanks
I’m going to give the original 24mm TS-E lens a try and upgrade later if I need to. Thanks again for your generous advice!
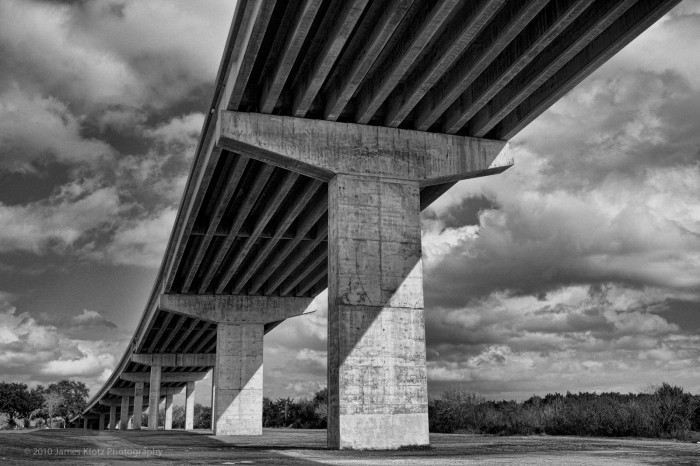
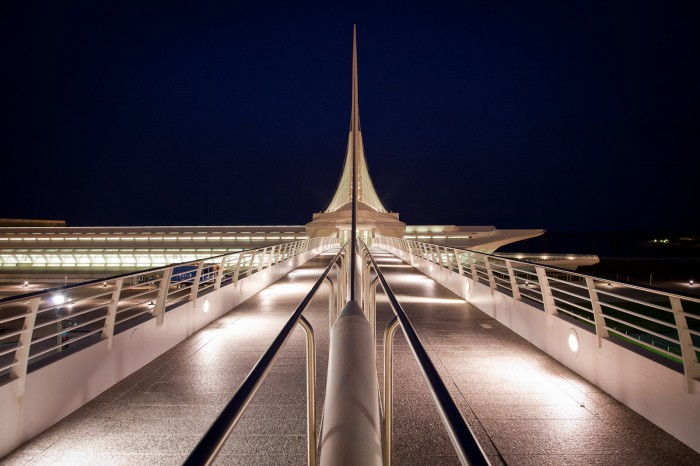
James, this was great. Lots of practical advise. Very helpful thinking about what gear to consider in the future. Love the picture of the bridge at the beginning of the article, where is that? Thanks.
Thanks guys, glad you found it useful. Zlatko, the newer version of the 24ts/e has improved operability, higher resolution, especially in the corners and the edges of the image circle and reduced chromatic aberration when compared to the original. That being said, the original is not a bad place to start IMHO. My recommendation would be to pick up a used copy of the original version, see how much you use it. If you really “take” to this type of photography, you can sell it for very close to what you paid for it, then get the second version, which is not cheap ($2,199.00 last time I checked).
Hope this helps.
James, thank you very much for this excellent article. Is the difference between version I and version II of the Canon TS-E 24mm lens noticeable even at f/11 or f/16? Or is version II significantly improved in other respects, such as the image circle and the tilt-shift movements? I am wondering whether to even consider version I for this type of work. Thanks again.
Thanks for the article the level should ne cheap and it opens a whole new world. Thanks again
Thanks James for all encouraging advices and recommendations!
Very interesting article. Thanks for the information Mr. Klotz, and thanks Steve for the this article and the article on Bokeh. These really supplement your reviews and comparisons, etc. very well.
I love shooting architecture, I’m absolutely no pro, but I’ve learned a lot from this article. Thanks a lot!!
Peter, your M8 will take beautiful pictures. Here is the trick with it – use it on a tripod, and get a bubble level. Make sure it is level and plumb! You might have to back up to get the entire building in the frame, and it may require cropping out the part of the frame you don’t want, but by all means, do it. Architecture can be a very rewarding subject to shoot!
Thank you James.
I´ve decided a few months ago, to commit myself to the category of arc. photography. This article only encourages my to increase the speed of getting started. But – I just sold all my dslr, and bought an M8 + CV 15mm/4.5 lens. Of course it´s not a large- or medium format, but I hope it will be usefull anyway. Maybe some other readers can supply with further informations, regarding the issue of M8 as arc.camera?
Best regards!
Yes, I was talking about the L-plate from RRS.
4×5 with db …. of course … now your set up picture makes sense 🙂
Thanks for the tip Harald. My setup is a 4×5 with a digital back, I just used the 5DII as an example because I thought most of the readers here could relate better to that. If you have a helpful suggestion to those using a DSLR to shoot architecture, please do post. I’m assuming you are talking about the RRS bracket and plate?
I am surprised you’re not using a L-plate. You wouldn’t need that spirit bubble and your set up would be more stable because the weight of your camera would be above the tripod center column and not off to the side.
Thanks so much for this article. I learned a lot. Shooting 10 minutes after sunset. That’s a GREAt TIP! You’ve explained it in layman’s terms, which is so much better than technical jargon. Thanks for the book links too. If I ever want to photograph buildings, those are wonderful resources.
That picture of the bridge – right after the building series. Awesome. I love getting really close to a subject with a wide angle lens. Great tutorial.
i always found that perfectly straight verticals is not very natural … the real vision also gives unparralel verticals …