
Understanding the Basics of Exposure by Emanuele Faja
Note: This is a guest post by Emanuele Faja from AndBeThere.com
Introduction
In this post you will find all the information you need to understand how the different aspects of photography come together to form an exposure and how each setting has a distinct effect on the final outcome. Please remember, this is a guide on the basics.
If, after having read through this guide, there is something you don’t quite understand then please do not hesitate to leave a comment with your question and I will answer it.
Another point to keep in mind as you read this guide: There is no such thing as a “correct” exposure! It’s all about YOUR artistic vision and it will vary with every scene. There is no “cut and paste” method. It will require plenty of thinking on your part if you wish to take your photography to the next level.
You will want to bookmark this page because there is a lot of information and it will require reading a few times.
[ad#Adsense Blog Sq Embed Image]
What is Exposure?
Exposure is simply the amount of light that you allow to reach the light-sensitive photographic medium inside your camera. This medium could (or should!) be film or it could be a digital sensor.
The more light you let in the brighter your image will look and, conversely, the less light you let in the darker your image will be. You see? It’s not exactly rocket science!
The factors that affect Exposure.
There are three things that you modify to make your image darker or brighter.
- Aperture – This is the adjustable opening in the lens. The bigger the opening, the more light hits your sensor at any one time.
- Shutter Speed – This determines how long the shutter will stay open. The longer the shutter stays open the more light hits the sensor.
- ISO – This is a measurement of how sensitive your film or digital sensor is to light. More on this later.
So far so good? Right now you only have to remember three things. Easy 🙂
Now let’s talk about each of these three factors in more detail. I will go over the basics of each factor and then explain how each one effects your image.
Aperture
The Aperture setting on a lens is expressed in “f stops”.
This is actually part of a conspiracy created by photographers who don’t want anybody else to understand how photography works so they can charge ever increasing fees for their work 😉
Of course, I’m just joking. The f/stop is actually a ratio that’s reached by doing some tedious mathematics. It’s the ratio between the diameter of the aperture in the lens and the focal length of the lens. Got that? No? Good, it doesn’t really matter…
This is all you need to know for now:
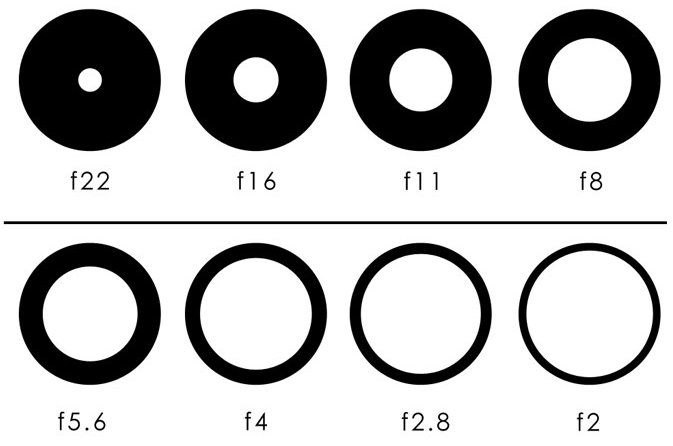
The standard sequence of f/stops:
2 2.8 4 5.6 8 11 16 22
Going from right to left (f22 to f2) each f stop lets in twice as much light as one before. So f/8 lets in twice as much light as f/11 but only half as much as f/5.6.
Got it?
Yes?
Good.
Because of the tedious mathematics, the smaller the number, the bigger the aperture. This is because they are actually ratios and the f stop number is the bottom number of the ratio/fraction. So they really should read 1/2, 1/2.8, 1/4 etc but they don’t… probably part of that conspiracy theory by photographers…
Here is a nice little graphic to make everything even easier to understand:
There are lenses which go beyond f/2. For instance, I own a Pentax SMC K 50mm f/1.2 lens. There are various reasons why a photographer would want to own such a lens. We will talk about that a little later but it’s worth mentioning that the lenses become much heavier and more expensive as you go beyond f/2.
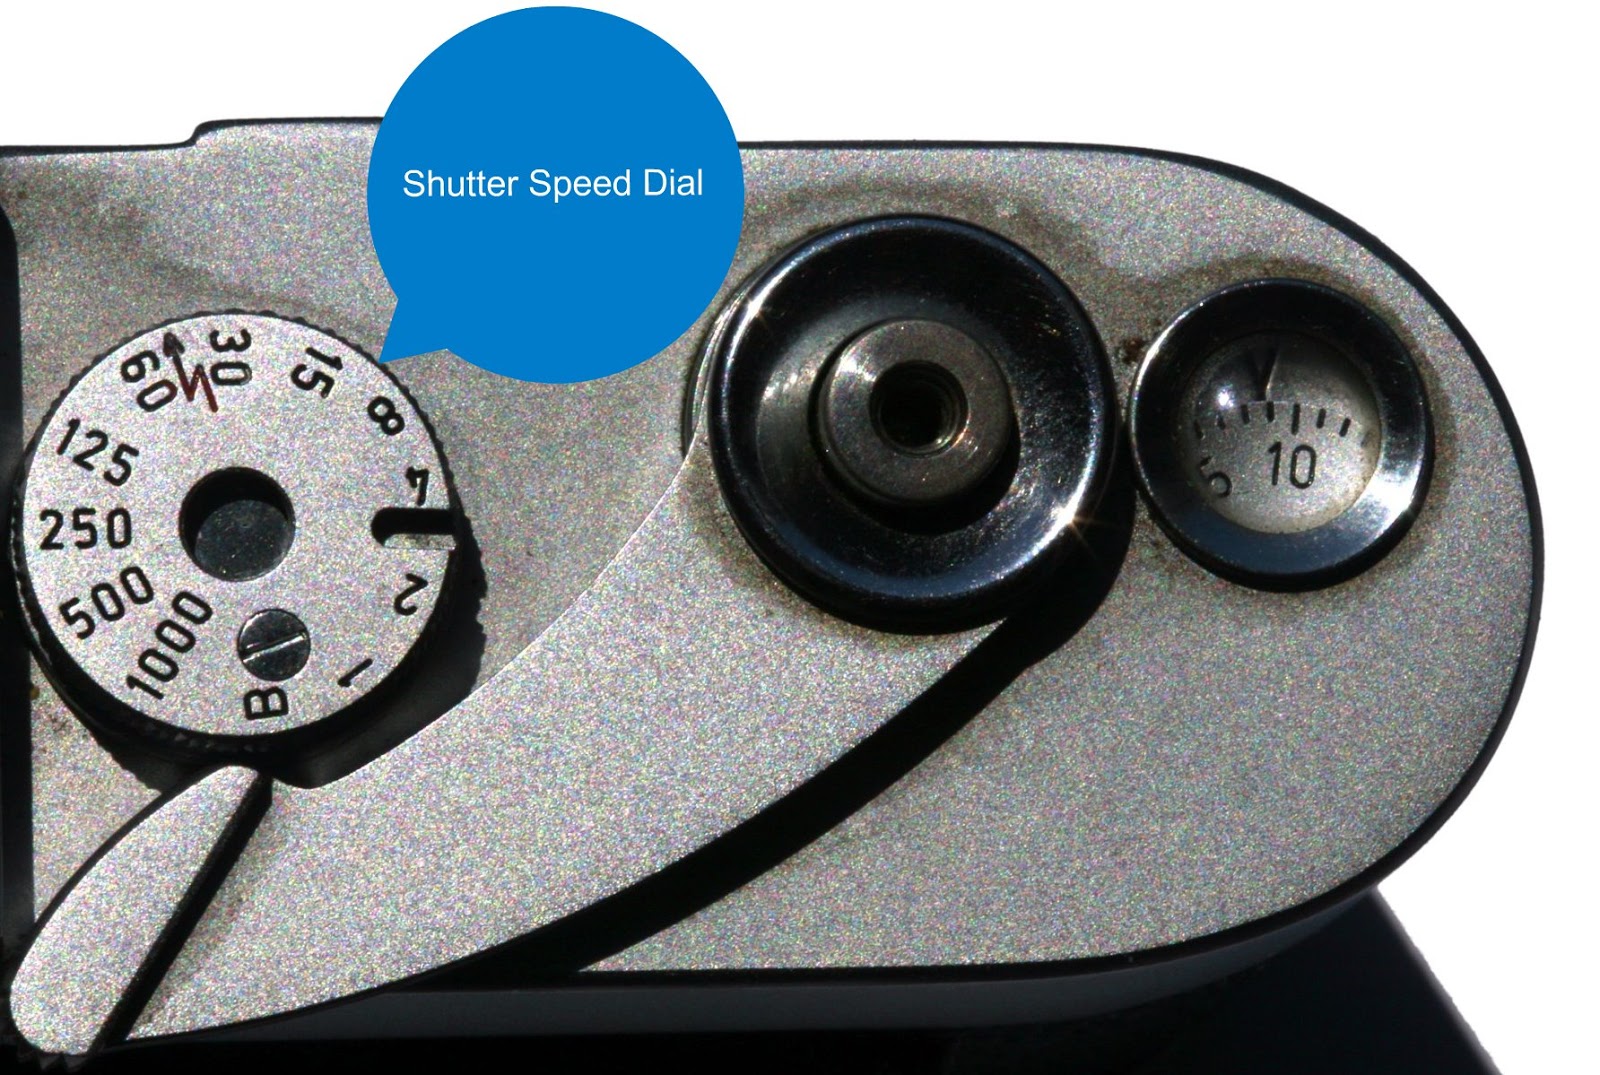
Shutter Speed
Shutter speed is expressed in seconds or fractions of a second.
Most cameras have shutter speeds ranging from 1 second to 1/2000 of a second and also a “bulb” mode that will keep the shutter open for as long as you keep the shutter button pressed down.
1 1/2 1/4 1/8 1/15 1/30 1/60 1/125 1/250 1/500 1/1000
Going from left to right (1 to 1/1000) each shutter speed is twice as fast and so lets it half as much light. 1/125s lets it twice as much as light as 1/250s but only half as much as 1/60s.
Easy!
Instead of tediously writing 1/125, 1/250, 1/500, 1/1000, the shutter speeds are just written as numbers on the shutter speed dial.
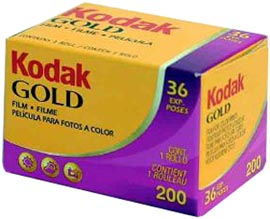
Iso
Iso is a measurement of how sensitive your film/sensor is to light.
Iso is actually a throw back to the lovely pure days of film photography. It’s named after the International Standards Organisation which decided the ratings in the first place. Different films would have different Iso ratings and a photographer would select which film to use depending on the situation and, of course, personal preference. A few examples:
ISO 200 color film
 –
–
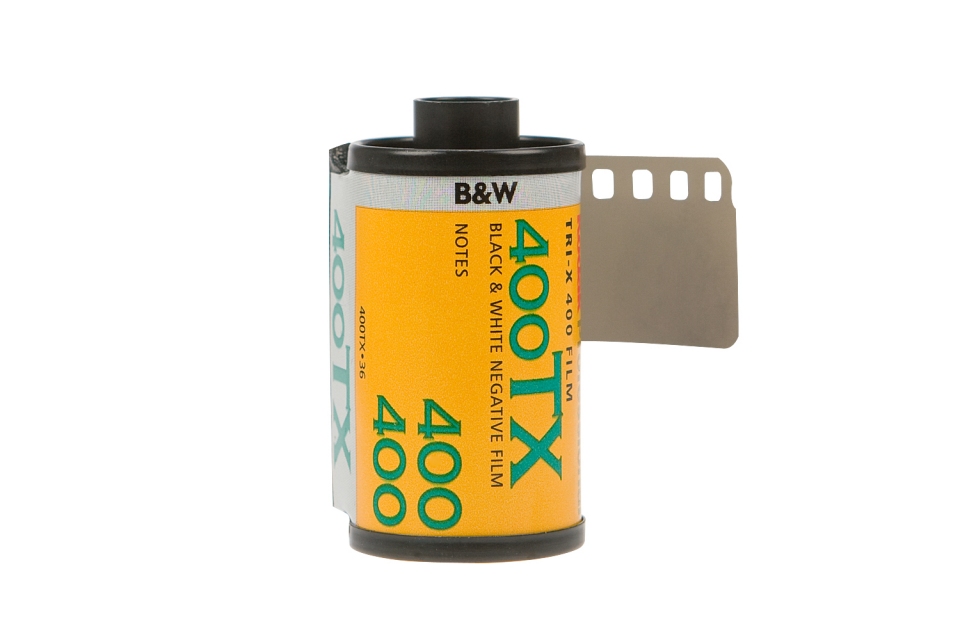
ISO 400 Black & White film
 –
–
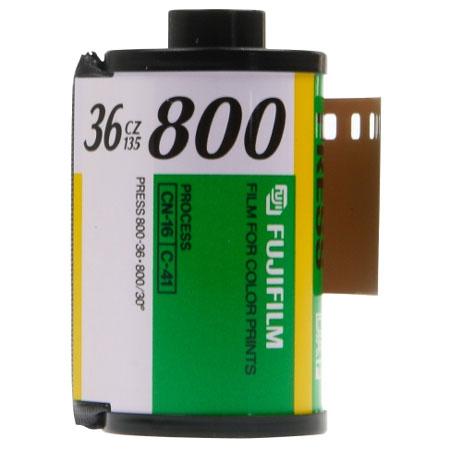
ISO 800 Color print film
 –
–
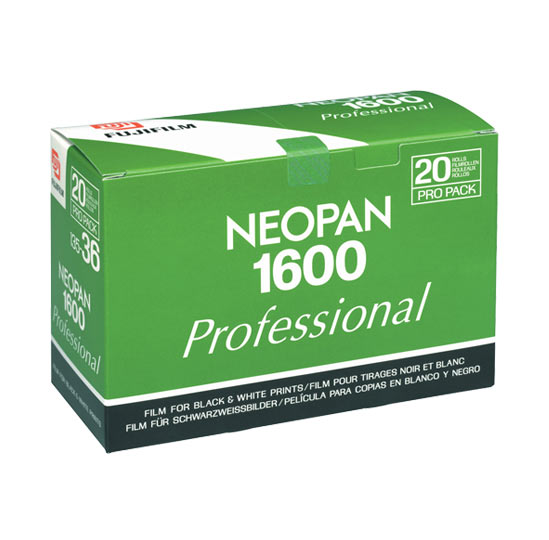
ISO 1600 Black & White film
In order not to confuse the hell out of everybody when photography went digital the camera manufacturers continued to use the term Iso and also the same scale:
25, 50, 100, 200, 400, 800, 1600, 3200, 6400
Going from left to right (25 to 6400) each Iso setting is twice as sensitive to light. Iso 400 is twice as sensitive as Iso 200 but only half as sensitive as Iso 800.
The higher the number, the greater the sensitivity of the film/sensor.
The greater the sensitivity of the film/sensor, the less light is required to create an image.
The sensors in new digital cameras today are becoming so good that they reach ridiculous Iso numbers like 51200 and even higher! This does mean that digital is great for night-time photography but I do wonder what will happen in a few years time when Iso numbers in digital photography will be 7 digits long!
A Quick Recap
So now you should know the following:
What are the three factors that affect exposure?
Which is the bigger aperture: f/2 or f/16?
Which shutter speed lets in more light: 1/2s or 1/500s?
Which Iso setting is more sensitive to light: Iso 200 or Iso 1600?
If only it were that simple!
I have a confession to make. I have not been entirely honest with you in this article but I did it for your own good. Instead of drowning you in information right away I just introduced you to the three factors that make up exposure but I did not tell you the “side effects” that these factors have.
- Aperture also effects the Depth of Field. I will explain what it is in just a moment.
- Shutter speed also effects how sharp your final image will be due to movement.
- Iso is linked to how much film grain or digital noise your final image will have.
Depth of Field
“The distance in front and behind the subject that is acceptably in focus”
Depth of field is often abbreviated to “dof”
The smaller the aperture, the greater the depth of field. So at f/22 (small aperture) you will have a much bigger (deeper) depth of field than you would at f/2 (large aperture)

Depth of field is actually determined by three factors:
- The aperture – We just saw how that affects the depth of field.
- The distance to your subject – The further away you are from your subject the greater your depth of field.
- The focal length of your lens (35mm, 50mm, 85mm etc.) – The longer your focal length (i.e. 100mm vs 35mm) the shallower your depth of field.
Boring Note: Sensor size also plays a big role because of the way it magnifies the focal length of a lens. Most DSLR cameras these days have “cropped” sensors which are around half the area of a full 35mm frame. This means that they magnify the focal length of a lens by roughly 1.6. So a 35mm lens becomes roughly a 50mm lens.
My advice: shoot 35mm film and forget about it. 😉
Sharpness
Generally speaking, if you are hand holding your camera you should be using at least this shutter speed if you wish to get optimally sharp images:
1
——————————-
Focal length of your lens
So this means if you are using a 50mm lens your shutter speed should be at least 1/50s (or 1/60s if your camera doesn’t have a the 1/50s setting). I find this to be true if you are shooting a camera that uses some kind of mirror system (analog or digital SLR systems) . If you are shooting a rangefinder camera (which is a different type of system which has no mirror and thus far less movement going on when you press the shutter) you can get away with far slower shutter speeds. Some people claim they can shoot a rangefinder at 1/10s or slower!
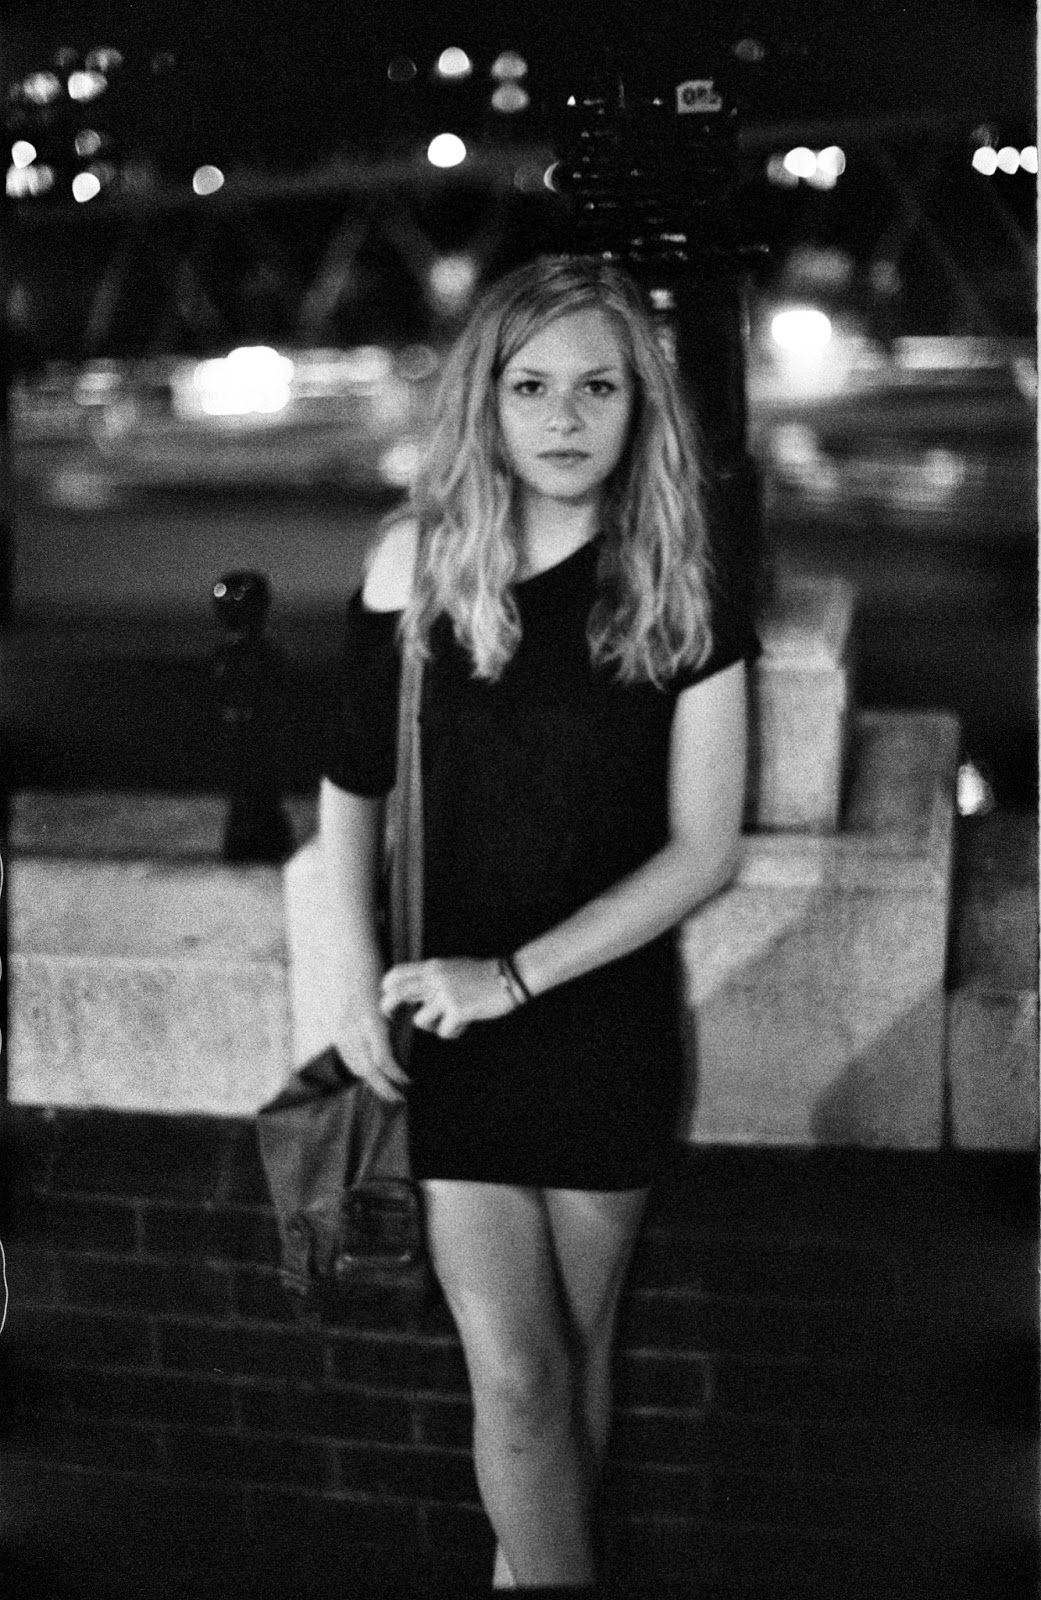
Here is an example of a picture I took using my Pentax K1000 at a low shutter speed. I had no choice. It was late at night and I had Iso 1600 film and my lens was fully open at f/1.2 so my only option was to lower the shutter speed below 1/60s. If I remember correctly, this was taken at 1/15s.
You can clearly see that the image is not sharp because I was holding the camera and the cars that were crossing the bridge in the background are also very blurred. This is also due to the very small depth of field at f/1.2
You also need to choose a shutter speed that is fast enough to capture your subject while they are moving. We will talk about this a little later on…
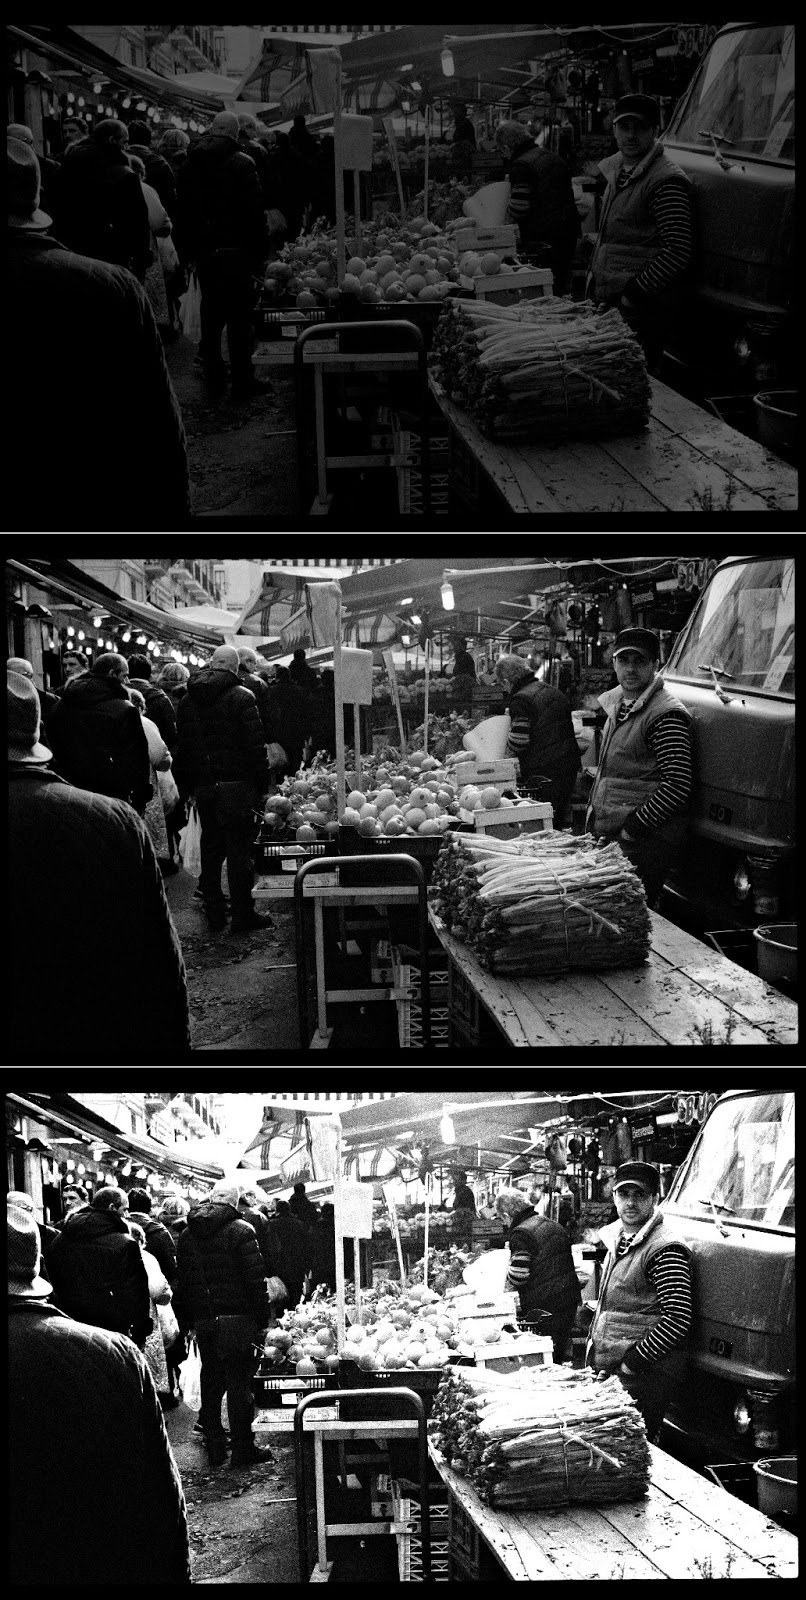
Grain/Noise
The higher the Iso the more film grain or digital noise you will have in your final image. Film grain can be quite lovely while digital noise is always disgusting. Thankfully, digital cameras are getting “cleaner” as the technology matures.
A quick example:
Putting it all together
Time for another little test. 🙂 Feels like being back at school eh?
- Define “Depth of field”
- What will have more in focus: A large d.o.f or a small d.o.f?
- What is, generally speaking, the longest shutter speed you should use when shooting hand-held with a 50mm lens?
- Fill in the missing word: The higher the Iso the more ______ your image will have.

Let’s now talk about the Exposure Triangle that is created by Aperture, Shutter Speed and Iso.
Let’s assume that a particular scene can be shot at f/8, 1/250s with an Iso of 200. There are actually many other equivalent exposures that we could use to shoot this scene. If you change one factor of the triangle of exposure then you must do an opposite change with another factor to keep the exposure the same.
For example:
- Original exposure: f8 1/250s, Iso 200
- Equivalent exposure 1: f4 1/500s, Iso 200
- Equivalent exposure 2: f2 1/1000s, Iso 200
- Equivalent exposure 3: f11 1/125s, Iso 200
- Equivalent exposure 4: f8 1/125s, Iso 100
There are a huge number of variations but they all have one thing in common. The exposure (brightness) of the image will be the same.
What does change between these equivalent exposures is the following:
- Depth of field due to Aperture
- Sharpness due to Shutter Speed
- Grain/noise due to Iso
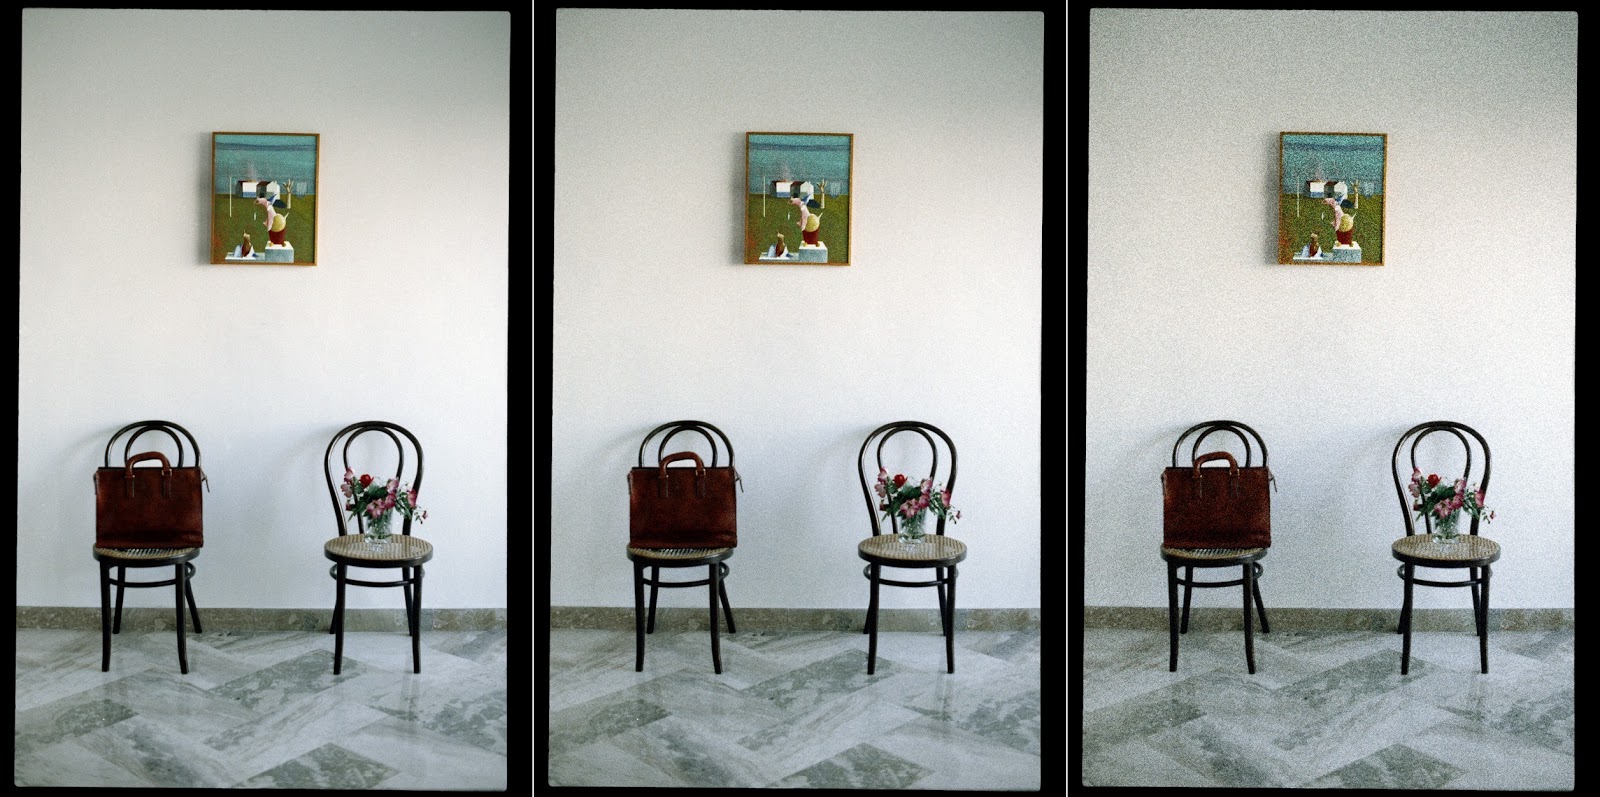
So what happens when you under-expose or over-expose an image?
The first image is under-exposed, The middle one is a normal exposure. The bottom image in over-exposed.
If you under-expose a scene then you will lose details in the shadows and your image will be dark.
If you over-expose a scene then you will “blow” the highlights which are the bright areas of the image. They will usually come out as blocks of white.
Artistic considerations
Now this is the fun part. You have gone through all the theory and now it’s time to see how you can use it in the real world and how it can spark your creativity.
As I mentioned at the beginning, there is no “correct” exposure. It’s all about YOUR artistic vision. Each scene you photograph has a certain dynamic range (the range between the darkest and lightest parts) and often its greater than the dynamic range that you can capture with your film or digital sensor. It’s up to you to decide how to handle the situation.
Before we jump straight in I want to say one last thing:
You need to pre-visualise the effect you want to create in your head before you start to change the settings on your camera and lens. Otherwise will you have a hit and miss approach and you will never understand why you aren’t capturing the type of photographs you want.
A few ideas to set you thinking:
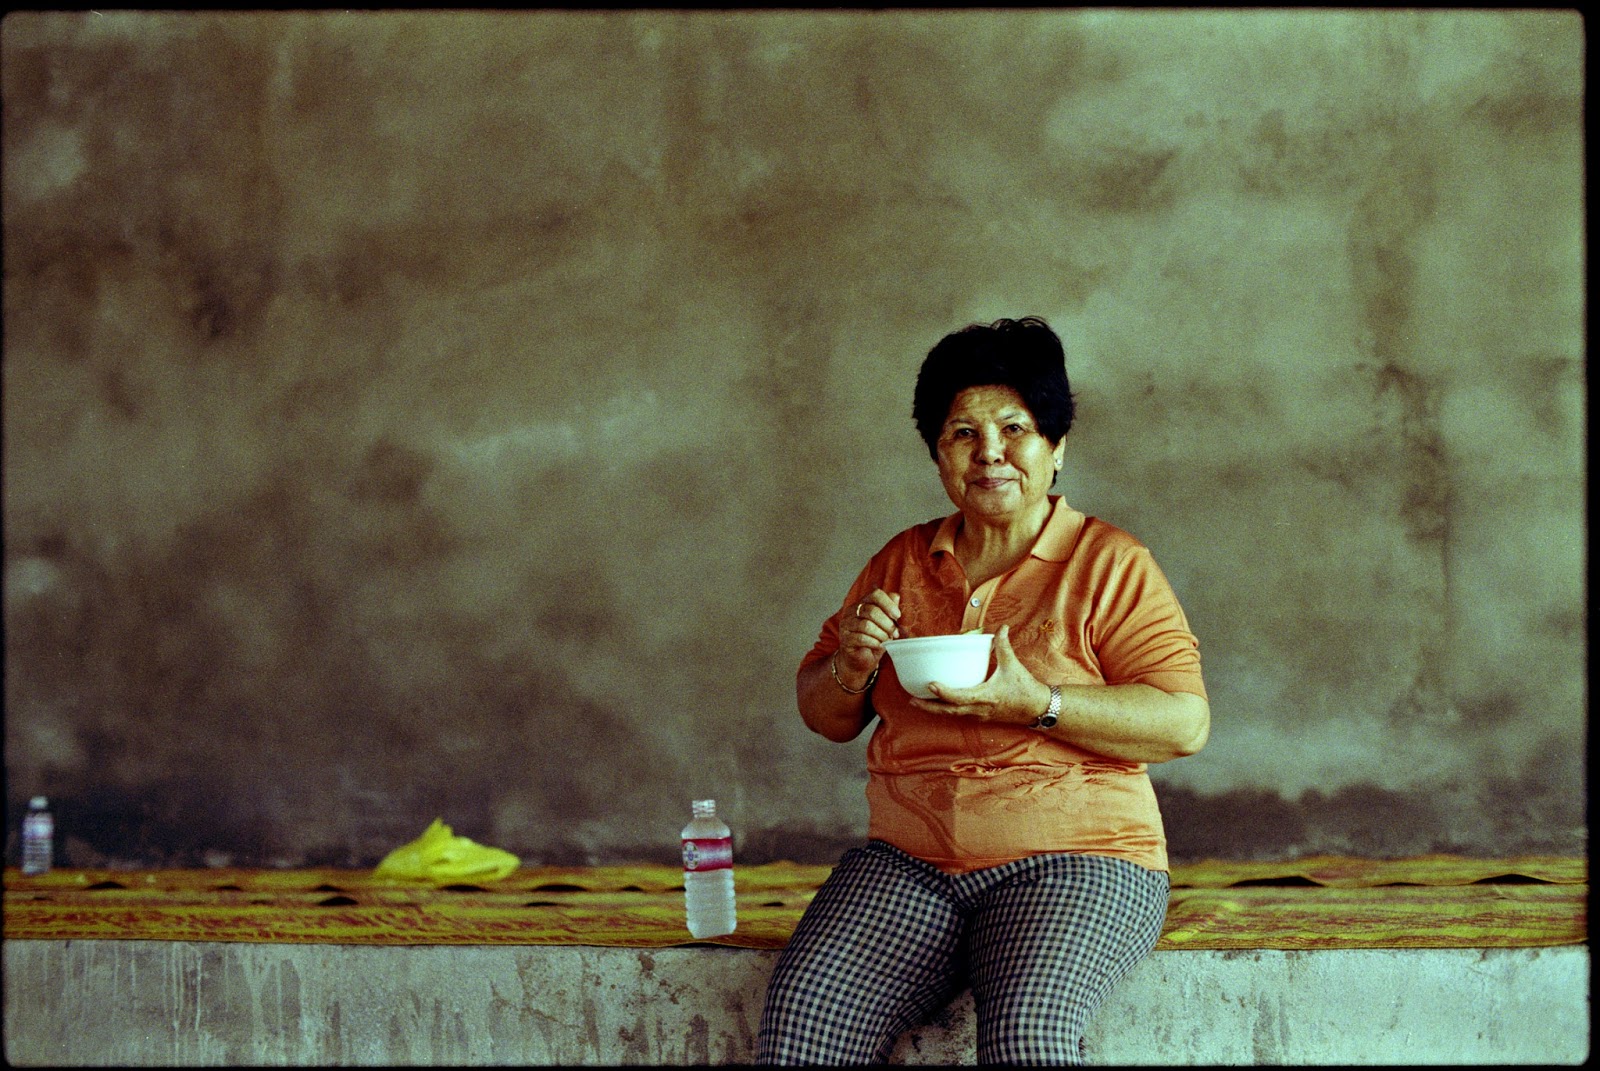
- Using Shallow Depth of Field for flattering portraits.
This is perhaps one of the most common uses of shallow depth of field. By taking a portrait of somebody using a large aperture (i.e. f/2) you blur the background. This is especially useful if the background would otherwise be distracting to the overall feel.
Notice how the woman is in sharp focus but the wall behind her is blurred.
- Using slow Shutter Speeds to create artistic effects with water.
This is incredibly common all over the internet and for good reasons too. It looks great.
Remember that if you are shooting fast-moving subjects then you probably want to use a fast shutter speed like 1/250, 1/500 or 1/1000.
- Using large Depth of Field for landscapes.
If you shoot landscapes you should try to use a large depth of field so that the entire image appears sharp. This means you will need to use an aperture of f/8 or smaller (f/11, f/16, f/22 etc).
Sometimes photography is about compromise. I couldn’t use a really tiny aperture like f/22 because the sun was going down and so that would have meant that my image would have been under-exposed.
- Mix it up a little!
What ever your artistic choices, make sure you don’t always do the same thing. Don’t shoot every portrait with a shallow depth of field, the background can often add to the the image!
As this is an introduction to exposure, I’ve not covered exposing for backlight, sidelight and exposure compensation.
Conclusion
(and the best way to learn exposure)
Don’t worry if you don’t understand everything yet.
This does take a little while to all sink in.
The best way to learn, in my opinion, is to get yourself an all manual camera like a Pentax K1000 and 10 or 15 rolls of cheap film like Kodak Supercolor 200.
There are a few reasons why I recommend using a simple all manual film camera like the Pentax K1000.
These cameras they have a real shutter speed dial on the camera body and an Aperture ring on the lens. This means that you are always aware of the settings you are using. Also, the physical location of the shutter speed dial and aperture ring remind you that one is a function of the camera and the other is a function of the lens.
There is no “auto” mode! This means you are forced to think at all times about what settings you are going to use! Don’t worry, there is a light meter to tell you if your exposure is correct.
By starting out with a film camera and using the same type of film you take Iso out of the equation. If you take my advice and only shoot one type of film while you are learning it means that you will always be using the same Iso value. This means that you only have to worry about shutter speed and aperture. It makes it even easier! You are turning the exposure triangle into a see-saw.
There are plenty of reasons to shoot film. Once you try shooting film you might just want to stick to it! Check out my article on giving film a try.
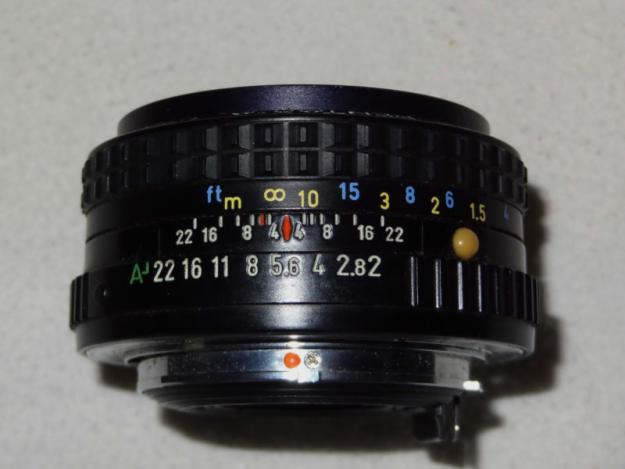
A Real Aperture Dial with a Depth of Field Scale
Shoot 3 or 4 rolls a week while also making a note of the aperture and shutter speed setting and in less than a month you will have it down like a pro. As a bonus, you may also have some lovely pictures too 😉 After you have shot your 15 or so rolls and got accustomed to manual setting the exposure then feel free to move to scanning, digital or a more advanced camera… It’s up to you!
Thanks for taking the time for reading this guide and I hope you found it helpful.
Feel free to leave some feedback about what could be improved. I’ve tried my best to explain everything as clearly as I can.
If there is something you don’t quite understand then don’t hesitate to leave a comment below and I will clear it up for you.
Note: This is a guest post by Emanuele Faja from AndBeThere.com
You can connect to AndBeThere via:
Our Website | Facebook | Google+ | Twitter | Flickr | Via Email
I would like to thank Steve for the opportunity to write an article for his website.
I am a big fan…keep up the good work!

Thank you for your simple explanations. What I knew already and has been scared out of my my conscious brain rather than my intuitive reactions has been fed back in. Maybe gut reaction to a situation is useful, but creates too much hit and miss. Time permitting to think with the conscious options is hard to come by, but practice has no substitute. Thanks again.
Fiona.
Emanuele, the deep beauty of your photos (flickr) perfectly illustrate that definition, contrast, resolution, sharpness, accuracy etc … are often only tricks to try to hide the lack of inspiration and the flatness of the message. With minimal means, You express yourself completely. I can’t prevent myself from thinking of a sort of filiation with Giuseppe Penone and this school of arte povera.
Hey Jean-louis,
Thank you for your kind comment. I strongly identify with what you just wrote and I feel that by using “simple” tools I concentrate more on capturing the moment than worrying about the details. While I don’t think there is anything wrong with perfectly sharp, clean images, I think the emphasis lately has shifted to that aspect in photography instead of actually trying to communicate and express.
Thanks again for commenting and I hope to see you on Flickr!
Emanuele,
I loved the article. I am just getting into photography and think that this is easy to follow (even though I have had to read it a few times when taking pictures), As a new photographer, I disagree with the thoughts about newbies starting with film.
I recently picked up an Olympus OMD-EM5 and love it. It is easy to use and allows for as much or as little manual operation as you want. If I had purchased a film camera as my first real one, I am not sure that I would be using it nearly as much or learning at the same pace. Being able to see the immediate difference in settings from shot to shot is immensely helpful, and being able to compare bad shots to the settings in the auto mode help me to think about the differences when the shot is composed correctly
As a learning tool and to encourage use, I am a big proponent of digital. I may progress to film at some point, but this is something that I would have definitely missed out on if I had started there.
I do love your idea about keeping the camera at a certain ISO to minimize the adjustments. I have been doing that and limiting myself to a certain number of shots at a time (similar to a roll of film) to make sure that I continue to put thought into it.
Thanks so much for writing this. It is articles like yours that keep me trying new ways to learn this skill.
Hey Michael,
I think the important part is to put the camera on “M” and experiment, make mistakes and then learn from them. It’s far less important if one uses digital, 35mm film, polaroid etc etc.
While obviously film lacks the instant feedback benefit of digital, it’s not that much of a problem if you keep detailed notes when you are out and about. It’s really not that difficult!
I feel the huge advantage to film is that is really does force one to slow down. I know you can slow down using digital but you are not forced to and that’s quite a difference. Imagine you’re walking around and find an interesting static subject such as a statue. With a fully manual film camera you will have to walk around it a couple of times and then decide what’s the best angle and then think about the light etc etc. You aren’t going to start shooting just to see what it looks like. The same could apply to digital but from my experience seeing many digital shooters in the streets, it often isn’t.
As a music composer, I don’t write dozens of versions of the same piece and then compare them to each other and pick the best one. I have a clear idea about what I want to create and during the entire compositional process I am asking myself: “Does this make sense? Does it fit? Have I wandered too far from my original idea? If yes, do I store this idea away and use it for another piece?” and many other questions.
Thanks for reading!
Emanuele
Hi Emanuele
Are you going to correct the equivelent exposure numbers as pointed out by Ernest and DanielS ?
Seems like an important error to leave alone.
Otherwise I enjoyed the article.
James
Hey James,
I corrected my mistake on the copy of this article on my website but I don’t have direct editing access to this article so Steve will have to fix it for me.
Thanks for your vigilance!
In my next article I might have to put an “easter egg” mistake and give a prize to the first person who call it out! 😉
Cheers,
Emanuele
Sorry for the delay, I will fix it today.
Thanks Emanuele and Steve.
It’s a great article and I want to forward a link to it to a friend of mine just getting into photography and I want home to get off on the right foot :-).
James.
Sorry , meant ‘him’ instead of ‘home’
Emanuele – It’s very good article and I’ve really enjoyed your site as well. I use Sunny 16 and and also a Sekonic 308 meter. When I have time, I still like to walk around my neighborhood (Bucktown, Chicago) guessing exposure based on Sunny 16 and then checking it against the Sekonic. I’ve found it’s a good way to get familiar with the variety of light in one’s part of the world. In a place like Chicago, “Sunny 11” is often a better baseline, unless you’re near the water.
Yeah one needs to change the Sunny 16 rule according to where you are and what season you are in. In Sicily in the summer it’s often Sunny 22 due to the incredibly sunny weather!
Soon there will be another post of mine here on the Sunny 16 rule. 🙂
Emanuele,
Thank you for this contribution. Although I have been a photography enthusiast for awhile, it is always helpful to think about the basics.
I started using a rangefinder a couple of years ago, which has been great for reducing my photography to considerations of aperature, shutter speed, and ISO ( and of course white balance), but one area in which I am always challenged is when taking a portrait shot of more than one person if they are not all on the same focal plane or the same distance from the camera. What is the best way to approach such a situation if you want all subjects to be in focus? Thanks.
Hey George,
If the subjects are not all at the same distance from the camera you need to decrease your aperture (i.e. a smaller f/stop such as f/16 or f/22) to create a bigger depth of field so you can include both subjects within it. Obviously, depending on the lighting situation this might not always be possible. If you are in a fairly low light situation an f/stop such as f/16 or f/22 would lead to massive under-exposure unless you used very slow shutter speeds, but that may result in a less-than-optimally sharp image due to handshake. You could use a tripod I guess but meh. Unfortunately you can’t always capture the exact image you have in mind
Just be aware that the depth of field scale on lenses is approximate. The edges of the depth of field is where apparent focus begins and ends. The middle of the depth of field is the point in focus. (It’s a little bit difficult to explain but I hope I got my point across}
So yeah to answer your question simply: Smaller aperture for a larger depth of field!
Hi Emanuele,
Thanks for your reply. I have tried to get the focus with F5.6 TO F8 because of available light and thinking that I am close enough to the subjects that they should all be in focus, but I have found this doesn’t always work. I guess there just isn’t enough DOF. I wouldn’t have thought that I would have to decrease the aperture to F16 or smaller, because the distance from subjects is not that great. Shooting portraits of multiple people has been a situation that I have never felt as much in control of as I do otherwise with the camera. Thanks again.
Hey George,
You could try shooting a smaller format? The smaller the sensor size the greater the depth of field. That’s why point and shoots can’t isolate subjects very well/at all. My Olympus Pen EES-2 half frame camera almost always has the entire scene in focus (it only has focus areas, you cannot manually focus)
You might find this online DoF calculator quite useful.
http://www.dofmaster.com/dofjs.html
Cheers,
Emanuele.
Hey Emanuele, thanks.
I’m blown away by the picture of the lens with a real appeture ring, and focusing ring!
Reminds me how user unfriendly electronic lenses are! Jeez, how we’ve regressed!
Haha yes..and that’s just a run of the mill Pentax K 50/2. (It’s very good but as cheap as chips)
Hi Emanuele that’s a great read thank you, I’ve booked marked it for reference! You have managed to lay it all out in an easy to understand way, well done. Another good read for anyone starting out and who is looking for a book on the subject is ‘Understanding Exposure’ by Bryan Peterson.
Thanks! I tried my best,I’m glad you found it helpful. I will make sure to check it out!
When I first got an SLR, I had to learn the basics, luckily, it had a built in exposure meter, so I simply tweaked asa, aperture to get the meter in the middle,,obviously, this was pre Internet and I had to pretty much work it out myself, with just 2 lenses, a 35mm and a telephoto zoom, I’d get some nice Bokeh shots using the telephoto, not that I knew what Bokeh was then! It was only when I bought a DSLR and learned about the different qualities of lenses, fast lenses, wide angles, etc that I really understood, now, after enjoying the instant gratification of a DSLR and a decent lens that I’m going back to film to use beside the digital,,and using old glass on my DSLR to embrace the wonders of manual focussing, slowing down, and composing shots, plus my old OM-1, sat next to my canon 600d with my Tamron 17-50, looks minute! How did DSLRs get so big! Lugging this behemoth around i? I thought digital was supposed to make our lives easier?!! Holding my Om1 in my hands again, feels far more natural.
Dear Emaluele,
very good article as it summs up what you need to know about phtography.
I customized my Leica V Lux 3 (Pan FZ 150) in the exact wy: I can change ISO, speed, Fs etx without taking away the eye from the VF plus I have pre control with Live View while pressing down half way.
OK, the VF is not that good and I cannot see DOF in pre, but it gives me a lot of control that my DSLR cannot provide.
Best regards
Heiner
Hey Heiner,
Thanks! Don’t worry, I shoot a Pentax K1000 which doesn’t have a DoF preview button (although there is a trick to preview the DoF but I never use it) and a Leica M3 which obviously cannot give you a preview of DoF. As you build up experience and practice you know roughly how big you depth of field is and if it’s appropriate for that particular image. The depth of field scale found on manual focus lenses also helps a lot in this regard.
Thank you for the post!
For those of you who are more visual, I found 3 amazing tutorials on youtube that aslo explain these three variables. They are worth taking the time to view.
http://www.youtube.com/watch?v=WEApLA-YNko&list=PL6667B69421A696BA
Cool video!! I understand what digital noise is now!
Film photo results are available in approximately 55min and quicker if required. No doubt, digital is more convenient and of course, preferable in most cases for most people as long as there is a thing called COMPUTER and PRINTER (with ink) and software. If one had to do fine tuning like WB, sharpness/noise corrections it’s a LONG story infront of a computer, printer and add-ons (software) which amounts to thousand literally. Alternatively, Wallmart/Office Works will print a photo for less than 10c. Also, if one had a Mamiya 7, or similar camera by Fuji and Pentax in hand, everything is going to be in a different/parallel Universe. To my eyes, film renditions are like looking at paintings whereas digital images are basically pixel peeping because one’s mind is always thinking how much noise, how many pixels etc etc.I f you are talking about “learning” then the K1000/FM camera types will be appropriate together with man. focussing and other twiddly bits and knobs. We have gone the way of FEWER knobs, then back towards MORE knobs….take your pick.
Does anyone remember Polaroid on large or medium format there was even one at 3000ASA (type 57 and 667 and one of the B&W ones (type 55 and 665) had a negative as well. Fast processing -under a minute but very expensive so you had to slow down and check everything. If you really wanted to push the boat out you could hire a 24 inch Polaroid camera… Fuji and others have now produced compatible Polaroid film packs but still no positive / neg version and at the moment. Then there was image transfer etc …
I tried to learn with a DSLR and found that I wasn’t learning anything. Yes, it had manual mode, but auto was too tempting. It had unlimited frames which prevented me from thinking about composition, I was using the “shotgun” approach. With 35 frames (12 with medium format!) I have to think very carefully about the subject. I have to slow down and think what is the BEST exposure and then bracket a half stop either way. The DSLR had “instant” feedback, but the feedback was too instant. Waiting the week for the film to be developed I found myself thinking about the exposure and what those bracketed shots would look like. I had a week to think about how that extra half stop would affect the photo. Having a dedicated shutter speed and aperture dial was so much easier than trying to remember what function the dials were set to on the DSLR. Shooting film forced me to slow down and take detailed notes regarding what I was shooting allowing me to actually learn these lessons. And the best part is that film cameras are cheap! (assuming you don’t need a Leica)
Do you need to set the white balance (WB) on Pentax K1000?
Assuming this is a serious question and not a joke: No; you choose the type of film you want – “daylight” for normal light, or “tungsten” for artificial (indoor) light.
If you’ve got the wrong type of film in the camera (daylight film, when shooting by electric light indoors) you either put a correcting filter on the front of the lens ..or you rewind the film – and write a note on the tab of film that’s left sticking out of the film cassette, to show how many images you’ve shot on that roll – and then load the camera with the correct type of film.
A film camera is completely “dumb”, it cannot make corrections for different types of light. You make corrections, or alterations, by using an appropriate filter on the front of (occasionally inside or at the back of) whatever lens you’re using.
White Balance (in-camera correction) was introduced with 8mm movie cameras, then with video cameras, and now with digital still cameras.
Thanks. I don’t know there are different types of film besides the ISO number on the boxes.
Seems very inconvenient to manage when you take pictures in different environments. Does the rewards pay off?
“..Does the rewards pay off?..” ..yes, in the old days of film. ISO100, or lower (like ISO50) gave very -s-m-o-o-t-h- pictures, and ISO800 was good for low light. (I use ISO800 almost all the time for film.)
But now, in the digital age, I don’t think there are many rewards from using film. Each person, of course, has their own idea of whether they prefer to shoot film or digitally.
I prefer digital, because you can switch ISO from frame to frame, and pictures can be checked (almost) immediately, and many digital cameras can shoot very high ISO, which film can’t do (and most digital cameras also shoot movies, too).
I shoot film just for nostalgia: I like to use my father-in-law’s 1954 Leica (it’s now mine) so I put a roll of ISO800 through it now and again. And I have a few other old film cameras. Film’s good for making big (chemical, photo-paper) enlargements, instead of using digital and a computer printer.
People say you can “slow down” using a film camera ..but you can also “slow down” and shoot things manually with any digital camera which has a Manual setting.
OK, I may try that when I am tired of digital gears.
Thanks for your insightful information.
You’re welcome, my pleasure.
In fact for most of my shooting i now use my cameras on 100% manual, and apply auto ISO. I use Sony RX1 and NikodD800e, and with this technique I am in full control of shutter speed and aperture all the time.
..But if a digital camera chooses its own ISO, the “digital noise” or “graininess” may vary from picture to picture: if the camera chooses a low ISO the pictures will be smooth and “noise free”, but if it chooses a very high ISO in dim light you may get coloured “speckles” in the picture. That’s not very likely with the full-frame sensor D800e (or RX1) but can happen with smaller-sensor digital “pocket” cameras.
So whereas film maintained the same degree of “grain” throughout the 36 (or 72) shots on a roll of 35mm, a digital camera may show varying degrees of “grain” from shot to shot if it’s left on ‘Auto ISO’.
What’s been your experience, Lars?
Nope! There is no white balance setting on film cameras. Film has it’s own white balance and you can use warming or cooling filters when desired, or just use a different film. I keep a warming filter permanently on my Leica 50mm Dual Range Summicron but it’s really up to you.
Thank you Emanuele for summing up in one article, what some photography books don’t do. Which is break down the basics of photography in a fun, easy-to-understand, and visual way. Congrats!
Thanks for reading Alejandro!
The best way to learn is with a digital camera that has manual settings because it will give instant feedback, rather than wait a week to get film back from a lab.
+1
This article was written in 1979.
Not so sure about that. Entry level DSLR is way more expensive that film slr. Anyone can buy a canon eos 300 + zoom for $40-50, and shoot in manual mode. For the manual hands on experience, eos300+ m42 lens for a little more.
DLSR + lens is more expensive, and whoever goes that route will have to deal with the crop factor on top of everything else, a FF DSLR is WAY more expensive. I agree with the article, for someone starting, a film camera is the way to go. It’s basic, there are no options to confuse the average beginner and it’s cheap. Sure it’s not immediate, but it’s the only downside… not much of a downside though, the process of waiting for the development of pictures is very rewarding- speaking for myself, of course.
There is also one small factor, and this is my experience alone, might not be valid for other people. I find that I almost never print one of my digital pictures, it stays in digital format. But I have amazing pics taken with my old film camera all printed. It speaks more of my laziness than anything else, but it’s a fact.
An SLR is not a requirement to learn how to use a fully manual camera. There are many fine examples on ebay of very usable cameras to learn the principles on. I just saw a Minolta AL for less than $20 and Olympus pen film cameras, there are lots like them some of them have great lenses and will fit into a pocket. The slr is not a must have.
Yes, it’s true, second hand cameras are cheaper. You can pick up a Canon 10D for under $100.
I think both ways are valid. I learned using film so that’s what I recommend. I think a digital SLR camera provides too many distractions. Also, it’s not very difficult to carry a small notepad/scrap of paper and write down the settings and then compare them later with the negatives/prints/scans.
The lab around the corner from my has a 27 minute processing turnaround time for colour print film so it’s no that long a wait 🙂
I appreciate in this article, the advice: “Shoot 35mm Film and…”. I am about to re-kindle my love for photography by going back to my film camera “for a while”. I find this kind of photo-taking altogether more “honest” and satisfying, even though the convenience/cost of digital these days, cannot be beaten. It is like making coffee the old fashion way in a pot rather than with something that requires electricity and 15 Bar+ pressure. Of course it means now that taking the occasional video and 180 deg panoramic scan will no longer be possible, but the benefit is, that just like LPs versus CDs, you are not having to go through something called a “Sensor” and “Algorythms” which is basically the package conceived by a bunch of people who decided how your image sould be processed between the pressing of the button and the recorded image that you see. The other benefit is, that a film camera will outlast a digital camera by probably 200 to 1. Film companies however (Kodak) often do not have the same track record!
Good basics, with all auto everything this gives a good view to the basics of photography. Well presented and done.
looking forward to ‘making sense of your light meter’
K1000 was the camera I learned with. Wonderfull piece of kit!
It really is! If you are still using it then you might want to check out all my Pentax K1000 tips & tricks:
http://www.andbethere.com/2012/12/pentax-k1000-tips-and-tricks.html
Let me know how you get on!
Emanuele.
+1
thanks it’s a great article and I wish I had read something as good when I got into photography. Would have helped a lot to understand the concepts.
However, to beginners I would give a different advice. It is, instead of a K1000 get a DSLR with a prime 50mm lens and practice taking pictures in manual mode. Then you can see instantly how aperture is affecting the pictures and see the results and you don’t have to wait for hours or days to get them developed, when you would have long forgotten what settings you were using. That way you learn really really fast.
Better to have “Live View” to check the exposure (histogram) on the LCD screen or EVF before you take the shot.
Well done… Much more condensed and amusing than the Ilford Manual of Photography. in the old days I used to use the filling the bath analogy where aperture was how far open the tap was and shutter speed was the time the tap was on. Lesson 2 – will that be altering the image through processing and printing…. you have the Tri-x at 3000+ ISO (although film speed was known as ASA in the UK and DIN in Europe) processed in paper developer for two minutes at about 40 I think degrees C… Or 50 ISO film pulled to 25 ISO…
I believe there is a mistake when discussing equivalent settings:
Original exposure: f8 1/250s, Iso 200
Equivalent exposure 1: f4 1/500s, Iso 200 –Shoud be f5.6 at 1/500, f4.0 would yield 1/1000 (2 full stops)
Equivalent exposure 2: f2 1/1000s, Iso 200 Should be 1/2000 — 4 full stops
Equivalent exposure 3: f11 1/125s, Iso 200 This is correct
Equivalent exposure 4: f8 1/125s, Iso 100 Ditto
Ah yes! Well spotted! (Steve can you fix this?)
I noticed the same thing. Looks like f/5.6 got left out.
Yes, this table is definitely wrong. f8 to f4 is *two* stops, therefore shutter speed should change by a factor of four.
Etc.
A great introduction otherwise.
At first I thought, sheesh, we all know this. But, it’s really well done. Very nice. Very nice. Thanks!
Glad you liked it! I also created an infographic based on this post. Take a look: http://infogr.am/Exposure-101-8179/
What an excellent introduction for those that haven’t yet grasped the concepts. I particularly like the cartoon dogs.
Shooting a Zorki 4K certainly keeps me on my toes.
Thanks! Those cartoon dogs are the product of many long and painful art lessons at school. 😛
Except ISO isn’t part of the exposure… And the sensor in a digital camera only has one sensitivity, which is its base iso setting, normally 100 or 200.
Yeah, good point. You are absolutely right but for the purpose of this guide, I decided to present it like this. It doesn’t effect how much light is let in but I think a beginner has enough material to wrap their heads around without trying to understand how digital sensors work in detail. Thanks for the feedback 🙂
Yeah, it’s tricky, because, on the one hand, your guide does make it easier for beginners to understand. On the other hand, because digital photography has been taught like this for so long, I frequently talk to even pros that don’t understand that digital really only has one sensitivity, and, whether you raise ISO in-camera or raise exposure in your raw converter, you’re really just pushing the exposure from base ISO, like you would with pushing film.