I Shoot Digital Film by Ofri Wolfus
Hi Steve, how’s everything doing? The other day, while scanning some negatives, it suddenly hit me. I was shooting Digital Film. I immediately thought this might be of interest to your readers, and so decided to write this article. It’s a bit technical but I think understanding these things can really improve one’s work.
In the rest of this article I’d like to discuss what Digital Film is (other than a term I made up 🙂 ), and how anyone can take advantage of it. However, in order to truly understand the idea let’s first understand how digital photography works.
From the moment we press the shutter button of our digital camera, to the point we have a finished photograph, the following three steps usually take place:
1. The sensor inside the camera captures the light hitting it, producing a bunch of digital data.
2. The camera’s firmware then creates a JPEG and/or RAW files. It usually does some processing on the data generated in the first step along the way.
3. We take the image files our camera produced to our computer, and then we apply further modifications to the image until we have a finished file.
Now lets zoom in a bit, and understand what happens in each of the above steps. Firstly, I bet a lot of people are unaware of it but our fancy digital sensors are actually *analog*. Yes, you’re reading this right. The part which converts light to electricity, the thing of which actual pixels are made of and where the magic really happens, is actually an analog device ( http://en.wikipedia.org/wiki/Charge-coupled_device ). Once light hits this analog device it generates electric voltage, which is an analog signal. This analog signal is then passed through an analog amplifier which then effectively boosts the ISO and adds noise. Finally, the signal is fed to a digitizer and then, and only then, our photo becomes digital. Another little known fact is that a digital sensor has a single sensitivity to light. Increasing the ISO in the camera simply increases the amount of analog signal amplification, but the sensor’s sensitivity to light remains unchanged.
At this point lets stop for a second and look back at what we have. Surprisingly, this mechanism is extremely similar to how we work with film. First, we expose the film to light. Then we develop the film, at which point we can push process it, effectively increasing its ISO and adding “noise”. Finally we pick our scanner and digitize the analog data captured on the film. Have you ever noticed this similarity before? 🙂
Anyhow, lets continue with our process. Once we got the digitized data from our sensor, our camera starts to process this data. First, it applies some noise reduction in order to compensate for the noise generated by the analog amplifier (higher ISO). Then two things can happen – either the camera applies further processing and creates a JPEG, or it leaves the data as is and saves a RAW file. Conceptually however, creating a JPEG is just letting the camera automatically perform the tasks we’d be manually performing on the RAW file, so let’s assume our camera is set to produce RAWs. Again, this resembles the scanning process very much. We can set our scanner to produce RAW files or JPEGs.
Finally, we have our RAW files in our computer. Usually, we’ll apply the following processing in any particular order: color balancing, sharpening, further noise reduction, any kind of color manipulation (saturation, contrast, etc) and so on. Obviously, we’ll do this kind of processing to any type of RAW file, regardless of its origin – be it a digital camera or film.
Now ladies and gentlemen, you know what Digital Film is. It’s both a workflow and a state of mind. You’ve probably been doing it yourself already but perhaps didn’t fully realize the potential, so lets explore it a bit further. When working with digital cameras there are certain techniques that are common. We may also apply them to Digital Film in order to produce really interesting results. Before that however, I’d like to point out two key differences between the “pure” digital workflow and the digital film workflow.
First of all, when film is your origin you actually have the analog data at hand. The equivalent in a digital camera would be to record the electric voltage generated by the sensor to some intermediate media, and postpone its digitization to a later point. Obviously, separating the digitization stage leaves the maximum theoretical resolution fixed, but the actual sampled resolution highly depends on your digitizer (scanner). Conceptually, imagine you had a digital camera that produced huge RAW files. They were so huge that your computer was unable to open them as is. Instead, in order to be able work with them, it automatically scaled them down. If you had a better computer it could scale them down less, and let you work with a file that’s closer to the original. At the time of this writing, this is the state of film scanners (digitizers). They’re not advanced enough to fully extract the details in all film formats.
The second key difference is color. Every digital sensor has its own unique color signature. It’s the way the sensor converts light to a color image. Film however, has a much stronger signature, and each film type has a different one. Conceptually, it’s as if the digital sensor could apply saturation, contrast, color balance, etc before the analog amplifier that increases the ISO. If we had that, each digital camera would produce a very different look, much like different film stocks have completely different looks.
Finally, let’s see how we can exploit this difference in color rendition for our use. For many digital shooters, myself included, pressing the shutter is when we set the framing, composition and exposure. We then have a rough idea of what the final image should look like but we postpone all color modification to RAW processing. Taking this state of mind and applying it to film is simply fascinating. First of all, in my experience, RAW files from scanned film have much more latitude to work with. Second, we get to work with very interesting base colors. When opening RAW files from a digital camera one usually gets dull and flat colors. With film RAWs however, the film’s unique look is already baked in. Saturation, contrast and color balance are already “in the pixels”.
Another neat idea is to think of film RAWs as digital without NR and sharpening applied. Some tools have magical noise reduction abilities and are able to almost completely remove the grain of low ISO films. This then produces files that look digital in their cleanness, but retain the unique film look. Neat Image is one such tool. With low ISO films that have very fine grain, and high enough resolution scans it’s able to completely remove the grain without affecting the sharpness. That said, since grain size is fixed but scan resolution is not, different scan resolutions require different noise reduction techniques.
The last technique I found about lately, and became hooked, is to add film filters such as Alien Skin Exposure and Nik Color/Silver Efex to the scanned film. These can combine with the unique rendering of the emulsion and turn out spectacular colors that I’m unable to get in any other way. Converting color scans to B/W using some B/W “film” filter also produces a very unique look.
Pretty much any digital workflow can be adapted to film this way if you take a moment to understand where it fits in the different processing stages. However, there’s one thing you need to be aware of. Excessively modifying film RAWs will kill the unique film look. You’ll easily end up with a file that looks like it’s “completely digital”. Obviously this isn’t a bad thing, just something to keep in mind. Basically, like with any other effect, don’t overdo it 🙂
In conclusion, my personal belief is that neither film nor digital is better. To my eyes they are quite similar in the technical concept, but greatly vary in execution. Each medium has its own strengths and weaknesses. They are, in fact, completing each other if you get your workflow right and are not afraid of exploring new things.
Some Examples
So far I processed less than 10 rolls using the ideas described above, but here’s my flickr set with the shots I like so far http://www.flickr.com/photos/ofriwolfus/sets/72157632100772083 On each shot I tried to explain the methods I used for processing, though I’m quite new to film and its processing in general. This is turning into a really fun way of shooting for me, and I hope for others too.
Kodak Ektar 100 scanned with Plustek OpticFilm 7600i. Simply reduced any noise/grain with Neat Image, balanced color in Photoshop and applied unsharp mask. I tried to make it as clean as digital but retain the Ektar look.
–
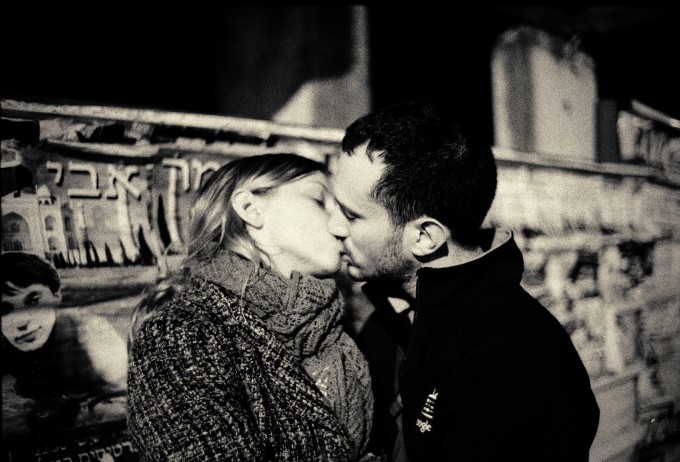
Me and my GF, shot on Kodak T-Max 3200 and scanned with Plustek OpticFilm 7600i. Tint added with Alien Skin Exposure, contrast was adjusted a bit in Photoshop from the RAW scan.
–
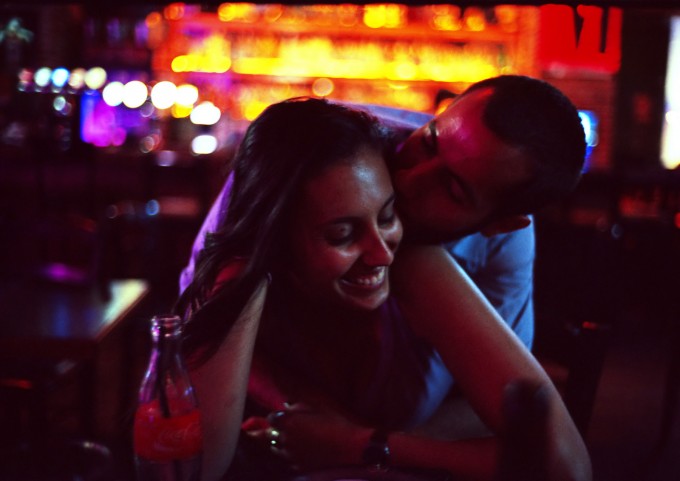
Shot on Fuji Provia 400x pushed to 1600. Scanned with Plustek OpticFilm 7600i, but this time I used the proper color space for the file. It was then passed through Neat Image to clean up the grain, then further processed in Photoshop for color balance, sharpening and some curves.
Cheers,
Ofri




I’ve been doing this for the last 10 years or so, the color signatures and grain characteristics coupled with digital workflow techniques puts you in a different working space. I particularly love shooting in high ISO medium format, scanning at very high resolution and processing it down for web, it ozzes quality. Effectively my sensor size is 6cmx6cm with a 48 µm grain size, annihilates anything digital less than the price of a volvo in terms of noise and creamy textures. For low light work this process owns. I call it “Film RAW”.
A digitally scanned film has more dynamic latitude? I don’t think so. My experience of commercially-quality scanned negatives is rather that you get a mismatch of the dynamic range of the scanner partly overlaid with the dynamic range of the film. Since the exposure of film never is as accurate as a carefully exposed digital still using the available histogram, you have less dynamic range.
What it adds up with is
a) film grain for those who like it
b) the fun of doing manual labor like with analog turntables and
c) the inaccurate color rendering of the specific film brand
IMHO processing a RAW file carefully allows with little effort to get photos without black-outs and clipping.
So each his own. But please don’t argue technically in favor of film 🙂
The trick is to under expose by up to a full stop depending on how much dynamic range is in the scene. Film has way more latitude in the shadows then digital but is more sensitive to over exposure. With this technique expose the film for maximum data retention not balanced print output. Then you can scan multiple times with different gain to get multiple images that can be layered together for maximum dynamic range. Is it more work? Yes. Is it worth it? For my composed night cityscapes, hells yeah. For snapshots of my cat, nope.
If scanners are not advanced enough to pick up all the detail in a 35mm slide do you lose something by scanning the slide and then printing off of the digital scan?
There is always loss, at each processing step.
And certainly in optical steps, because there analog.
Thanks for sharing, I’ve noticed an interesting trend lately with many professional and street photographers who for decades criticized digital photography and upheld this hilarious puritanical stance on film, have taken to the Nikon D800 and Leica M (and Monochrome). I almost spit up seeing exif data in their images. We’re at a point where camera hardware and software can really match if not supersede the capabilities of most film work. Photographers and agencies are coming around to the fact that film developing and darkroom techniques are very much akin to processing raw images, and that it’s the eye and not the medium that is important. A great example is Cindy Sherman’s work, just on the technical level (she thoroughly embraces digital), compare and contrast her large prints over the decades to today, some would say photos taken during the late 80’s shot on Ektachrome are very much like her recent prints using digital. Of course there are some film and slide stock that is difficult to emulate, it’s just a matter of time, Fuji has done pretty well emulating Velvia film stock digitally.
Do you shoot “digital film” or “film digital” 😉 Thanks for the article and the nice shots. If I only had a reliable lab around the corner I’d do the digital film shooting as well as there is certainly a special look to film digital simply can not match (not better or worse, but different and pleasing to the eye).
It is an interesting article, and highlights the thought and perception of film and digital. Which has more character and what must you do to both a RAW file and scanned negative once in your computer? As a professional photographer I am quite lucky to have had a reasonably long career in Film and TV too, 5 years of that was spent editing TV commercials and it gives you an insight into story telling, editing down shots, grading and also work flow. At the time (not that long ago I am 37 now) everything was shot on 35mm film and the rushes dumped onto digibeta or miniDV as a one light. That is the film was just captured onto tape at a general value. Grading film and dumping onto broadcast 4:2:2 tape is expensive so doing all the rushes is not an option. This meant you could then edit a 30 second ad from say 30 mins of rushes. Once your edit was done you sent an EDL, a list of in and out timecode values and these shots (say 15 shots to make up the ad) were found by the colourist by matching timecodes to the edge numbers of the neg. The director would then go to a grading suite and just work with a colourist on those shots. The graded shots then went back out to broadcast tape. You would add graphics back in the edit, do a sound dub and all done. As an editor I would never tweek the grading of the graded and telecined master shots. This brings us back the the article. Today people feel that digital files lack personality and so LR, Aperture, VSCO, Nik et al allow us to add style, grade and in some cases (a lot in certain fields) degrade the image. The one thing I notice out there in the day to day world is that people shoot film, scan the neg and grade away, happy that the film neg is the base character. Maybe the scan needs very little work as it looks how they would have mashed up there digital RAW file. The imperfections are embraced. For me however you are just scanning a one light. Depending on how you scan you only capture so much of the latitude of the film. I often think that really you need to actually do all the grading work as you print to paper. Create a paper neg and then scan that. Yes you are still at the mercy of your scanner, in the same way that graded rushes end up being captured at 422 for broadcast (so not 4:4:4) but the grading work has been done. You are merely digitising for distribution. Trannies are different as you need to be spot on in camera, but 35mm chemically has a lot of push and pull. So are people who shoot film and love the look merely embracing the one-light? To make the most of the film and be truly separate from digital do you need to do your grading in the dark room only and scan for distribution? Professionally clients want things now, and so if you do still work on film scanning immediately on a drum scanner gives you not only more scope to do amends but more time. However so does grading the one-lights from miniDV. HD footage (from 4K at least) is now closer to grading RAW in that you have a flat value, though the curse of 5D’s is that if you don’t level off your picture style then sharpness et al is firmly lodged in the file as you are shooting compressed.
A
@ Andrew.
And now for the translation………..
Grading? one-lights? EDL etc?????
One-light: once the neg has been developed you just do a very basic transfer to tape, no whistles or bells. Think having your RAW or JPEGS at zero…flat, lifeless
EDL: Edit Decision List. You list of shots. For example an ad containing twenty edits is twenty different bits of film. A video tape has to have a timecode. Hours, minutes, seconds, frames. As reference and sync.
Grading: Tweeking or drastically altering colours and tone, highlights and blacks..midtones too
Ofri, thanks for your time and article. Informative and interesting.
Some of the coments about “0s and 1s…..” “Particles”, “signal processing will be based on quantum principles”….etc
I respect people’s opinions and different levels of interest…. but whether it be digital or film it comes down to emotion. Can film produce more hormones and bring about feelings more than digital images? For some I guess yes…….but for the majority it’s the person behind whatever camera is being used and their skill in capturinging a moment.
Great article Ofri.
I too have taken to shooting both film and digital, recently starting to develop my own negatives and scan at home.
I too love the unique look of film, and that whole process of waiting to see what you got. I think a great deal can be learnt and transferred; too many articles are devoted to film vs.digital, and it’s refreshing in the extreme to read a post like this!
I completely understand the enjoyment you get from combining the two mediums – no filter can produce a true film look and feel, however having film as a starting point then using the ‘digital darkroom’ (including some film simulation colour balancing) gives a great deal of control and can yield unique results. I’ve a lot to learn, but I’m greatly enjoying the process of trial and (often) error!
I have a few questions which I’ll pm to your flickr account later. Great read – thanks for sharing Ofri.
Well , i absolutely loved it , i like it when ppl still using films or at least scan films 🙂 , man if there is something, some kinda film that can turn your film SLR camera into a Digital SLR ,but wait (i have a canon AE1 program) how many mega pixels does it have any way ??!!!!!! 😀 🙂
You´re shooting film and scan the negatives. Like 10.000 other people do. “Digital film”… yeah, sure.
Hi!
I have spent a lot of time digitizing negatives and slides with my 5D MkII. I am curious about your developing. After I started experimenting I wanted to shoot film again but when I visited my favourite photoshop there barely was any filmrolls to buy and developing them turned out to be rather expensive. Do you delevelop and push your filmrolls yourself? Do you develop colorfilm as well if that is the case?
Cheers!
I used to develop myself E6 and B&W but it was too much work for me. I then gave up on film until about a month ago, when I found a local lab that does everything – B&W, C41 and E6.
As for buying film, I’m buying mine from B&H and Adorama. They have everything I need and shipping is super fast.
I like to work with my photos in Lightroom, Alien Skin etc and like the look of cross processing witch I did a lot before (on film) I found that diffrent sensor gives different “look”. I found the sensor in Olympus E410 gave good colors when working out a crossprocessing look. And also some of the older compact cameras like Casio. Now I like the Fuji cameras like Xpro 1 and x100 to give very interessting result in post prossessing. And of course the Fovon sensors in Sigma cameras. Digital is just not digital.
Greatings Jens
Is this the same girl in #2 and #3? just kidding – I looked through your flickr set. Keep up the good work!
Digital photography will one day have analog propriety when:
1. Signal processing will be based on quantum principles
2. The sensor will be multilayered ala Foveon but each layer with bayer mosaic. Imagine analog film thickness layer of photo sites suspended in transparent media.
That`s why the best prints are on photographic paper. Nothing can rival the depth of medium.
In out hectic consumerism frenzy times there`s very little place for reflection. One might sum it up with Marshal MacLuhan saying – when you got the message you hang up.
Just a quick look at website ( http://www.digitalandfilm.com ) and you can see that you are preaching to the choir with me.
I just loaded a roll of Fuji 400 in my Olympus OM2 and will also shot with the OM-D. Love them both!
For ease of use, I bypass prints and go with scanned tiff’s and then bring them into LR or NIK software.
Every so often, I get a film shot that has colors that seem to be unique to film.. and digital can’t touch it.
Interesting read.
Nice article.
I follow your logic and imho that what matters is the final image.
Love the creativity.
Ross
HI
#1 and 3 look more plastic/digital than from some cell phone.
Sorry.
Maybe. I’m still learning 🙂
Very nice and interesting article Ofri, nice pictures! It shows your great enthusiasm in the magic of photography, may it be analog or digital. That’s a good thing!
It’s all these great different kind of posts that make me love this site and enjoy reading it every day!
Thanks,
Kris
The big thing you left out is the fact that scanning is again a optic process. Loss of information.
And how would one measure that information loss? Its not like the initial scene the image was shot has a finite amount of information.
There are many places where you loose information along the way: the lens’s resolving power, your capture resolution be it the film’s grain or the sensor’s pixels, the digitizer in the digital camera, the bit depth you use, the color space you use, your screen’s/paper’s color reproduction etc. However, all of this doesn’t matter. What matters is to maintain enough information to achieve your goal.
Well put, Ofri. I also scan my film and I always have more than enough detail/resolution to print my 35mm keepers as large as I could want (12×16 is as large as I ever want to go, though I could probably go even larger). I really enjoyed your article and photographs.
Very interesting article, thank you.
There remain some huge differences. One is when the signal is converted to 0’s and 1’s there is a complete physical separation from the light from the moment of the exposure. When using film the actual photons of light intermingle with the sub atomic particles of the subject being photographed. Those photons mingle with the particles of the film. When you expose the film with the light from the enlarger, the particles of light mix with the particles of the film and then below mix with the particles of the paper. There is on the final print some physical trace of the actual light and the actual particles of the subject.
There is a remaining “essence” of the original moment. In the digital world that connection is lost.
Peace,
Peter
Photau,
Thanks for this comment – of course everyone knows how film works, but your take on it expresses a feeling that I think many film shooters experience, but cannot describe as elegantly as you have here.
One might add that in the case of transparencies, the film itself was physically at the location with you, and ages just like our memories do….
Conversely, since individual film grains are either exposed or not exposed, it could be argued that film is actually digital, but it’s the random location of the film grain that gives the impression of analog. Since sensors are analog devices converted to digital, they are as much analog as film is, and arguably more so.
Either way, who cares? The biggest difference between the two is the randomness of the grain location with film, as well as the non-linear response.
There is no way that digital is more analog. I now realize that it is analog a step further than I thought, but once it is stored as 0’s and 1’s it is purely digital. Also the randomness of the grain of photographic paper is part of the process as well. The closest you can get to a genuine black and white photo on the screen is to shoot film, print in the darkroom and scan the print. I say closest, because nothing compares to looking at the actual print.
Peace,
Peter
The point is that film is technically digital, because the film grain itself is on/off. ie. digital. The randomness makes a pleasing image, but that doesn’t make it analog.
I’m not saying that film doesn’t have a different, or even better look than digital. I’m simply saying that film being analog isn’t the reason. It’s because of the randomness of the film grain, as well as the non-linear response curve.
These are two different mediums with different looks, but one isn’t more digital than the other, really.
I did not realize that the grain was binary, interesting. How does the the size of grain compare to a photo receptor on a sensor ?
Film grain is a visual phenomenon (perceived) resulting from the visual accumulation of smaller particles through the thickness of an emulsion layer and hence much larger than the ability of film to resolve detail of a specific size: 10-30 microns (um) vs. 6-10 um. The physical size of a sensor pixel (solid state device) is around 5 microns today.
But even more interesting is the fact that film grain (as stated in above comments) has no grey levels (it is exposed or not) compared to sensor pixels (solid state device) – you need a lot more spacial resolution for a monochrome picture on film. – At this point I have to thank Michael Reichmann of Luminous Landscape that brought me to the subject many, many years ago in his article “why bumble bees can’t fly” (www.luminous-landscape.com/essays/clumps.shtml).
Cheers,
Matthias
Yep, here’s that link to the article:
http://www.luminous-landscape.com/essays/clumps.shtml
There is room for debate about the binary or continuous character of grain:
http://photo-utopia.blogspot.com.es/2007/10/chumps-and-clumps.html
I read Reichmann’s article a long ago, together with this reply I link to above and ended being convinced that film isn’t binary.
I know the guy from his participation in forums (APUG) and he did quite some research (he quotes Ron Mowrey among other film industry sources).
Anyways, the fact of grain being continuous or not should not have that much importance in photography. It won’t make a bad composition any better.
Film grain isn’t on or off. So the rest of your theory doesn’t work.
A good article debunking the film is binary debate.
http://photo-utopia.blogspot.ca/2007/10/chumps-and-clumps.html
Sounds like that must be some ridiculously high contrast film you’re shooting
A good photo is a good photo. I can see you are having fun and there may be some advantages for colour using film but overall I do not see that this is better than digital per se. Interesting article though.
Ofri, thanks for this post! I too shoot “digital film” and the results are very satisfying. The dynamic range of film cannot be matched by anything in digital. However, I tend to shoot all my color images with digital cameras. Perhaps I should try some color films. Great images! I love the look of the pushed Provia in the last image. Tom
You’re wrong. My Nikon D800E has better than a 14-stop dynamic range. That’s more than any film except Tmax.
Guys, this is not a film vs digital article. It’s the opposite – it’s about combining the two. There’s really no point in arguing about one or the other.
Tom, I’m happy you like it 🙂
Your D800E will also be obsolete in 4 days. Yay Japan!
Really. My Canon 10D still takes the same pictures it could a decade ago. Kind of a dumb post on your part
Those photos are obsolete, any good picture taken with a d700 is now worthless and needs to be shot with a d800. Thats just how it is… *sigh* (sarcasm)
Doug but films like Portra 400 have up to 19 stops of DR currently digital can’t match that but I’m sure within the next decade it will, but for te moment film is the king of DR