
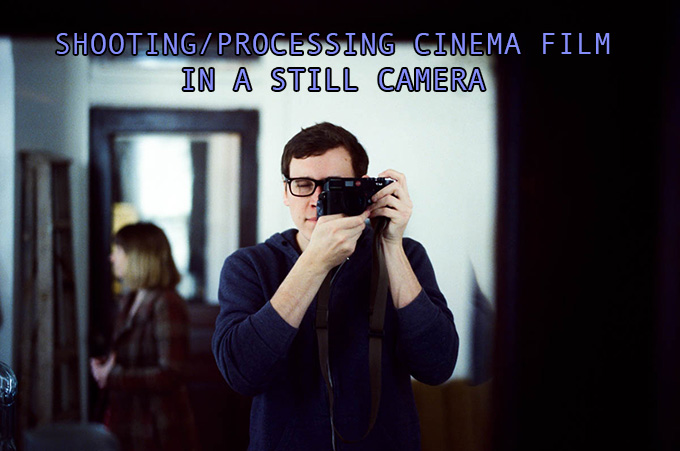
Shooting & Processing Cinema Film in a Still Camera
by Brett Price
Hey Steve,
Thought I’d write up a quick little article on a recent set of photos I took. I’ve submitted several posts before outlining several photography related experiences with different equipment/techniques I’ve been playing around with, a lot of the fun in photography for me is the ongoing discovery of new techniques, equipment or processes. The latest addition would be my experience shooting motion picture film in a still camera. There’s a lot to do with something like this so Its not exactly something someone can just pick up and do but I figure that this article could be a first step to many who might be interested.
**See Brett’s other posts HERE – HERE – HERE and HERE**
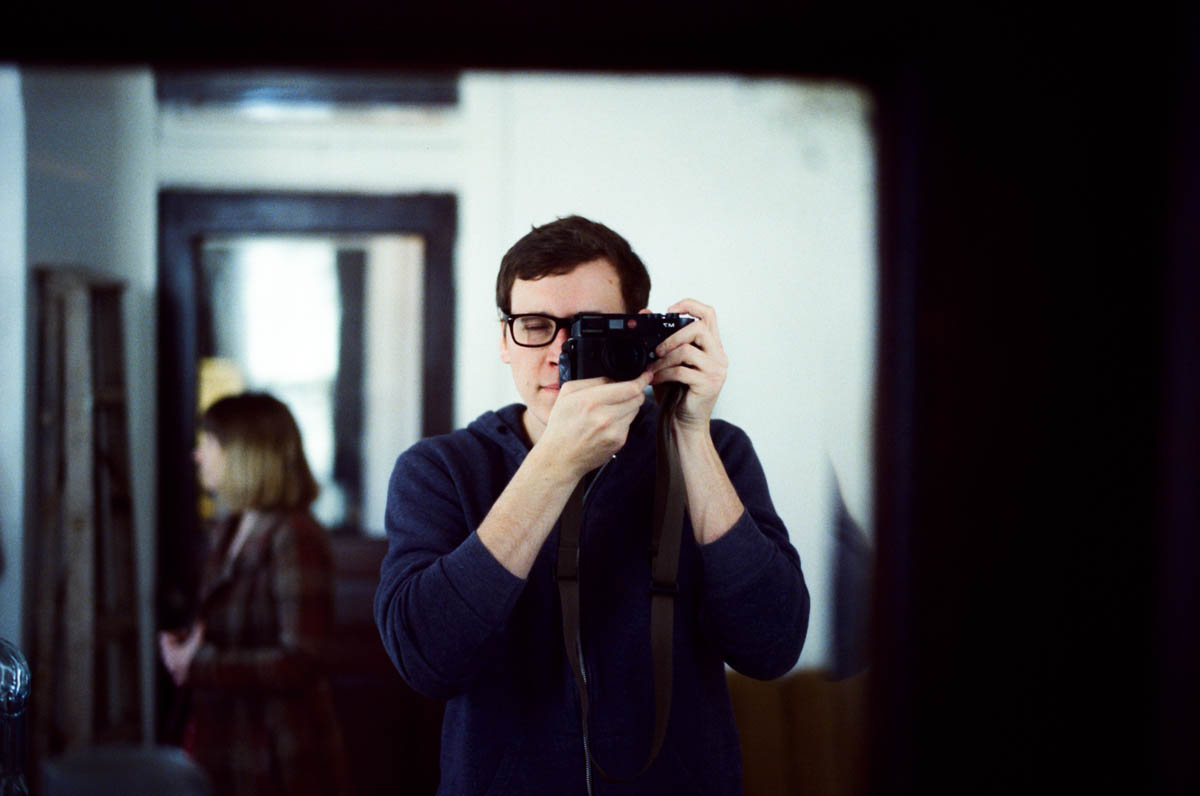
First off, All of the shots below were rolled, shot, developed/processed and scanned in an at home process and were all taken with Kodak Vision 3 500t film. This is a fabulously versatile film that used a great deal in modern cinematography. This is the same film that you can also purchase online, called CINESTILL FILM that has had a special process to make it capable of being developed at a traditional film lab. (more on that later).
One of the reasons I wanted to play around with this film is because well, I still shoot a lot of film, and the choices for films are becoming more and more limited today for still photography. I still feel like cinema film has a place for a while until most of the more seasoned DPs give it up and its relatively more affordable to shoot considering how much more of it you can buy. You mainly just have to have the infrastructure to take it from beginning to end to make that work, something I have developed over the years. Another reason, like I mentioned is the cost. I purchased a 400ft roll of kodak film online for about 100 dollars. That’s enough color film to make over 100 rolls. That is a dollar a roll, not too bad. It’s also a film thats really not available in still format. Most still films are daylight balanced, which can be troublesome if you shoot it under any type of tungsten light. I’ve never really understood why films were made that way, with no high-speed stocks available for that type of light. It’s quite easy to take a high-speed film and add a warming filter to it to shoot outdoors if needed. Its pretty difficult to take a daylight film and shoot indoors, as the filters remove a great deal of light, and then you have to shoot it in a place where typically there isn’t a great deal of light.
But oh well. It’s a fantastic film. All of these shots were taken outdoors or by open windows without a filter so this is the look you can get when you shoot it outside. It’s very blue but able to be balanced nicely in the scanning process. It’s also a very versatile film if it’s all you shoot as all it really needs to shoot outside is a warming filter. I shoot a lot at night and in urban environments so this film really fits my daily Leica carry.
The first step is getting it into shootable cassettes. Bulk loading is pretty common with b&w film, as you can still buy 100ft rolls of it. All you need is to separate out about 100ft from the 400ft roll and load it into a bulk loader and then into the film cassettes. Pretty easy.
One of the reasons everyone hasn’t picked up on this film yet is the fact that it comes rolled with a layer on the film called REMJET. Remjet is a layer on the back of the film that is typically removed in the films native process but the C-41 process does not account for. You can’t just shoot this film and take it to a lab for development. Not only will the film ruin the lab’s chemistry, it will come out with a layer of soft black gook on the back. The CINESTILL film that is available for purchase has this layer pre-removed so the film can be developed in any lab, hence why its caught on with a lot of 35mm film shooters.
All of these shots were home developed and not taken from a lab. I actually used waste lab chemistry because I work at a lab but the same process can be done with any home c-41 kit. The biggest unknown for a lot of people, even me, was how easy or difficult it is to remove the Remjet layer after processing the film. There’s a lot of stuff online that goes into detail about how difficult or easy it is but nothing very specific of helpful. I actually found this to be super easy. The film comes out after processing almost totally opaque, if you touch the back of it you’ll get an inky black residue on your fingers, it comes off quite easily but the issue is you don’t really want to get it on the emulsion side. All I did was wet a microfiber cloth, grab the film from the top, and essentially squeegee it from top to bottom. This took off the rem jet perfectly. All that’s left is to restabilize the film so you don’t get water spots from the wet cloth.
I have access to a lab scanner so these were pretty straight forward to scan in but the process of scanning can be done after development like any other film. Also pretty straightforward.
I really like the characteristics of this film. I’ll probably pick up a roll of Kodak 250D (daylight) as well and then i feel like all my bases would be covered for shooting color 35mm. It’s a super versatile film and the process isn’t nearly as scary as many people make it seem. I would highly suggest checking out the CINESTILL website for side by side examples as to why this film is so nice. They lay it out between some more popular films like Portra and Fuji Pro, and the results are pretty easy to see.
Anyway, I post a great deal to various websites ill list below, please check them out for more shots. Hope you all like my photos with this film and my write-up on it as well. Happy shooting.
Brett Price
Instagram: Brettprice
Tumblr: Brettprice.tumblr.com
Website: www.iambrettprice.com
Flickr: www.flickr.com/photos/brettprice


Great post Brett. I have one question. You said “All that’s left is to restabilize the film so you don’t get water spots from the wet cloth.” I’m not familiar with “stabilizing” film. Do you mean dunking it in photoflo to clean it off?
Hi Brett, great post!
I’m quite used to develop C-41 at home with a Tetenal kit, so if understand your post well, you used waste chemistry, and you removed the rem jets after processing right ? But if i use my c-41 tetenal kit (which chemistry i reuse for say 12-14 rolls) won’t it ruin my chemistry ? The Remjet i mean ?
What chemistry should best be used ? I don’t really have a home lab, just a very small bathroom 😉 so the tetenal kit is perfect me, being quite simple and straightforward.
Thanks in advance for your answer, i’d really like to pull that off, it’s a very interesting way of shooting film i think.
I remember those folks!
Tomas Vrzala, we’ve been trying to get in touch with you for months now. Please send us our wedding photos. You were paid in full and are contractually obligated to do so. You have basically stolen our memories from that day and we are devastated.
you can, if your digital camera has a customizable white balance setting. just set the color temperature somewhere between 2500-5000 degrees K. the results may not exactly replicate the look you get with the film, but that will be due more to the difference in the technology base than in the renderring of the light itself.
Thanks, this helps me in the remjet issue.
I honestly use a windowless closet to change the film into the bulk loader. Takes about 20 minutes to pull 100 ft off the spool and reel it up again and into the loader. I do restabilize after wiping the film so that tap water isnt the last thing touching it. I did a roll like that and it left water spots when drying.
“..Though wouldn’t you say Brett’s images above just aren’t achievable in digital? They have a texture to them, the tones, the grain, the blur..”
I would say they are achievable in digital. I’d say Instagram; I’d say “Lens Baby”. I’d say (looks at phone) Snapseed, Normalise, Photogene, Big Lens, Hipstamatic, Filterstorm, and dozens of other low-fi photo-filter apps and devices.
This is tungsten film, with blue-tinted daylight creeping in around the edges. What surprises me about this film, compared with several of the publicity shots on the CineStill website http://www.cinestillfilm.com is that these results – like mine – are so grainy, and so indistinct. (There; I’m trying to avoid using the word “sharpness”.) Many of the publicity shots on the CineStill pages appear, by comparison, to have been shot on a larger format, and lit with high-intensity photofloods, rather than with plain, simple domestic or general-purpose tungsten lights.
So by flooding it with tungsten light, maybe this film can look good, when shot at a lower ISO, and with a hint of background daylight to provide a subtle cool counterpoint.
But for me, having tried it, I find it’s not worth the hassle, as I said above. And I’m glad that Brett has got such pleasure out of it, and has enjoyed it so much.
I would be remiss in not thanking also Brett for this wonderful article.
Though wouldn’t you say Brett’s images above just aren’t achievable in digital? They have a texture to them, the tones, the grain, the blur. To me, film still gives a certain look, it has that textural quality, dream like, a layer from reality — where as digital is clinical, perfect, sharp.
Some may tire from the cost and labour associated with film. Though I tire from the endless pixel peeping and talk of “sharpness” and “skin tones” that riddle forums like this. It seems everyone is chasing the crystal clear snap shot of reality out of their gear these days. Boring.
Now both obviously have it’s place, and I do predominately shoot digital for all the reasons you mentioned. That said, when I’m randomly surfing blogs and sites like flickr, the photos that I love, just by chance…. 9 times out of ten – they are shot on film. Even the above here are some of the best photo’s Steve has featured in a long time.
Sounds good. Yes your kit will be fine for 12 rolls of 35mm, as long as your diligent with the pre-soak and pre-rinse with baking soda. If you don’t try and clean off as much of the Rem-Jet prior to developing you’ll damage your chems.
Hi Dominic,
I just went to your website. I think my questions were answered. Thanks!
-diz
Hi Dominic,
From your blog, you mention that it ruins the c-41 chemistry at the labs. In home processing, I use the C-41 Tetenal kit that is supposed to be good for at least 12 rolls of 35mm film. Do you think this kit can be reused for the same amount or less?
Thanks,
diz
If you every have any questions about developing it yourself feel free to ask. I’ll be happy to help anyone with the process.
I shorten my spools in a changing bag as well. I recommend you un-spool small sections at a time and hand roll it on another empty spool. Takes me around 15 minutes for 80-100 ft.
Great blog Dominic…thanks!
I will definitely give your method a shot. Now all I need to do is figure out how to get the 400 ft roll spooled down to my bulk loader!
Cheers,
M.
Thickness of the film base should not affect focus in-camera, since the front emulsion side of the film is in contact with the transport rollers and sprockets. And being a bit gentle with the film advance lever should alleviate any fears of tearing the film base. The biggest problem comes when nearing the end of the roll and you’re trying to eek out one more frame at the end.
Nice article Brett!
I’ve been shooting Cinema film extensively for the past year and love it. I currently only bulk load and remove the rem-jet during processing and haven’t tried the cinestill film primarily due to cost. If anyone is ever interested in trying this film out and feel like developing it themselves I’ve written an extensive how-to for processing cinema film.
http://blog.wakingmist.com/?p=1481
Well said. I agree.
Beautiful stuff, Brett!
I am already bulk loading Tmax, so I am certainly going to give this a try. It looks like a STEAL for color film!
Two procedural questions for you:
1. I don’t have a proper darkroom (just a changing bag…) so any advice on how to get 100 feet off the large bulk roll, and into my loader without damaging it too much?
2. If I understand you correctly, you process normally (including stabilizer…) then wipe off the REMJET, and then run the film through the stabilizer again?
Thanks in advance for any tips.
All the best,
M.
Love cine films!!!
I like some of the images here and it was without doubt an interesting experiment. Film has a certain look which you can use if it suits your vision ,same goes for digital. I actually like both. If you use film today you must play to it’s strengths and be willing to embark on a steep learning curve to get the best out of it. Photographers must also be open to experimentation be it analogue or digital. There is a terrible sameness now in photography -which film in the past did not have to quite the same degeee due to it’s organic processes. So more digital and analogue experimentation please! Well done Brett.
I agree. It’s like saying an artist who paints with acrylics thinks oil is an outmoded art form or something. You don’t here artists fighting over water colour vs pastels. For me, it’s the same with photography I use digital and film for different looks. The whole digital vs film argument is really boring and naive. Personally, I love the look of these images as they have a sense of narrative about them.
Sorry David,
That comment was for Stepan. You’re explanation was excellent and backed with actual fact. Cheers.
This film gives heaps and heaps and shed loads of LATITUDE. I mean I have seen scenes where you’d need 3 bracketed layered “HDR” digital shots to even come close to the results this film can achieve and what it does do especially in motion picture film making (what it is really for) Shot correctly, produces wonderful results. And I must say Brett, you’ve really shown this film’s advantages and strengths.
Hollywood isn’t “giving it up” because of quality.
And if you’re so over Film, so what? others are just grasping it and beginning to enjoy it.
I’m sure Brett wasn’t here to shout loud from the rafters about Film, rather his creativity and how he has been using this particular medium to express his vision in ways he would not be able to using a digital chip.
Who said photography is supposed to be “natural” in looks? Or that it is supposed to portray “reality”?
Only complete amateurs or automatons would consider it so.
Photography is Art which is all about what the photographer would like to convey and present, in terms of his vision.
It is sometimes far removed from reality in all respects, and the medium used is a reflexion of his creative decision.
See my explanation – which is “..awaiting moderation..” and may appear above or below later today..
That makes zero sense.
Magnificent set of photos Brett. My personal favorite is the fourth photo. The light feels magical and I love her gesture.
Thanks for sharing these inspiring photos
Kind regards,
Liandro
There are different base materials used for cinema film. The most common – “acetate” (cellulose acetate) – just snaps and tears exactly like the film which is used in 35mm stills cameras.
The tougher “Estar” (polyester) film base is used only for some ‘release prints’ (the reels which are, or were, sent out to cinemas) ..for example “Starship Troopers” was distributed on Estar.. but it’s seldom used for the light-sensitive film inside movie cameras, because, as it’s so very strong and doesn’t easily tear, if it jams it would damage the camera or projector mechanism instead of simply snapping (as I know from my own experience as a projectionist!)
Different types of film do have different thicknesses, and it may be that the lack of sharp focus which I saw when using “CineStill” film with wide open (f2, f2.8, f1.8) lenses in stills cameras might just be partly due to the shallow “depth-of-focus” (the focus behind the lenses inside stills cameras) not quite matching the depth-of-focus required by the thickness of ciné film (this Kodak VISION3 Colour Neg film which Brett and others have been using) compared with the thickness of ordinary stills camera colour negative film.
There’s more general (not specialised) info about film base materials at http://en.wikipedia.org/wiki/Film_base
Note that Kodak’s own specialist pages say “KODAK VISION Color Print Film / 2383/3383 is coated on thin 0.0047 inch (120 micrometres) ESTAR (polyethylene terepthalate) base..” (but that’s the film for print distribution to cinemas, not for shooting with!) on Kodak’s page http://motion.kodak.com/motion/Products/Distribution_And_Exhibition/2383.htm
That’s a bit thinner than – about half! – what’s described as PanF’s normal black&white film thickness of 5.5mil =138 microns/micrometres at http://photo.net/leica-rangefinders-forum/00Ax5s
But note also that Kodak describes TWO versions of the “CineStill” 500T film which we’ve been talking about here: “KODAK VISION3 500T Color Negative Films 5219 and 7219 have an acetate safety base with rem-jet backing. KODAK VISION3 500T Color Negative Film SO-219 has an ESTAR Safety Base rem-jet backing” ..on Kodak’s own page: http://motion.kodak.com/motion/uploadedFiles/TI2647.pdf
And Kodak also says “After processing, the product code numbers 5219 (35 mm), 7219 (16 mm), or SO-219 (16, 35, and 65 mm; edgeprint shows 0219) emulsion, roll, and strip number identification, KEYKODE Numbers, and manufacturer/film identification code (EJ) are visible along the length of the film” ..and my “CineStill” film shows 5219 along the edge, which means that it’s definitely normal quick-snap acetate, and not unsnappable, super-strength, super-thin Estar.
So I was – and presumably Brett was – using normal thickness snappable acetate-backed 5219 Kodak VISION3 film ..and so any out-of-focus appearance wasn’t due to a super-thin non-rip Estar film base.
On the whole, in usual practice, normal easily-snappable non-damaging acetate is used for cinema and stills camera films, and the non-rip, pull-the-projector-off-its-pedestal super-strong thin Estar base is used primarily for “release prints” which are those delivered to movie theatres.
You can breathe again, Stepan.
Shooting cinema film in a still camera is a violence commited on still camera.
Cinema film has different tensile strenght then still camera film.
It is good only to completly destroy the shutter mechanism.
I wouldnt like to get the still camera used with cinema film even for free.
Poor is the one who purchases such a camera withou knowing that it has been used with the cinema film.
Yes, the pictures looks good. But please ruin Zenit, Practica, Konica, Minolta, M42 camera with it but not Leica.
Excellent, they have “the look”!
A usual, great job, fantastic images! I really like your tumblr as well, great stuff!
+1
Agreed. I’ve noticed the halation effect too and while it can look good, I’ve seen things that really exaggerate the effect and it looks bad. I think the grain of the film is potentially how you scan it for sure. I’ve seen this film scanned poorly and it looks bleak and flat. I had to correct in the scanner to remove a great deal of magenta to make it look more balanced.
Summilux 35mm ASPH v1 and Summilux 50mm ASPH
It is a negative film. It will look almost no different in the base of the film than Portra or any other C-41 film. The difference is you will see a lot more red (opposite of blue) in the image because of the balance towards tungsten light.
Well said.
Its technically rated via cinestill at 800asa but the film itself is Vision3 500t. I.E. its a 500ASA film technically. I actually knew most about expositing it from my filmmaking friends who tend to underexpose it, hence the 800 speed for stills. It seems to do well anywhere from 400 to 800. 1 stop overexposed really helps with the grain from my experience.
800
I’d disagree on the shooting experience. Having less makes you appreciate what you take. There is no way around it. Its easy to throw something away thats digital at the press of a button but you have to live with what you shoot on film. Its a far more disciplined process. You may have more opportunities or freedom with digital but that is not to be mistaken with skill. I would have to say the photographer that gets the shot with 1 try is far more skilled and disciplined that the one who shoots 50 and throws 99 percent away to get the one. Does it make a difference in the final product? No. But it certainly makes me feel better about my skill set.
I think film is more natural in the sense that it isn’t artificial. Its organic. Its not 1’s and 0’s interpreted by a computer. You’re right. Digital is closer to what we see. A sensor isn’t all that different than a retina. But perhaps that’s why they refer to film as having a certain magic. I will say in my experience a film photo with no alterations looks far superior in color and tones than a digital photo right out of the camera.
Very teal and orange:
http://theabyssgazes.blogspot.co.nz/2010/03/teal-and-orange-hollywood-please-stop.html
Tim, that shot of the fireworks came out great w the halos.
On set photographers did this all the time back in the pre-digital days. They would take the short ends from the cinematographer and bulk load it into still film canisters to shoot with. There used to be RGB Labs in Hollywood that would process it into negative and positive on the cheap, too. It was a great way to learn to shoot on film.
M Mil
Which types of film.
Therere were hundreds.
To lump all film as “film” shows a lack of understanding of the hundreds of different types of film.
I dig it! Thanks for sharing this!
Love this. I want to try it myself. The world looks looks like this to me quite often, especially in winter.
Love the look you got with the film! I’ve shot a few rolls of the CineStill and I have been impressed with the film so far. The cool blue tones when shot in daylight is something unique and quite appealing. Of course shooting this in low light and tungsten light is where it shines. David up there said that his came out grainy but mine came out about as grainy as Portra 400 which isn’t much at all…maybe different development and scanning?
The best part about your technique is, you can keep the REMJET layer on so you don’t get the crazy halation effect. With Cinestill, because of the lack of the anti-halation layer, you get these crazy red halos around bright pinpoint light sources. While it does give a unique look sometimes it can be very distracting. However, when I recently took the film to Disney World, it worked great with the fireworks like here.
http://www.timarai.com/images/pad2014/l/02212014-02.jpg
Almost looks like it was a natural part of the fireworks!
Thank you for sharing the photos and it reminds me to try to shoot more of this outside during the daylight!!
Great photos. I really like the film look! Thank you for sharing. By the way, is the lens mainly used here the summilux 35mm v1?
Hi!
Im still interested in film photography and it is first time I have heard about this film. Actually, it is not clear to me, if it is a negative or positive film and if negative, if it has orange mask.
BR
Tomas
I’m wondering if you have shot film, probably not…
As the first commenter pointed out, there is an interesting combination of warm and cool tones. The girl fighting off the cold with the fuzzy sweater and making coffee are great subjects that take advantage of that quality. You can feel the warmth and see the cold simultaneously. Thanks, I like these.
Real nice Brett. Couldbe stills from a film 🙂
To me the scanned images look like a Leica M9 with Leica lense.
I’m glad that your pics came out so well: my experience with this “CineStill” film – which promised so much: ISO 800 under Tungsten (indoor) light, or ISO 500 when used outdoors with an 85B filter – was that the developed film looked, or looks, so grainy, and (surprisingly) not particularly sharp ..far grainier than, say, standard ISO 800 Kodak colour negative for snapshot (35mm still) cameras.
Maybe the rolls I bought were too old (perhaps outdated film stock), but the processing was spot-on (processed alongside Kodak and normal “Lomo”-rebranded ISO 800 stills film) and the results were just very disappointing (even though shot with great lenses; Contax G2 Zeiss lenses, Canon SLR and Leica lenses).
Like Patrick and Robert Falconer, above; I really don’t want the hassle of film any more: only 36 shots to a roll, the development costs for each roll that’s shot, non-variable ISO once you’ve loaded the film, no possibility to check that you’ve got the shot right until the roll has been developed ..there’s a “charm” to it – like driving or riding on an old steam-powered traction engine – but for practical use ..nah; it’s had its time (in 35mm format, anyway) ..and just as Oskar Barnack’s first pocketable Leica sounded the death knell of old, heavy, cumbersome, slow-to-use wooden sheet-film cameras, so digital has now killed-off film.
I’m romantic, and nostalgic, and sorry that the fine engineering of mechanical cameras has had its day, and I do like quirky experiments now and again with old-style chemical developing and printing, but nothing beats the versatility of digital ..even though I’m sobbing over my keyboard as I write this!
People often tend to get kind of romantic when they talk about the “shooting experience” when shooting analogue and how it “slows you down” etc. In shooting digital you have more freedom, more opportunities, more ease of use and this may seems to take the “magic” of taking pictures because it´s so easy. You don´t like the picture you have taken? Take the next one! The shooting experience lies in your shooting behaviour and discipline and not in shooting digital in principle.
Regarding the “natural” look of film I disagree too. What you call natural is just what we were used to. From my point of view the clean and sharp images taken by a modern digital camera is considerably more natural as it reproduces the reality in a siginificantly more accurate manner (apart from X-trans sensor cameras and their terrible fuji colors). Grainy, blurred and washy analogue photographs look “classical” if you so will but not naturally.
Beautiful ambiance, makes me think of pick up an analogue camera and try it myself.
thanks for sharing Brett!
Brett, fantastic shots as usual. What ISO you used?
Its pretty confusing what CINESTILL states about ISO of their film.
It might have been interesting to shoot some more cinematic-style subject matter (e.g. wider vistas with some sort of “story” taking place in the frame). But as a technical exercise, I just have to say it now (and perhaps finally): I am so over film.
Admittedly it has superior tonal transition to digital, but that’s starting to change, too. There’s just nothing about it I miss, save shooting some of the older film cameras that still adorn my shelves.
Hollywood is giving it up, too. There are very few television series left that use it (JJ Abrams is a notable holdout for some of his stuff), because of the huge cost savings, lower light performance, and giant advantages when editing and adding VFX in post.
Interesting look. I like the intensity of the colors and contrasts, yet the subtlety of skin tones. What ISO/ASA is it rated at?
I would agree myself. I love my M240 and the sharpness and clarity is fantastic. I find the negative to digital though would be the shooting experience and the fact that many people take their processing too far. There are supposed to be Blacks and Whites! Shadows and Highlights! Not everything should be the same exposure! Where film has a softer aesthetic its more natural to my eye than digital. (keep in mind I’m not speaking about everyone). My 2 cents.
I agree Patrick.
Awesome pictures, I wish I can post process my digital images more like these film ones.
Love this kind of experimentation. Thanks for the post!
Brett,
This is very interesting. Thank you for sharing.
Cheers!
Beautiful colour from that stock, easy to see why you like it.
Washy and ancient? Well, this film has a very cool tone but that is the whole point of it.
There are plenty of other films that give bold rich colours, that are balanced for daylight.
Nice read Brent.
Best regards
Huss
I guess I don´t like the analogue look (anymore). Looks washy and ancient and for me there´s nothing special in it. Like it or not, the sharpness and accuracy of digital images has successfully bewitchen our eyes the last couple of years.
Just my 2 Euros…
love the cold tone of those pictures
This may surprise some people, but years ago – back in the stone age – (1970’s) there was a company named Seattle Film Works that ran a “mail order” (no internet back then) film developing and processing. They sold Kodak “movie film” packaged in 12, 24 or 36 picture cassettes. For about $4.95 – $9.95 depending on the size of the roll, you received both slides and prints of each image, plus a replacement roll of film including shipping and a new prepaid mailer!!! They were very good at developing images, and you could even tell them to push process the film if needed.
I shot loads of this film while my kids were growing up. What I remember most was the latitude one had – you could set your ASA (film speed) from 100 – 500 and the results were never disappointing.
This is a great film, and you images strike me as similar to what I can remember. Great to see your write up.
Art
Fantastic look.
Love the experiment!
It’s certainly an interesting look.
What strikes me is the huge hue gap between the warm skin tones (and other “lit up” items) and the often intense blue cast of the backgrounds.
Were you using any photo lighting on subjects?
Nice!