
The Leica M 240 – Plasti Dipped!
By Darren Wong
As an industrial designer, ux architect and general photo dude, I’m pretty fond of the processes and physical tools in which we create our work, be it our phones, computers, kitchen knives, pens, or cameras. These tools themselves can be a treasured item to be coddled or handed down to the next or an object that inspires confidence to go out and use them; some of the greater designs out there can be a bit of both. In the end though, tools are just that: a means to create something meaningful in our lives and possibly others.
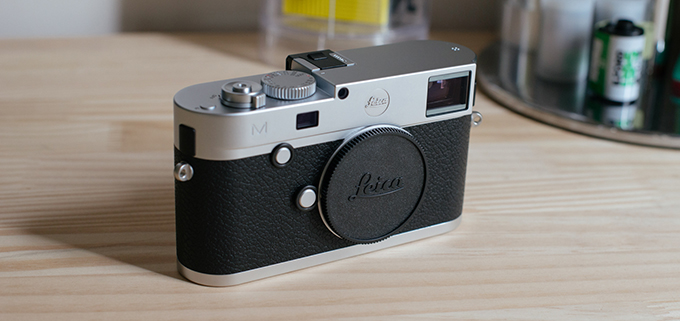
However, as a lot of folks on this site and other gearheads know, we like to make the tools that we use our own complete with fancy or functional straps, bags, gaffers tape, bling, or sharpies. When the day came to upgrade my Black M9-P, I was presented with the opportunity to score one of the first Silver M240s here in LA and as soon as it popped out of the box, I stripped the red paint off the dot for an instant pseudo M240-P look even before Leica slapped a giant 300 dollar screw on theirs maybe a year later. Since then it’s never really left my side in my daily life and travels and his been a great companion scarred with use. However classic, iconic and beautiful any Silver Leica looks, I couldn’t help but feel it did indeed get a bit more attention while walking around and it was about time for an experiment.
I was looking for a solution that was preferably non-permanent and even though I’ve spent many of hours around model shops and paint booths, I was a bit less familiar with Plasti Dip, a spray-on or paint-on rubberized substance that’s graced the surfaces of workshop tools and used by custom car enthusiasts alike. Known for it’s grippy and durable finish, it’s also completely removable on most finished surfaces leaving little to no residue if the coating is thick enough (~2+ m). My biggest concern was the resolution of pigment in the atomized spray as I didn’t want to gum up any of buttons or internals. I took to the internets to find any information on spraying this stuff on cameras, but came up short with only a few dudes using them on GoPros, repairing camera bellows, and coating circuit boards – at least I knew it wouldn’t affect any of the circuitry if it did happen to penetrate. After a successful test on a beater Nikkormat, it was time to get down on the M240!
[DISCLAIMER: Use this information at your own risk. I or this site take no responsibility messing up your camera. I have somewhat decent modeling experience but even I was a pretty cautious and/or crazy throughout the process.]
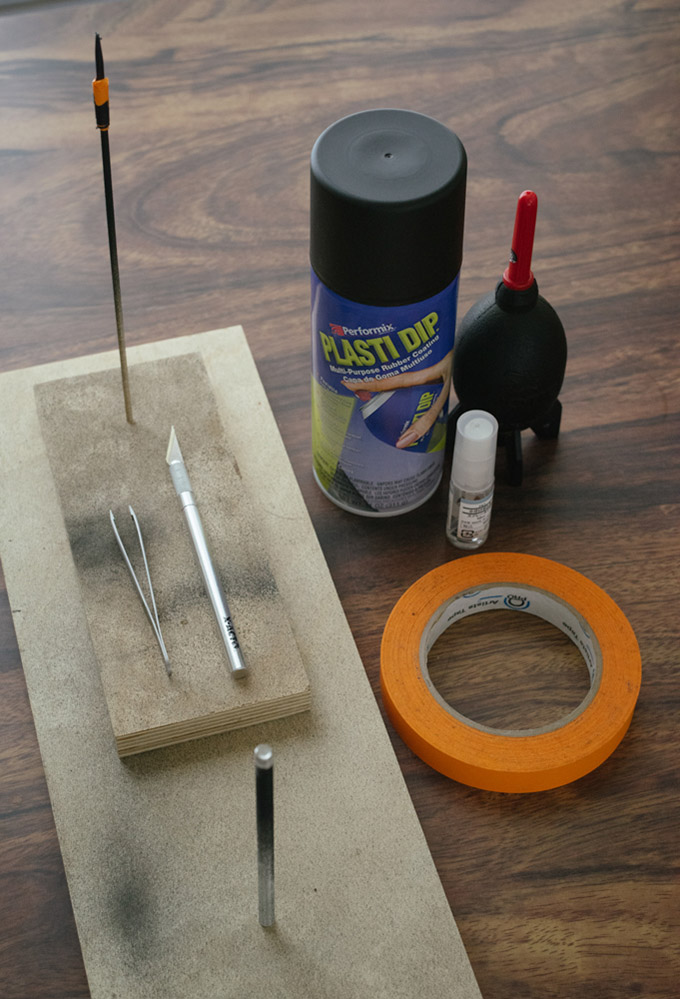
Supplies: M240, Pocket rocket blower thing, Isopropyl 95% alcohol, microfiber cloth, Plasti Dip, carbide Xacto, a standard ¼”-20 screw, some painters/artist tape, some toothpicks, and some scrap wood to mount the parts on. Not in anyway sponsored by any of the above products – brand names are just for contextual use.
With some quick masking of the middle section and a once over with an alcohol wipe to make sure the body was entirely clean (super important), in a well ventilated area away from dust, it took about 3-5 coats at 6 inches with a set time of ~15mins between coats, per surface starting with the small delicate parts first (buttons, toggles, small radii, etc.) and then moving on to the coating the larger body panels. Luckily with the pretty tight tolerances between the buttons and switches on most cameras, Plasti Dip didn’t seem to give me too much of a problem, the spray is thick enough to cover most part-lines without going any deeper or gumming up things like the menu buttons, shutter speed. About 45 mins after the last coat I took my Xacto knife and carefully score around all the (sapphire) windows and used a sharp piece of plastic to score around the non-glass edges. Using the toothpicks, delicately peeled away from all the parts I wanted to leave uncoated. It’s important to score, release buttons, and peel off the rubber at this stage as it’s easier to get cleaner lines around these delicate parts.
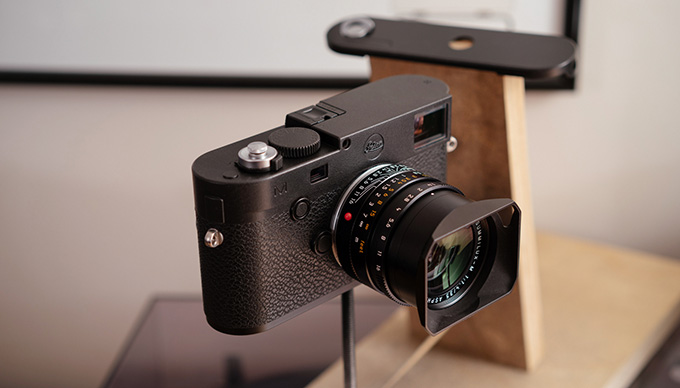
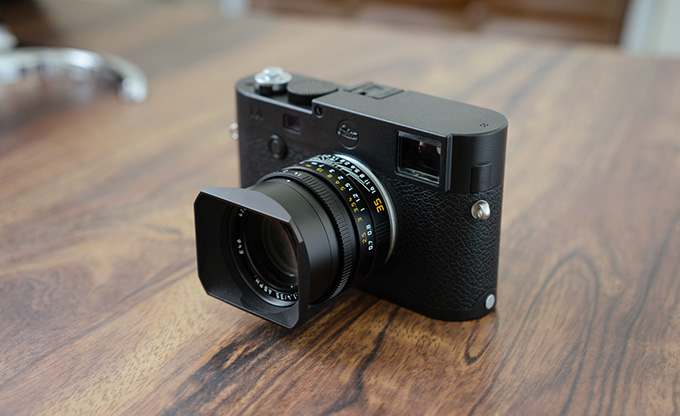
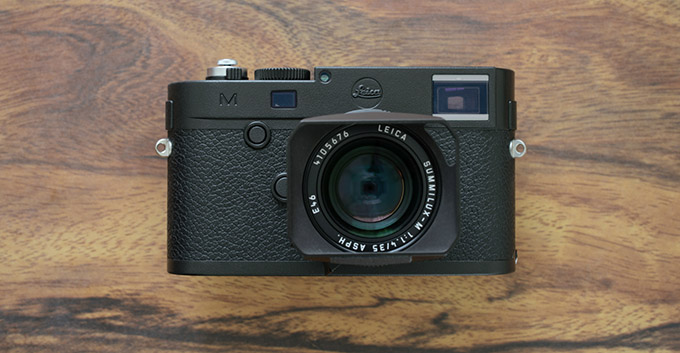
Left to finish curing for another 4 hours or so, I’m pretty stoked. The result is an almost fully murdered out soft-touch rubberized Leica M240 with an overall grippier feel, a bit more durable, and best of all completely reversible! It’s definitely a process but possibly a nice alternative to sharpies, gaffed up bodies, and DigitalRev style pinkentas!
Thanks for letting me share Steve! Shouts to the Todd Hatakeyama and the LA Photo Gang!
Cheers,
Darren Wong
Twitter & Instagram: @sticboy
Darren@sticboy.com
sticboy.com | zeroninefive.com
Cheers,
Darren Wong


I have to admit, it looks beautiful. But then I liked how it was originally too. My preference is to use gaffers tape. Has that grippy feel, and it’s easy to put on and take off. Yeah, it does come out looking like a camera wrapped w/ gaffers tape…..that’s the whole idea. I never was into that whole pretty camera thing. My preference is to have something that can be knocked around and not have to worry about a little nick here or there so I can get on with the photography.
I dipped a beater Bessa. Carefully dissembled and cleaned the top and bottom covers, then applied 4 coats.
Did look good, but man so much hassle. Started to peel off within three days’ use. So, definitely not very durable if it’s for something being handled and scratched daily.
Would have been nice to seen some step-by-step pix. Hope you post a followups to show how your new finish stands up with use.
My only concern is regarding the spray getting inside the camera – via microphone port, menu buttons, etc.
Is there a clear Plastidip?
Looks pretty cool. And it’s reversible, that’s the best about it. So it can be done again and again to get the same look.
Excellent job! You beat me to it, I was going to do this on my older M4-2 (and I will!).
I would be tempted to do the M9 too, but it is in excellent shape, so I will leave it for now.
I have done this on all my cars’ wheels and on some panels, it is a very easy process and not as messy as with ‘real’ paint – plus, being 100% reversible makes it a no brainer!
I like the idea, but basically this article is worthless as it has no real content on how it was done. After pics are great. but showing people how to prep and and finish is more important.
For what it’s worth you could have just showed us after pictures with one sentence. “I painted my silver Leica black with Plasti-Dip”.
just take it out for more shooting instead
The beauty of a Leica should never be covered up. Its magnificently beautiful out of the box and perfect in touch. Just my opinion though.
Looks great, dude. Would have been nice to have seen a video of the process.
I have to agree with previous posters it looks great but I can’t imagine i’d have the courage to do that having dropped the dollars that thing costs.
Great Caesar’s Ghost!
on a different note, does anyone know who or where i can send my black M9, to remove or paint over some scratches on the top metal part of the camera body? thanks.
i never understood why someone/anyone never made a plastic rubberized skin to cove an M.
This is close but i reckon hazardous..
Is a black beauty , congratulations !!!
Darren,
Aesthetically, I prefer your DIY black body to the silver version. Makes it look fantastic in matt black.
I’d not heard of Plastidip. Is it similar in texture to the rubberised texture found on some small portable audio devices? If it is, I’d be interested in how easy it will be to revert you camera, should you ever want to, that is. The stuff on two of my personal portable video players has started to come off and is very sticky. This will be the only thing putting me off trying to re-coat with Plastidip, so I’d welcome your comments as a user. Whatever, it sounds like it will be great at doing DIY repairs to old leaky camera bellows.
Crazy experiment but final result is nice to my taste anyway- I like black Leicas and consider the fact that there are no white paint filled engraving visible to be a plus.
Leica make their cameras beautiful but they should also make them really tough and weather sealed -Listen up Leica ! The film Leicas were brilliant ….but the digital Leicas not so!
I love cycling and love racing bikes new and old style …recently a fellow cyclist said about his bikes components -“these are beautiful but I want my components to look like and wear like weapons !”
I kinda think he is right…..maybe cameras as well.
Rgds
Why not buy a black M240 or trade your silver for a black ?
Hi Darren,
Being an industrial designer and mechanical engineer with over 20 years of experience, I hate when I hear people put ideas down. In the case of this project is that you run a very high risk of damaging your very expensive Leica. All it will take is one little piece of that to get into a place where it shouldn’t and it could be catastrophic. I’ve also built many cars using that stuff in unexposed areas because it can be easily rubbed off. It also takes proper preparation in order to make it stick. E.G. sand / rough metal areas and then use acetone to completely remove and oils.
Powder coat, anodize, hard coat, or PVD (this being the best) are other processes that would be better suited for what you are looking to do. Even better would’ve been to sell and by a black 240
Just my opinion.
Frank
Why?!?
This is fabulous and I have to say it looks really badass. How did you cover the rangefinder windows? Excellent job!
1. You are insane, obviously. Reminds me of: “I had Earl Scheib paint my car. I left the windows down, and they did the inside for free.”
2. Looks great, fantastic result.
3. On my way to the hardware store. My Leicaflex SL 2 awaits.
Very cool Darren, I’ve Plasti Dipped parts of my Jeep, doing the wheels this weekend. Never thought of doing a camera, great idea! Great job! thanks for the shout out
I just use a piece of black tape to cover the red dot to make it less conspicuous when I take the camera into NYC or wherever.
Looks great now, but wait until it starts to peal off…then what…not a way to treat a Leica or any camera…
Fonzi over at dipyourcar on youtube would be proud…
I dig it. I’m in LA. How much would you charge me to do this to my M-E?
Any pics of the Nikkormat?
I only tested a few coats on top plate of the nikkormat with the shutter release, film indicator and film advance lever. After about 3 or so coats and 40 mins, I was ale to cleanly peel off the skin. I wish i documented it but didn’t think i’d even get that far! The only problem i had was the area under the lever but knew it wouldn’t be much of a problem with the 240.
Looks cool. Some Leica aficionados may call it vandalism.
Cool … but when the plastic coating starts coming off in irregular pieces it’ll look pretty funky.
This is the craziest thing I have ever seen!
You, my friend, have some big cajones.
Nice work.
PS: Would like to have seen a before photo. Patina is awesome. Perfection is ugly.
That looks awesome. I’m familiar with Plasti Dip in liquid form to restore vintage german car bits. Never used the spray version. I, too, will be curious as to how you like it. Keep us posted.
how durable this plastidip is? i mean can it handle zippers, velcro, table surfaces and things? isn’t this a kind of thing that peels off pretty easy?
I’d say it’s fairly durable depending on the thickness of the coat – if you youtube “Plasti Dip Durability” there’s a ton of videos of guys using it for the front of their cars and rims to prevent rock chips for sometimes over a year. Originally it was used to dip the raw handles for tools such a wrenches and screw drivers to prevent rusting and increase grip. I’ll take one for the team and report back after my travels to see how it holds up on a hand held product. But even if a small abrasion does happen i can just touch it up with a small brush or respray a certain portion.
It’s not extremely durable, but if you’re taking proper care of your camera I doubt it would be an issue.
People have been plastidipping high wear auto parts for ages. Including wheels which are cleaned twice a week.
Oh m’y god, you are insane! Looks good though.
Ok, here is the deal: if the camera still works and looks good in a year or two, I’ll buy it used, as long as you realise you have just ruined its resale value 😉
Plastidip peels off. He hasn’t ruined anything, it might even serve as a layer of protection against scratches.
i’m allergic to chrome, so i can’t use leather camera’s and/or straps. This is a way for me to use an leathersealed camera
Rad! Thanks for having me Steve!