
Making the EM5 mk 2 High Res Mode Sing
By Brad Nichol – His blog is HERE
Hi Steve, I though that some of your readers might be interested in a little low down on the Olympus EM5 mk 2 high res mode, it is certainly a popular camera but one that is difficult for many to come to grips with, increased capability does not normally equate with increased ease of use or understanding.
The Olympus EM5 mk2 is a rather lovely camera and it also has one killer feature that really got keen photographers salivating upon release, specifically the high resolution mode, in this article I will explore the benefits and deficits of the HR mode and hopefully readers will pick up a few tips to help get the most out of the option.
Background
This HR mode creates the magic by combining the output of eight separate frames which are captured by moving the sensor by just one half of a pixel for each of the donor frames. It was not the first time such a feature had been offered for sale, but certainly the first time it was offered at a price point that most of us can aspire too.
In theory the option to create a 40 plus megapixel image from 16 megapixel sensor sounds incredibly exciting and when all’s working perfectly indeed it is, but
in practice the high resolution mode is devilishly difficult to use for consistently high quality results without strange artefacts, this article may help you increase that level of consistency and provide some insights for those who have never experienced the High Resolution (HR) option/mode.
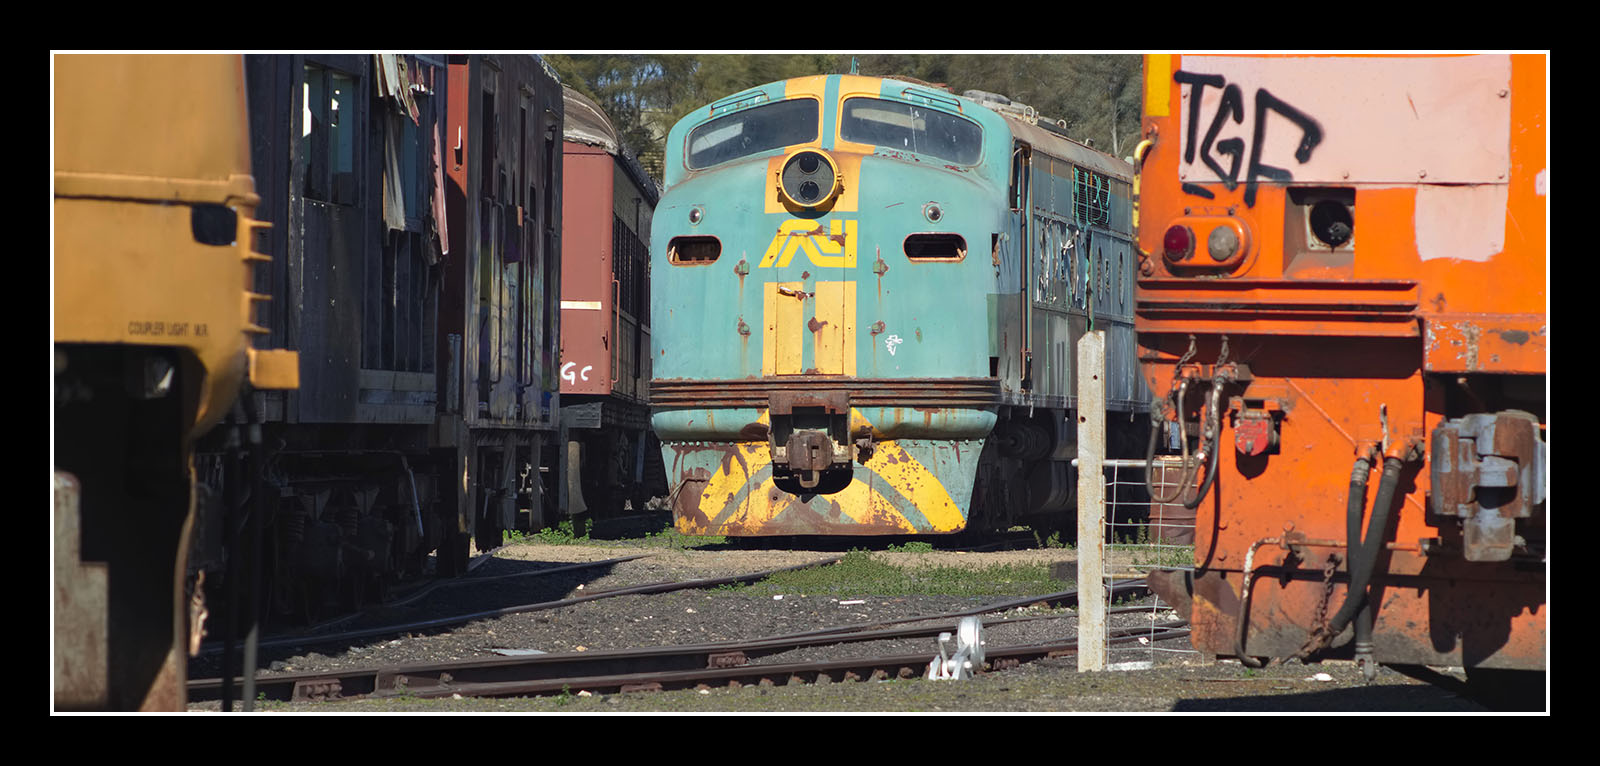
Original cropped image 9200 by 4100 pixels, just under 38mp, looks fine at reasonable size, but when enlarged to 100% it is easy to see the effects of camera and subject movement.
–
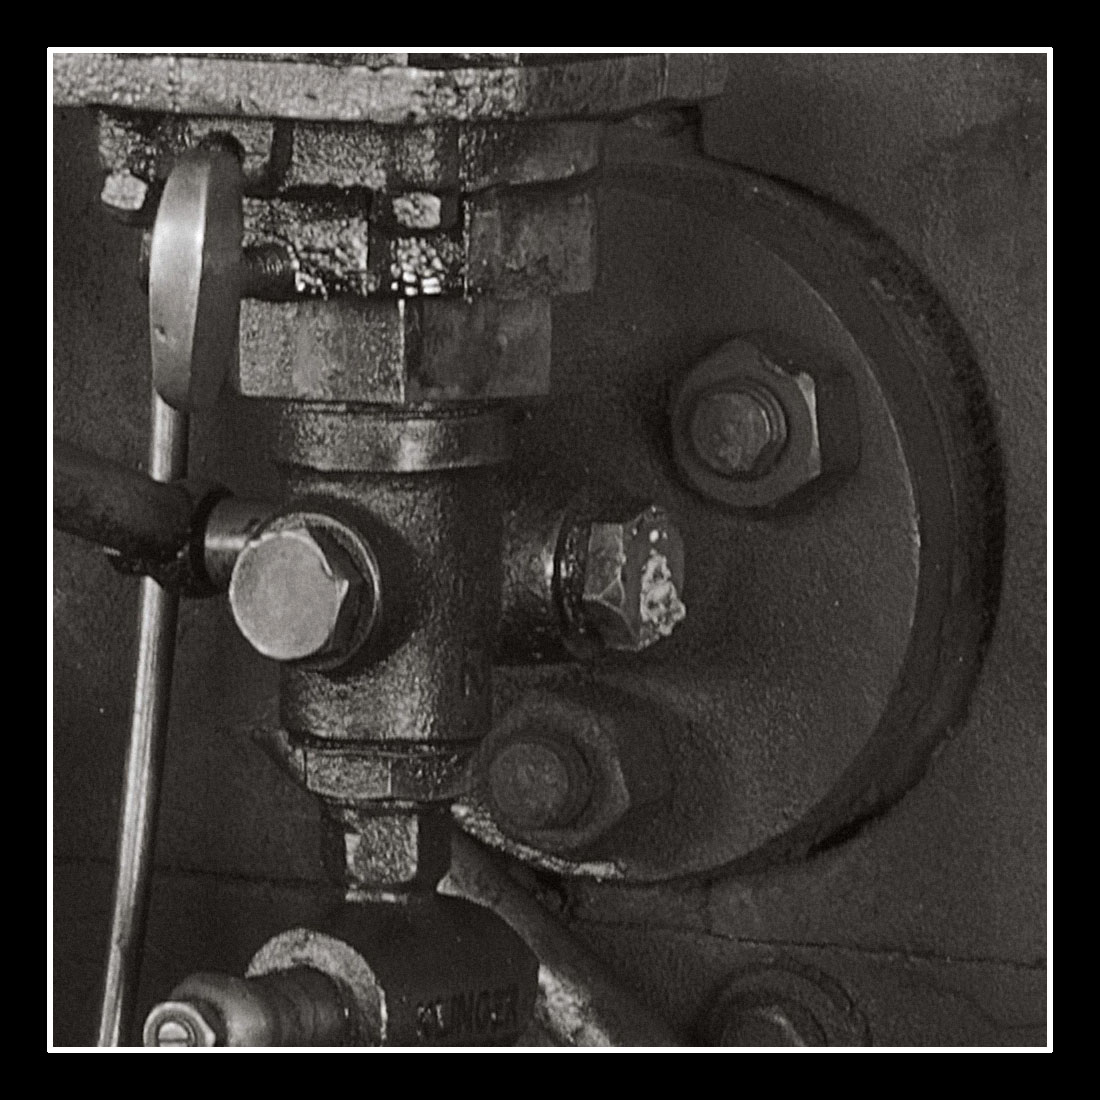
The 1000 by 1000 pixel crop shows how the variable cross hatching caused by camera movement, in some places is just looks soft, this depends on the localised movement of the objects, if you look really closely you can see the jagged edges on the headlight and edges of the windscreen, this is the result of very minor camera movement and is evident across the entire photo, but is usually only obvious on hard edges.
There are other ways to go down the high resolution path, these include: buy a very high resolution camera, image stacking of multiple frames using something like “Photo Acute” or image stitching. Of these three only the first option offers ease of use but at considerable expense both in terms of the cameras price and the rest of the shooting and processing system required to support the option. No matter how we cut it, high resolution is not without additional cost either financially or in effort.
A couple of weeks back I decided to take the time to put the Olympus EM5 mk2 high resolution (HR) feature through the wringer to see if I could come up with a workflow that allowed me to achieve great results on a consistent basis, I’ll say up front, it was not easy.
In many ways I don’t think that the HR mode is fully ready for prime time, there are just too many variables at play for most situations however it appears that Olympus will soon be releasing the new EM1 mk 2 which apparently includes the ability to use HR “handheld” and I feel quite confident that updated iteration will address many of the inherent problems of the current system. Hopefully, Olympus (fingers, legs and toes crossed) will see fit to make a firmware update available for current EM5 mk2 owners then we too could better enjoy the benefits of the HR mode.
The Good News First
The HR mode does do what it promises on the can, it gives you a file which has a lot more detail and as a result images tend to look more three-dimensional. Additionally Olympus claim that images show reduced or no colour moire, a claim I agree with, it works perfectly, none of my test images have ever shown any false colour (moire’) effects.
Olympus don’t go to any great lengths to specifically promote using the HR mode as a means of decreasing image noise but in fact it does significantly reduce almost all types of noise in the image which is a very pleasant bonus.
And here we have in the original crop 58 megapixels of Olympus 100mm f2.8 goodness, you will have to take my words for it but that golden oldie of a lens really can do justice on the EM5 mk2 HR mode.
–
Another 100mm f2.8 grab.
As an aside, another aspect I had not considered prior to owning the EM5 mk 2 was that the HR files are slightly lower in contrast when compared to the standard resolution files, this makes sense, image stacking will always slightly reduce contrast in highlight and shadow areas (mainly shadows unless your adjust your exposure technique) and this gain can expand your post editing options, generally the improved shadow rendition and lowered noise means you are able to cut back the exposure a little beyond normal and thus better preserve the highlight details which is sort of the same as extending the useful dynamic range.
All up then what’s not to like you get higher resolution, better colour, lower noise and a bit more besides, it sounds like a digital photography is wet dream.
So its all good then? Well, yes and no.
The Not So Good News
The messy fly in the ointment is that the “envelope of operation” is really rather limited, you definitely need a subject which is not moving in any way or in any part of the image area, you need the camera to be absolutely, positively locked down, and you need lenses which are capable of resolving the amount of detail the HR method is able to produce.
I’ll touch on the lenses first, I’ve spent several weeks testing a wide array of M4/3 and legacy lenses on the EM5 mk2 and I figure I now have solid insight into which lenses actually perform optimally on this platform, straight up I can say that despite the fact that many of the M4/3 lenses are indeed very good, most of them are not really up to the additional rigours of the HR mode.
(Check out my blog for some insight into legacy lenses that might be up to speed with the HR option http://braddlesphotoblurb.blogspot.com.au/2016/07/the-great-m43-adventure-legacy-lenses.html
Detailed tests of many of the lenses will follow soon. )
For example, one of my favourite M4/3 lenses is the humble Panasonic 14 to 42 series 2 zoom (not the pancake version), this is a rather lovely and compact lens. On the standard 16 megapixel sensor it works superbly provided that you’re using focal lengths below about 32 mm, beyond 32 mm it’s not too bad and in fact probably quite a lot better than most of the other kit lenses on the market for any format, not just for M4/3. Sadly however this marvellous little kit lens simply doesn’t have what’s needed to work optimally with the HR mode, it just doesn’t resolve out into the very edges and corners of the image in a way that that matches the capability of this mode, though the centre always remains quite excellent.
On the other hand I can report that the Olympus 45 mm F1.8 is absolutely superb for HR purposes, it has amazing edge to edge clarity and gives a consistency across the entire image area (even close to wide open) that most of the lenses on the platform lack. Yet despite the 45 mm lenses’ obvious expertise it is still bested by some older legacy glass, in my case I found that my humble and ancient Nikon 35 to 70 zoom can easily out resolve the Olympus 45 mm and so in the interest of getting the greatest resolution out of the system possible I chose to carry out more tests initially with that particular lens.
I guess what I’m saying is, if you’re going to use the HR mode to its advantage you’re either gonna have to purchase some good glass or find some really nice legacy glass that is capable of matching the demands of the mode and the latter will probably require some testing on your part.
In its current implementation the HR mode does not work in conjunction with image stabilisation, this makes sense as it’s the image stabilisation drive units that allow the HR mode to work its magic by microscopically moving the sensor around. No IS? No problem you think, well once you start working near the outer limits of photography and trust me trying to obtain the greatest of quality from a 63 megapixel file (the 40 megapixel output is a down sampled version) is definitely working on the outer limits. Small things you probably never noticed or cared about become major impediments, suddenly the smallest degree of camera or subject movement will become very obvious, ruining an otherwise perfect shot and movement is only the start of your potential issues.
Getting It Steady
Now Olympus say that you should place the camera on a tripod, well yes of course you need a tripod, but not just any old tripod, fact is pretty much the majority of tripods that photographers are using out there will be practically useless with HR mode. Trust me on this, even the slightest amount of movement will obliterate the advantage of the HR mode and most tripods move at least a little bit, especially those with little mass.
My first HR attempts were really quite disappointing I found there were artefacts in various places around the image and also obvious ghosting when examining the 100% views, especially when you looked closely at more distant objects. None of this was because the subject moved, after all telegraph poles tend to stay put, no it was clear the camera had moved just by the slightest amount between each of the captures.
Yes the camera was locked down on a good quality tripod (at least better than the ones most students bring into my classes) with a good quality ball socket head, everything was quite optimal I thought, yet typical of Goulburn weather there was a light breeze blowing. Actually a light breeze is not typical, normally Goulburn does a good impression of a wind tunnel, often being called the windiest city in Australia, anyhow with most photo situations that slight breeze wouldn’t have been a concern but in this case it was enough to etch away at the image clarity.
I also felt that some of the movement may have been due to me pressing the shutter and upsetting the balance despite the built in delay and pretty soon afterwards two things dawned on me. First, you really need to use a remote release to trigger the camera, yes I know that the Olympus has a built-in adjustable delay before the first shot triggers but even that’s not enough, it seems to take quite a long time for the camera to settle down to the point where it is absolutely steady enough for the frames to be captured without any movement.
The next realisation? To make sure there was no movement, zoom in to the 14 times magnified view take your hand off the camera and then watch the screen to see if there was any sideways or up-and-down movement of the image. This generally means you can’t put your eye up to the viewfinder, you need to be looking at the LCD screen which in turn means you may need to attach an accessory LCD hood to be able to see it well in bright light. Placing your eye against the EVF and then moving it away will upset the balance of the camera, meaning you won’t see it settle down at 14X view and of course you will trigger additional movement as you move your head from the viewfinder.
All of the above meant I had to take a trip home to grab the cable release and then go back down to my test site, I expected everything would work fine and I proceeded to take a dozen or so photos, a standard photo of each of the scenes is embedded in the HR files so I could easily do a comparison between the two when I got home. Note, probably better than the cable release is to use the Olympus smart phone app to trigger the shutter thus eliminating any chance of induced movement, this also means you are not constantly opening that little door that covers the remote release port, I just don’t think it will last well if subjected to constant use, in fact I think it is one of the few blights on an otherwise excellent device.
Again I returned home opened up the images in my raw converter of choice (Iridient Developer) which is quite capable of processing these special Olympus raw files to perfection, again I suffered the pains of disappointment. It was obvious that despite my refined technique I was still getting some movement within the image, creating weird hash- like artefacts and ghosting, though at a considerably lesser degree than in the first tests. It was obvious what was causing movement, it was that damned light breeze blowing the camera around, despite the fact that I had used the cable release and timed the release using the 14X view to trigger in the lull between gusts, clearly there must still have been some tiny micro movements.
There was only one thing for it, get an even bigger tripod which fortunately I had in the shape of an old studio Manfrotto unit with a very large video head on the top, so again I traipsed back down to my test site, set up my camera on the heavy mother and assumed that all would be fine.
You guessed it, all was not fine, the first shots that I set up on the railway platform pointing the camera down along the railway line were quite reasonable and displayed the obvious benefit of the HR mode. But then the gods or perhaps stupidity conspired against me, I took the camera up onto the footbridge which crosses the railway line, setting it up on the far side landing, nobody else was using the bridge, it was too damn cold for casual walks. I aimed the camera back down along the Railway line and proceeded to take some photos, assuming that the tiny breeze would’ve been taken care of by the much heavier tripod.
Still I had problems with camera movement due to the breeze, now just at a much smaller level but in this case it was not the tripod at fault, something else had cropped up that I had not considered. The railway footbridge is a pretty solid affair, one would assume it wouldn’t move anywhere, but in fact the light breeze was enough to get the steel framed footbridge to move sufficiently enough to knock the edge off the image sharpness, well like I said working on the edges photography and all that.
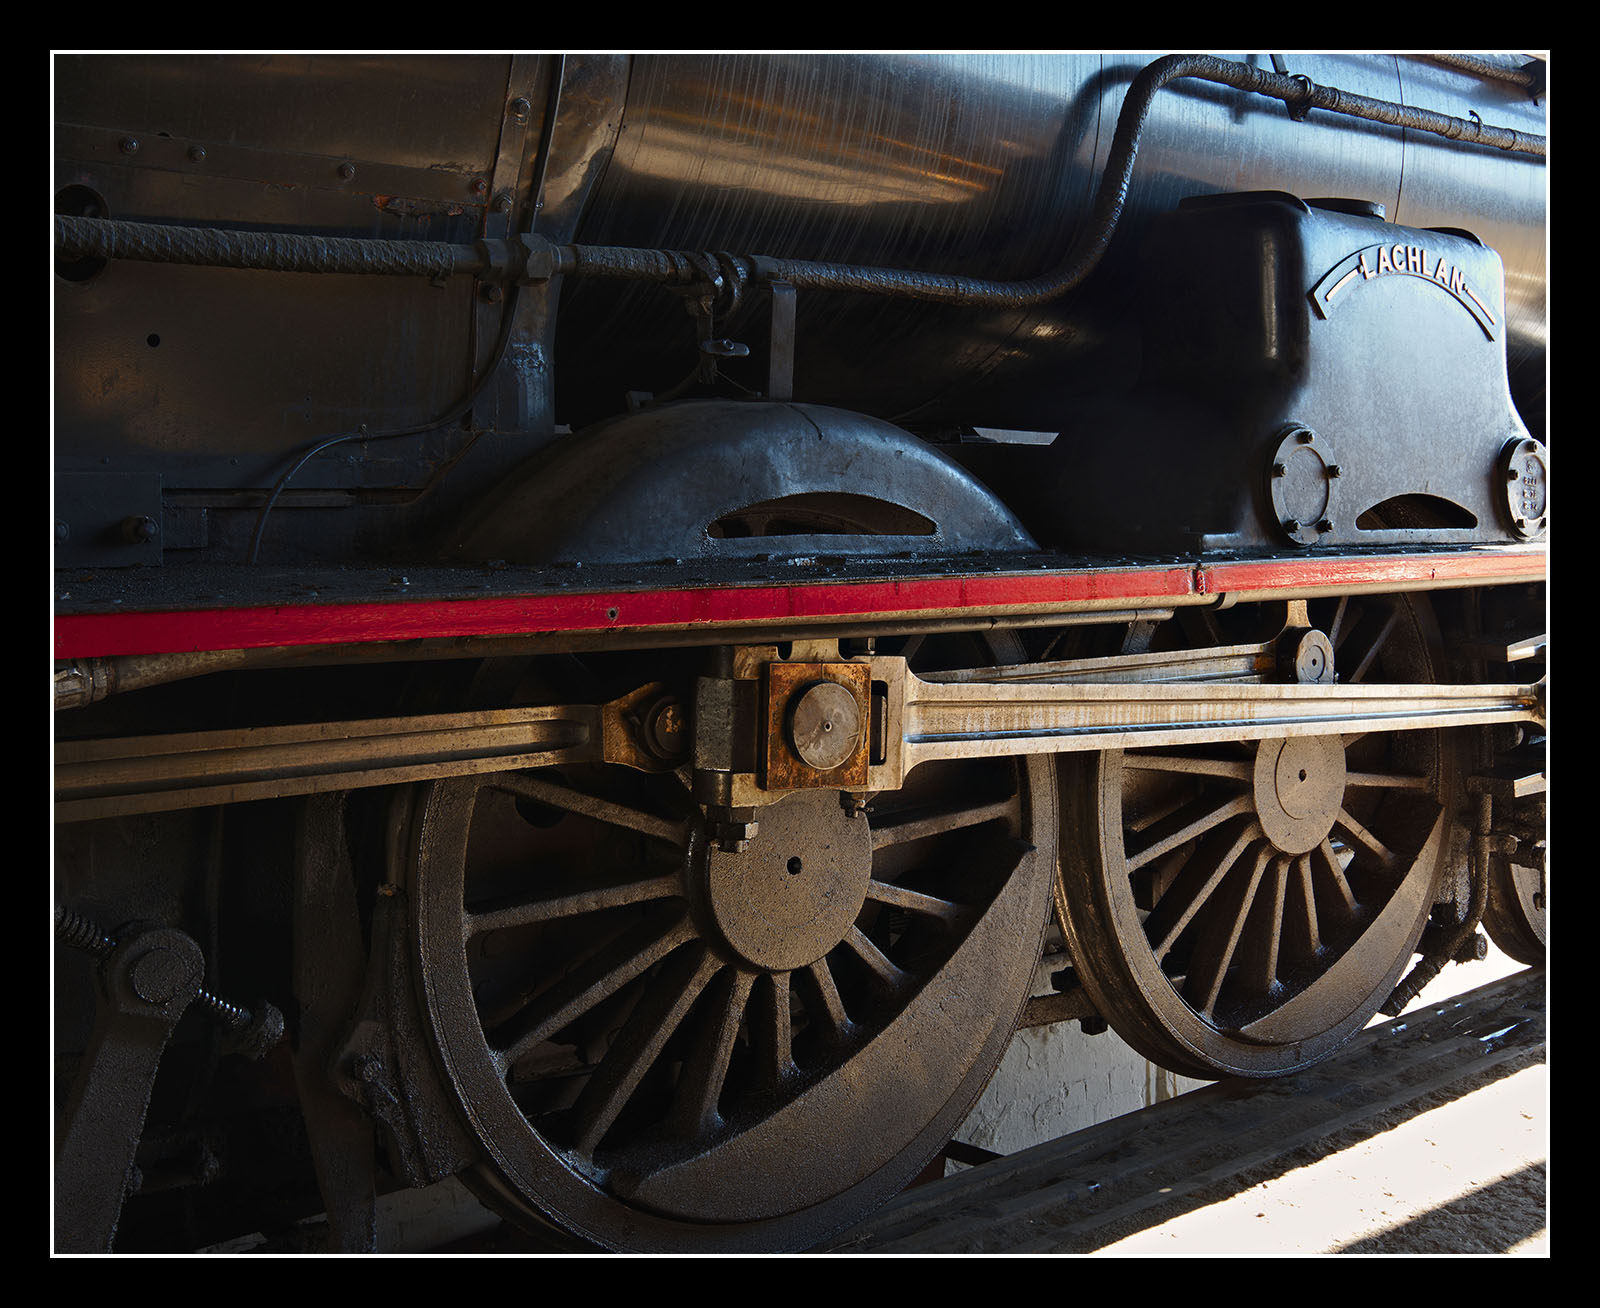
Luckily I was out of the wind here and we have a exceedingly detailed image. This was shot using an old film era Olympus 100mm f2.8, yep it really sings a fine tune on the EM5 mk2
Once I’d cottoned onto the problem I took the camera and tripod back down onto solid ground and continued shooting one of the parked grain freighting cars, this time it was obvious looking at the final “in camera” results that I was indeed getting much higher resolution but even so a couple of the frames still showed some movement.
Now my problems may have been exacerbated because I was working with slow shutter speeds in the sub 1/15 second range and no doubt if you were shooting at say 1/500 second you would experience much less of a problem with movement but all the same, the single standard resolution frames captured at the start of the 8 shot HR sequences showed no movement whatsoever.
The takeaway from all the above is that you absolutely have to apply the most rigorous efforts to keeping your setup completely still during the course of the exposure and more importantly that a state of perfect solidity is likely much harder to achieve than most photographers would probably think. I am even considering on attaching a sandbag around the underside of the camera where it comes up against the tripod in order to take out some of that micro vibration and then weighting down the tripod by attaching a bag of sand between the three legs, I am sure the latter will work but its neither elegant or practical and removes much of the benefit of running with the otherwise lightweight and compact m4/3 system, anyhow I’ll let you know how that one goes.
Getting Enough In Focus
One issue which is not a deficiency in the system but rather purely related to the fact that we are dealing with a very high resolution file in the first place is “depth of field”. Your concept of adequate depth of field will likely need a complete re-evaluation, scenes that you thought had ideal sharpness in the distance will not, objects in the foreground that you thought were adequately rendered will look quite mushy. Okay so you say, Brad just close down the aperture a little more, not so fast there, diffraction effects become absolutely obvious with these images, close the aperture down just one stop more than is ideal and it’s completely clear that diffraction is impacting upon your image clarity, some of this can be compensated for in the editing process but generally you need to be able to work with apertures of f5.6 or wider and in my tests it seems that around f4.5 is optimal.
Of course the above just gets back to the fact that you need lenses which are critically sharp at the wider apertures, which rules out most kit lens options, but more importantly it means you absolutely have to know where to place your focus and how estimate your depth of field with better than casual accuracy if you are going to get an optimal result, for most photographers used to working fast and automatically this aspect could be more than a little challenging.
One workaround is to set the focus where you feel it should be, then close down the aperture, ( helpfully Olympus give you the option of tapping the DOF button once to lock the aperture down, it’s a custom item in the menu) then go into 14x view and move your view around the image to check for critical focus and readjust if needed. Yes of course this is slow, but then again the HR mode is not for shooting from the hip and sometimes slowing down makes for a much better result.
In this case the shot was captured with the Sigma 18-35mm f1.8, really the only failing of the EM5 mk2 for high grade results is the slighly poorer dynamic range (even in the HR mode) compared to what can be done in a single frame with modern FF camera, the concrete lit by the direct sunlight coming in through the shed doors lies outside the recoverable range, the shadows have plenty of potential for opening though, so the exposure could have been held back half a stop or so.
–
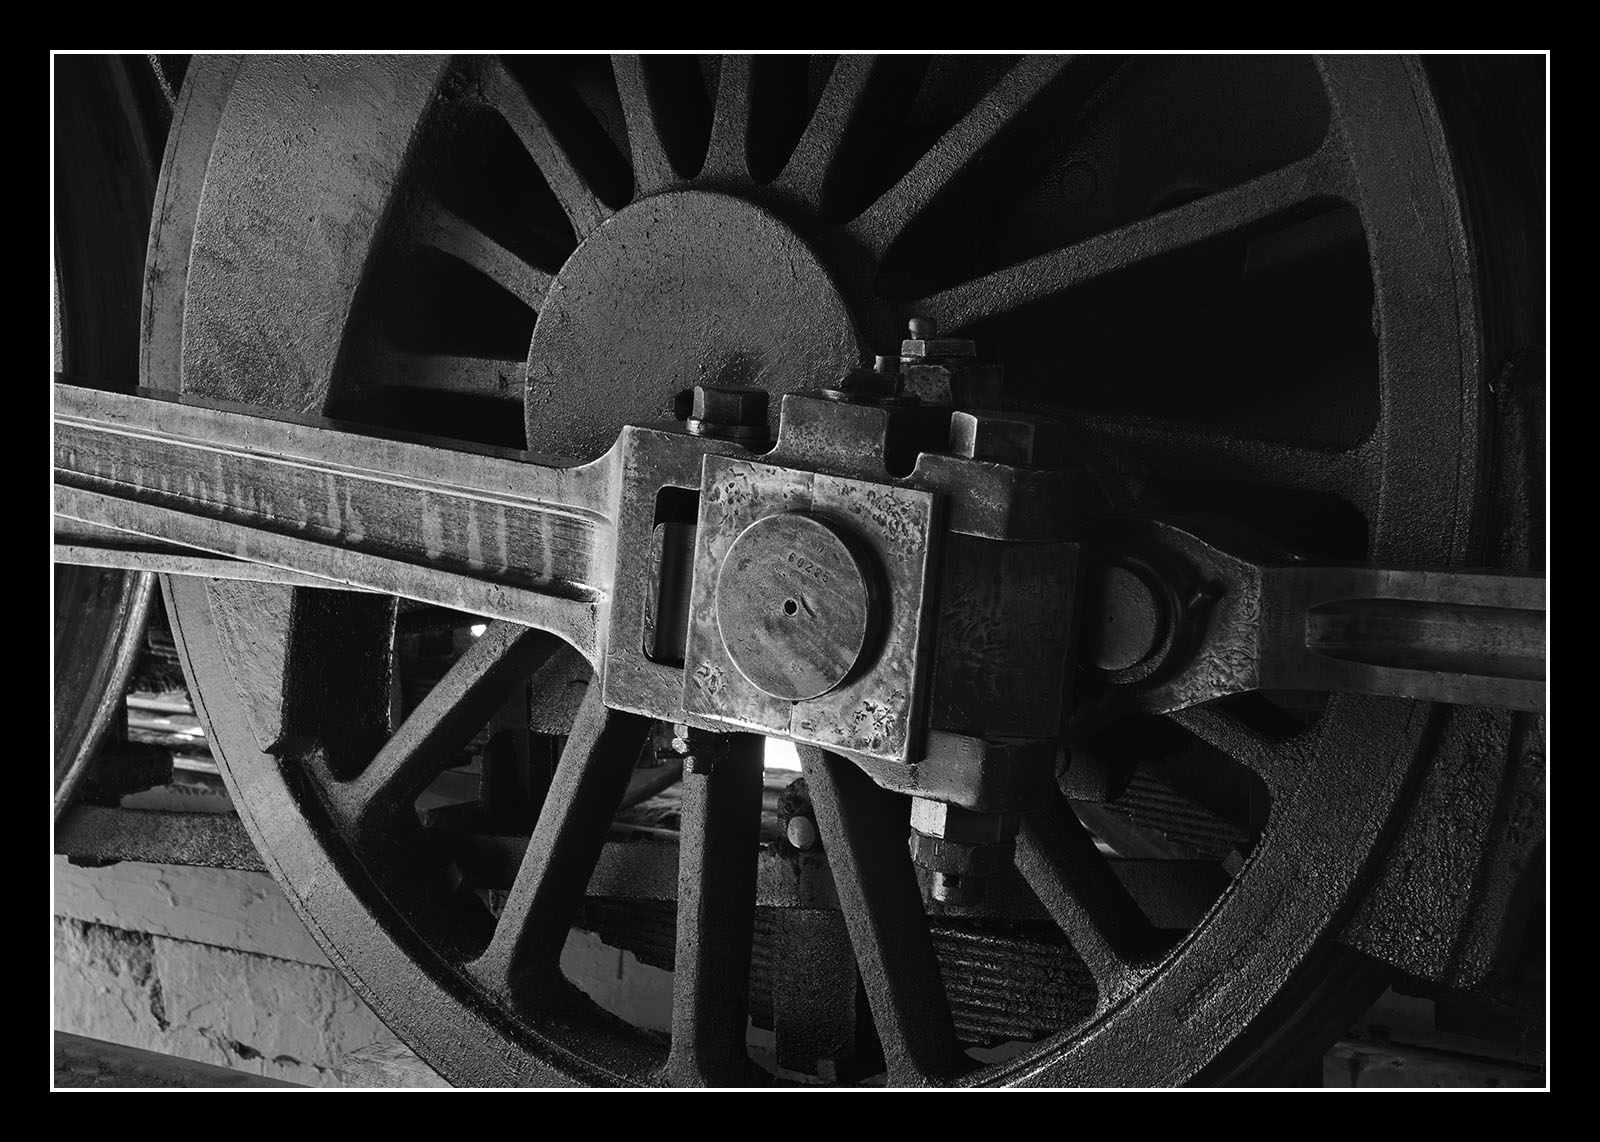
The HR files lend themselves to mono conversion with tones able to be pushed and prodded at will, mono often live and breath by textural rendering and the HR files deliver in spades.
Watch That Shift
Many wide aperture lenses exhibit some focus shift as they are stopped down, knowledgeable photographers often work around this and indeed many cameras allow for this as part of their auto focusing system, regardless it can still catch you out with manual focus lenses and has proven to be a real bugbear for DSLR shooters over the years. Mirrorless shooters working in manual mode can largely get around the focus shift by having the camera focus at the shooting aperture, but this makes it a little harder to really nail the focus as you cannot see the focus pop in and out the way you can at wider apertures. (Note: the Olympus has focus peaking and that certainly helps)
It has been assumed that with smaller aperture lenses focus shift will rarely if ever be an issue….until now that is! Repeatably I found that many lenses exhibited small degrees of focus shift when there was moderate disparity between the focusing and shooting aperture, the Sigma 18-35mm f1.8 in particular shifted the point of focus enough to be easily discernible in enlarged views on the computer. In the end I found the best approach was to manually focus one stop wider than the intended shooting aperture, unless of course you intend to shoot at wide open or very close to it, fortunately the EM5 mk2 has a great EVF which takes the pain out of the process.
I did try several shots using auto focus on the 45 mm lens (which I must add is a pretty keen focuser) but frankly I found that there was too much variability in the results unless I manually fine tuned, normally with the std 16mp shots you would not see precisely where the focus was lying once you focused past a few metres but in this case it was blatantly obvious if it was in the wrong spot, my take, to make the most of HR mode you need to manually focus with the camera view zoomed to the maximum 14 times magnification, then stop down only enough to get the fore and aft items you want nicely sharp.
Now here is a challenge, taken in a dark environment 1/10 sec at 100 ISO, the image is originally just under 64mp, it is a HDR image in as much as the gauges were from a second darker frame as they had a lot of light reflecting off them making the details unreadable. So if we grab a 1000 by 1000 pixel crop out of the image (the area in the white box) we get the 2nd pic below.
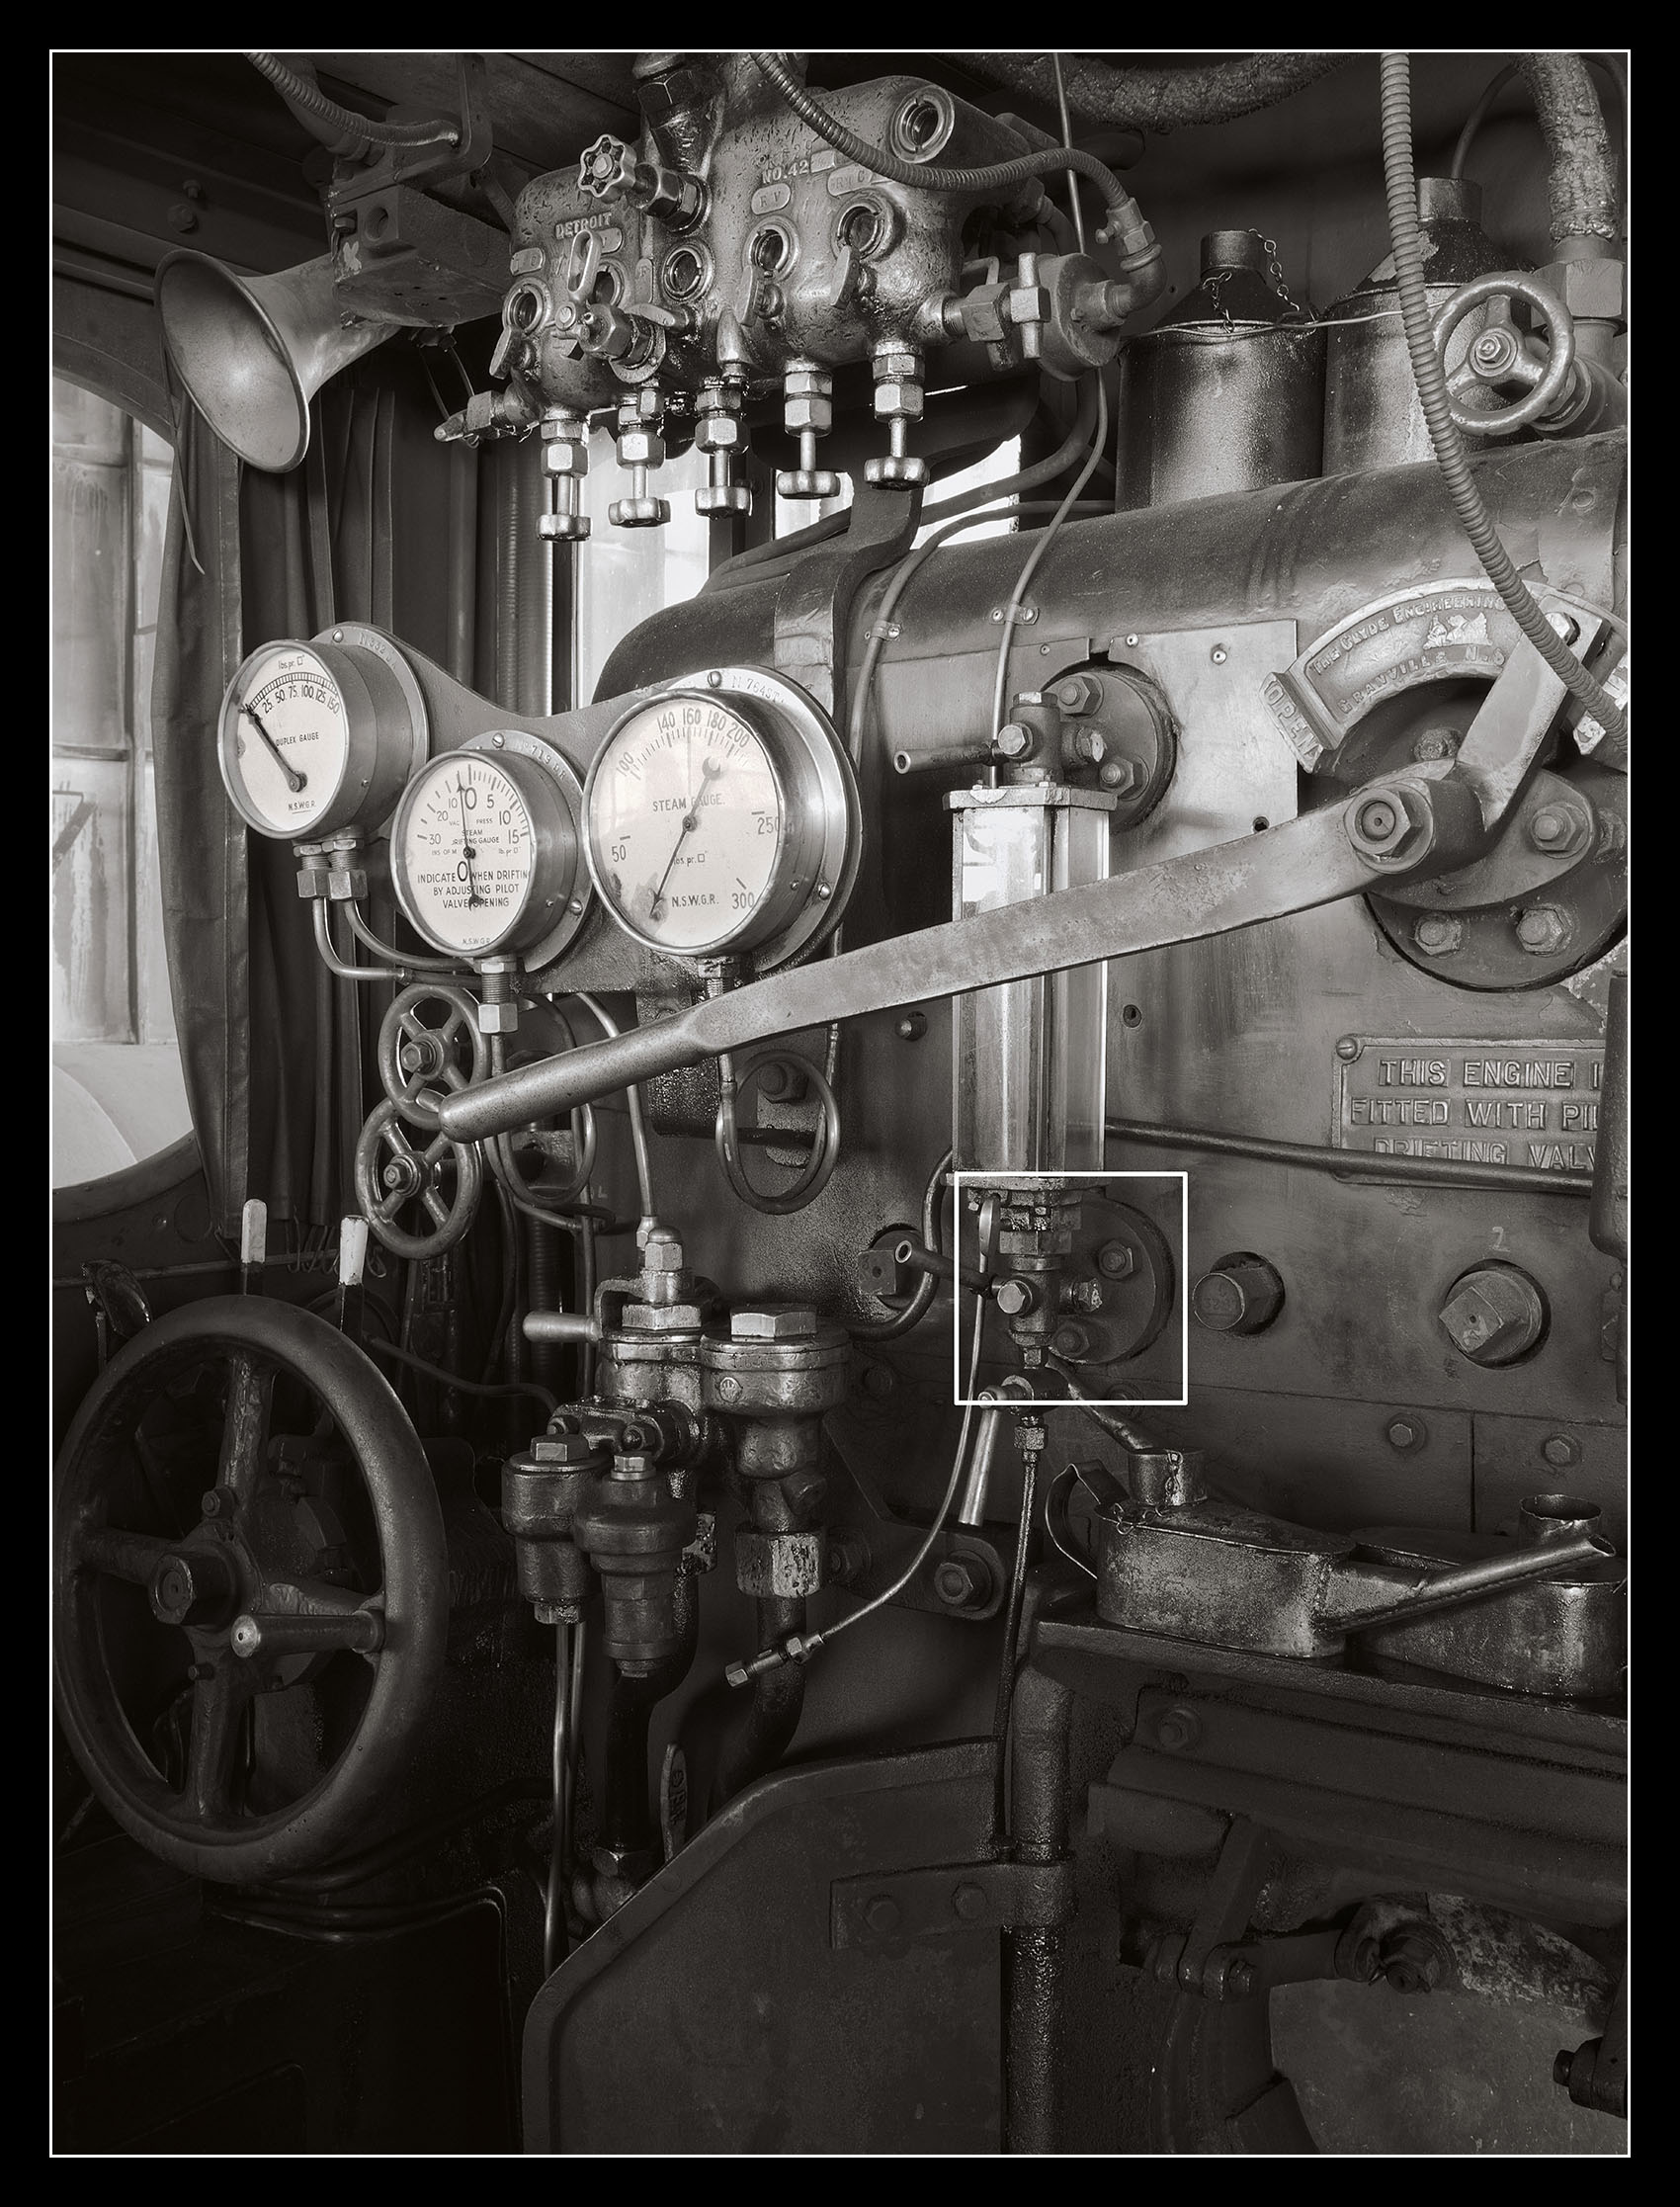
crop below…
Camera Movement and Subject Movement Are Different
It might seem to be stating the bleeding obvious to say that the two types of movement issues are different, but what I mean is they show up as a different types of artefacts in the final image. Very sharp hash like artefacts that appear patchy and often surrounding by a soft blur are the clear indicator of the movement of items at image capture time, obviously they are not all over the frame only in the bits that moved, but the way they look has a lot to do with how much and how quick the movement was.
Moderate to low levels of camera movement are obvious enough as you can see ghosting but small amounts of movement on the other hand appears as a very subtle jagged/pixellated look, or if at a lower level still, a kind of cross hatching that is most obvious on straight lines, the latter is really only visible at a 100% view and can be blurred away if needed, at some cost to resolution.
In the case of low grade camera movement the issue might not be noticed in the closer up up areas of the photo, this is because a tiny amount of sideways movement when aimed at closer object subtracts little from the overall detail of the objects but as you move further from the camera a small angle of movement is more amplified as a percentage of the width of the item in question. With normal resolution photos you wouldn’t normally notice this but the HR images beg to be zoomed in for some pixel peeping time to see those really distant items. These distant objects are generally very small and contain only a limited amount of textural detail, but at high magnifications you see ghosting on distant trees, telegraph poles etc that just doesn’t matter much in the closer and of course much larger/more detailed objects. Of course lower resolution files won’t resolve enough to see the camera blur in really distant objects in the first place.
The opposite is true for subject movement however, a tree blowing at great distance will show little movement and probably no artefacts but a shrub blowing a few metres from the camera will be an artefact ridden mess.
At first I was a little confused because looking at the scenes I had shot, I really wasn’t expecting that there would be any movement of objects or the camera, but it’s the little things that catch you out. As an example, a strange patch of artefacts was present in a photograph I took of the end of a Grain Car just as it started rain. Obviously when the camera started to capture the image raindrops on some areas were present but by the time the camera got to final donor frames drops had fallen on a few additional areas meaning that there was a miss-match between the frames thus introducing artefacts in ways that I had not contemplated.
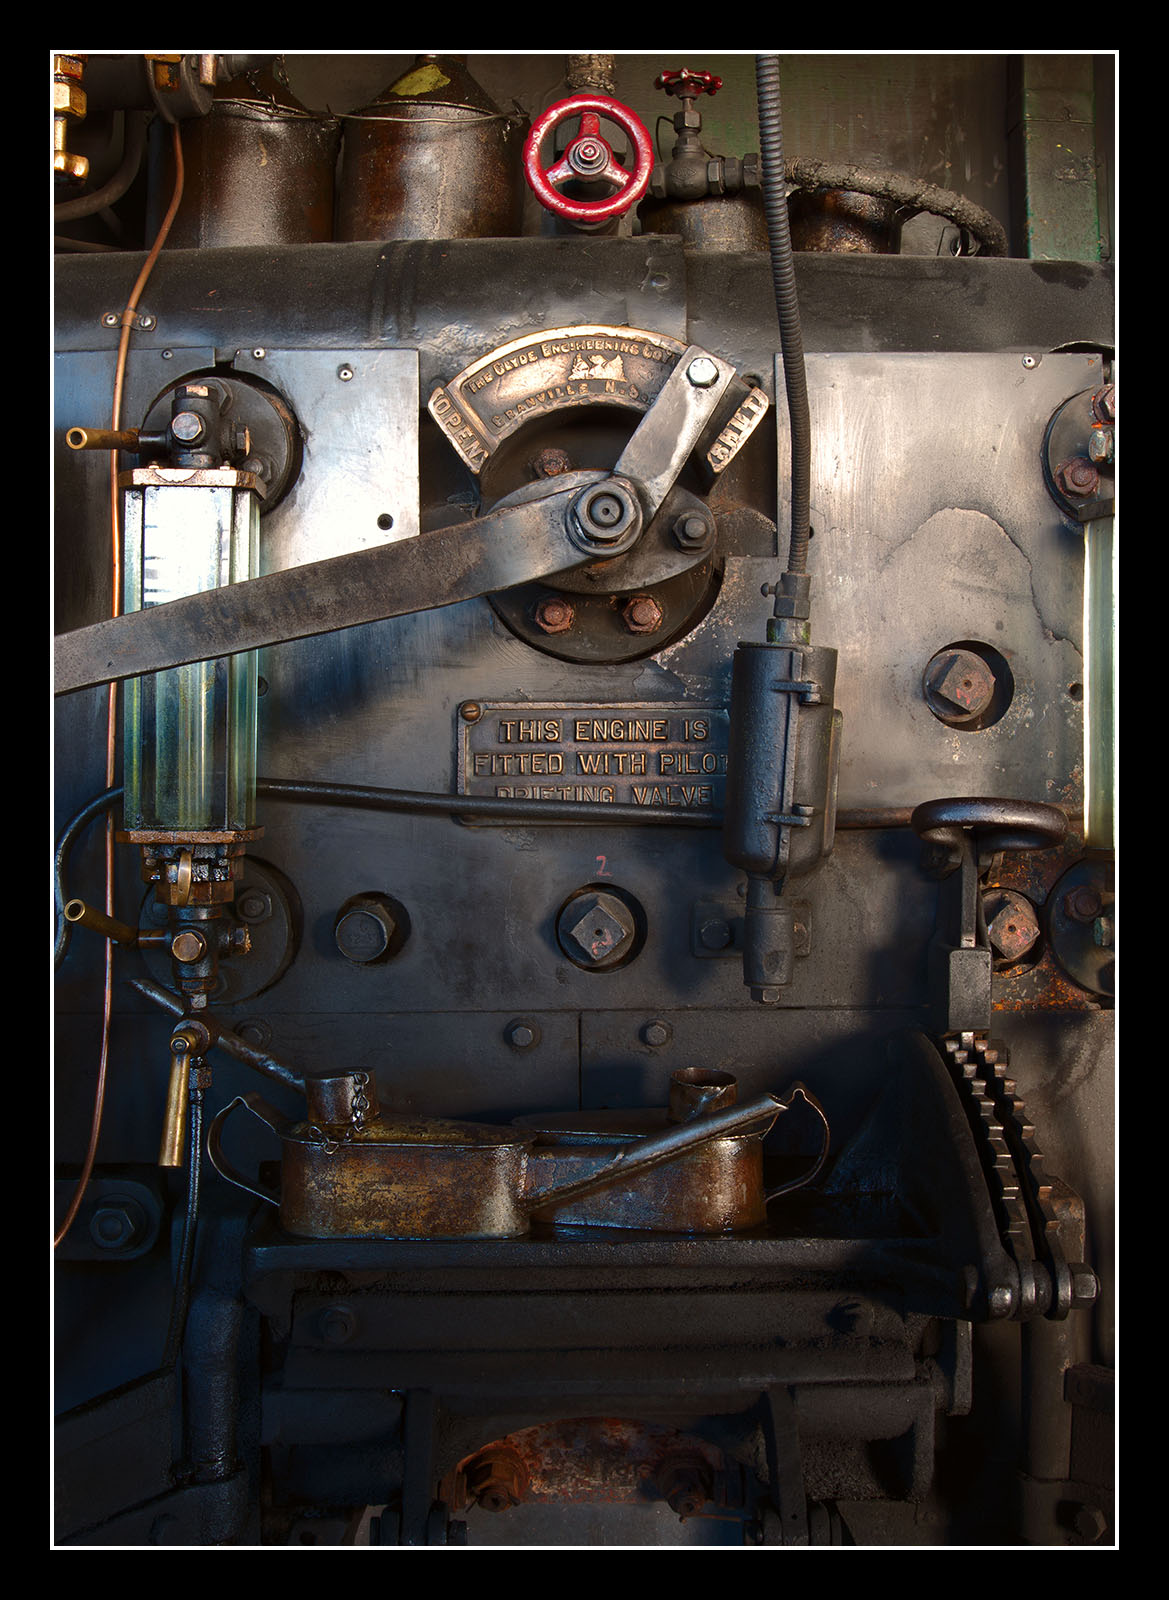
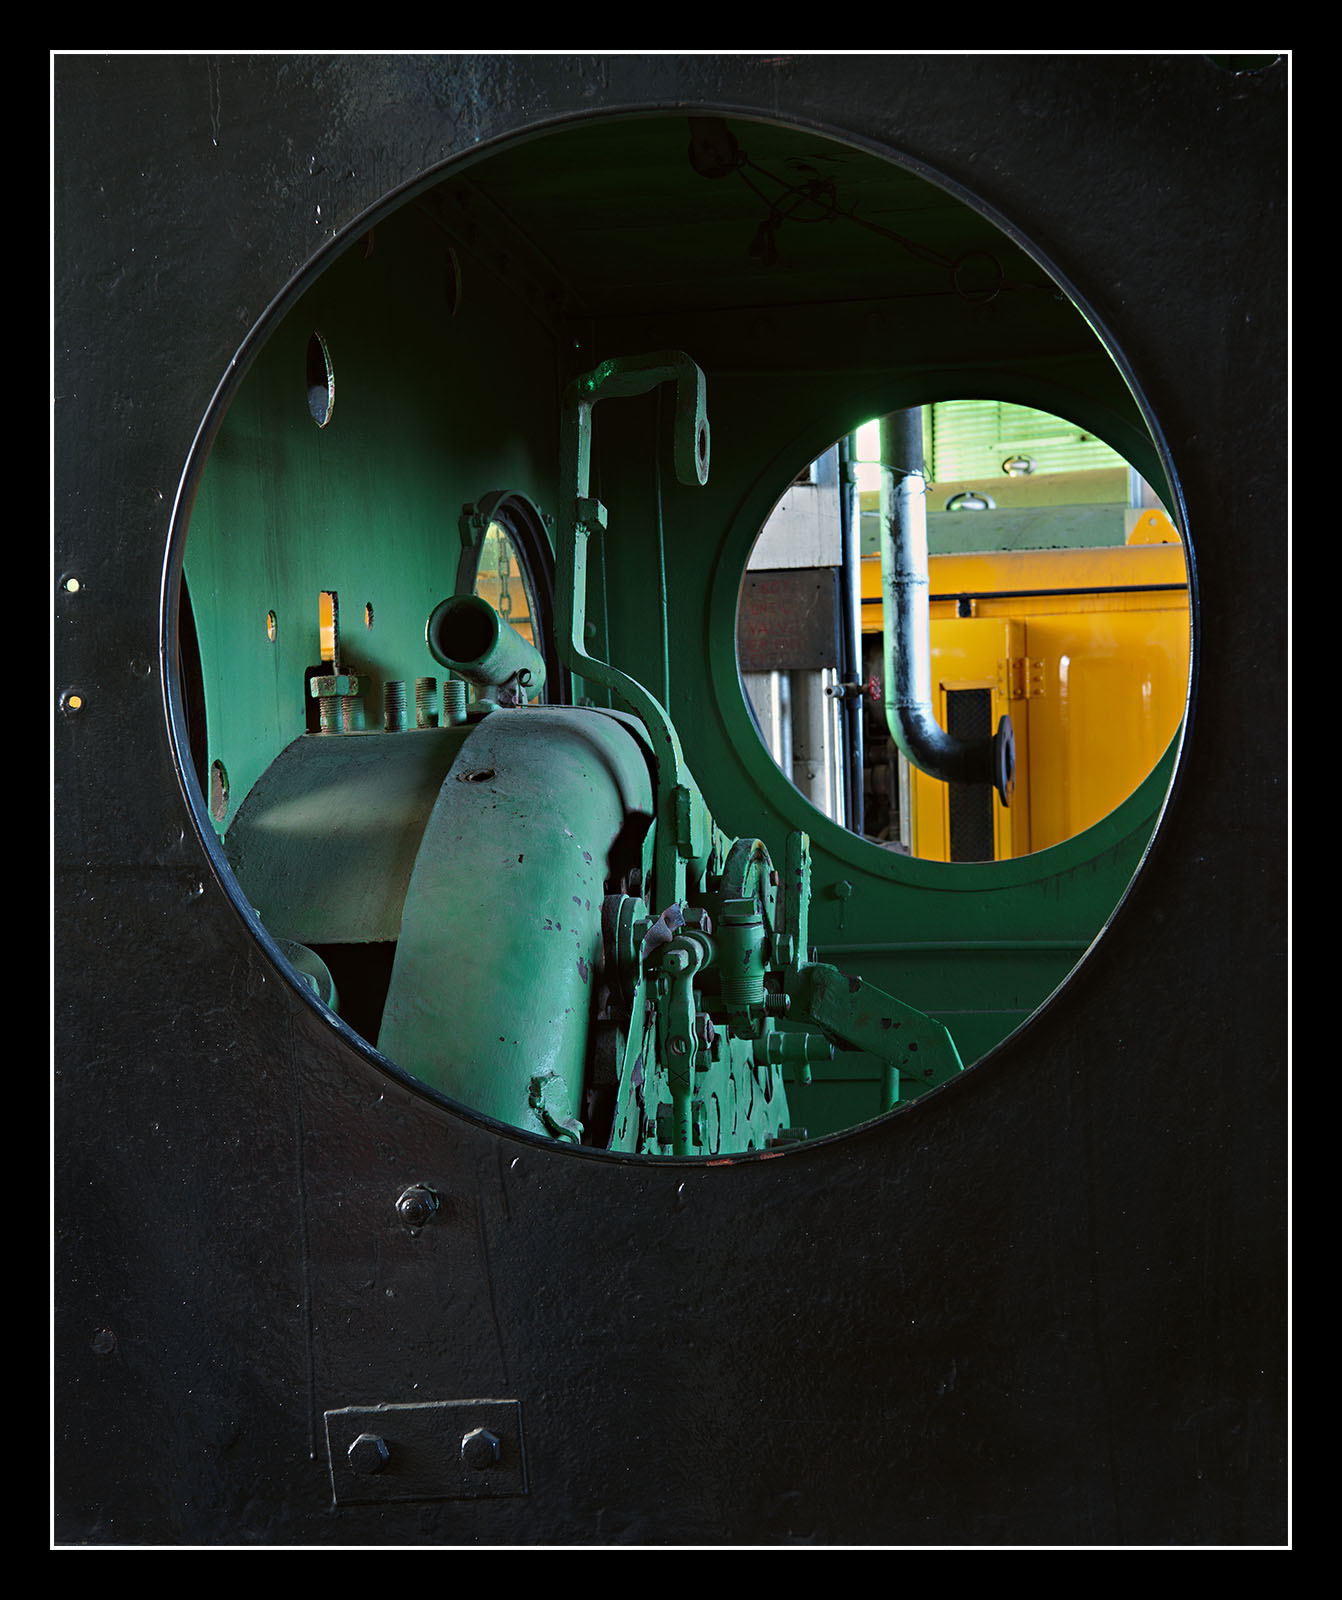
Here is another cropped frame (approx 70% of the frame) taken in the cab, the HR mode really does make for some lovely natural colour rendering even under very low light.
Could the Artifacts Be Fixed
Very slight movement of trees, grass, people, cars you name it will cause the same sorts of problems, as said, fortunately a standard resolution shot is saved with the HR version, this is additional to the ORI files and on my Mac at least it shows up as an EXEC file without a thumbnail but click on it and it opens in the image in the RAW convertor just the same. The trick is to process this file as well and upscale it to the same resolution as the HR files then later in your editing app place it as a layer underneath your original HR shot and erase away the artefacts by revealing the unaffected areas in the standard resolution file. Since most of the artefacts from movement are small it is highly likely this process will give a nearly perfect result and in any case the slightly lower areas of resolution will look vastly better than those artefacts, cause trust me, some of them are butt ugly! Of course if your whole image is ruined by camera movement this method will be of no use at all.
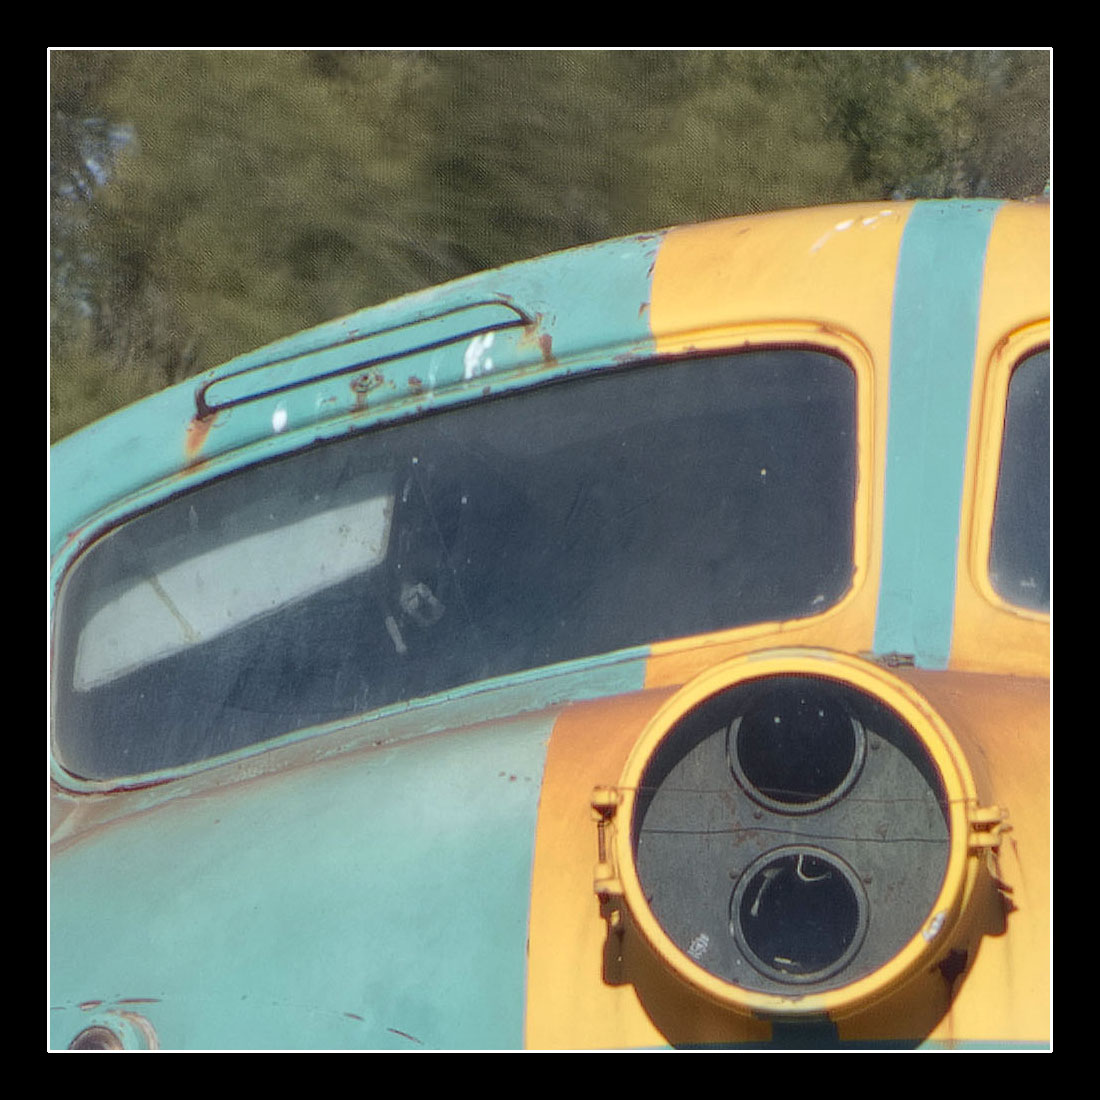
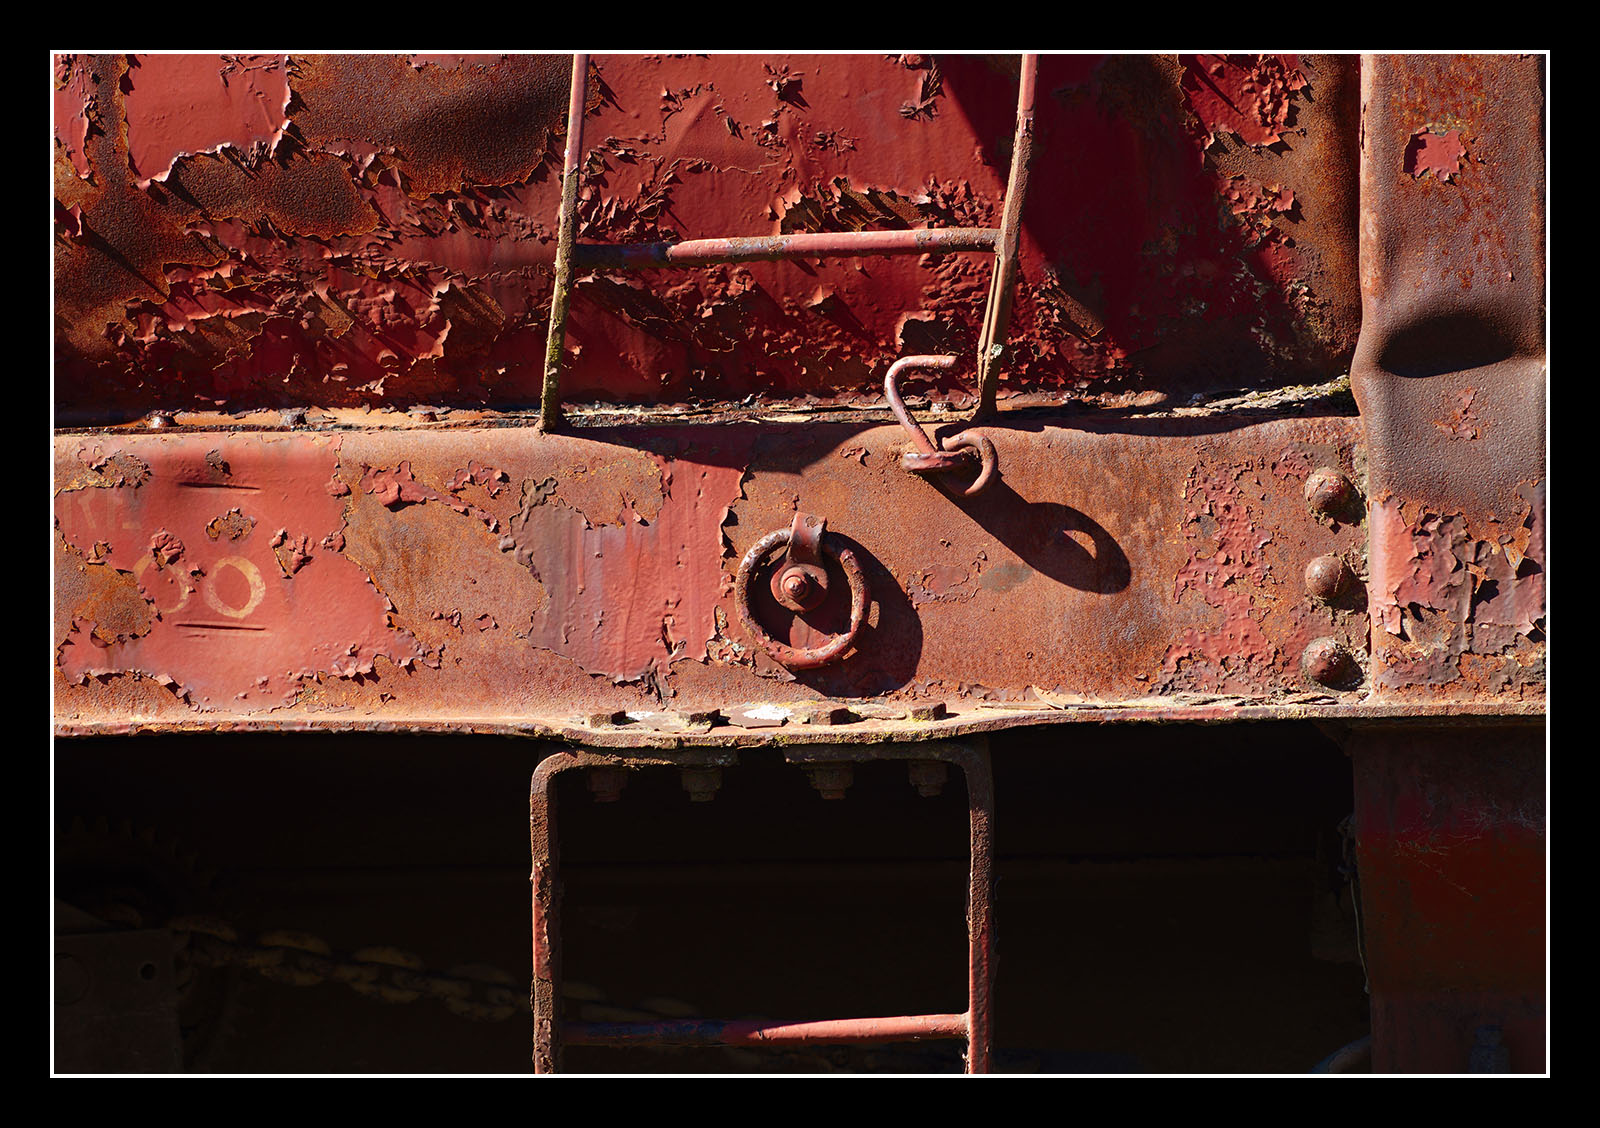
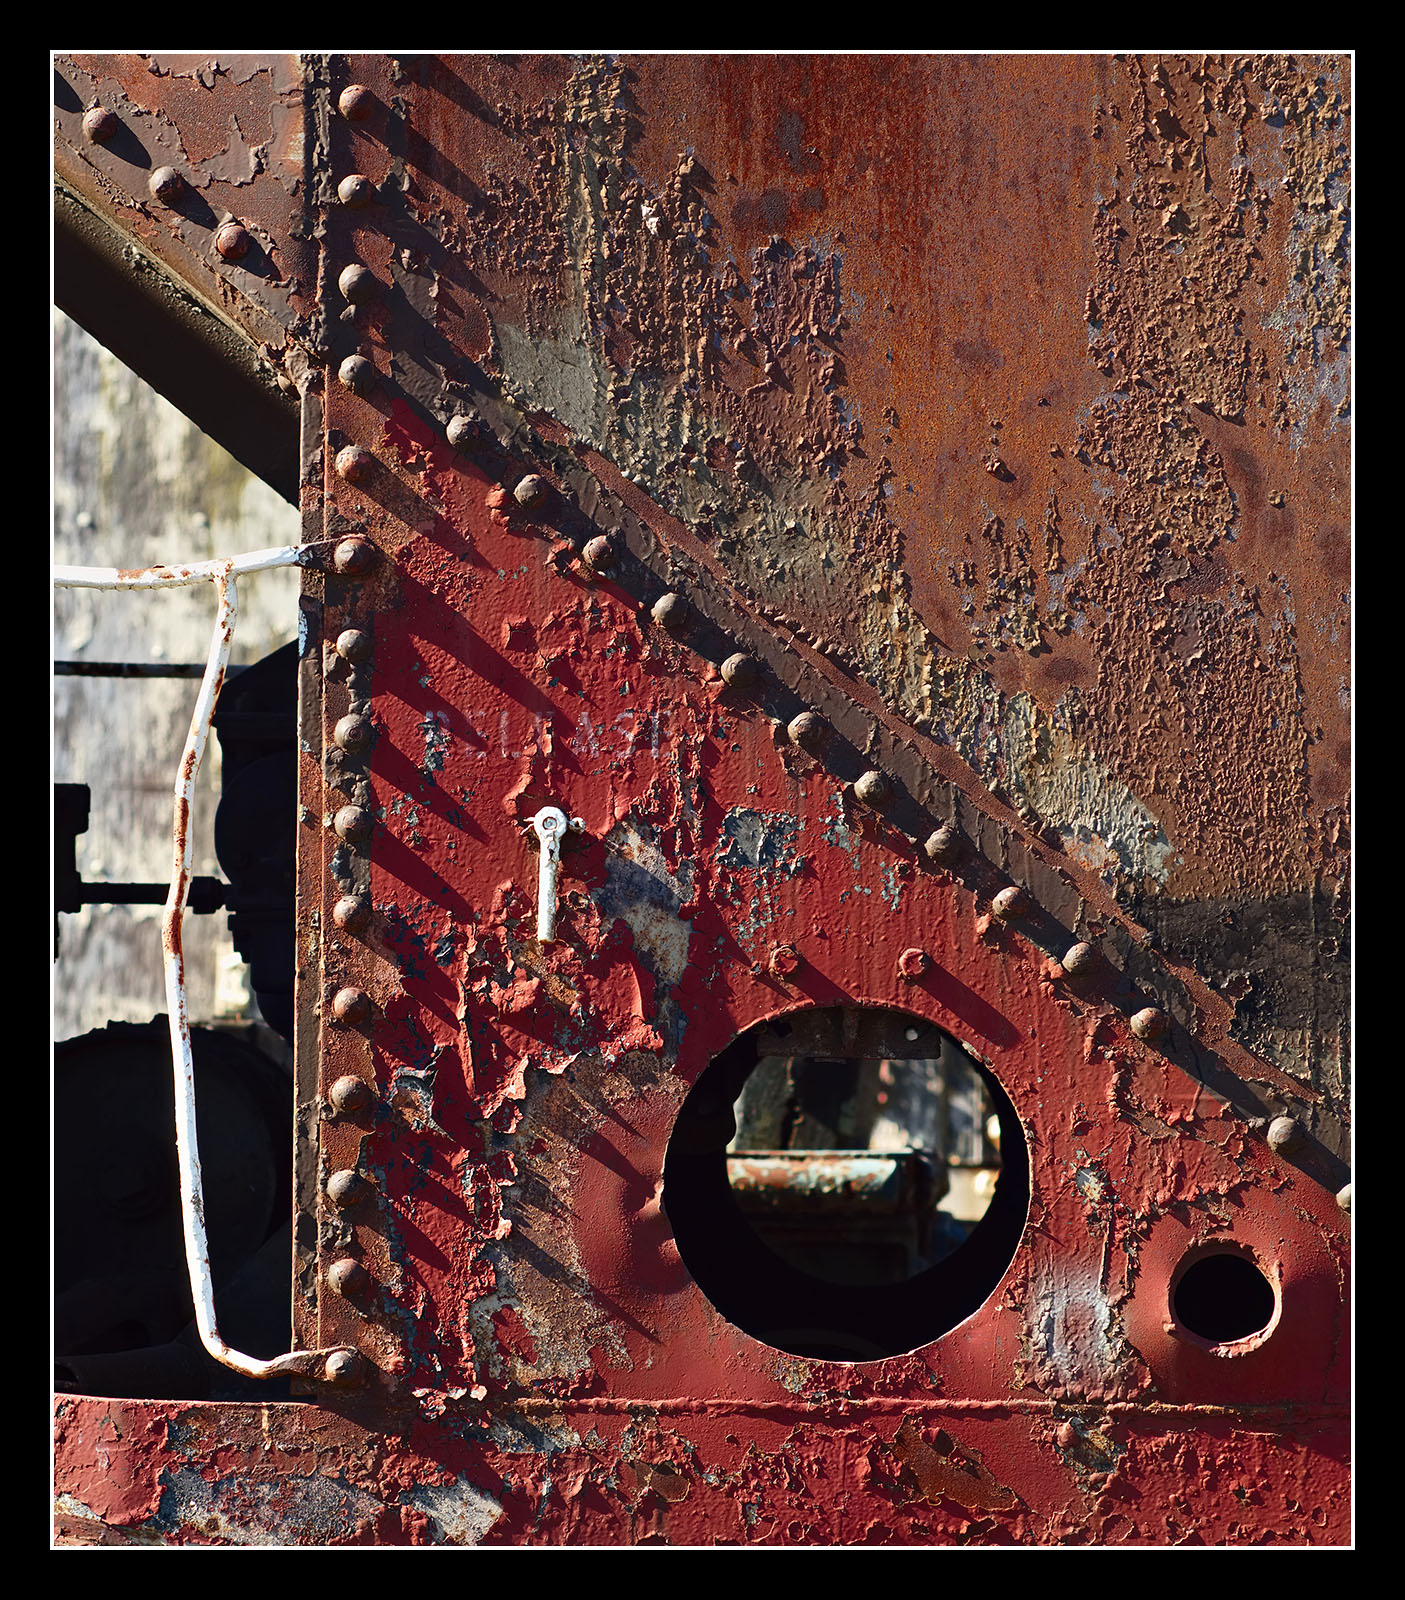
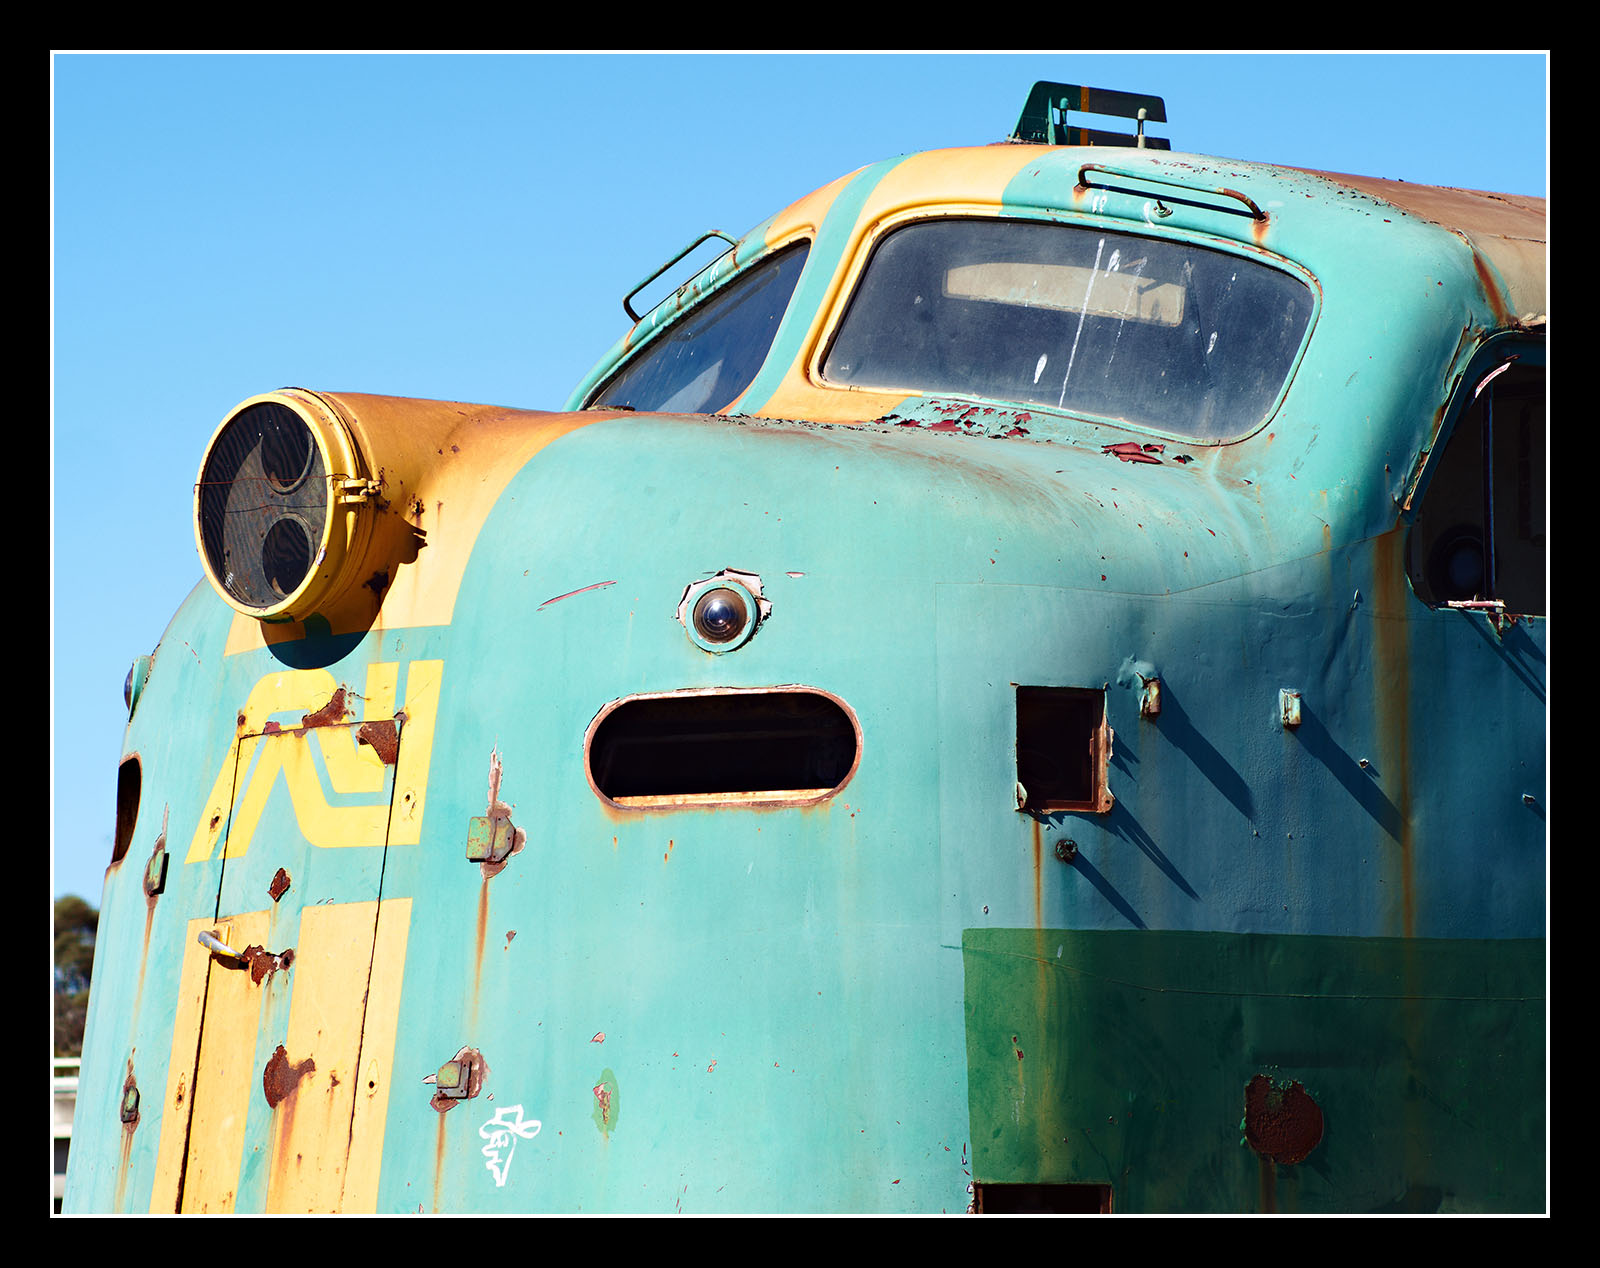
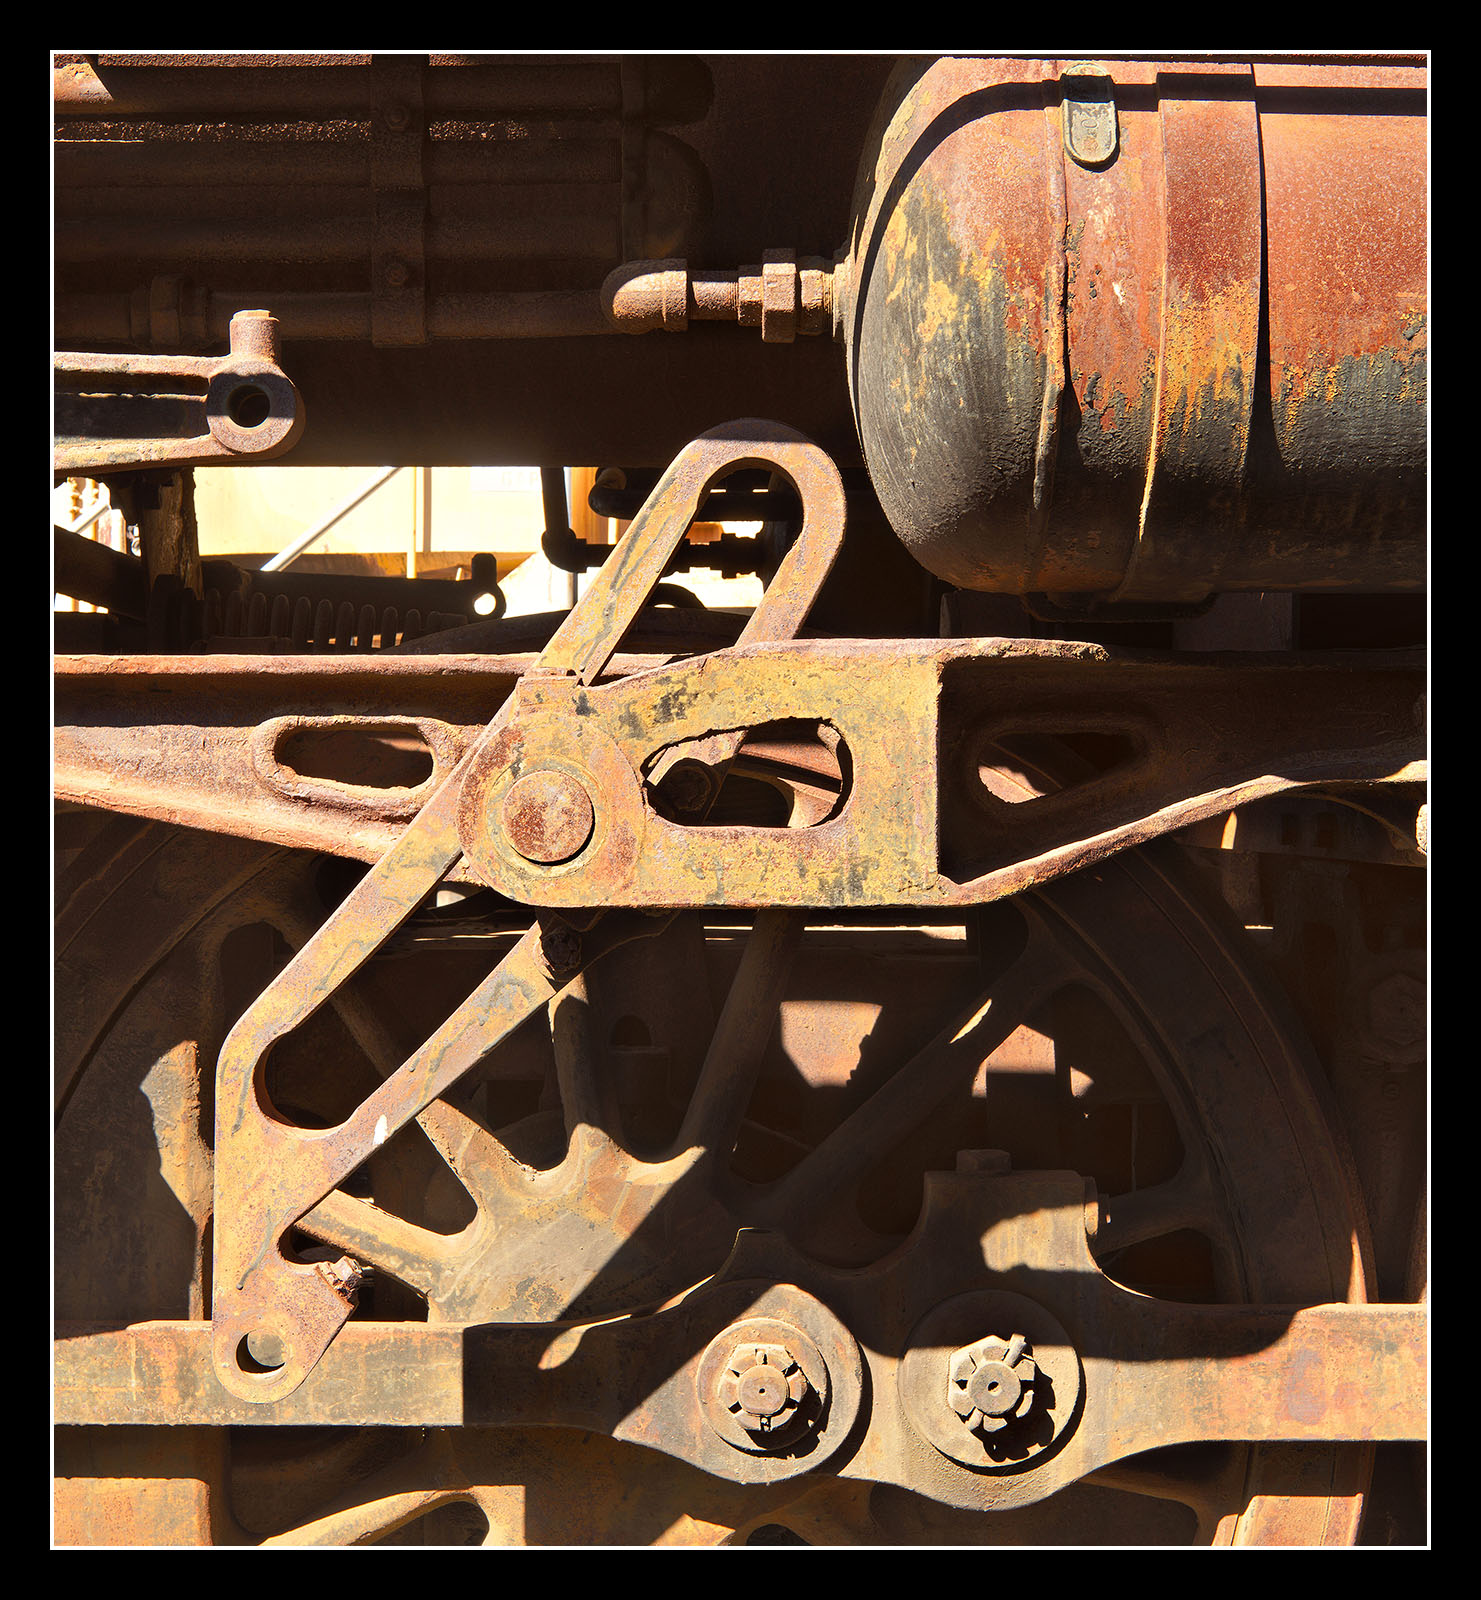
The HR mode is perfect for subjects that require high grade textural rendering to be successful, like rusty oil burning locos.
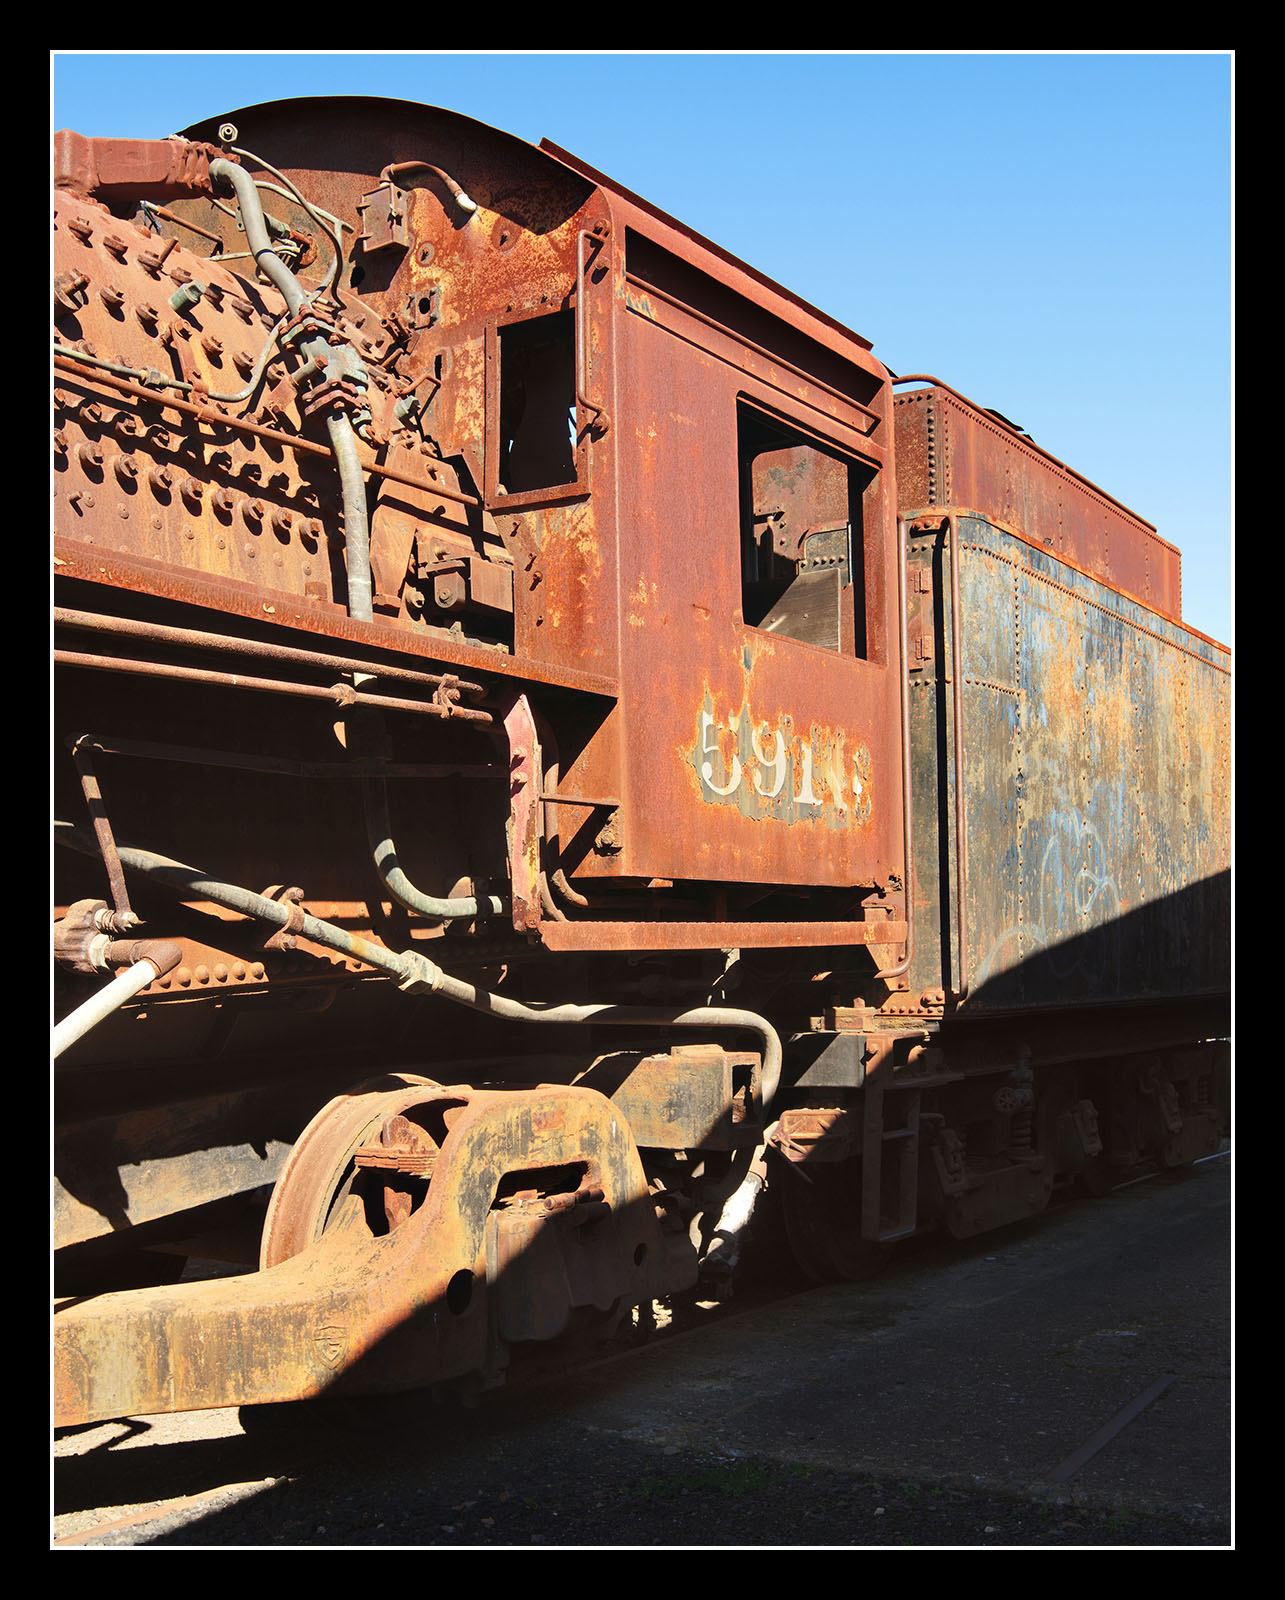
–
This was an extremely contrasty image, fortunately there is quite a lot of shadow recovery capability in the HR files.
The camera can capture RAW plus JPEG versions of the HR files at the same time or JPEG only, that’s right there is no option to shoot RAW only in the HR mode. I expect the lack of “RAW only” has to do with the need to be able to review the final “in camera” processed file, but nonetheless I’d prefer to be able to just choose RAW, frankly the JPEG’s lack the extra detail that you would expect from such a high megapixel file and for me at least are a waste of time so it pretty galling I have no choice but to fill my memory cards with them unnecessarily.
One issue that cropped up is the memory card you use has a significant bearing on the speed of the full process, it won’t effect the time for the in-camera processing but it will impact on the saving. The EM5 mk 2 is designed to use U3 cards for additional speed and indeed it would be wise to purchase one if you were going to use the HR mode regularly. Standard cards tend to be somewhat tardy in writing the data, in fact generally I would say the EM5 mk2 is one of the few cameras that really benefit from the use of much higher speed cards (even for regular shooting), with most consumer cams and many semi pro models the higher speed cards are useful only in as much as they give some extra profit for the dealer at the point of sale. I don’t normally promote any products but as a freebie I can tell you the Lexar 1000x series cards are a great match for the EM5 mk2, and if the dollar coins are burning a hole in the bottom of your pocket the 2000x series are a little bit better again.
Processing
If you’ve never worked with every high resolution files before you might find file sharpening a little bit disconcerting at first. For example the radius of the sharpening tools will need to be set to a much higher level than you are probably used to and the HR files do seem to need a fair degree of sharpening to make them really sing. One oddity, though it makes sense when I think about, is that the HR files sharpen far better than most by using the “Deconvolution Sharpening” methods in Iridient Developer and are easily be able to be rendered out at the full 63mp size when treated this way.
Looking through a black window, no problems rendering tonality from a black subject.
It’s also possible that you might find that low iso images are in fact too clean and to improve the tonality and overall clarity you need to actually add a little noise, this is a trick I often use with very clean files when prepping for printing.
Finally the one thing that will hit you in the eyeballs is just how incredibly malleable the HR files are, the lack of noise, ample detail, great colour reproduction etc all go to make for files that can be pushed with relative impunity. I have not been able to induce any obvious shadow noise, colour banding or harsh halos, not doubt I could if I really tried hard but the upshot is these files are a dream to work with, other than the fact they will hog your system resources.
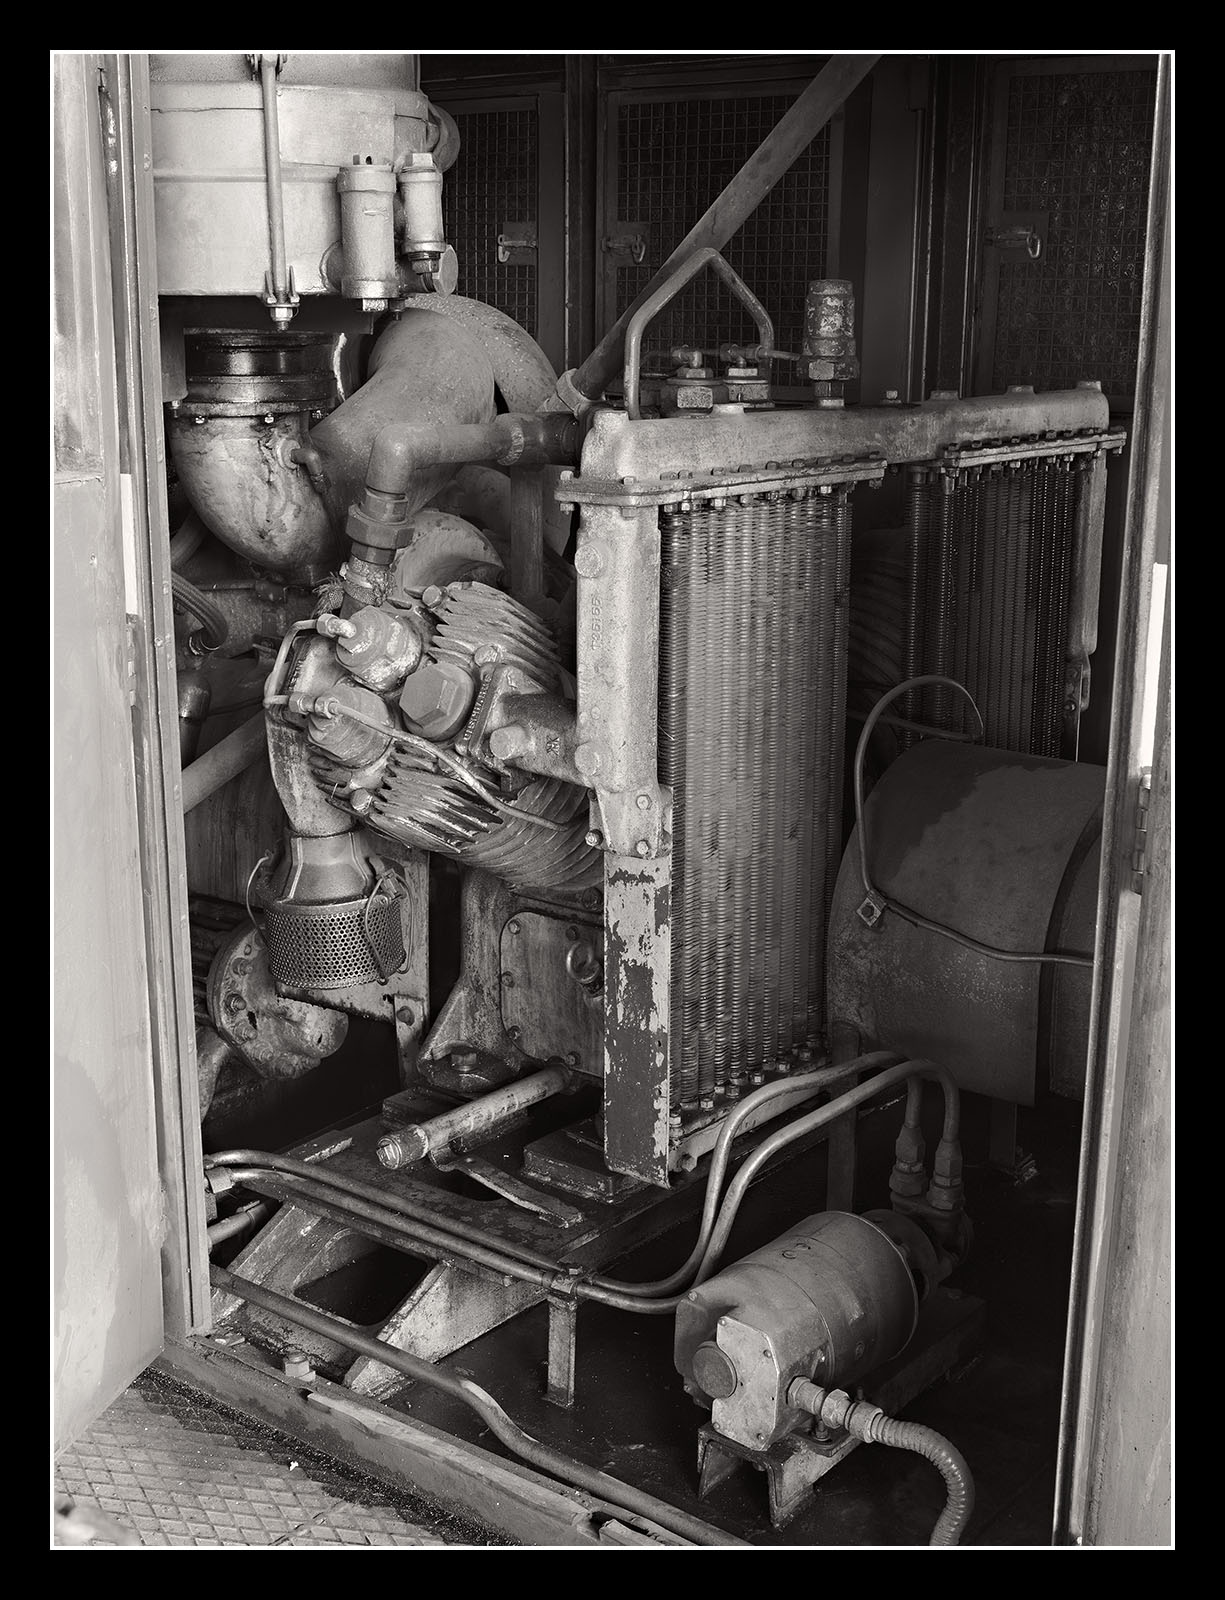
This pic is a testament to the mode, it is hard to convey just how dark this area was, it is the compressor unit un a shunting loco which was buried deep inside a dark maintenance shed, the subject was virtually unlit and my eyes could not see half of what you can see in the photo, and of course it is very high on detail too, but more importantly it shows that the files just love to do the mono.
Ok let see if I can sum it all and distill it down so to speak.
The Bad
You absolutely need to have everything fully locked down and movement free.
You will need a big and heavy tripod.
Shooting in windy conditions is very unlikely to yield good or even passable results.
Lens quality is paramount and ideally you need something that is optimised for the f3.5 – f5.0 range.
Anything moving in the scene will cause artefacts, degree and speed of movement will determine how they look.
You have zero chance of using the mode handheld.
The jpegs do not do justice to the potential of the mode.
There are only a few RAW convertors that can currently deal with the files.
No option to shoot RAW only.
Physically long lenses are hard to use due to imbalance unless attached via a very firm tripod collar, otherwise you will surely get some movement.
Long exposures can take inordinately long to process, maybe NR could be turned off, you are unlikely get any noise problems anyway.
The Good
It does what is says on the can.
You will get lower noise images.
You may be able to increase the useable dynamic range.
Files are extremely editable, vastly better than the standard res files.
The files can withstand large degrees of cropping.
There is no colour moire to worry about.
The EM5 mk2 lets you nail focus manually perfectly, much better than any DSLR can using the OVF only.
Iridient Developer does a stellar job of getting the most detail of the RAW files (only for Mac users).
Low noise across all three channels means that mono conversions which mix high percentages of blue or red channel still look very good.
Color seems to be better, more real, probably more accurate but in general I would
say it has more subtlety.
Even very underexposed images show no noise if shot at 100 or 200 ISO.
Recording of textures is vastly better which gives pics a more 3D rendering.
Ideal for architectural images where transformations are needed in post.
Upscaling the HR files works really well, handy for extreme post capture options.
Works very well for really dark scenes, brings out shadow detail nicely.
When combined with bracketed exposures the results are stunning.
Facts to consider
You probably need to re-evaluate your ideas on depth of field.
The extra weight of the support gear will nullify many of the benefits of the M4/3 format.
If you are not going to shoot RAW it is not worth the extra effort involved.
You will need a nice fast memory card unless you like waiting for your files to write and read.
The files are very large, so you are going to fill your hard drive and memory cards much more quickly.
Being honest there are not that many times you will really need this much resolution.
Wireless remote shutter release is better as cords can induce a little vibration unless you are really careful.
Generally it is highlights that will cause the main processing issues, M4/3 tends to clip earlier and the mode helps but is no miracle cure, however you can always hold back the exposure a little more than you otherwise would.
Ideally you will have less issues with artefacts if the capture can be sped up, in other words by using faster shutter speeds, there is only a minor trade off in noise by upping the ISO, but you are limited to 1600 ISO….no, I have no idea why.
With native lenses you are limited to f8 or wider, legacy lenses can be used at whatever aperture you like of course.
Maximum shutter speed is 1/8000, the 1/16000 is not available.
When to use it
Landscapes on very calm days
Product photography in the studio
Artwork reproduction in the studio
Scanning slides and negatives for high end results
Architecture, both inside and out.
When to forget it
Anything Handheld
Anything with movement in the scene
Portraits (unless your subject is able to hold dead still)
Outdoors macro work (almost impossible to avoid movement)
Casual shots (way too much resolution for this )
Holiday Photography (you will need a tripod that ultimately is just too large to be convenient to carry).
Other Ways You could Use HR
Capturing panoramas without the panning and cropping the top and bottom of the frame.
Extending the reach of your lens.
Shooting with lenses that have less than perfect edges and corners knowing you will crop them off in processing.
Going wider to extend depth of field then cropping.
Taking one photo and cropping a group of smaller images out it.
Shooting with fisheye lenses and applying radical de-fishing to gain ultra wide but normal looking views.
The Wrap Up
It is highly likely that Olympus will find ways of addressing many of the short comings, coping with movement, speed etc. rumours are the EM1 mk2 will work handheld. I think the mode has enormous potential and what we have here is just a glimpse into the future. Ideally I would like Olympus to provide firmware updates if possible for current EM5 mk 2 owners, Oly have a good track record on firmware updates so the chances are good.
Ultimately however it is highly likely that to move beyond the current limitations will require some hardware changes, in any event we will have a much better idea about this once the EM1 mk 2 is released.
Thanks for reading and I would love people to go to my new blog and have a look at the other articles I have posted there:
braddlesphotoblurb.blogspot.com.au
Oh and if you can click to “follow” me and you will be kept up to date on new articles.
Links for extra reading:
https://robinwong.blogspot.com.au/2015/02/olympus-om-d-e-m5-mark-ii-review_10.html
http://www.imaging-resource.com/PRODS/olympus-e-m5-ii/olympus-e-m5-iiTECH2.HTM

Very well done Brad, I leaned a lot. Thanks for sharing what you learned…
Hi Wing, gotta say I agree with all you have said there, the nascent technology is already in place and the possibilities boundless, though of course some Camera manufacturers have to start thinking outside the box a little, which in the main seems to be a concept that has passed at least of couple of them by (no names mentioned).
It wouldn’t surprise me if the real groundbreakers, as far as general public acceptance and implementation of much of this technology is Apple on the next gen iPhone (not the one about to be released ). What can already be achieved via the right Apps and even the current phones is really deeply impressive from a technical point of view and I like many others here happily use the iPhone for all sorts of stuff, not just quick pics.
Anyhow I think Olympus have done a great job and kudos to Pentax as well, I really am looking forward to that EM2 announcement.
Oh and to you and the others responders here, thank you so much for your kind comments it really means a lot me and makes the effort worthwhile.
Great images, examples, analysis and insight.
I think the e-m1 mk2 is going to be pretty cool to finally have hand held (without tripod) high res shot mode.. wlll be interesting to see what becomes of that.. I’m sure there will still be limitations, but olympus is making progressive steps towards improving some of their key unique features.
Regarding the e-m1 mk2 do for an official announcement very soon…
I’m sure a good number of people will consider the High Res Shot mode mostly a gimmick, unfortunately. I, however, am hopeful on the future of this technology Olympus is continuing to push.
It’s great that the High Res Shot mode can now be done without a tripod and as earlier rumors have said that it can be done handheld. I’m sure there will still be some limitations to its usage, but I foresee if and when the technology reaches a certain pinnacle, getting high res images in even motorsports (or any fast action for that matter) from such a relatively smalll sensor is possible.
It’s just a question of time.. literally, in more than 1 meaning. 1, at some future point in time, the technology may be that good to practically freeze time. leading to meaning 2, if the motors that control the sensor shift AND the processing hardware AND software get to the point where it will basically process the multiple images that high res mode makes to create 1 high res image at near lightspeed (well, something insanely fast where even the highest possible shutter speed is not a hinderance), then essentially any motion that could possibly be in the photographer’s hands as well as in the scene will be a non-factor as the action can be captured that fast. Makes sense, does it not? In theory, and with such advanced technology, it should work.
The key and question of taking control of time.. in the image capturing abilities of the camera. That will eventually be made with advanced technologies in mechanics (or a form of microrobotics) and of course sensor, applied materials, and computer processors and software to compose it all into a lightspeed symphony of beautiful imagery.
Getting a solid global shutter technology will be part of that, I believe.. all about time and capturing as much info in that super short amount of time as possible is the key. And, that will eventually translate into the dominance of mirrorless cameras over DSLR… You’ll no longer have EVF lag, rolling shutter, and AF and tracking will be amazing (provided that AF technology advances just as well, of course). I feel the technology of today and amount invested in military and homeland security to basically track our targets will eventually trickle into the consumer market.. a lot of stuff we enjoy today stems from military research and tech.. even the simple things like plastic and crazy glue.. but, i digress..
I don’t think this it too unreasonable to imagine and hope for. Look at the rate technology is moving.. a rough but fair example is the processing power that is in the palm of you hand in your smart phone today probably took up an entire floor of computers in yesteryears… technology progressively improves upon each generation… what amount of time and resources took to get to one mile stone will be less for the next mile stone and so forth… many technologies we only imagined and played up in science fiction movies set 1-3, maybe even 4 hundred years into the future are now available.
Anyways, my somewhat long positive rant about the excitement of the E-M1 MkII and the possibility it holds for the future (as well as generally mirrorless camera tech future)… but, I am open to reserve final judgment on the E-M1 MkII once it is out and feedback from real users has populated review and related forum sites.
Yay !
This is a most thoughtful, objective, and methodical review. Brad has approached the subject with method and reasoned interpretation. What a wonderful breath of fresh air !
Brad has verified that engineering a product is a matter of setting goals and the juggling options for a reasonable result. In short, compromise is a reality one seldom escapes.
I love Olympus OMDs and compliment Olympus for their willingness to innovate !
Congratulations to Brad !
I have a Pen F, which extends the resolution envelope even further, if I were to choose to play with this mode; I think my 20Mp files will be fine for now. It seems to me that Olympus will have to improve HR mode implementation dramatically before it becomes practical. Even then, finding and using the right lenses remains important.
Thanks for such a detailed experience. HR mode is not for the faint of heart.
Nice review Brad, thanks.
Have to agree, minus your negatives, the High Res mode is simply amazing, way better then any other body out there. I own the Pentax 645Z and use it for most of my fashion work, but when it comes time to do (still life) product shoots I use the EM5II’s High Res mode, especially when working with fabrics. The color accuracy and lack of morie pattern from the High Res mode kills my 645Z (and the A7RII I borrowed). And the lack of an anti aliasing filter in my 645Z makes working with fabrics a nightmare and even with software correction it still does not come close to the image I get from the EM5II High Res photo. (Im so impressed with Olympus and their features like the High Res and the amazing Focus Stacking. I can’t wait to see what new features the EM1 II comes out with).
(I’ve still have yet to use the Pentax K-1, but would love to see how its Pixel Shift Resolution compares to the EM5II’s High Res Mode. So if anyone has used both of them side by side, please let me know what you think).
Brilliant. !
Wow! I feel like I just read an amazing chapter of a great instructional book. THANK YOU
So good to read a careful and informative article like this. Thanks for that!