
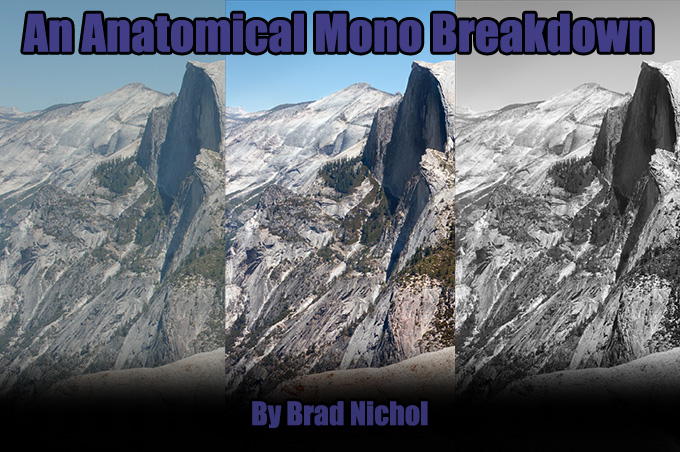
An Anatomical Mono Breakdown
by Brad Nichol
I while back Steve published an article of mine titled One Giant Polaroid where I gave some insight into photographic processes I use which I felt it might be of interest in the context of the artwork discussed in the article. This time round I thought I could give some insight into monochrome techniques that perhaps readers might be able to at least partially put into practice their own work. Please bear in mind this is not meant to be an instructional piece but rather some words to provide a little inspiration regarding the options you may consider in working in monochrome.
As said in the previous article, I am a firm believer that to be consistently creative, a photographer needs control over their tools, processes and methodologies, otherwise it’s all a bit of a lottery and potentially wasteful of time and resources and creative energy. Today I will look specifically at some methods I use to create high quality monochrome images. Methods in this article are for landscapes and static subjects, for moving subjects, street photography etc a different approach is needed.
BACKGROUND
First a little background, going back several years ago, probably like a lot of people do, I looked at my work and wondered why there wasn’t that real life “being there” punch and why did my images not match the vision that I saw with my own eyes, and more importantly how could I address this imbalance and get closer to my artistic intents?
From these three questions and following many years of exploration, testing and taking literally thousands and thousands of images I determined the answers and subsequently developed a holistic system of photography which I call True Light Capture. TLC fundamentally works on a completion backwards principle, in other words I determine what I want as the end result and then put into place all the steps I need along the way to get to that end point, being careful that nothing is done that would compromise the following processes. It sounds technical and perhaps limiting but in fact it is quite the reverse, the methods are now so ingrained for me that I feel free to just concentrate on the creative output.
Today I’m not here to promote that system and in any case I only run the workshops once a year in Australia, but rather I would like to give insight into a couple of contributing techniques that might be of benefit to you when capturing and editing monochrome images.
[ad#Adsense Blog Sq Embed Image]
CAPTURE
First up I firmly hold to the belief that to create a really good quality monochrome images you actually need a truly excellent initial capture in every technical sense. Without colour Monochrome lives and breathes by dint of its detail, texture and tonality, especially tonality. This is not to discount composition of course, and I would regard myself as being very composition driven but even the best composition can be totally brough undone by poor execution.
It is possible to use monochrome conversions to salvage noisy and sometimes poor quality files but that is not a pathway that holds any interest for me, I set out from the very beginning knowing that a mono output is the target, everything is driven be that consideration, I would never convert to monochrome as a salvage option. Such a file would be just discarded as I would feel embarrassed to present it, but perhaps that’s just me.
For my purposes JPEGs are completely useless, in fact I need low contrast RAW files that have full tonal information right into the highlights and shadows unless of course those areas are meant to be pure white or black. I think of it this way, I can always boost contrast and push tones around for artistic effect and interpretation but they have to be rendered in the file in the first place! JPEGs sacrifice an enormous amount of subtlety, especially in highlights and if you hold the highlights back enough via exposure to fully render them then your shadows are toast! JPEGs also have lots of noise reduction cooked in regardless of the camera settings and that sadly just eats the micro detail you need for great textural mono work.
I realize that JPEG quality is somewhat camera brand dependent, and being a Sony user I would never claim they produce great JPEGs, but nonetheless all JPEGs have significant limitations. I often tell students, if your RAW file derived images are not better than your JPEGs it’s either you have not yet reached a stage of being able to truly process them to their maximum capability or the RAW converters are just not up to the task yet for that file type yet. For example I am sure the Raw files from the X series Fuji cameras offer more potential than we are currently seeing, it is just the converters that are the problem and they will undoubtably get better as raw software developers learn to better crack the unusual Fuji RAW files. In any case RAW future proofs you, the converters will continue to improve and thus open up further options for you down the road.
Fully rendered highlights are I feel particularly important because the human eye is not used to seeing bleached or absent detail in highlights unless of course it is a specular highlight, it is that lack of subtle highlight details that helps make images look…… well digital.
Since I am after a certain look, I also choose my lenses accordingly, generally this means high contrast Zeiss style renderings are off the agenda and typically with both my NEX and Sony A series cameras I shoot with low contrast legacy glass.
Some lenses are particularly nice for certain types of monochrome images and fail miserably for others. For example I often use an ancient Minolta 28-85 f3.5-4.5 zoom, it’s a superb lens at the wide-angle end, but only if using the green and blue channels for the final image, it displays amazing clarity and micro detail in the green channel. Should your image however require a channel mix involving the red channel it is far less suitable as the red channel is very poorly resolved, especially in the outer reaches. Go to the long end on the same lens and the blue channel falls apart and the red shines! One needs to know their lenses and importantly where the individual strengths lie for any photography need, but especially for mono work.
One of the biggest impediments to truly successful high quality color to monochrome conversions is image noise. Don’t get me wrong noise can be a really good thing in a monochrome image but it needs to be applied post-production in the areas where you want it, it is definitely not desirable to be fighting noise from the very beginning of the conversion process, it will simply limit every process you try to implement from tonal adjustments right through to sharpening.
I shoot always at the lowest ISO I can get away with, which with the NEX 5N used for these pics is 200 ISO, I prefer 100ISO and there is a significant difference but if I am forced to hand hold, as I was for these images I will trade the higher potential quality off for a sharper capture.
Obtaining the greatest level of exposure without clipping any of those precious highlights is paramount to me, sometimes you will hear this referred to as ETTR, (Expose To The Right) which refers of course to shooting with your exposure set to the right side of the histogram.
ETTR is a little controversial and in any case there is a lot more to it than just going to the right side of the histogram, and I feel those arguing against it often misunderstand how it works and is actually used but the principle is simple enough, the more light you capture the further down the exposure scale your noise will be buried. The optimum setting for exposure to be set at the point where your brightest wanted highlights details just avoid clipping.
Sometimes I take several frames and noise stack to average noise out, sometimes I bracket the exposures, sometimes I even take the same frame at differing ISOs for later blending, there are lots of things one can do but ultimately really low noise in the file coming out of the RAW convertor means far greater post Raw flexibility. It is a beautiful thing to be able to just push tones around without having to worry about banding and rampant noise.
None of the above is radically different to anything a great number of photographers do but there is one other tool in my armory which you may consider is a little bit unusual. The use of “balanced sensor capture” which forms an integral part of the whole TLC process.
THE PROBLEM
Bear with me please….don’t nod off now.
Fundamentally good colour to monochrome conversions are impeded by differing noise signatures across the three colour channels, normally the green is quite noise free, the red has a greater level of noise and the blue may have quite radically high levels of noise.
With some cameras the red channel maybe the worst with the blue in the middle but the green will always be the best. The problem is that most channel mixing processes involve mixing the green with some red and some blue or perhaps just green and red or perhaps green and blue etc In all cases you’ll find that the level of noise in the resulting image varies depending upon the donor colour of the items in the original scene. In other words perhaps blue objects may appear far more noisy and less detailed than those objects which were initially green. There will also be differences in the levels of details that are held in the objects once again dependent upon the colour of the initial object.
The root cause of this is that the three colour channels at capture are not actually exposed identically typically the green channel will receive far more exposure than the red or blue.
Without going into full details and there are many, this also means that the red channel and the blue channel will possess less detail in the shadows than the green channel and will clip in the shadows far earlier, likewise the green channel may clip highlights before the red and blue channel and please note: Here we not talking about JPEG images but actual raw file data, that is as they say a horse of an entirely different colour.
If you could actually obtain a close to equal level of exposure across all three channels you would have roughly equivalent noise signatures for each channel making your monochrome conversions far more successful. Well in fact you can do exactly that.
This state of Nirvana is achieved by filtering the light before it reaches the camera sensor, there are no post production methods that will give the same result.
Typically this will mean you need to use a combination of red and magenta filters and this is exactly what I do. As to the exact values they will vary from camera model to model and even with the lens used. The filtration required is quite significant.
The trade-off of course is that the sensor is receiving less light for any given EV value so your exposure times become longer, in effect it’s like shooting at around 16-32 ISO instead of 100 ISO! Hence a tripod or really steady hold is doubly important.
The resulting files are low in contrast and very low on noise which means they are eminently suitable for monochrome conversion. The most important factor being because the noise signatures are roughly equal across all three channels, channel mixing can be done using almost any combination of mixes, safe in the knowledge that your image will not fall apart due to weird noise signatures in certain donor colours.
A side benefit the images are slightly sharper, probably due to the better quality of the data being fed into the interpolation algorithm at the beginning of the process. Even more importantly because there is a lower level of noise across the entire image it can withstand far greater and more sophisticated approaches to sharpening than is normal.
Because I’m obviously aiming for a high-quality result I’m very careful about controlling camera movement and shake, picking the exact focus point usually using magnified live view and using an aperture which is optimal for the final DOF that I want. Nothing startling there but take it as a given, this is no off the cuff high-speed street shooter option.
Back at the office the next important step is the conversion of the raw file into a Tiff file. For the ultimate high-end work I choose to use our RPP (Raw Photo Processor) a Mac only converter, but I also use RAW Developer (also Mac only). I adjust RPP to output the files as low contrast 16-bit files without any sharpening or noise reduction. RPP has an option to render files with a film-like tone curve, I use this because it allows an enormous level of flexibility in the post processing.
A cursory glance at the converted RAW files will show just how low in contrast they are, there is no clipping anywhere in the files and a wide amount of tonal wiggle room.
In some cases, mainly with very high contrast scenes I produce multiple conversions of the same RAW file, for example one better attuned to highlight rendering, one for the shadows etc, but in the case of all these example it is just a single conversion.
As mentioned I almost never use any noise reduction in the conversion process regardless of the converter used, this is handled later and very selectively in Photoshop should I need it, In reality I almost never need to apply any noise reduction at all except perhaps to clear cyan/blue skies, which are always a problem in any type of photography. It is in fact quite amazing how much more detailed a monochrome image can be if no noise reduction was applied anywhere in the early processes and when you do apply NR it often makes the noise look worse, clumping fine film like noise into dirty great gobs. Trust me what matters is the final look of the print output, and way too much noise reduction is aimed at making 100% on-screen views look smooth as silk, I suspect so people can brag on photo web forums about their latest wonder cam. Noise is not the enemy! and a 100% on-screen view is not a useable way to display a photo.
EDITING
This next point which might be a bit challenging for those looking for an easy pre-potted solution, is I firmly believe that for high-quality monochrome conversions there is zero possibility of using automated processes. Every image is different and needs to be treated as such.
I need constantly changing combinations of channel mixing, and other mono conversion methods, local and wide area tone curve variations and much more. It simply defies my experience that you can automate any of it to even a moderate degree and get truly high end custom results. And I didn’t even touch on sharpening, which most definitely cannot be global in nature.
Upon opening the resulting file in Photoshop, which starts as a 16 bit Lab mode file I make an initial levels adjustment to the L Channel being very careful to keep all the highlight gradation with a bit of headroom to allow for the printing needs and increase the colour saturation by adding equal levels of contrast to the A and B channels. Once the file looks OK I convert it to RGB mode but leave it in 16 bit.
Continuing on I make several duplicate copies of the file, usually five, maybe more. Each of these copies are treated differently, one copy may be converted from colour to monochrome using a gradient map, another simply desaturated, yet another may be converted using a combination of red and green channel mixes and so on. There is no limit to the possible combinations that I would use and sometimes that includes oddballs like infra-red simulations for some parts of the image.

I keep one open version of the full-colour image, this can later be it used to make further mono versions if I need to, and usually I edit the colour one at the same time as the monochrome versions. Additionally I may use this with Photoshops’ black and white conversion option.
Having created my multiple mono versions I have Photoshop arrange them by “floating all in windows” which means I can see each version side-by-side. I then closely examine each version deciding on which parts I wish to use from each and decide on which version will form the best core image to work from.
The composited full range tonal version is obtained by copying and pasting different versions of image over the top of one another and using the eraser tool to reveal the pieces that I want to keep each of the underlying layers, this gives me absolute flexibility over how the tonal range is rendered for every part in the image. and with practice I am able to do this quite quickly.
FINE TUNING
Having flattened the monochrome image to a single layer I’m still nowhere near finished, it requires localized dodging and burning and tone curve adjustments, sharpening and to a certain degree blurring.
A great deal of this step is aimed at giving a closer simulation of how our eyes perceive things in landscapes due to atmospheric factors, for example distant objects appear lower in contrast and lighter, close up objects are often higher in contrast and show deeper detail in the really dark tones, mid range objects rarely show full black, but have only a slightly flattened tonal range compared to the foreground. I’ve literally spent sleepless nights thinking about these factors and hours and hours looking at scenes in real life and questioning myself on what I was really seeing. Most painters understand this stuff intuitively almost but most cameras totally overcook all this.
Sharpening is normally carried out on a localized basis I do not apply any global sharpening and I apply differing degrees of sharpening depending upon the objects in the photo and where they are placed in relation to the plane of focus.
The sharpening methods include USM, High Pass and even Gaussian Blur with custom fade modes (yes I know that one sounds odd). The radiuses used range from 60 pixels down to even 0.2 pixels. Its complicated, heck it would take a book to explain and again it definitely defies any method of automation.
Much of the sharpening is aimed towards creating a more 3D look, but it is a long way from the more, now traditional HDR look which generally is quite forced and global in nature.
The flip side of sharpening is that in a lot of cases I apply lens blur to certain parts of the image to give greater separation and the appearance of having shot at a wider aperture. In fact my general principle is to shoot with an aperture that is just slightly smaller than I would optimally like to use for the required depth of field, this gives me more flexibility in terms of setting precise focus and DOF look in post-production.

An added benefit of finalizing the DOF in post is that you can get effects that would not be possible with regular aperture adjustment of DOF, for example you can simulate field curvature etc. It must be added that DOF adjustment is not particularly easy and care needs to be taken not to overdo things, often in conjunction with masking but well done in tandem with a sensible shooting aperture choice it can be seamless in final appearance.
I personally have a bit of an issue with the current trend for ultra shallow DOF shot with really fast lenses, whilst it might look interesting and all for web images, most times the images lack sufficient clarity and DOF for real world “on the wall” printed use. There is a vast difference between a 600 by 400 px image on-screen or in flikr and a 16 by 20 inch print, but each to his own, if you shoot solely for web use then go as wide as you like.
Ultimately I can take detail away, but I sure as hell can’t create it afterwards if it is lacking and since for me many shots are a once in a lifetime opportunities taken when traveling, I’d just rather not throw all caution the winds with ultra shallow DOF recordings of the scenes.
Once all the tones are finalized, final DOF is set, dodging and burning done and sharpening sorted I have one final thing to do. Add the noise!
Normally I don’t just add noise globally, rather it is added subtly to parts of the image to either increase micro tonality or synthesize detail, in fact in many ways you can think of “noising” as part of the sharpening process.
I am not normally adding noise to simulate film noise….if I wanted that look I would and often do shoot film. No the noise done properly gives the printed image (note, the use of the term printed) a more organic 3D look. This will rarely be obvious on the computer monitor because the pixels of the screen tend to alias the noise dependent upon the screen view, downsizing the image won’t give much of an idea either, ultimately I have to make test prints to verify the result. “Noising” is again usually done via layers and the use of the eraser tool, and again it is almost the subject of a book in itself.
Once the monochrome image is finished I usually copy the flattened monochrome image and place it over the top of the original colour image then choose luminosity mode for the top monochrome layer. The resulting rendering represents the detail and tonality from the mono image mixed only with the chrominance info from the colour image, and usually results, to my eyes at least, in a much better colour version of the photo. I normally then make further adjustments to the colour image but that is the subject of another installment.
PRINTING
And finally the printing, I don’t even attempt to do this myself, despite being capable of doing so, it’s simple really. I don’t have the room for a high-end large format printer and I don’t have the throughput to justify the prodigious expense.
Instead I use a local company who know and appreciate exactly what I am trying to achieve, we have a great working relationship. I have them run some strip tests to ensure everything looks right and of course adjust it if it doesn’t. They do not make any adjustments to the file unless under the watch of my eye.
The prints are made on only a limited array of substrates which we know will work as intended.
Ultimately with printing it is not about the price but the quality, for my part I’d rather spend more knowing that the result will be great than have to worry about the outcome by saving a few dollars working with someone who doesn’t care.
THE WRAP UP
So there you have it, an anatomical look at one approach to monochrome, my approach. Don’t for a moment think I am advocating that this is what others should do, I have offered this to perhaps inspire those who are wanting a bit more from their images, pick and choose as you wish.
Best be a little realistic here, before going off all excited consider that neither you or I are going to whip up a whole batch of these cookies in one afternoons sitting. Most images take me 5 hours or more spread over a few sittings, but then I am not into posting stuff on flickr etc, prints on walls it where it’s at for me so I don’t really need to do stuff quickly.
Probably one thing you would glean from my approach is that it is designed to work only with colour as the original capture method, personally I could never find happiness with a monochrome only camera, much as I really like the idea of the Leica Monochrom it would be just to limiting for my way of working, though I know there would be benefits.
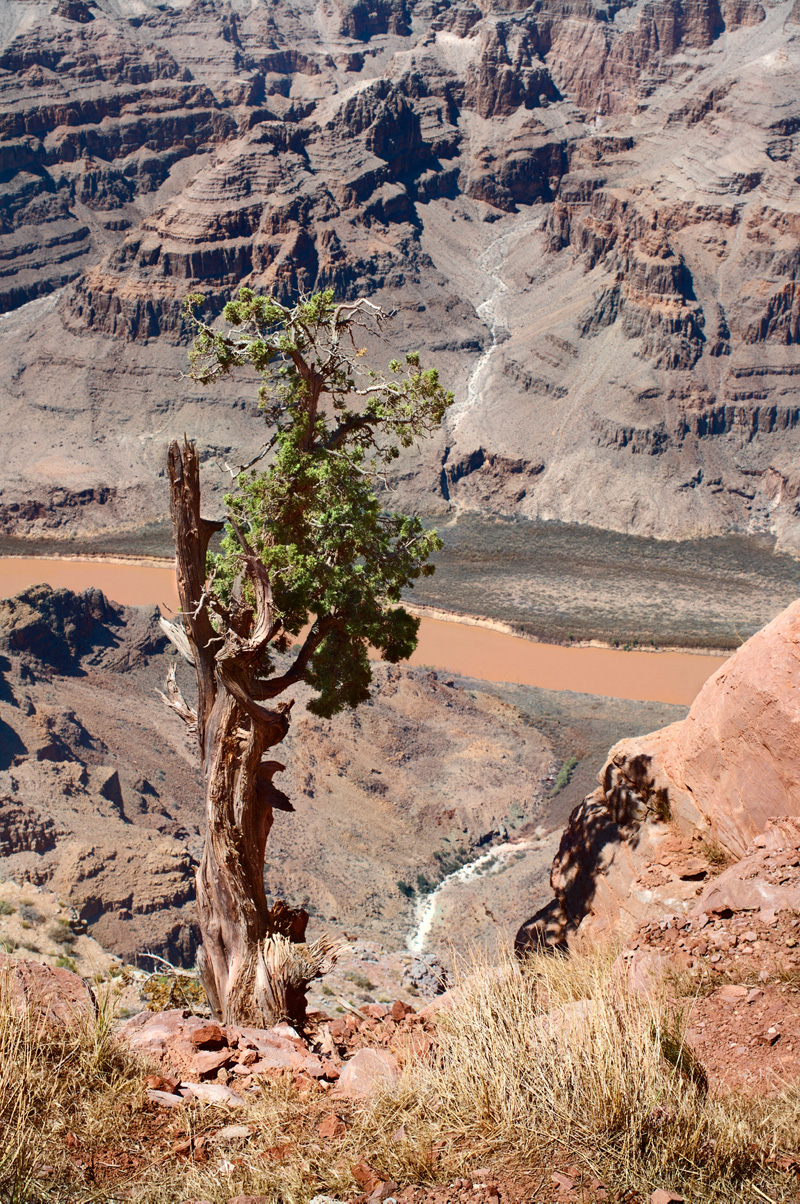
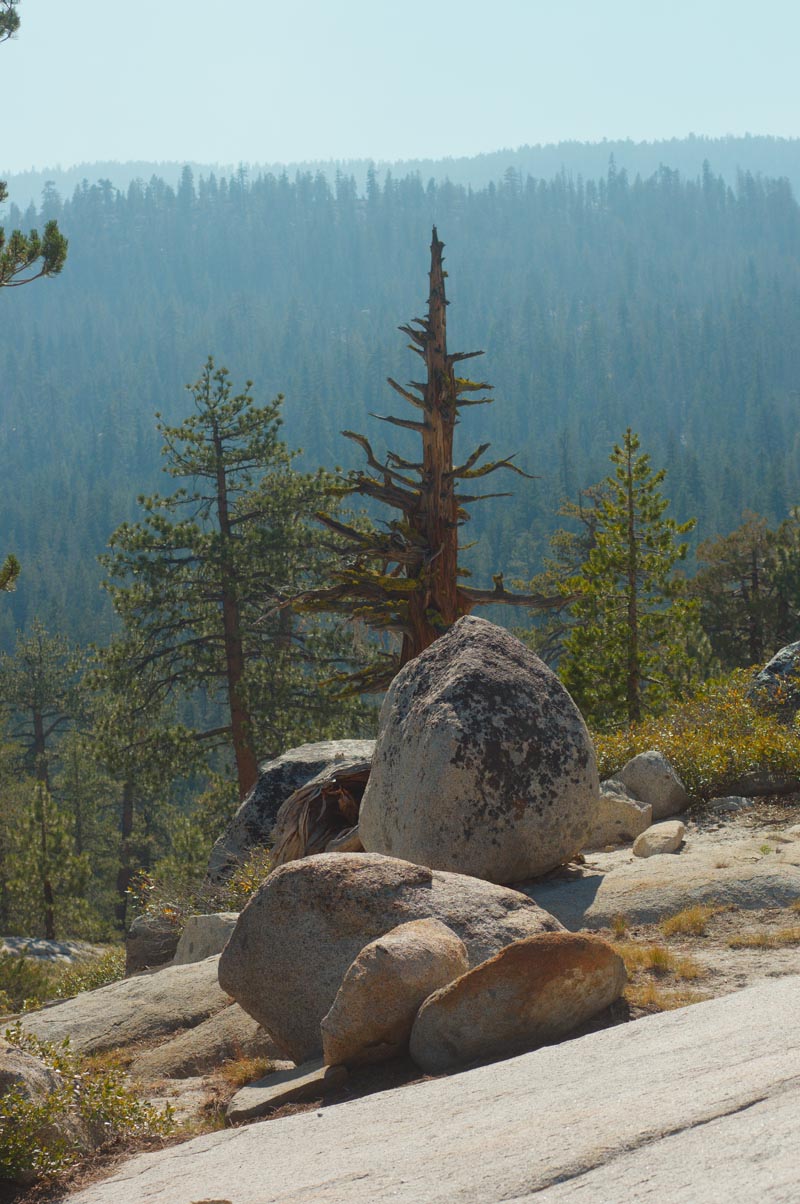
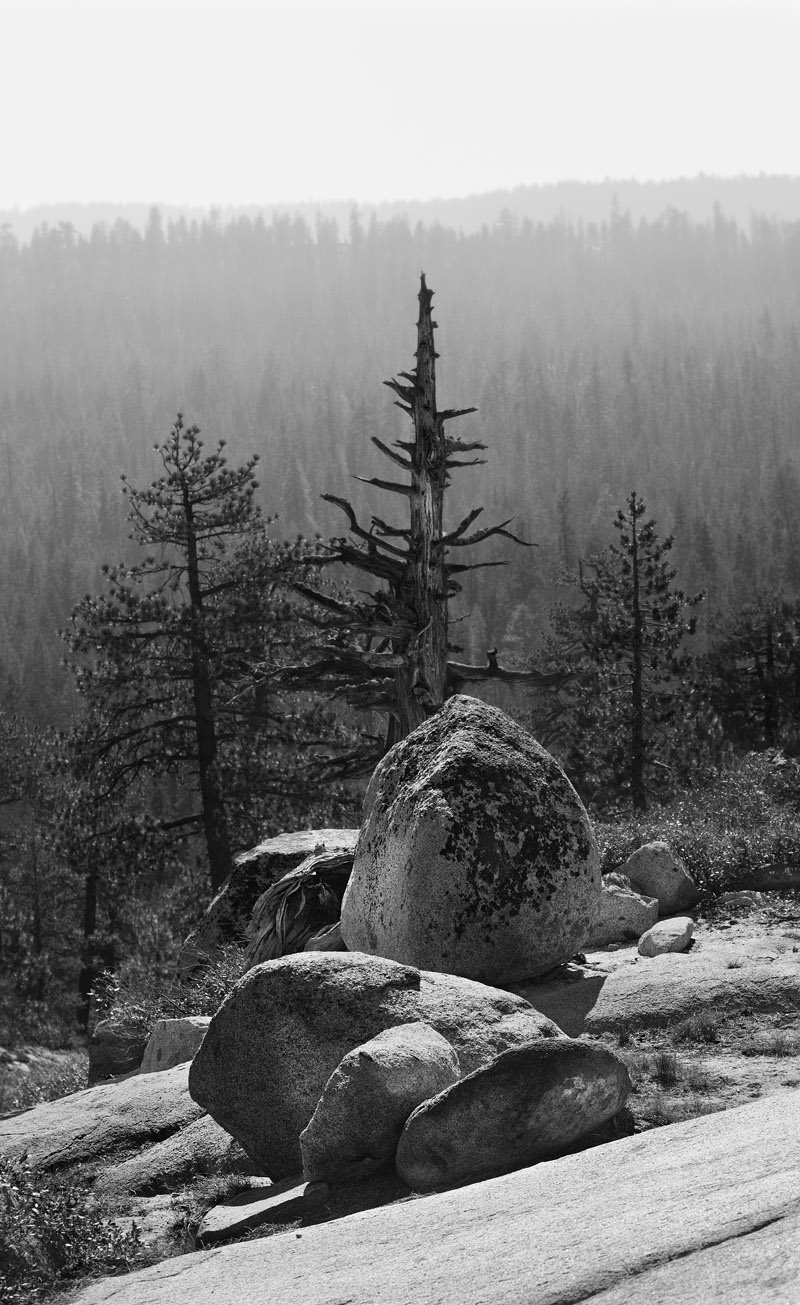
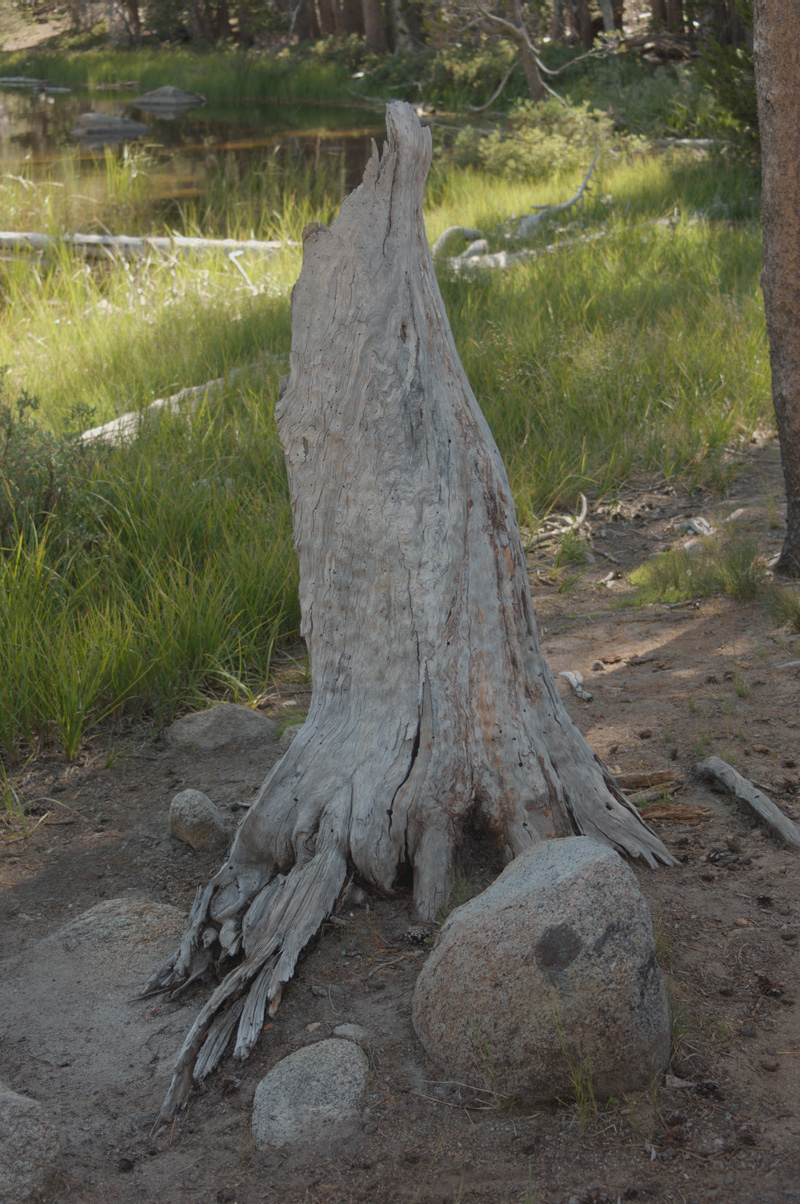
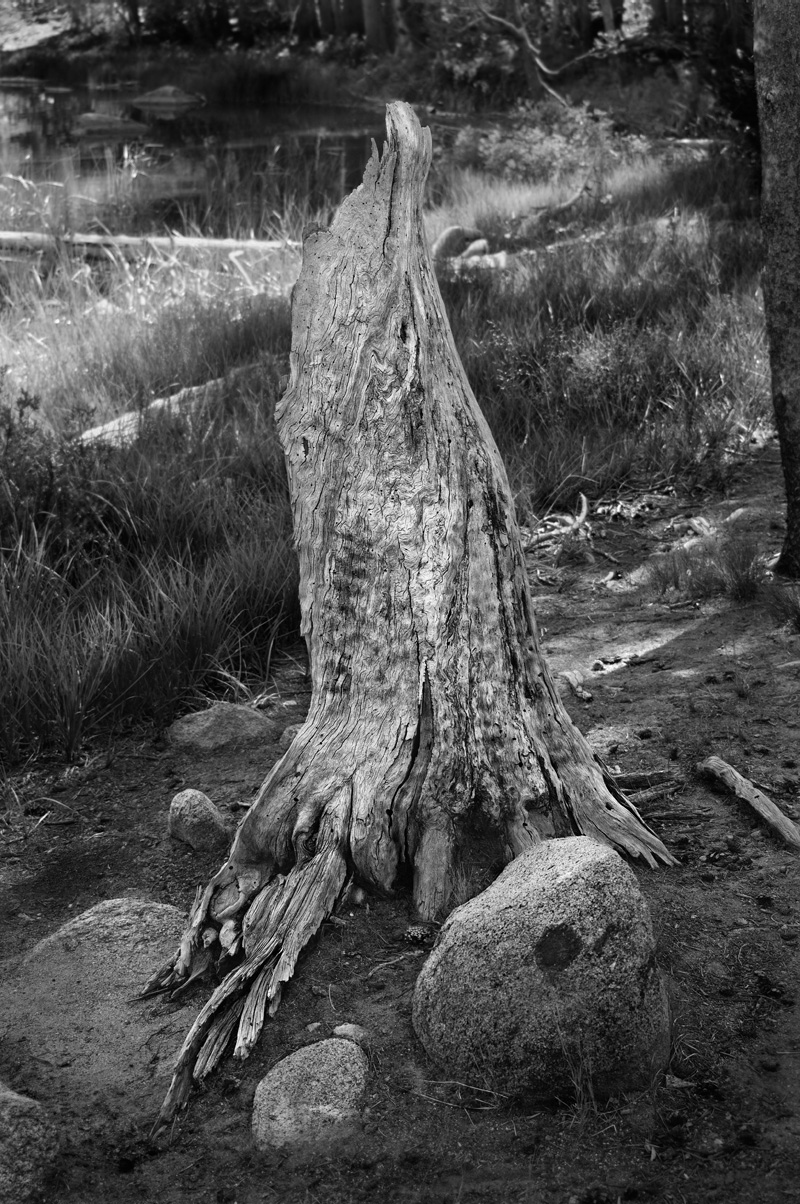
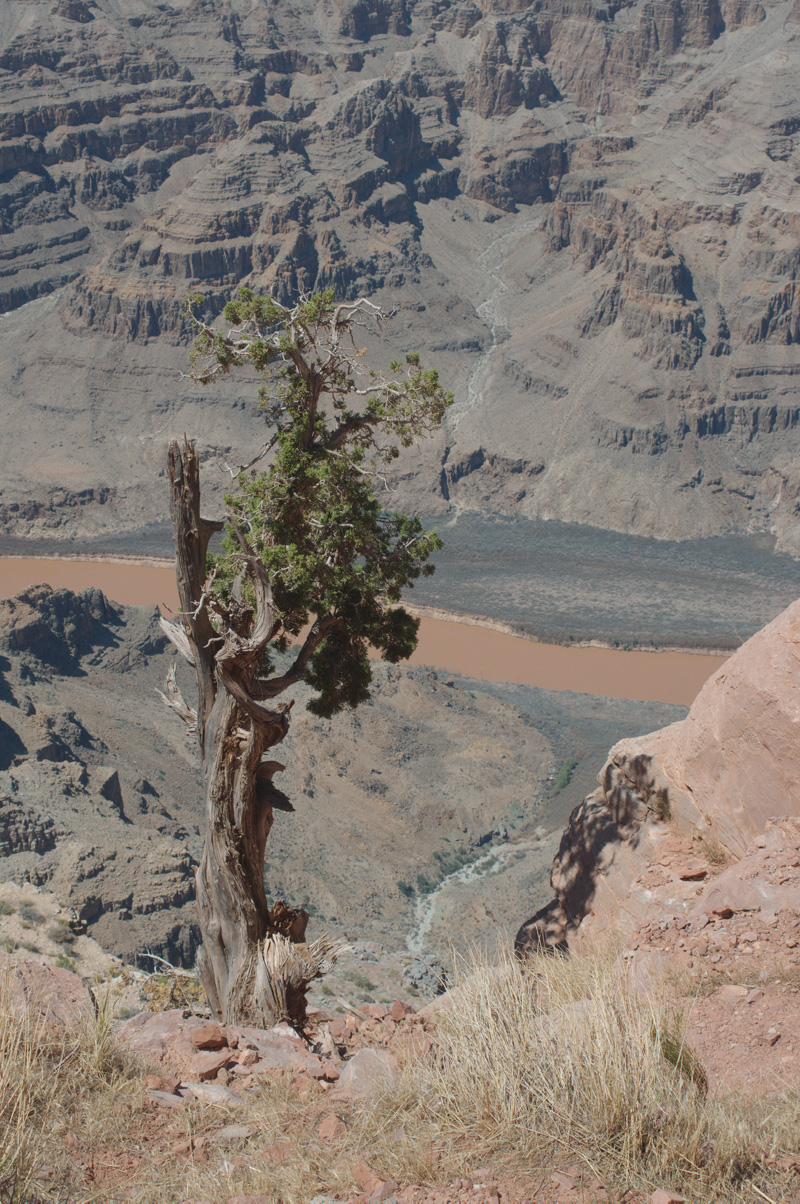
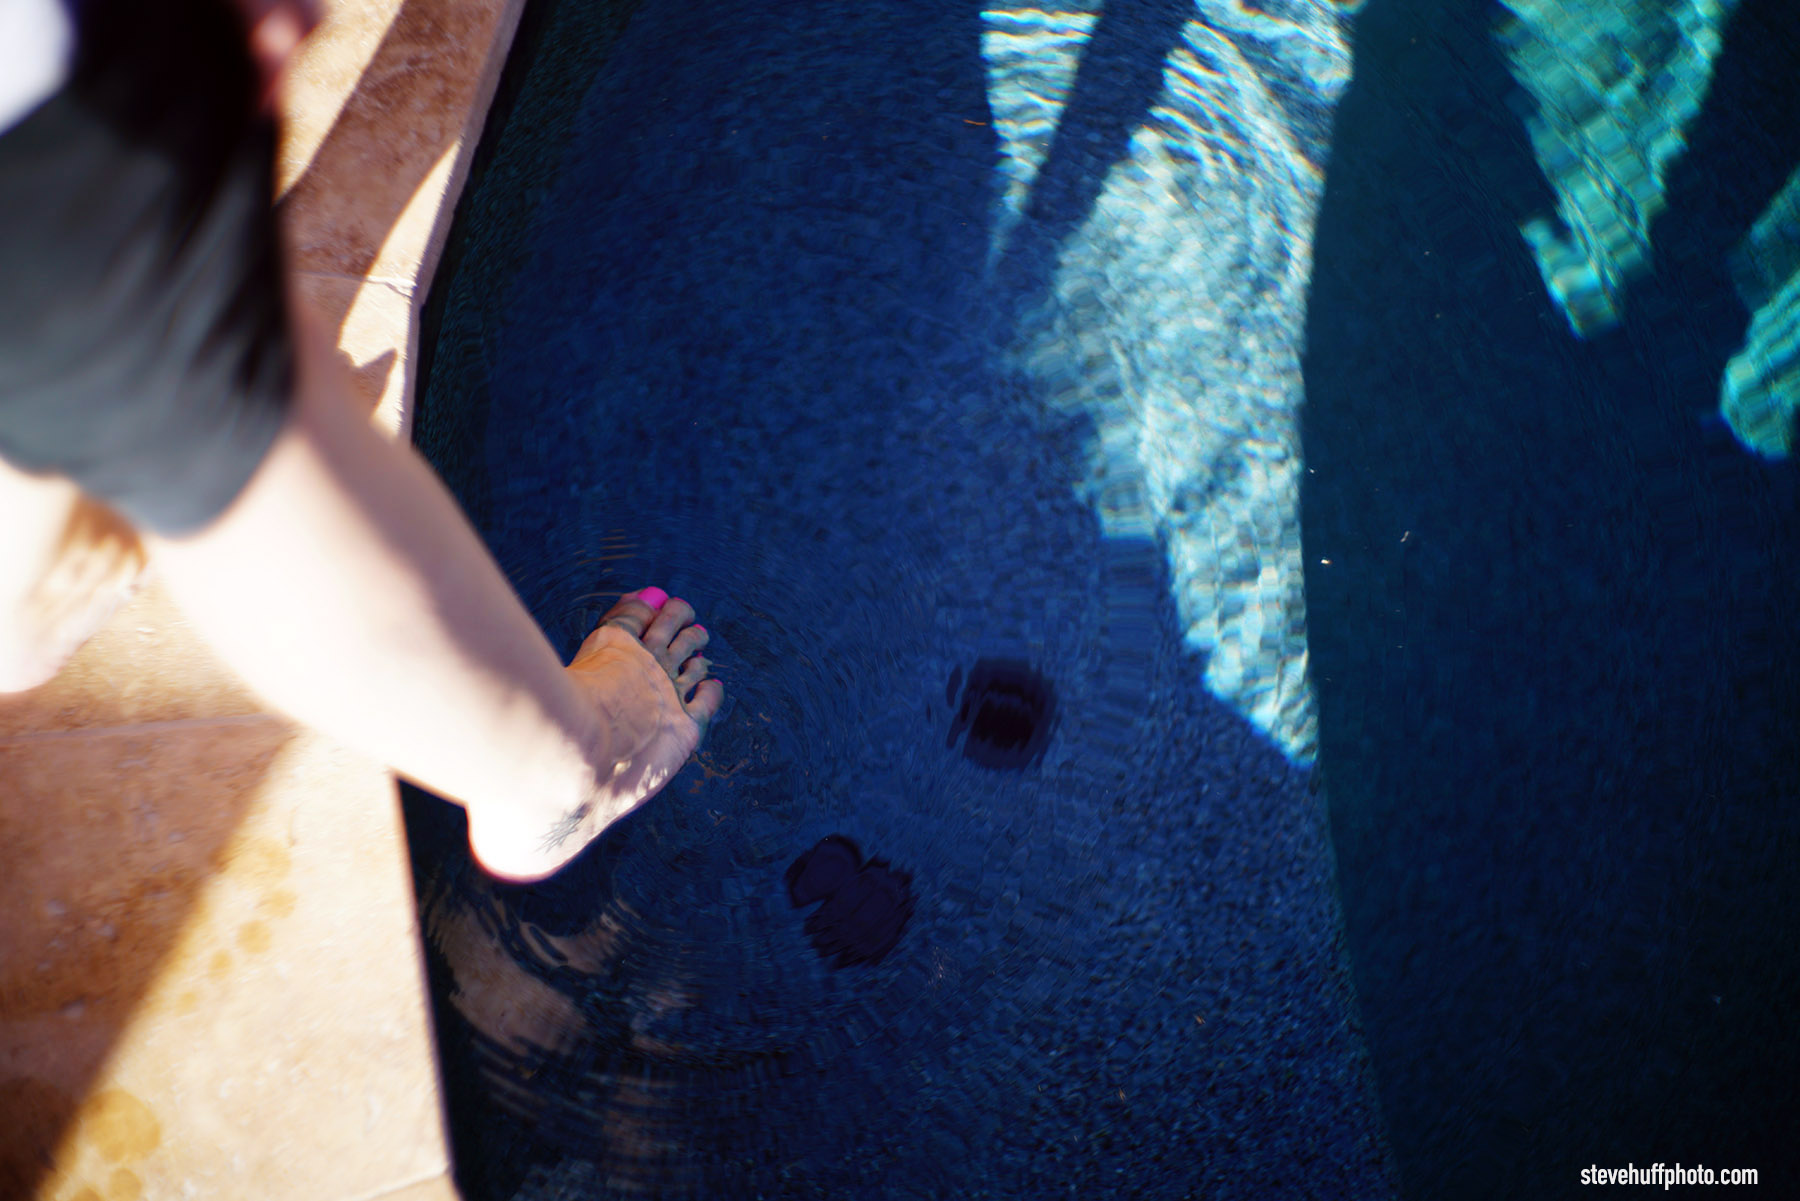
The photos I have included in the article show the original colour extracted TIFF image (in compressed jpeg form of course), the Monchrome version and the Monochrome over Colour info version. I think you will agree that the final colour version is quite lovely as well. It’s a funny thing but often a good colour image and a good mono image are much the same thing!

These images were captured with a Sony NEX 5N using legacy class, for these ones it was a Nikon 35-70mm f3.3-5.5 zoom and 55mm f2.8 micro nikkor with TLC pre-filtering. All are shot at 200ISO and around 1/100 sec. Being compressed web images of course it is a bit hard to judge the full effect, but they print superbly I promise.

An interesting article and discussion. After the monochrom was released I researched to see if a
normal camera could be converted. I found a bunch of astronomers taking to sensors with a dremmel
to remove the bayer filter. Not for the feint hearted. I also found this place which appears to take
a more scientific approach http://www.maxmax.com. I cant recommend or endorse but it makes interesting
reading for those interested
If you’re spending this much time pouring over channels, filters, sensor photosites, etc — why disregard a tripod? If I were looking to achieve optimal clarity I’d start there.
Also, I’d be weary about doing heavy level adjustments on low contrast images. The histogram would start to look less like a mountain range and more like a plastic comb with spikes and gaps, where tonal gradient loss and banding set in (then blur and add noise get that natural look back). I’d rather shoot brackets with the contrast and detail I envisioned up front, THEN stuff all that detail into a 32-bit tif composite and do targeted adjustments as needed.
Native white points and varying cameras aside, there are a lot of different workflows out there. I’m sure for this type of scenario, this method works…but everyone has to consider their available tools and the subject at hand. We get the shot no matter what it takes. Am I right? Capture the moment.
Let’s know our vision, and know our tools. Above all — let’s have fun.
Hello Steve, in answer, I don’t disregard a tripod, I use it often, it is just there are many times where it is not feasible or practical, like many photographers I have several tools and techniques in the armoury to suit different situations. My approach with regards to the what I have discussed here in this article is that it matters to me and works for me because I have actually eliminated as much as possible the other factors that compromise IQ.
More importantly your comments regarding levels etc are not correct. These files are optimally exposed to the right of the histogram without clipping which gives the maximal amount of information to start with. There are far more tonal level available on the right side of the histogram than the left but I won’t venture into the maths of it here. The conversion is outputted at 16 bits. We are not talking about jpegs, which if post capture processing is to be done need a completely different approach.
These files can be pushed around to enormous degrees is needed, but rarely are any radical compressions or expansions needed, the contrast is controlled via different channel mixes, conversion methods etc anyway. In short I can absolutely guarantee that I have never ever had any issues with data combing, noise increases, or banding. The addition of noise and blur is not to cover up problems and is so subtle you would never know anyway….its purpose is for other reasons like subtle focus shifts and textural emphasis.
Your bracketing and 32 bit works too of course, I use this also but the result is subtly different.
Of course you are right Steve, I encourage my students to use whatever suits there needs and have fun, my path is just one of many many options which I have offered up for those who wish to try in full or part and when it suits them.
Cheers Brad
Thanks for taking the time to write this, by the way. I enjoyed reading it! I was able to relate to the
I’d like to see a 100% close crop side-by-side comparison of the same scene to see the difference in luminance noise between two methods. I’m all about learning how to control the light that is recorded by the camera, and I’m curious to see the difference between them.
Thanks again,
Steve
Brad, your method would make more sense with Foveon sensors than with Bayer sensors. I do understand how you’ve taken logic borrowed from B&W film photography, but I don’t feel it applies well to Bayer digital photography.
Bayer cameras will always have a cleaner Green channel than Red or Blue no matter what you do because there are twice as many green photosites than red or blue on the chip. So what you’re looking at is a green channel that has twice as many photosites (and thus twice the resolution) than it’s lower resolution red and blue brothers. This is also why the majority of a file’s luminance information comes from the green channel.
By adding colored filters to your lens, you’re reducing the the amount of light contributing to a channel and then making up for it in exposure length, which would increase a different kind of noise depending on how long the exposure is. Adding to that, there is a measurable quality loss when using colored filters on a digital camera (especially when stacking them) and it can also cause focus shift.
If you feel your process somehow gives you some sort of edge in quality, then by all means, continue with it but I think a photographer would be better served by learning how to properly compose for black and white than to spend an inordinate amount of time in photoshop.
Hello Dez, thanks for your comments, please allow me to respond, this may help others who have questions relating to the concepts at hand as I feel there may be some confusion which is likely my fault.
There is a great deal I can add but first up please understand that this article is not meant to be a discussion of filtered capture as such, that is just one small contributing option folk may choose to use when all other bases have been covered.
I am well aware of how both Bayer and Foveon sensors function, but in the space of this article I did not attempt to venture into explanations of these matters. Perhaps I should have? You are of course correct, the green channel is always the best in terms of detail, it is not possible to obtain the same level of detail in the other channels for the reasons you outline. Agreed the green channel is also the source of the majority of the luminance information, however luminance which to a great degree attempts to simulate human vision response also includes significant contributions from the other two channels.
But lets think beyond that issue, on which we both wholly agree.
This method would I imagine not be better suited to Foveon sensors, they are already challenged significantly in terms of the amount of light the underlaying pixels receive, hence the very poor high ISO performance. As much as possible Foveon sensors have been designed to equal the cross channel exposure natively, which I also imagine is probably why they have that unique and almost Vericolour film like look in respect to colour. The blue channel is placed on top and less sensitive and the red channel at the bottom as far as I can tell from technical info is far more sensitive than the green middle layer, the net result is that as far as I can tell all three channel are natively close to equal in response and resolution. And clearly it works, really well. For what its worth I would seriously consider a Foveon camera were not limited in several ways that matter to me. In terms of mono work, you will find the files from Foveon sensors convert amazingly well.
Now as to Bayer issues.
This system does not in any way seek to emulate what happens in the monochrome film capture world. In that case you are subtracting from the sensitivity of the channel in question, it is a subtractive approach.
TLC works by capturing maximal information at the same time in all three channels, by holding back the most sensitive channel via filtration and allowing the other two to catch up, that is why the exposure is longer.
The green channel gets the absolute maximal amount of exposure, there is no impact on noise at all, in fact it is usually better because the histogram is telling the truth and allowing you to better set the clip point. The other two can be (should the filtration be suitably arranged) also fully exposed right up to clipping.
Mono film has one layer only and you pre-filter to sway the response from to differnt colours away from the normal, assuming the film is panchromatic.
With digital under regular daylight conditions, the red channel due to sensor filtrations variances and less pixels as you point out soaks up less light and needs to be amplified by a factor of 1.5-2 stops to get correct white balance. Likewise the blue channel is between .6 and 1.5 stops down by my tests.
The variance means as pointed out in the article that the noise signatures and all other factors are quite different between the thee channels. TLC will not give Foveon like detail, we still have a pixel deficits in the B/R channels but it can and does positively impact on all other factors for reasons that I am not going to explain in detail here.
The extra time for the exposure does not increase noise to any degree because under normal circumstances we are not shooting in the exposure range where thermal noise starts to dominate the overall noise levels. In fact with this capture method at the lowest ISO your main noise contributor is photon shot noise, which we can reduce, but only by multi frame capture.
The advantage is that the channels can as said be then mixed in any way you wish without running into resolution and noise issues. In short the files are very very flexible which is exactly what you need for mono work, where tones need often radical degrees of pushing in both directions.
There is no focus shift, that is never a result of filters but rather related to wide aperture lenses that move focus due to the effects of aberrations etc, which is precisely why I will not use any lens with an aperture wider than f1.8 and use a mirrorless camera that focuses at the actual shooting aperture.
The filters cause no sharpness loss, they are Kodak Gel CCs which are unless you stack heaps of them optically benign.
I agree that photographers are best served by learning how to shoot in mono first, no argument but your final Print result is an amalgam of a myriad of little changes, I have offered a number of options and ideas and people are free to pick and choose whatever they feel their current state of development and needs require. It is not my intention to be prescriptive and I hope I wasn’t.
Finally in an article such as this it is nearly impossible to get across the subtleties, we are not talking about chalk and cheese differences, unfortunately the web robs us of the chance to see what happens in Prints. As I said these files, which are just my holiday snaps by the way, are print optimised but are in no way indicative of the print quality, but please trust me when I say they print beautifully in either colour or monochrome. If I were to optimise them for the web, tone and micro and macro contrast levels would be set far higher. What works for web and works for print are almost totally different.
I create predominantly for large scale print, not web obviously, when I do work for web sites, composition, contrast, complexity, tonal values, 3D and 2D sharpening, even framing etc are all different. In short a web image needs everything turned up to 11 to have impact. That needs to be born in mind when considering the techniques outlined, if I were just making a web image a simple mono conversion in “Snapseed” on my iPad would be perfectly adequate or some other mono app on the computer as others have indicated.
When an image is to be printed to 30 by 40 inches, printed to fine art stock and matted and framed at say a cost of $400-500 the time spent in editing is pretty irrelevant. I can and often do edit stuff very very quickly (like 45 secs) for web use.
I hope this clears a few things up and all the best and great thanks to all those who have taken the time to read my article.
Brad, thank you for the detailed reply. I was busy on a shoot this weekend, thus my delayed response.
I think you’re confused as to how Foveon sensors function, the layers are arranged not according to sensitivity but to the depth at which different wavelengths of light (colors) penetrate silicon. Silicone is actually most sensitive to the green spectrum by nature, therefore the glass filter on top of the sensor surface is actually designed to to reduce the amount of green that hits the sensor.
I have experimented with using contrast filters on Foveon cameras with the intention of a black and white conversion. Although it can help with things like brightening foliage or darkening the sky, the optical downsides are not worthwhile, though you are correct, optical gels should have little noticeable negative effects, unlike colored glass filters which can cause softness, flares and focus shift. Of course, focus shift is less of an issue if you use an APO lens, as it is more well corrected for the focal point variance of different color wavelengths.
I understand your concern, as a 30″x40″ is not a particularly large print so your viewer is more likely to be standing close to it but if you’re going to be on a tripod anyways, I think bracketing exposures and then combining them in photoshop would give you more control overall, especially if you’re concerned about losing detail to a blown channel. This also has the benefit of being workable for color too, if that’s what a client needs.
As for the above discussion on correcting for tungsten, you’d be better off just shooting a grey card and setting a custom white balance at the time of capture, than losing light to filters.
Thanks again for the article, it was an interesting read.
Hi Dez, Thanks for the reply and the info re Foveon sensors, I have looked into them a bit and your info is of assistance. As I understand it foveon sensors have some issues with crosstalk between the channels which complicates the Raw conversion process this I imagine may have flow on effects if filters are added, but in any case having said that the colour results at low ISO seem really nice.
You ideas on bracketing are solid, if a tripod is used and I have done that, even in combination with full filtered capture to further extend the range. I also often use image stacking to eliminate virtually all residual noise. Ultimately of course it all depends on what I am planning for the end result. But your comment reminds me I really should use the bracketing a bit more than I do. Often however I don’t have a tripod and need to hand hold for example when bushwalking etc, I have several tricks to help here too.
The tungsten stuff has proven tricky and before I replied to this I went searching for some old test files but it seems I have dumped them off the system. The trouble with using the grey card etc is it does nothing for the channel exposure imbalance problem, the blue channel will remain radically underexposed and the difference is made up by increasing the gain for that channel via in camera processing. On the other hand if you increase the exposure enough to build up a better blue channel exposure then the green followed by the red will clip and ruin the highlights. Adding a bluish filter will subtract hold back the exposure in the red and green enough to allow the blue to catch up so to speak. Again this does not mean the green or red are less exposed the longer exposure keeps things equal.
Of course the longer exposure may increase thermal noise a bit, but in my tests that seemed to be pretty insignificant, at least for exposures in the 1/15 sec to 4 sec range, which covers most shots. Ultimately because of the way camera metering systems and jpeg renderings work I have found almost universally that the red channel ends up underexposed when shooting in RAW, although the jpeg looks OK and the in-camera histogram tells a totally different story. It seems that normally an optimal tungsten captured RAW and JPEG are mutually exclusive.
I have found the camera sensor can have a significant effect on the tungsten results, for example on the Sony A900 shooting unfiltered with tungsten and adding an extra 1.5 stops renders very low noise files, basically because Tungsten is actually much closer to the native sensitivity of the A900s sensor. My Canons have been very different, they seem to suffer from cross talk issues with some magenta/reds and tungsten can mess badly with them. Going to the other extreme the lowly Fuji F20 pocket camera works a treat under tungsten with just a little cyan/blue filtration mainly because it has I suspect extended sensitivity in the blue channel. In the case of the Fuji, the added filtration reaps enormous benefits over the unfiltered approach. Conversly adding an orange filter to the same camera for daylight shooting renders far better files in terms of colour neutrality.
I guess overall Dez, what I am trying to get across is none of this is a simple as it might seem on the surface and requires a lot of testing but there are improvements to be had often using methods that at first seem counter-intuitive or plain wrong. Ultimately very few folk have ever taken the time to test much of this stuff so they are working from the point of accepted wisdom, I am a bit of a contrarian I guess and like to prove things myself, if it works I use it if not I dump it.
Oh just on the concept of shooting with filters for colour, that is exactly what I do, I shoot in full colour through the filters, in fact I get perfect colour JPEGs right out of the camera. Basically the camera is custom WB’d through the filter pack so the colour is spot on and the histogram is as close to accurate as you can get for the RAW file. The shots you see in the article were shot alongside JPEGs, (not shown) that were print ready straight from the camera. I didn’t get into any of that in the article perhaps another time.
Anyhow Dez thanks for the chat and I hope we meet again in the virtual world.
Interesting article. For my purposes I find that if I expose correctly in-camera my B&W conversions with Silver Effex Pro 2 are excellent….and much faster. Not to mention the fact that you can make precise selections for adjustments throughout the image without messing around with masks in PS.
Check out Joel Tjinjelaar’s work…..if it’s good enough for him it’s good enough for me!
I experimented with colour filters to balance the light hitting the sensor in tungsten lit rooms much the same way I think you are using them. My theory was to balance out the colour channels instead of using the custom WB which would lead to certain channels to be subject to too much gain. (It’s the reason high ISO testing should be done under tungston lighting as it’s a more real world test)
Of course, this method only works with using base ISO’s like you described as the colour filters block out light resulting in the need for higher ISO’s if you are handholding and limited by your shutter, thus cancelling out the benefit. Taking photos at base ISO on a tripod is a different story. If you are taking interior photos in a room that is lit by lighting around 3000K, and you can put your camera on a tripod and use a longer shutter speed, and a blue filter will do the trick to get the maximum out of the sensor which I believe is optimised for 5500k(?)
I must say though, your thought process on the technical aspects of processing an image is impressive. When every step you take gives you a marginal 5% increase in quality, it really adds up when you factor in that you may have 10 or 15 steps. I’m sure your wall prints show this stacking of benefits and the overal impact it can have. It’s too bad these small web samples will never illustrate this. Our loss.
Hello LJ. I think you were heading in the right direction with your tungsten conceptually but you had once aspect working against you. The native balance point of the sensor is nowhere near 5500 K, which I note you had a question mark over. In fact the problem with tungsten light exposure is first up the histogram displays a corrected JPEG version which factors in the WB. This leads most folk to actually underexposing their RAW files under tungsten light by about 1 1/2 stops. It is virtually impossible to render a perfects RAW and JPEG file at the same time under tungsten, by the time you get the RAW file correctly exposed the JPEG will have hopelessly bleached highlights everywhere.
The filtration needed is not actually blue, though it should be close, a combination of magneta plus blue if my memory from tests serve me right will get you in the ballpark, and in fact the native response of most sensors is very close to tungsten unfiltered.
Effectively under normal circumstances the most cameras drastically underexpose the red channel under tungsten light, I realise that sounds odd but try this.
Take three shots in RAW under tungsten light, take one as per the histogram and take one a stop over and another two stops over without any filtration. Open the files and process them to get the exposure nailed, you will likely find the one over exposed by two stops is just fractionally over and the correctly exposed one is hopeless in comparison. Email me via my website and let me know how you go.
Your right on the web issue, unfortunately the web is the lowest common denominator when it comes to image quality, nowhere near enough pixels and too many issues with colour reproduction and all sorts of other things to do with gamut/colour spaces etc. and for mono that relies on subtle tonality and fine textural detail the web is a total bust! Generally by the time something looks punchy and appealing on a web page it is way too hot for fine printing, the shadows will block and the highlights bleach like crazy, but its all we have for sharing purposes. Such is life.
Thanks for the reply Brad.
The filter I was using was the same type of filter used to balance tungsten light with daylight film. I called it blue, but it may actually have some magenta in it. I was under the impression that the ratio of red, green, blue pixels (1:2:1) was the ratio chosen to allow the camera to optimally perform under sunlight (5500K) but this was only an assumption of mine and not bases on anything I read.
I tried your experiment to see what results I would get. I photographed my beside table which was lit by a tungsten light (2850K) and used no filter. Here is what I have observed.
Normal exposure had no clipping, +1 has some clipping, and +2 had some more. This could be the result of my weighted metering as my focus dot was on a brighter object (text on a page). My experiences are that I usually find my camera more susceptible to clipping the red channel under tungsten lighting. I often use +1 in daylight and still don’t have clipping. I use Canon bodies so this may be the reason for our differences in experience.
What I did notice is that when looking at the photos with the WB set at 5500K (Sunlight), the red channel is more to the right than the green and blue. This would make sense because tungsten is a warmer light. I assumed that since the sensor is at it’s most comfortable at 5500K (no digital gain needed to be applied to any channel to acquire the correct white balance), that pushing my white balance slider to the left was actually adding digital gain to the blue and green channels to get the correct white balance. The noise that would be created in these two channels is what I was trying to avoid by using a filter. My theory was that the filter would block out some of the red light, balancing the remaining light to match the native white point of the sensor. Any loss of light from the filter would be made up with a longer exposure.
If what you say is true, that 5500K is not the native white balance of the bayer sensors used, then what is it? I would assume taking a photo of a grey card under the different temperatures would give us our answer. You could take a look at each channel after and figure out at what temperature there is the least amount of noise in each channel. There has to be a nice balance in there somewhere.
I forgot to mention that when I did my test my camera was set to AWB (but shooting RAW). I’m not sure if Canon camera’s take into consideration what WB you are set at when metering.
Hi LJ Lets see if we can sort this for, I need to ask a few questions.
When you say there was some clipping, am I right to assume you were looking at the histogram on the camera.
If so regardless of what file format you are using you will see clipping as the Camera histogram is derived from the jpeg rendering with the WB factored in.
If you look at the file in a RAW convertor the result will likely be very different. I can say from testing my old Canon 40D there is nearly 1.5-2 stops of headroom in the red channel still left once the camera histogram indicates clipping.
Anyhow just confirm are we talking camera or raw convertor.
Canon cameras are a bit different, the Red filters are less dense on most canon sensors, they have a different philosophy it seems but nonetheless the Red channel is still the least sensitive.
Can you tell me which model you are using?
Generally the native WB is somewhere in the 3500-4000K range, with ones I have worked with. But don’t forget there are two axes to this, the Amber-Blue and Magenta Green, the later is hard to guess at.
When you mention the ratio, I assume you mean the pixels, I am not totally sure on the origins of it all, but it has a lot to do with Human vision, we see far better in the green spectrum so it made sense to use more pixels for that channel, were are all pretty hopeless in the blue and somewhere in the middle for red. I doubt, but could be wrong that daylight WB had much to do with it.
The blue filter you are referring to is I think just blue, there are a few different ones to suit different Tungsten sources, do you know which one it was?
When I mentioned clipping, I was referring to the clipping observed in Lightroom and not on the histogram on the camera.
I 100% agree with you that when you expose to the right using the cameras histogram, that there is usually 1.5-2 stops of extra headroom. Because of this I usually expose ‘past the right’ when shooting hence why my camera sits around +1 on the exposure compensation most of the time even if the resulting preview looks a little too light. I’m using a 5D MKIII.
The clipping I received in my test shots are in line with my own personal previous experiences. When shooting under very warm light, in this case 2850K, I find that the red channel clips earlier and has less headroom. My test shots with +1 had a true clipping that was observed in the RAW editor. This could be a case of the test confirming my thoughts, or that the weight put on my focus point affected the metering in a way to make the test faulty. Overal though, my experiences say that the red channel clips before either the green or blue. I’ve had situations when I first started shooting where I would accidentally overexpose a photograph. The only way of recovering was to make a black and white photo from the either the green, or blue channels as they were the only ones not clipped, unlike the red. (I believe RAW editors are far more advanced now and can simulate a recovery of a clipped red channel by looking at the info in the blue and green channels).
My theory about the ratio of RGB pixels again was not something that I have specifically read, but more a conclusion I drew that might not be correct. I thought that since the human eye evolved to be optimal during daytime (5500K) and used three different cones (L,M,S) or (R,G,B) that they would use a similar tactic in making the sensor, and that requiring that ratio most closely matched what the eye does to perform best in daylight. I also assumed that since there are mainly three shooting type scenarios (Tungsten, Daylight, Shade) that range across the K spectrum, that they would optimise the sensor for something around the middle so that stretching to either side wouldn’t be too hard for the sensor to read. Again, all theories of mine but based on some limited knowledge I have.
I really can’t say what filter I was using as it was a test I was doing about 6-7 years ago. My intention was to use it while handholding at higher ISO’s and then someone pointed out that the loss in light transmission would require a higher ISO which then would then defeat the purpose and create more noise. It was pointed out at this time that the only way it would have an advantage would be on a tripod with base ISO and a longer shutter speed. Since this didn’t match what my intended shooting style was for the particular event, I gave up on the quest. It is still something that has stuck in my mind ever since and your article just triggered those old days of experimentation.
Oh, all of this has got me thinking . . . . why haven’t they made a camera with a sensor OPTIMIZED for tungsten shooting? Or maybe a camera where you can swap out the sensor. That would be great! I would love to swap my cameras at a wedding reception to one that performs better for high ISO shooting under 2500K lighting. Would the sensor have more red in the RBG ratio to achieve this?
G’Day LJ. Yep a camera more suited to tungsten would be nice, but it would need more real sensitivity in the Blue channel in particular. In fact the now very old Fuji F20 F30 F31 series compacts did have such a characteristic and were widely known as being particularly good under tungsten compared to the contemporary competition.
Ah but there was a trade off, in daylight conditions the blue channel often clipped causing some odd highlight colour casts and fringing under bright daylight.
There is a lot of variance between sensors with regard to the native sensitivity of the 3 channels, in short the greater the difference between the actual purity of colours of the pixel filters the less cross talk and the better the colour accuracy. But the trade off is less sensitivity all other things being equal, which they are not necessarily in the real world.
The Sony A900 is an example where the filter density differences are great and the colour accuracy/rendering is lovely but the noise levels are far higher than the competition as the ISOs climb. Many A900s users love the way their sensors render, many feel it is quite film like (in a good sense). I love mine but its no high ISO monster.
Mobile phones often have weak differences (relatively), which allows lots of crosstalk and much poorer colour accuracy unless lots of super duty tricky processing is applied, but it makes the sensor more efficient at keeping noise levels under control or native ISOs higher.
Trade offs all round, but such is life.
Anyway I imagine that makers simply try to produce the best generic tool that suits the greatest number of users and who can blame them.
There are definitely however some cameras that are better under tungsten than others, the Sony RX1 for example seems to do really well under tungsten and mixed lighting. Likewise the Nikon D800 from my experience with some students cameras seems pretty much a winner in this area.
You could check out the DXO website and the charts they have on channel sensitivity to get a better idea of which cameras perform best under tungsten light etc.
All the best, Brad
Thanks, Brad. I appreciate your sharing your techniques with us. I found your approach fascinating. Of course, I felt “doomed” fairly early in your article, as I shoot Zeiss lenses on my Leica M-E and my RX1 has, of course, a Zeiss lens. Well, I’m not really doomed. I have a few takeaways from your article that I’m going to implement for my black and white conversions. I’ll definitely try shooting lower contrast and utilize a few techniques to maximize my tonal range before I convert to B&W.
Hi Frandy, Oh I would be so happy to share your doom, do you love the Leica and the RX1? Actually from what I can see looking at RX1 files they have a potentially a very long tonal range, they should convert to mono really well, and I do think that Leica glass has some little magic in its micro tonal rendering that suits it to Mono really well.
I could wax lyrical about how nicely the old Sony A900 with Minolta 28-135 lens files convert to mono when TLC’d, ah just beautiful. There is something special in those Sony FF sensors….very film like, I think the RX1 is cut from the same cloth but only better. It is one of the few cameras that have really tempted me in the last 12 months or so.
Lowering the contrast if shooting JPEGs is a great place to start. keep an eye on saturation also as this is closely tied to contrast and high levels obliterate fine textural detail in highlights. Just as an aside, pretty much every camera on the market comes with jpeg rendering set way to high out of the box for both contrast and saturation to give that impressive on line colour punch, but for printing almost always the highlights and shadow rendering is outside the print range before you do anything to the files and then sharpening just pushes the files over the rendering edge.
Have great fun with that Black and White and thanks for your kind comments.
Hi again. And thanks for your reply. Of course, I misspoke about lowering the contrast because in shoot in RAW. DUH! And yes, I love the RX1 and have had success with RX1 conversions. The Leica is a new acquisition and my first Leica also. I am still figuring out what I like best in post-processing those files. So far, so good. A question: If I shoot raw, should I lower the contrast in the raw images (I use Lightroom) and then convert to B&W? I guess I’ll have to try that and compare to not doing that first. Thanks again.
At the end no one cares what software, technicalities and processes you went to to get the picture… Photography is about emotions, capturing something that speaks a story. these pictures are as inspiring as dull for my taste…
I think that we should be grateful to Brad for giving us an interesting view about how he approaches the subject of b/w shooting and printing. Some of us will be more interested, other less, and others not at all, but at least let us give him credit for having spent his time putting on “paper” his toughts about the matter.
Brad, thank you very much! I’ve just finished an year-long project of shooting only-b/w, only-MF with a legacy lens. I’ve simply used raw shooting and automatic b/w conversion, and the results are quite pleasing, but for the next time I`ll consider seriously some of the steps that you have explained…
I happen to agree with you basharar. This is nothing I can appreciate, nor would I enjoy doing it. To me, it’s hard to believe those images are the result of all those hours of work. If there’s subtle quality differences to most other B&W conversions then I can’t tell what they are. I feel like I could get similar results (or better) with a 15 second, VSCO film conversion of a jpeg file.
However…I could be wrong. And…there a plenty of people who enjoy post processing.
I think that the issue at hand is processing FOR PRINT. In no way you can appreciate the differences from a web image, and Brad stated so various time in his article.
So, if someone shoots b/w only for web, the article can be just a fun informative reading and nothing more…
Gotta love how some peoples reactions are like “I like to half ass things and move on” and can’t come to grips with someone enjoying the whole process from start to finish in a perfectionist mindset.
Impressive article. But for me, life is too short to spend 5 hours behind a computer screen to PP one digital file. I prefer to be out there and take pictures. My philosophy: the more interesting the content of a pic, the less PP is needed.
Hmm interesting…reading, reading, reading….ahhh…mmmm….zzzz… what “don’t nod off”?..scroll scroll scroll…ah pictures! Nice! Blimey what a lot of work. Good on you but I don’t think I have the patience.
Me? Shoot to preserve highlights. Open in ACR (always shoot RAW) do minor adjustments run through basic action set in Photoshop. Do local tweaks. Done. Looks good… get on with life… Unless it is a really special image. : )
I am a big fan of B&W and all my serious work and art is in B&W.
My work flow is similar in many ways to the process you describe.
Initial capture of the widest possible dynamic tonal range by controlling exposure and use of the proper lens.
Next comes the raw conversion (adobe raw) where the file is opened up even further by reducing contrast (flattening contrast) and use of recovery tool.
Next the file is opened as a raw in Photoshop and colors are enhanced or reduced using the selective color tool so that in the B&W conversion those colors will gain emphasis or deemphasis based on my desire.
Next is the high pass filter applied as needed to assure sharpness is as I want it.
Finally the raw file is taken into Silver Efex pro 2 and the real conversion work begins.
Once this process is complete in all is complexity the file is taken back to Photoshop, still as a raw for the final touches.
Then the file is finally saved as a Tiff and is done.
To me, this is why photography is so great. I love snapping away with my RX1 RAW/JPEG mode, but never really doing anything with the RAW files and just enjoying the jpg’s. I however can absolutely appreciate the dedication and refinement your successful approach mandates. As much as I feel I could improve my technique, I sadly will never have the “eye’s” you do, so I don’t really worry about it. I do however feel confident our levels of enjoyment are similar, even with significant dedication to post processing. So with that, great post and thanks for sharing what a true student of his craft does.
The article seems to make sense . . . for you, as you point out several times. I personally like working with photoshop, but have skill limited to what I (think) I need. This takes me a lot of time, but I enjoy it. But 5 hours far exceeds my enthusiasm for conversion to B&W, and I am quite happy with the variety of transformations that NIK software provides once I have finalize a color version from Raw files that I am happy with. What I will take away from this is important, however. I will experiment more with my legacy 50mm rigid f2.0 lens so that I can start off with less contrasty files. Presumably it was designed for B&W film cameras. I will also try harder to get the highlights as far to the right as possible in the original image and perhaps start doing multiple exposures as you suggested. Normally, I am concerned with blown highlights and tend to set the exposure to a -1/3 or even -2/3 rather than on the plus side as you’ve recommended. I will stop fiddling with the Raw Conversion software and keep it with the desired low contrast, no sharpening, no color enhancement (which is now possible). I will start off with these recommendations that you start off with, using a variety of programmed conversions to see how well the final outcomes approach what I’m trying to create. If this still falls short, then I’ll have to reread your article more carefully and see what next to try. So, overall a very helpful set of recommendations. But you’ll have to wait for many of us to catch up.
Hi Larry, I am glad to hear there are some helpful take aways for you here.
Best advice I can give, try one change at a time and work it through, then move onto the next change.
Many photographers try changing everything they do at once and then they have great trouble working out which bits actually worked the magic for them.
Sounds like you are on the right track, have fun.
Wow…lt is quite a labor of love. I use Silver Evex Pro2.
Typo correction: Silver Efex Pro2.
i dont understand the article
Simply exquisite Brad!
While I am still quite far from perfecting my own processing techniques, I can confidently validate yours. There are not too many people that can objectively understand/appreciate the level of execution you are striving for, but as a B&W aficionado myself, I can clearly see what you have achieved, and its pretty remarkable.
I have spent years developing an eye for high quality monochrome work, and from a purely technical standpoint, this is some of the finest digital monochrome work I’ve ever scene. I’d love to see this technical prowess coupled with ideal lighting.
I think it’s particularly significant that you mention the importance of being able to, before all else, “see” what you are trying to capture. I find this is a particularly difficult hurdle for most photographers. Regardless of genre, truly professional level work requires a high sensitivity to detail. Taking that further, one must also be able to differentiate and identify which details are relevant to the scene…and this isn’t just limited to technique. It’s a matter of truly understanding what we see before even considering how to capture it. It’s a never ending exercise.
Anyways, I do have one question for you. How are you determining the level of lens filtration? This simple idea sort of blew my mind. As simple as it may be, I have never thought to use color filters to balance the incoming light. I am assuming you are determining the level of filtration based on the RGB histograms?
Anyways, great work Brad. Thank you for taking the time to share your process, and thank you to Steve for hosting this!
Thank you for the kind comments, much appreciated.
Your question regarding filtering is significant, I have never explained this on line any where before, I once mentioned a couple of things on a well known photography forum only to be informed by trolls it wouldn’t work and that I was, shall we say, a bit of a idiot.
Anyhow, suffice to say I have been using my TLC capture methods for a long time now for both colour and mono work and it works for me, providing a degree of tonal and colour subtlety that edits wonderfully.
There is far too much to this than can be covered in a response, (the workshop manual I wrote is nearly 400 pages) here but I can give you a couple of tips.
The histograms in the camera by themselves will be useless, they are derived as I am sure most folk are aware from the JPEG rendering, which has all the settings baked in. I tell my students, the histogram is normally a “dirty lying scoundrel out to reek havoc on your best intentions”
You will need to find a way to get your camera to Uni White Balance, there are many methods and it depends on the brand of camera and model, some cameras are virtually impossible to get into this state, but I have been able to do it with most NIkons, Canons and Sonys I have come across in classes, the Sonys seem to present the least challenge.
Once in Uni WB mode you then try test filtration packs (I use Kodak CC filters with a special home made holder) until a fully balanced colour image can be rendered in Uni WB mode without any additional adjustment of the WB control. (this may well be the first time this has ever been posted to the web here). Once you get to this point you are actually fully exposing all three colour channels as equally as possible, no gain is required of the channels to obtain colour balance in the RAW convertor.
Please note there are a few ways the filtration can be tested but that would be the subject of a multi page document and the above will get your there.
Now the above is really a starting point for me, and I tweak filtration to suit my needs and the light but in all cases the degree of filtration needed is quite dense and dependent upon the brand and model of camera. The one constant is it will almost always be a combination of Red and Magenta.
A vitally important point to note is that once set up this way “your histograms are now actually telling the truth” and can be relied upon for determining the optimal exposure and critical highlight rendering. But effectively at this level of filtration your effective ISO is probably around 16-32!
This setup actually allow me to shoot colour correct JPEGs and RAWs at the same time without any issues, the colour jPEGs are very robust and can be edited if needed, but I just normally use them to have cheap machine prints made for proofing purposes.
I hope that helps a bit, you can contact me via email from my website if you need, my website is 01imaging.com.
Cheerio
Brad
Awesome post Brad.
I read through “From Oz to Kansas” a while back to better understand monochrome conversion techniques, and although there are more details in that book, somehow I found your very logical process more compatible with what I normally do.
Thanks for sharing your workflow!
Wow…this is an extremely detailed, helpful, and informative article! Thanks for taking the time to write!
All the best,
-M.