

A practical comparison between film and digital!
by Bernd Reinhardt
A little over a year ago I bought a Pakon scanner following the advice of some Leica forum members, and this scanner has reignited my passion for shooting film. The Pakon was the scanner minilabs used before digital fully took over the consumer market. It scans an uncut roll in 6 or 7 minutes with dust removal. The only caveat is that the software only runs on the Windows XP operating system – I use an old lab top dedicated to this scanner.
I am preparing for an international trip and personal project that is very dear to me, and I am trying to decide which cameras to take with me. I wanted to compare film and digital in my workflow, so I shot some side-by-side (or one-after-another) comparisons in real life situations that will give me some insight into how each format performs. I used an M7 with Portra 400 color negative, and an M9. I rated the film at ISO 320 and set the M9 to the same ISO. The Pakon scans at 2000dpi, which gives me a resolution well below the M9’s 18mp file. This is something I need to consider when printing for exhibition. I am planning on a final print size around 17inches wide, possibly even 24. In that case I would have to get the final selection rescanned at a higher resolution. The m9 files were converted in Lightroom with the standard preset. In most cases I pushed exposure by around two-thirds of a stop and added about 20 points of clarity. Then I adjusted the white balance to roughly match the film images. I wasn’t aiming for a perfect match between the different formats, and I think it is somewhat subjective which is better. Considering that I own both cameras, I am looking forward to your input on which camera to choose for my project.
These images do not attempt to show any artistic ambition, but are purely intended for testing. I thought that some of you might enjoy seeing the results and consider Steve’s website the perfect outlet for discussion. If you like this test, please also visit my website www.berndreinhardt.com to see some of my photography and follow me on my recently created instagram account: https://www.instagram.com/bernd.reinhardt/
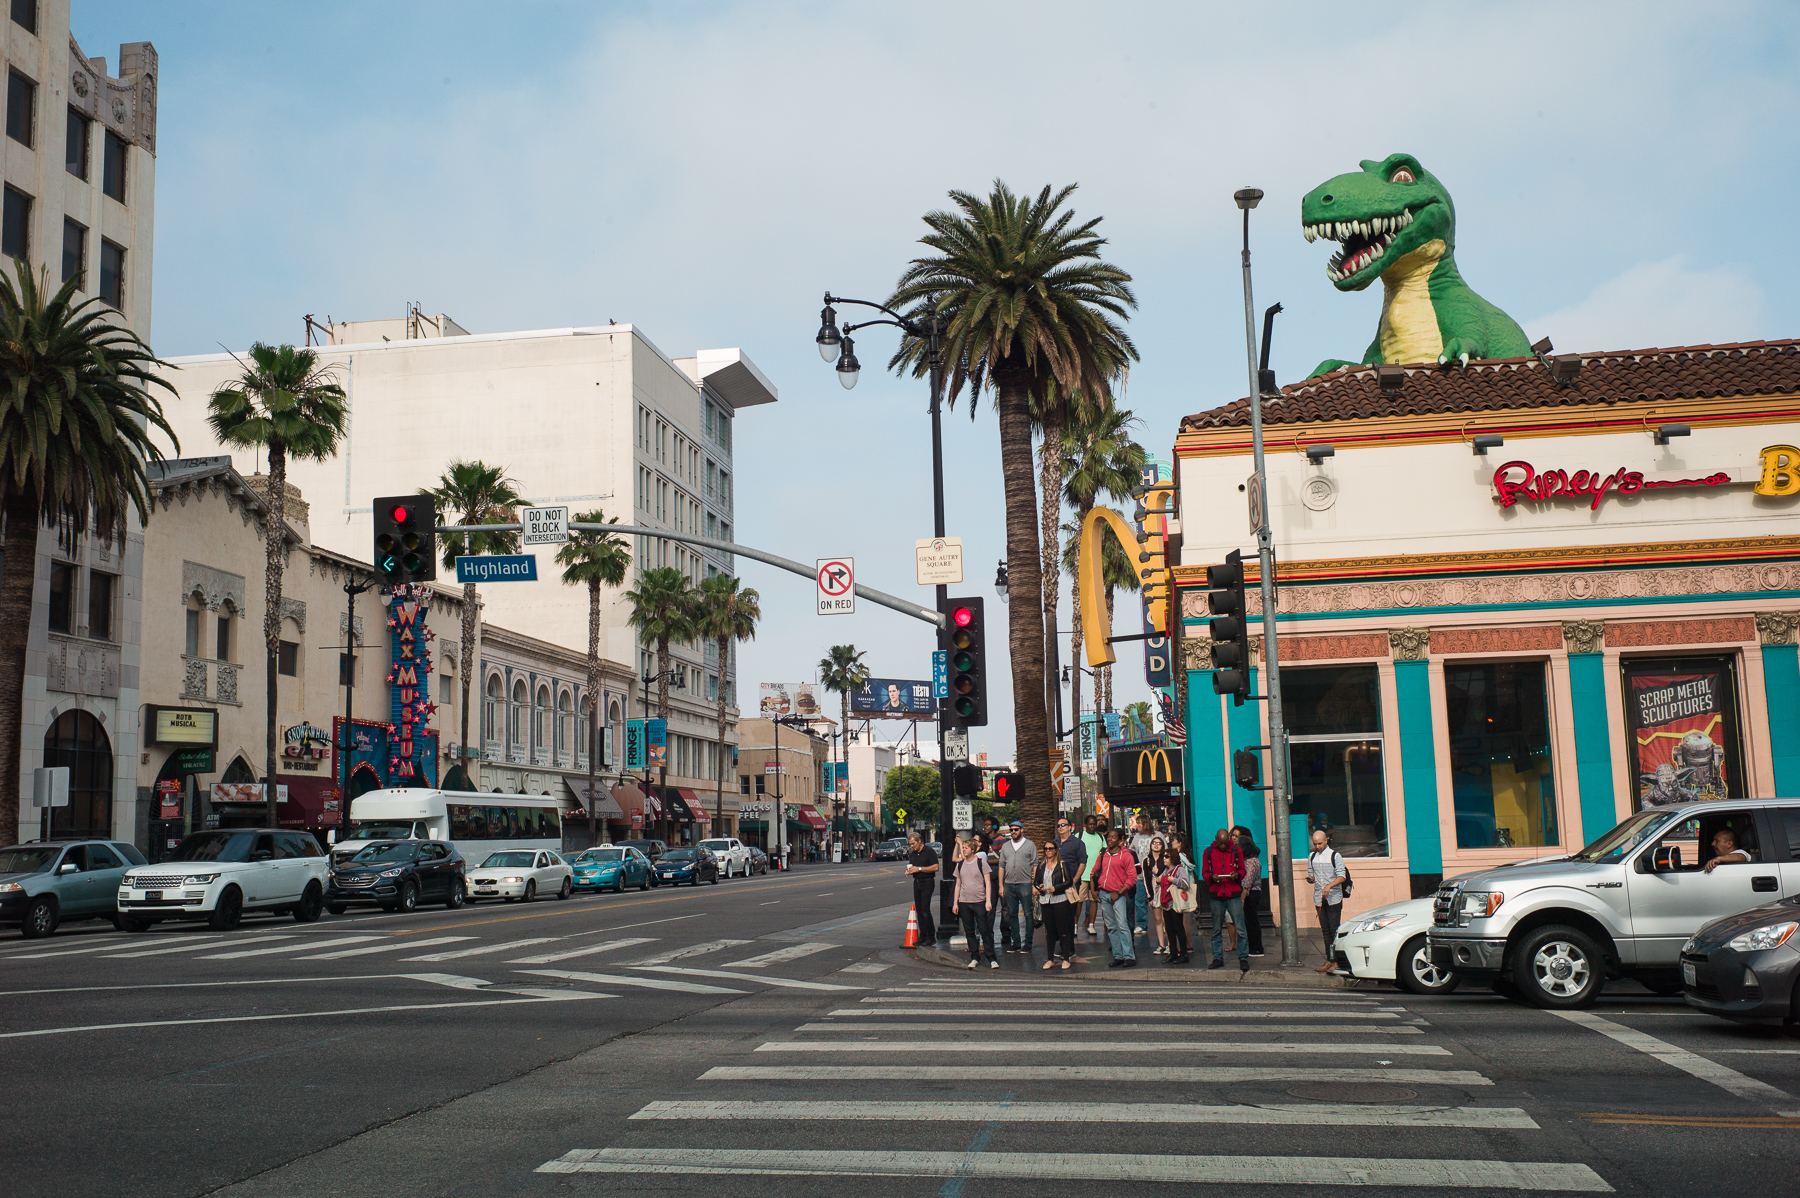
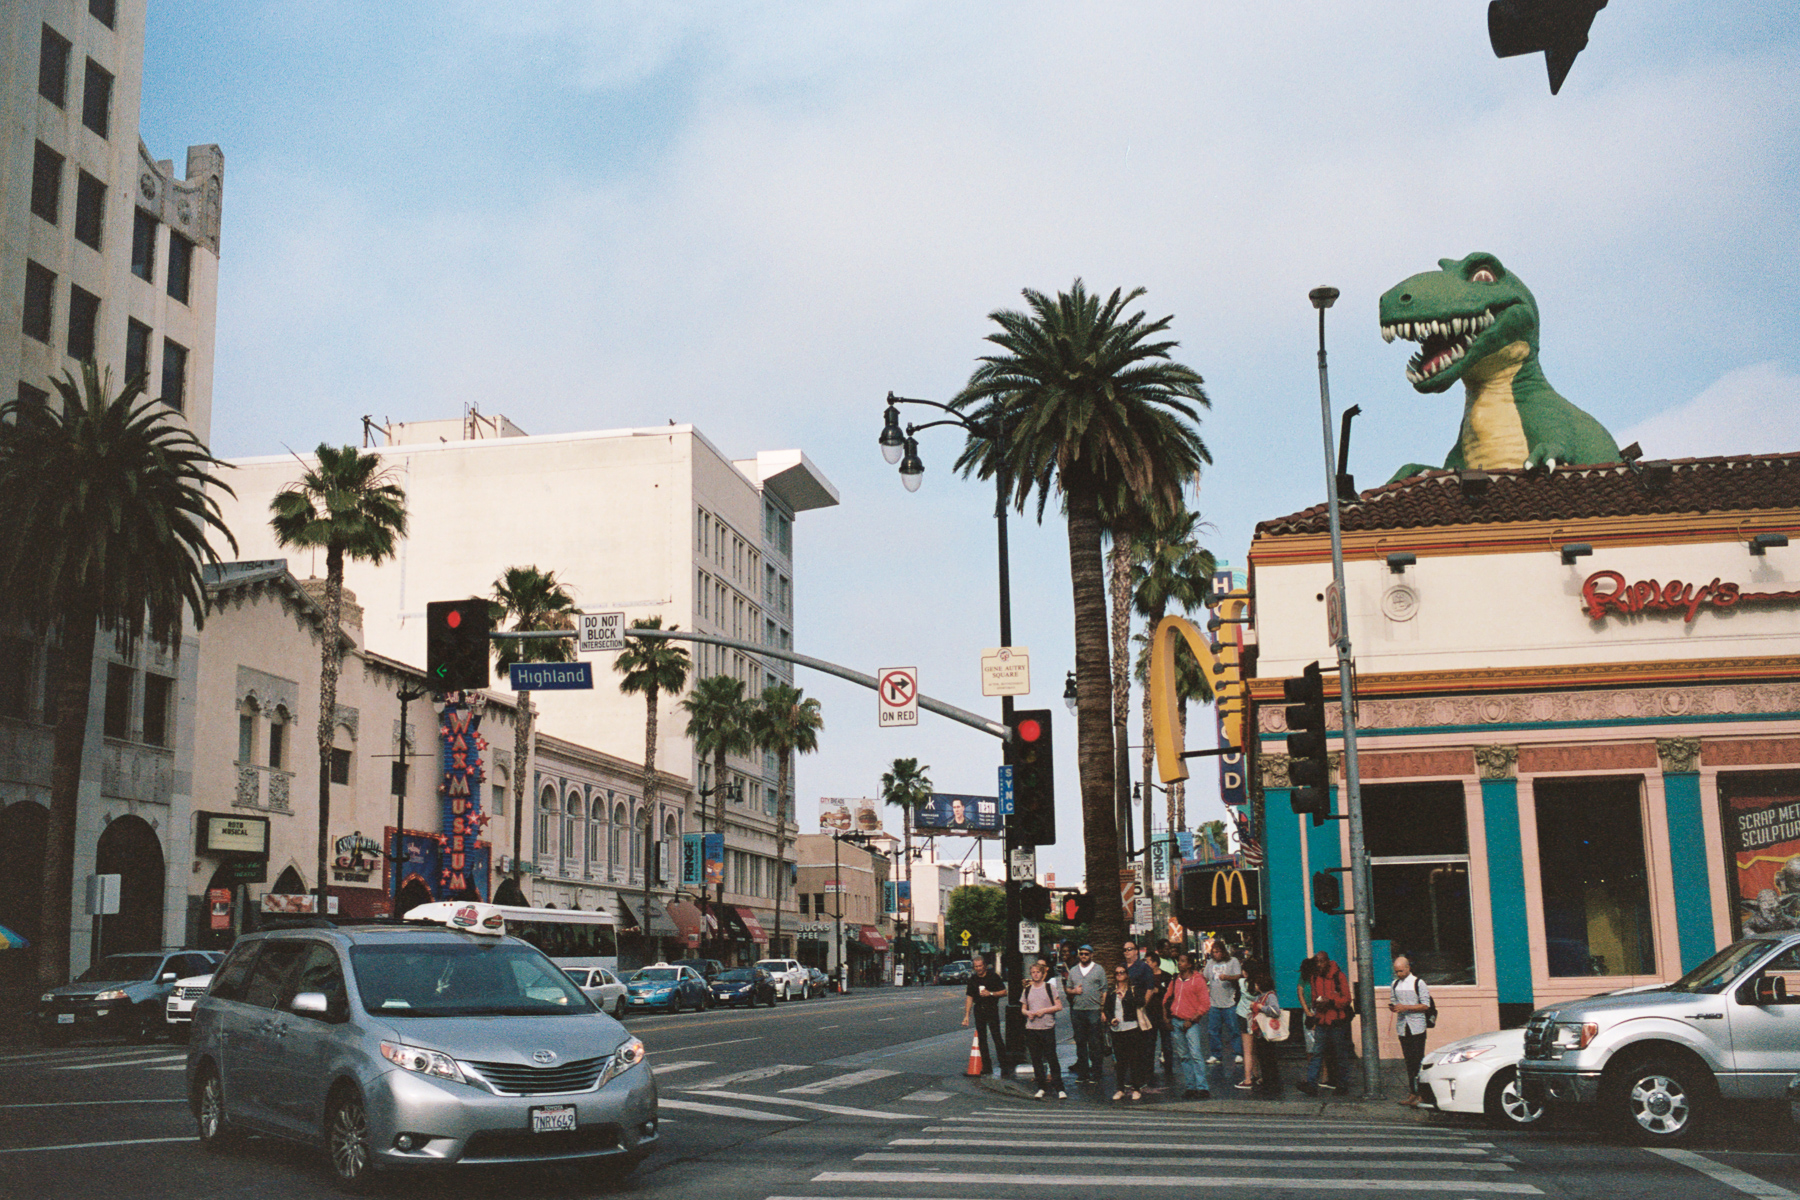
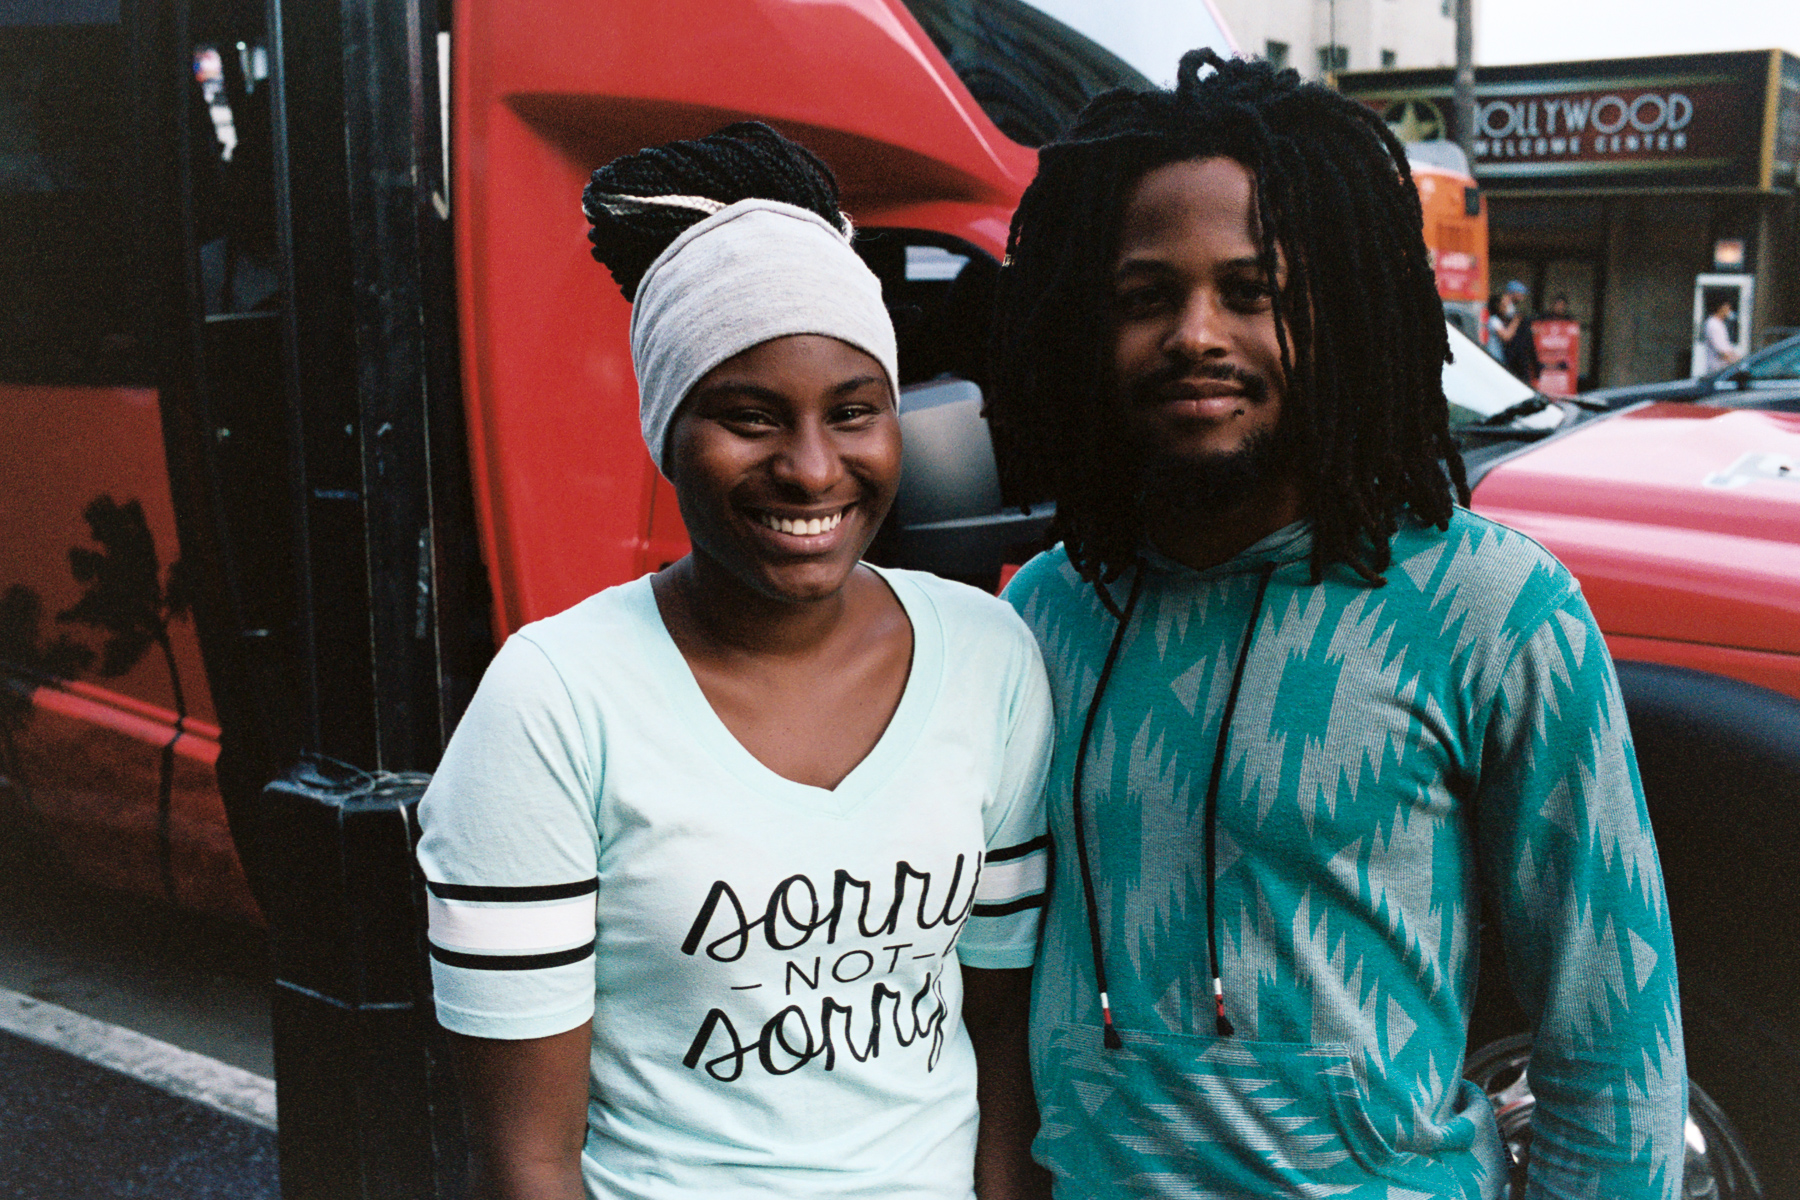
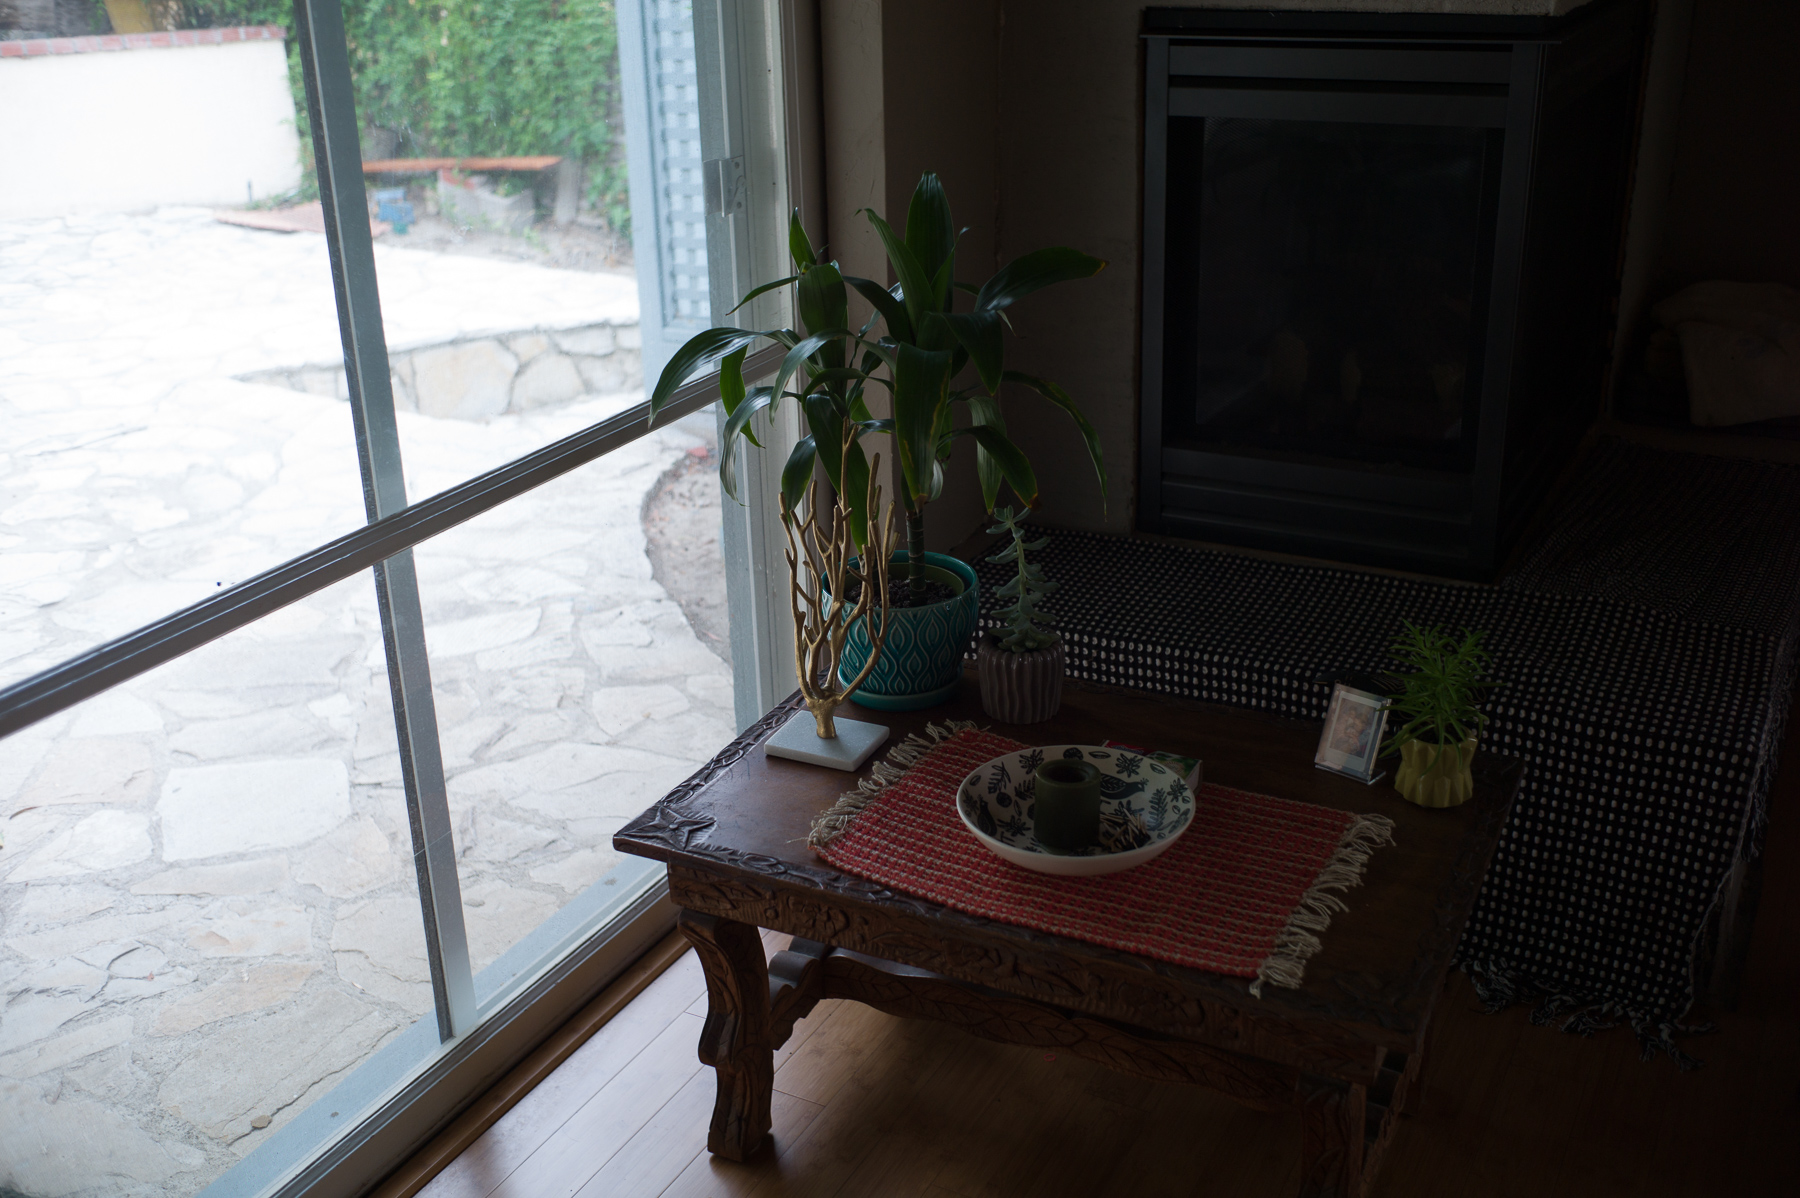
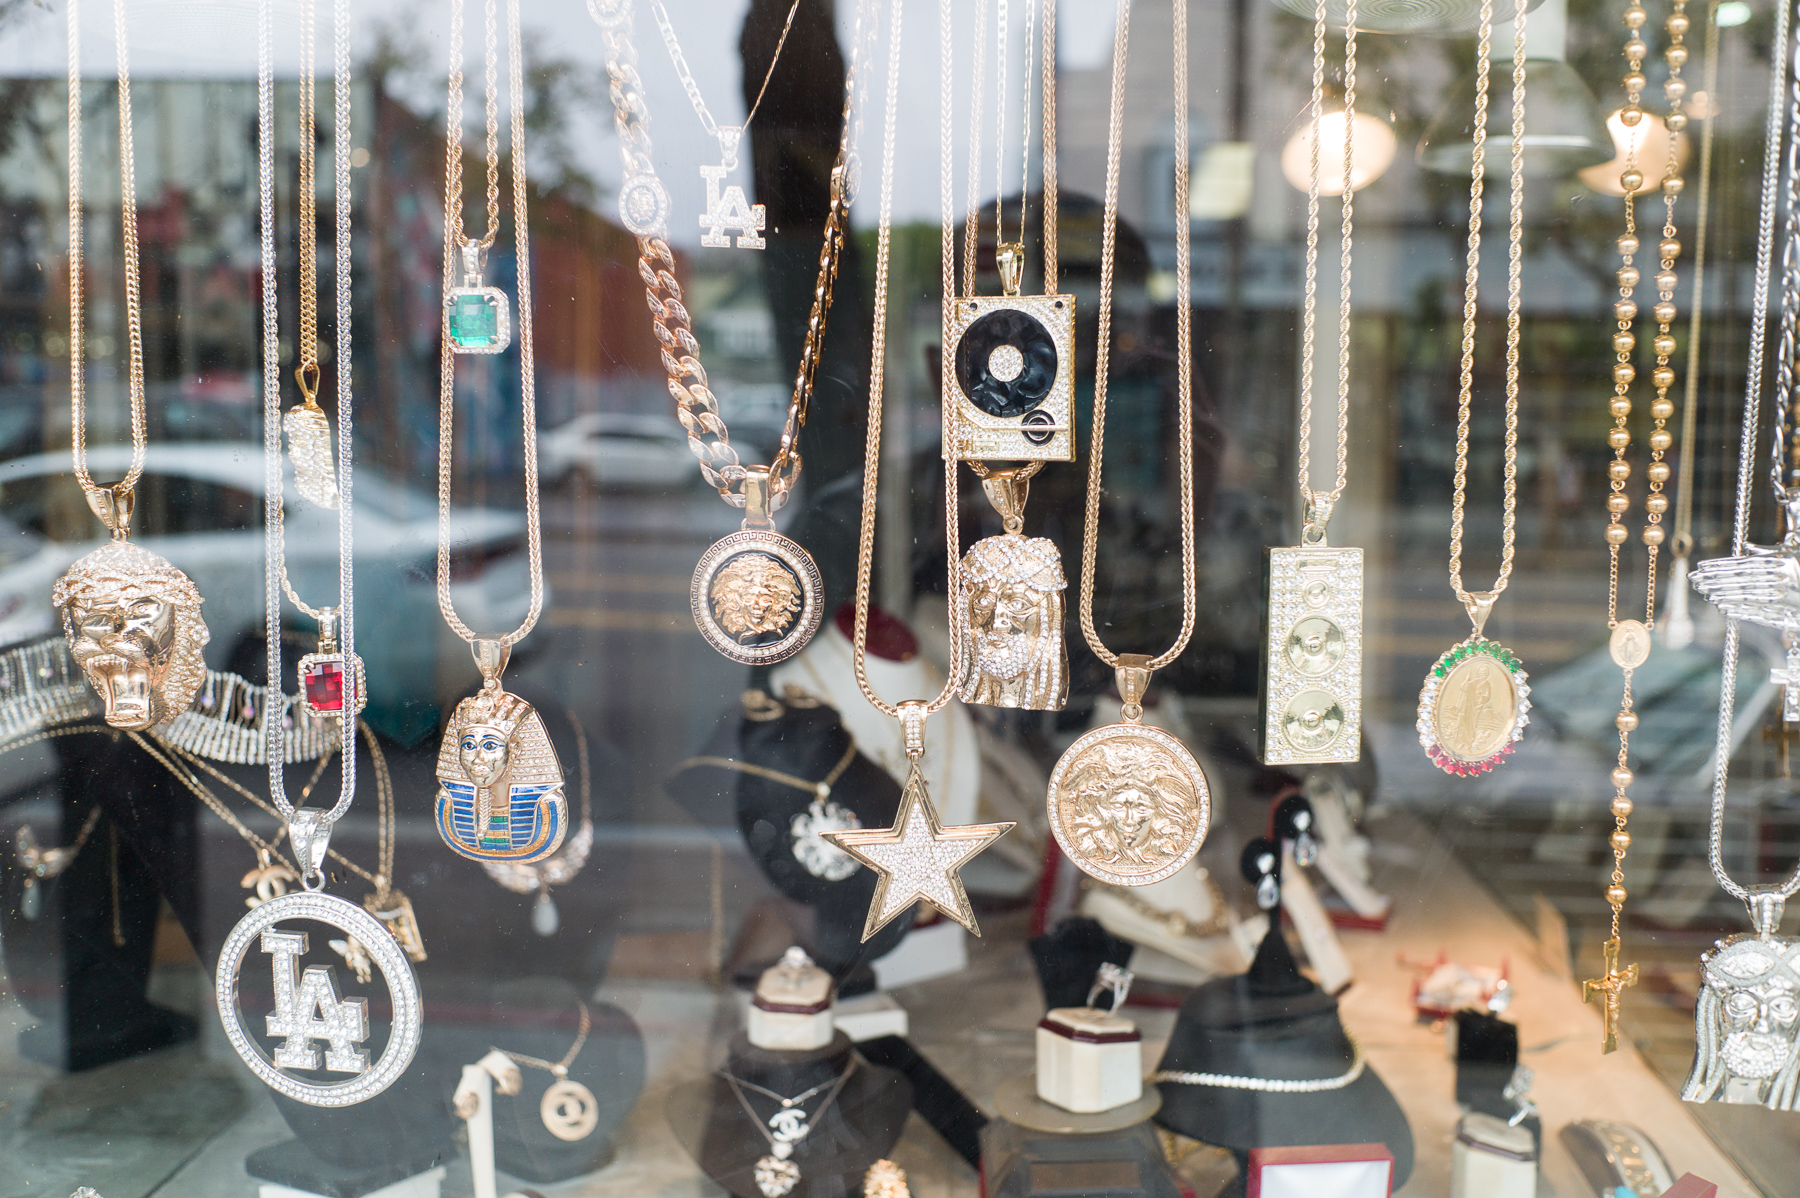
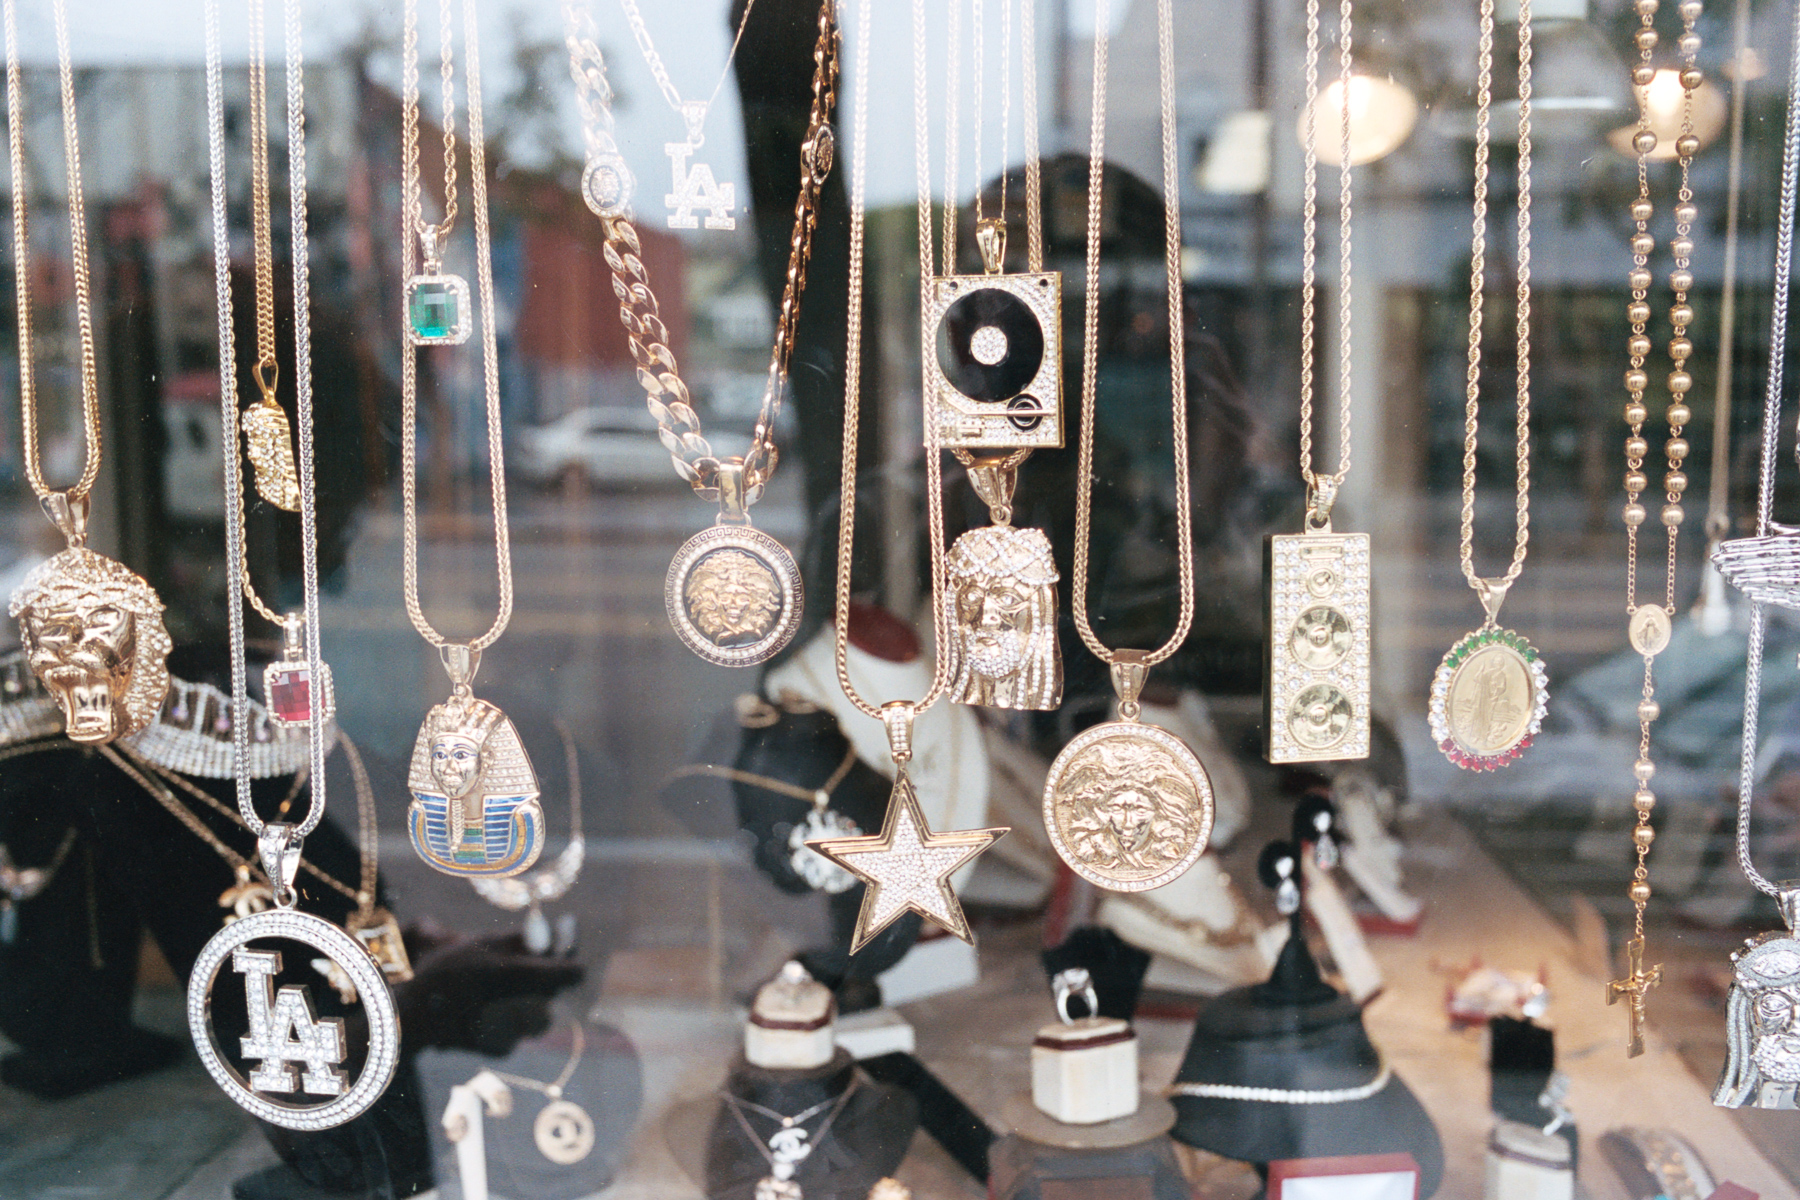
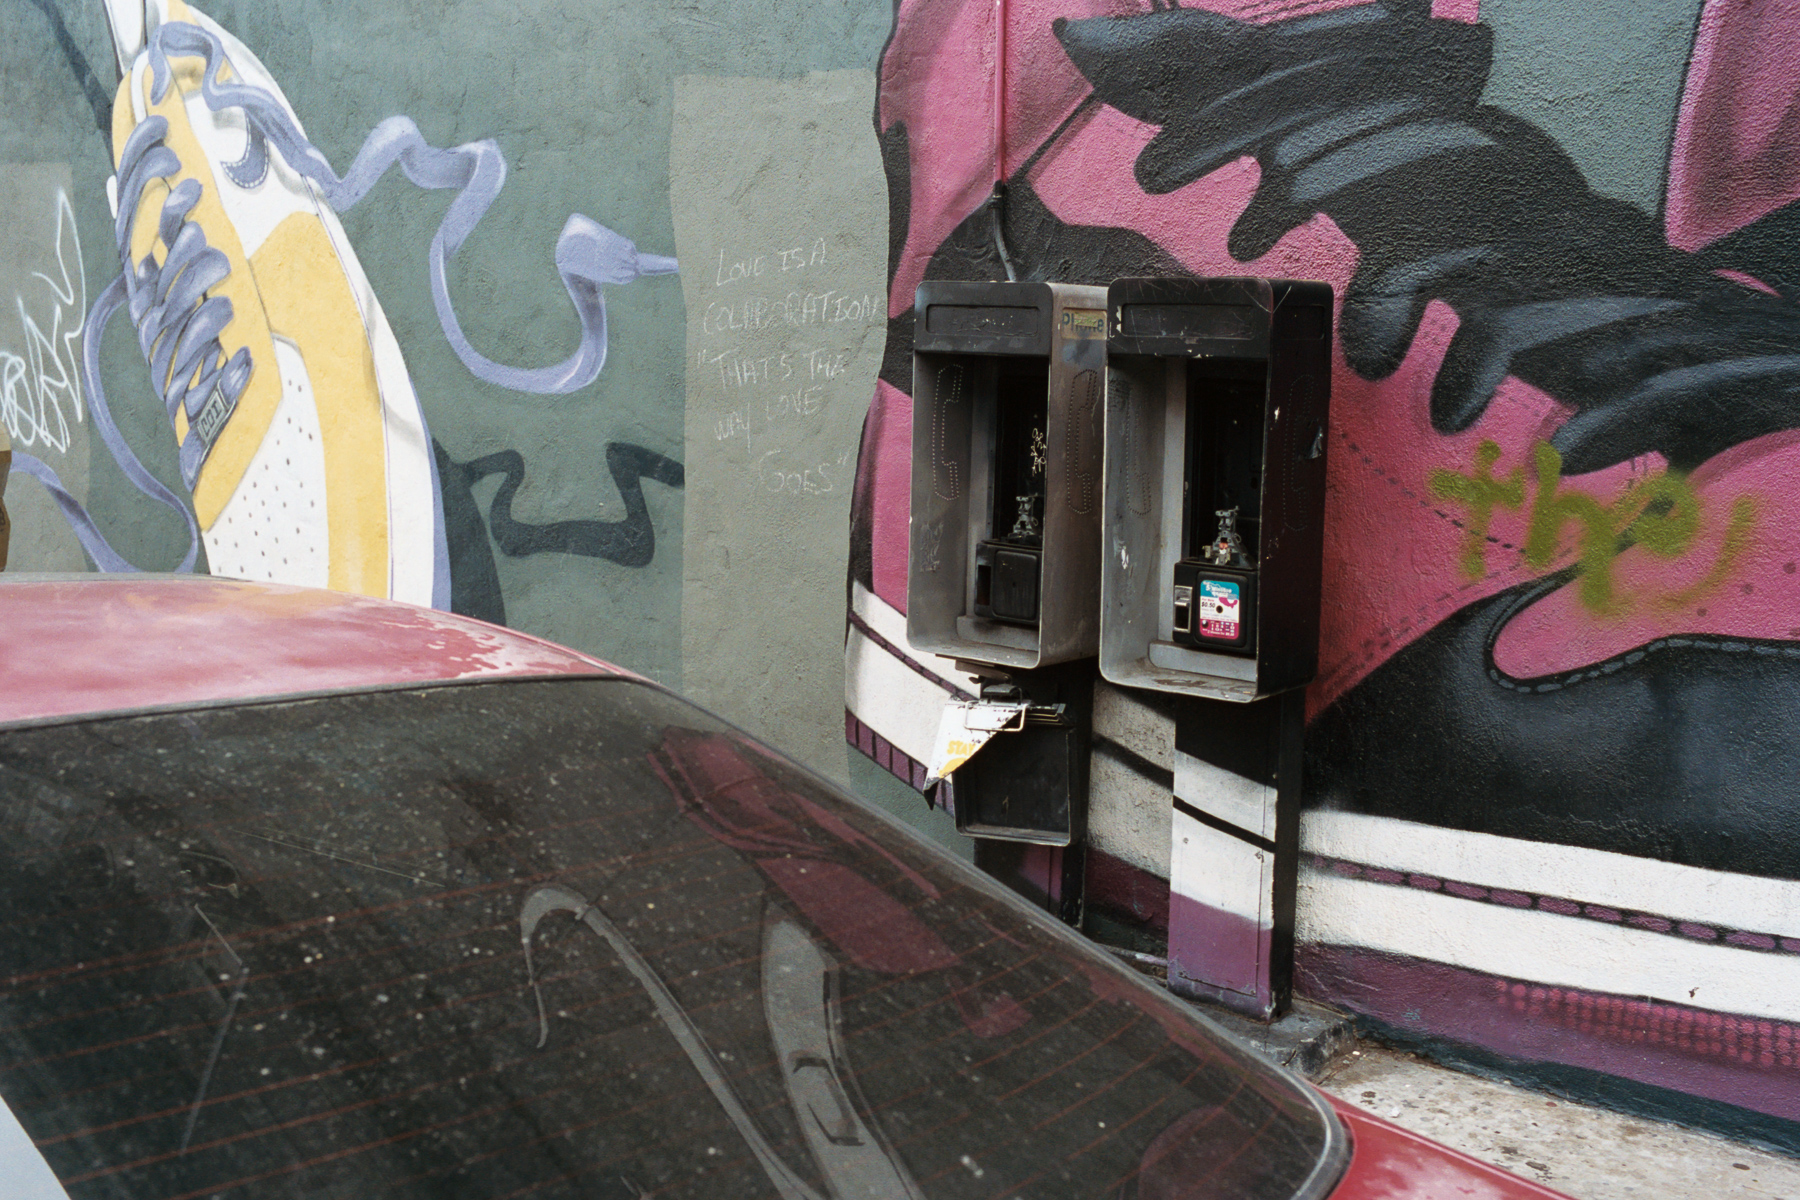
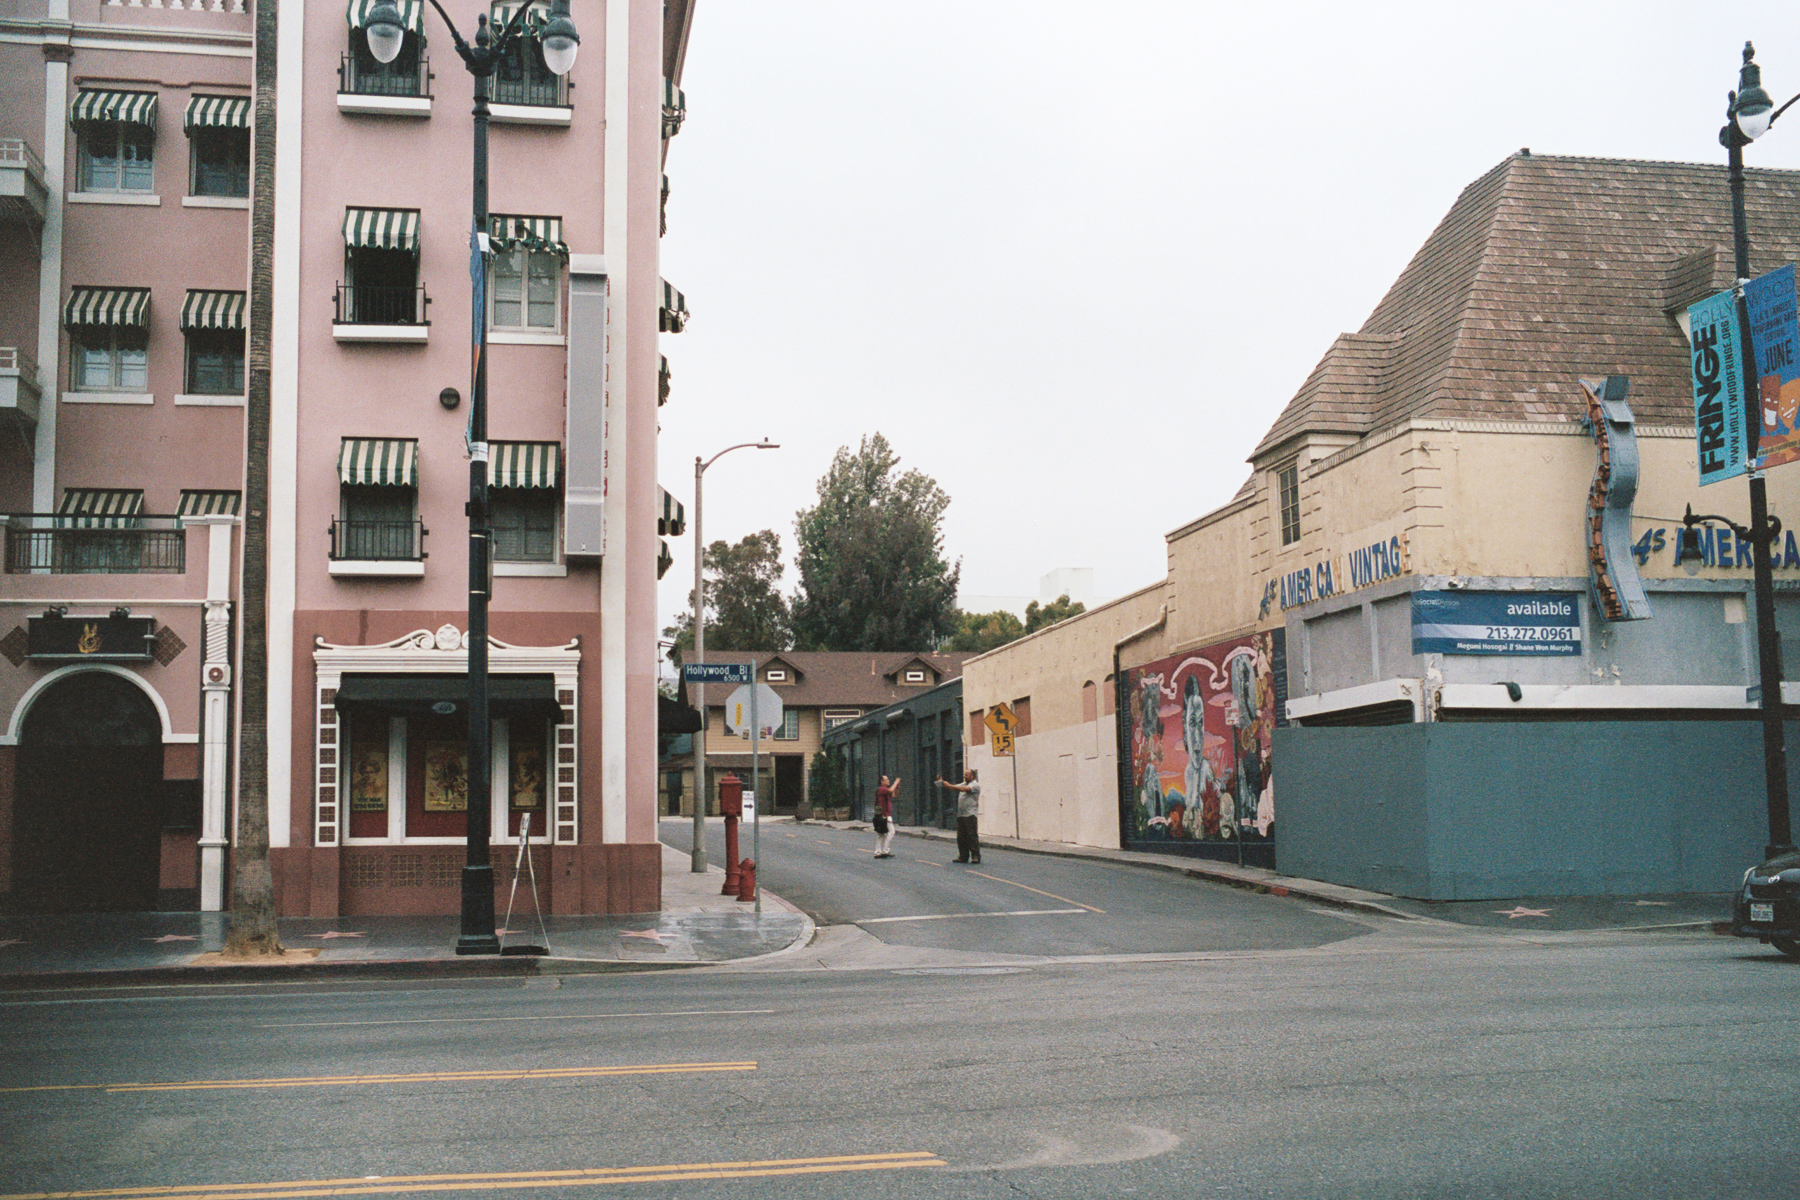
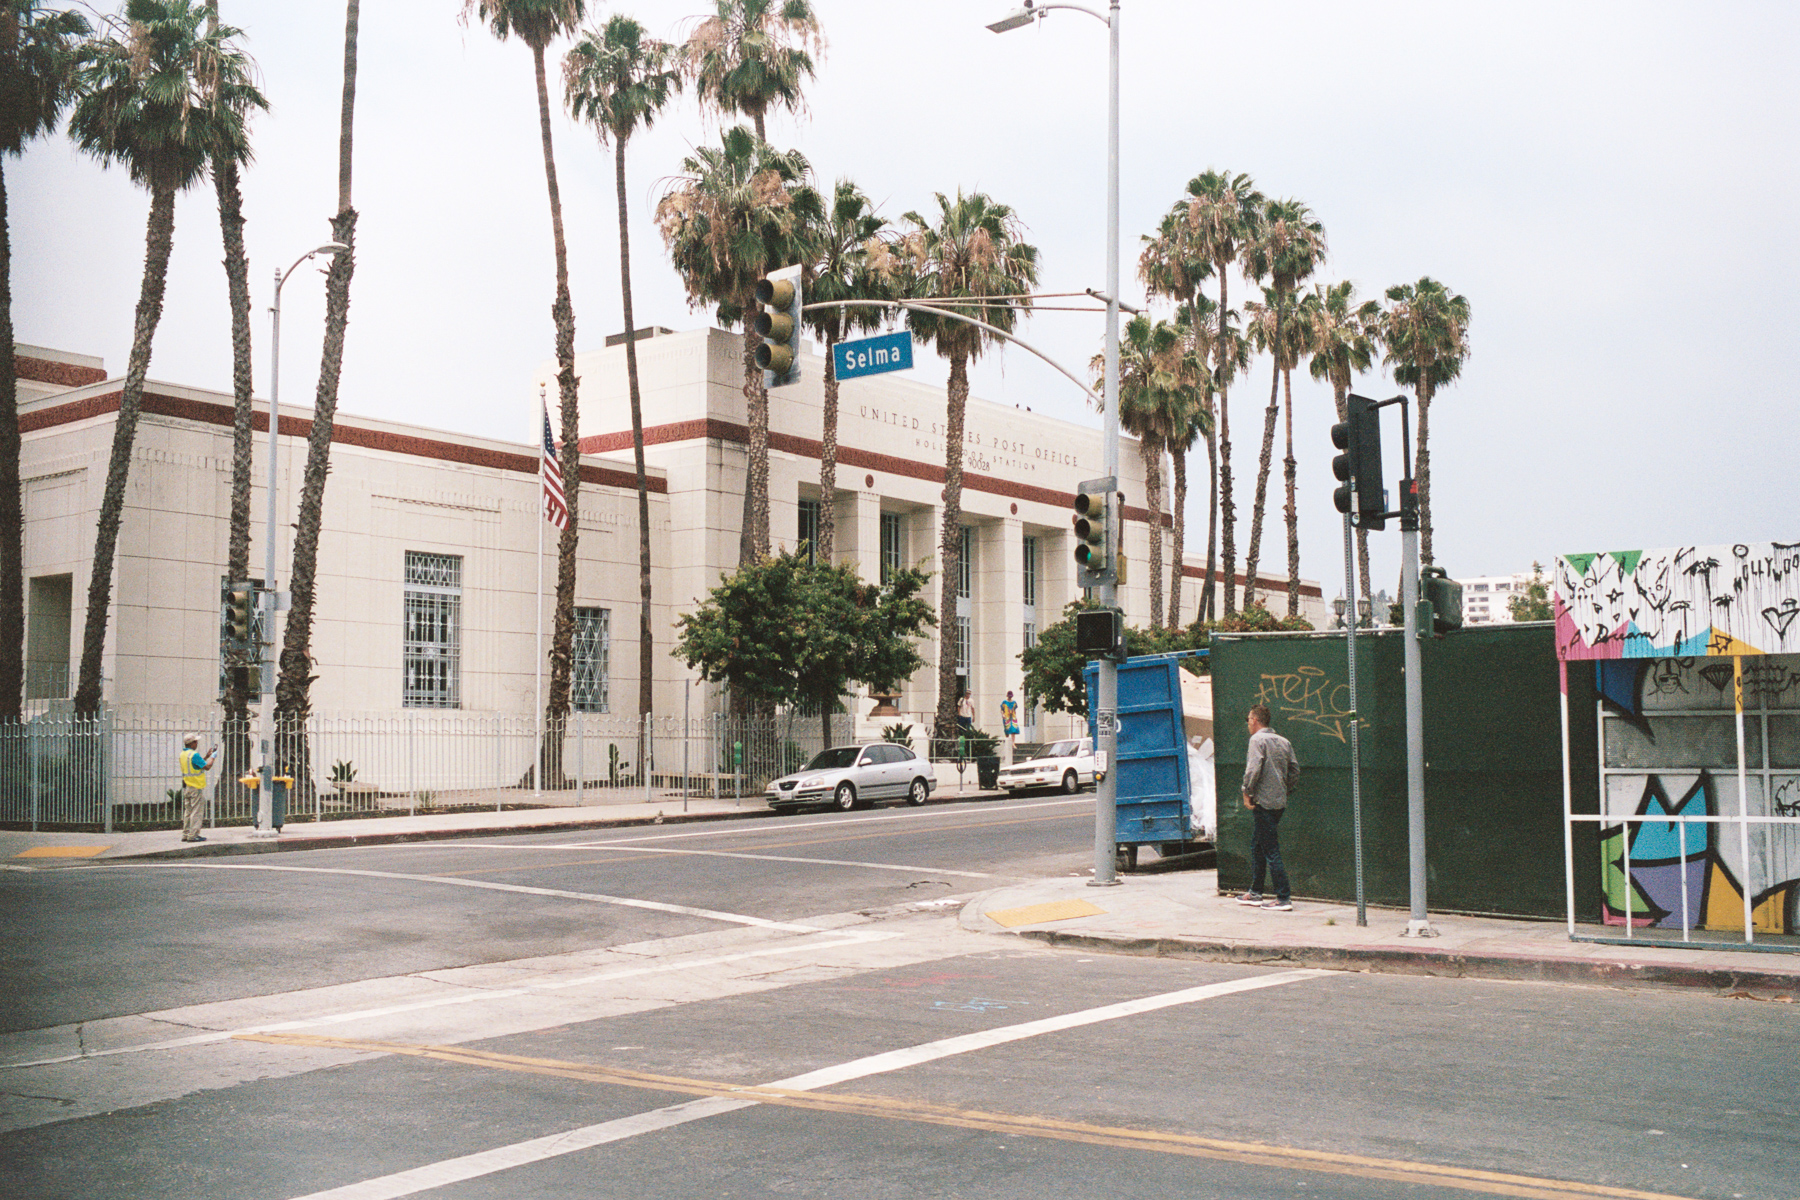
Here are the images, you can click them for larger
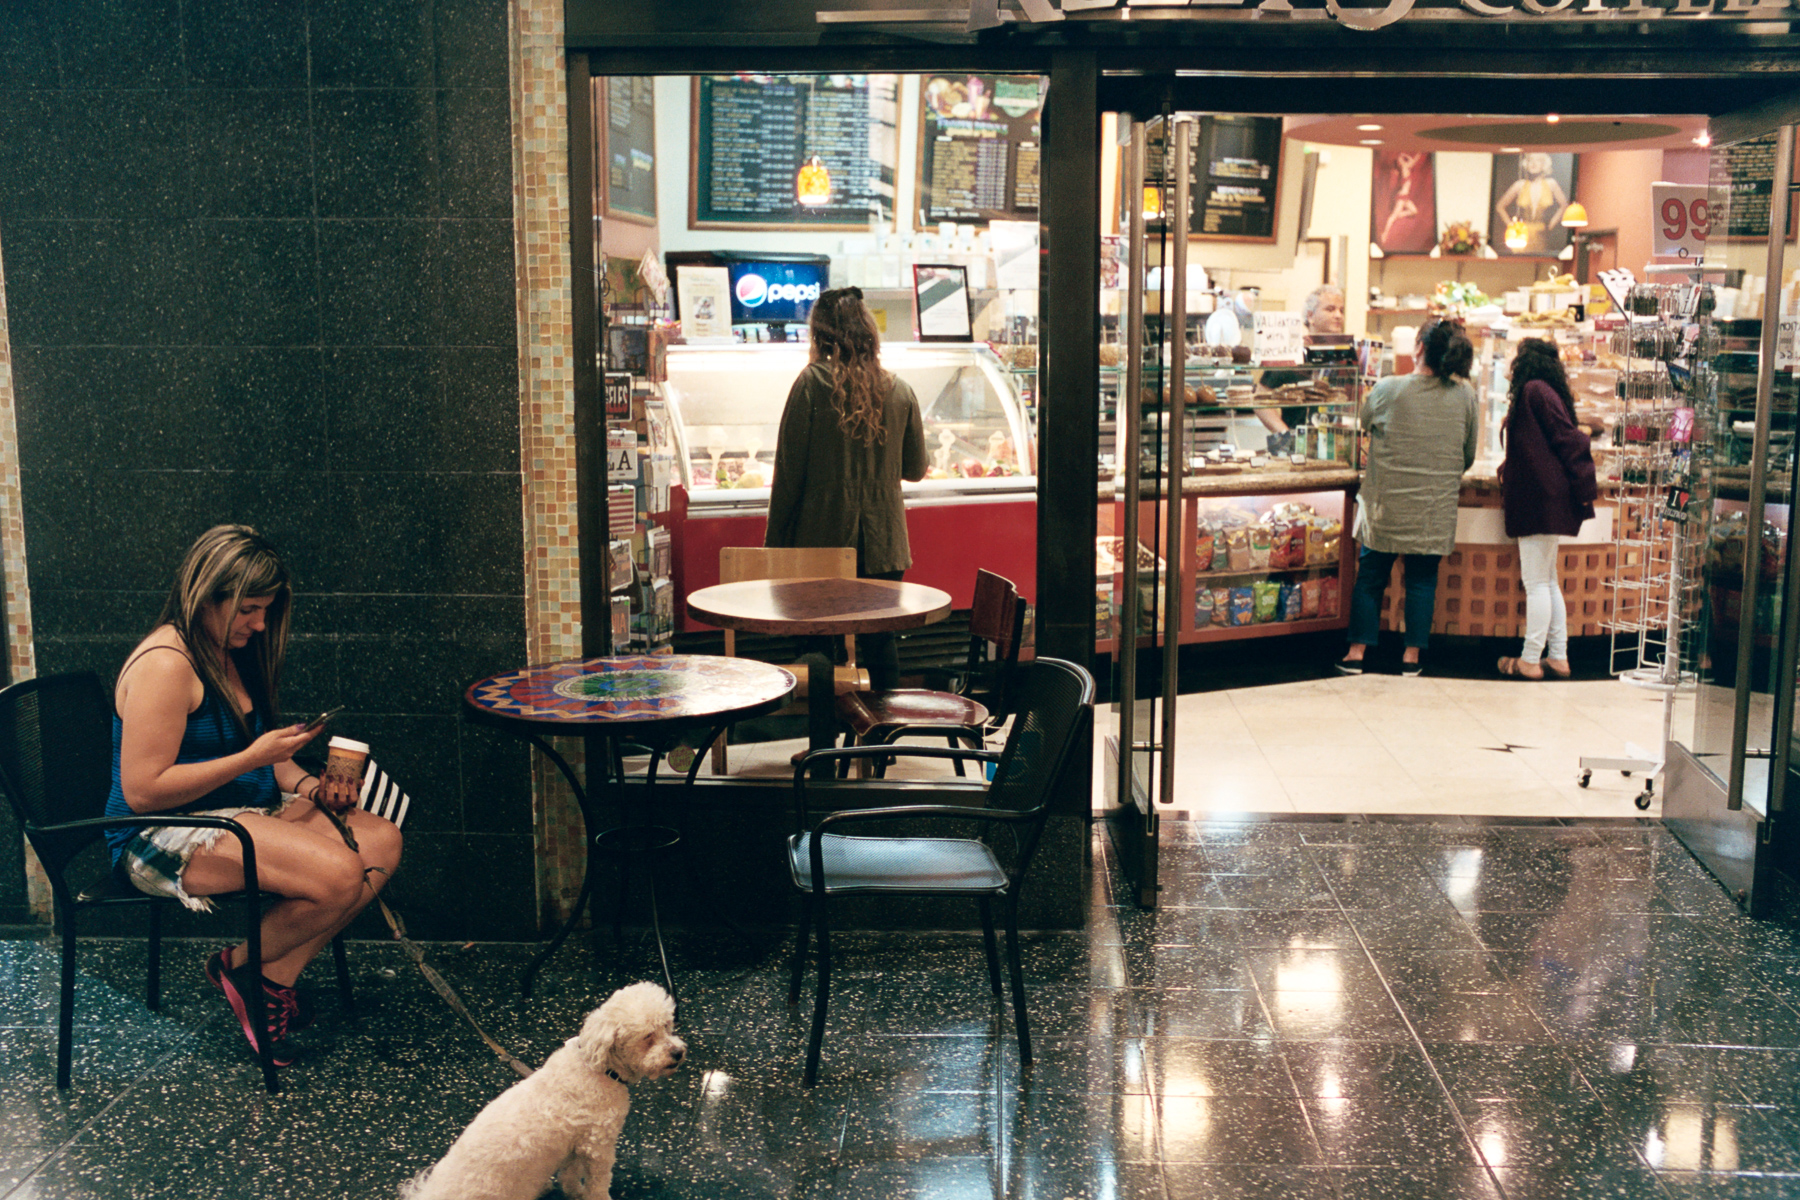
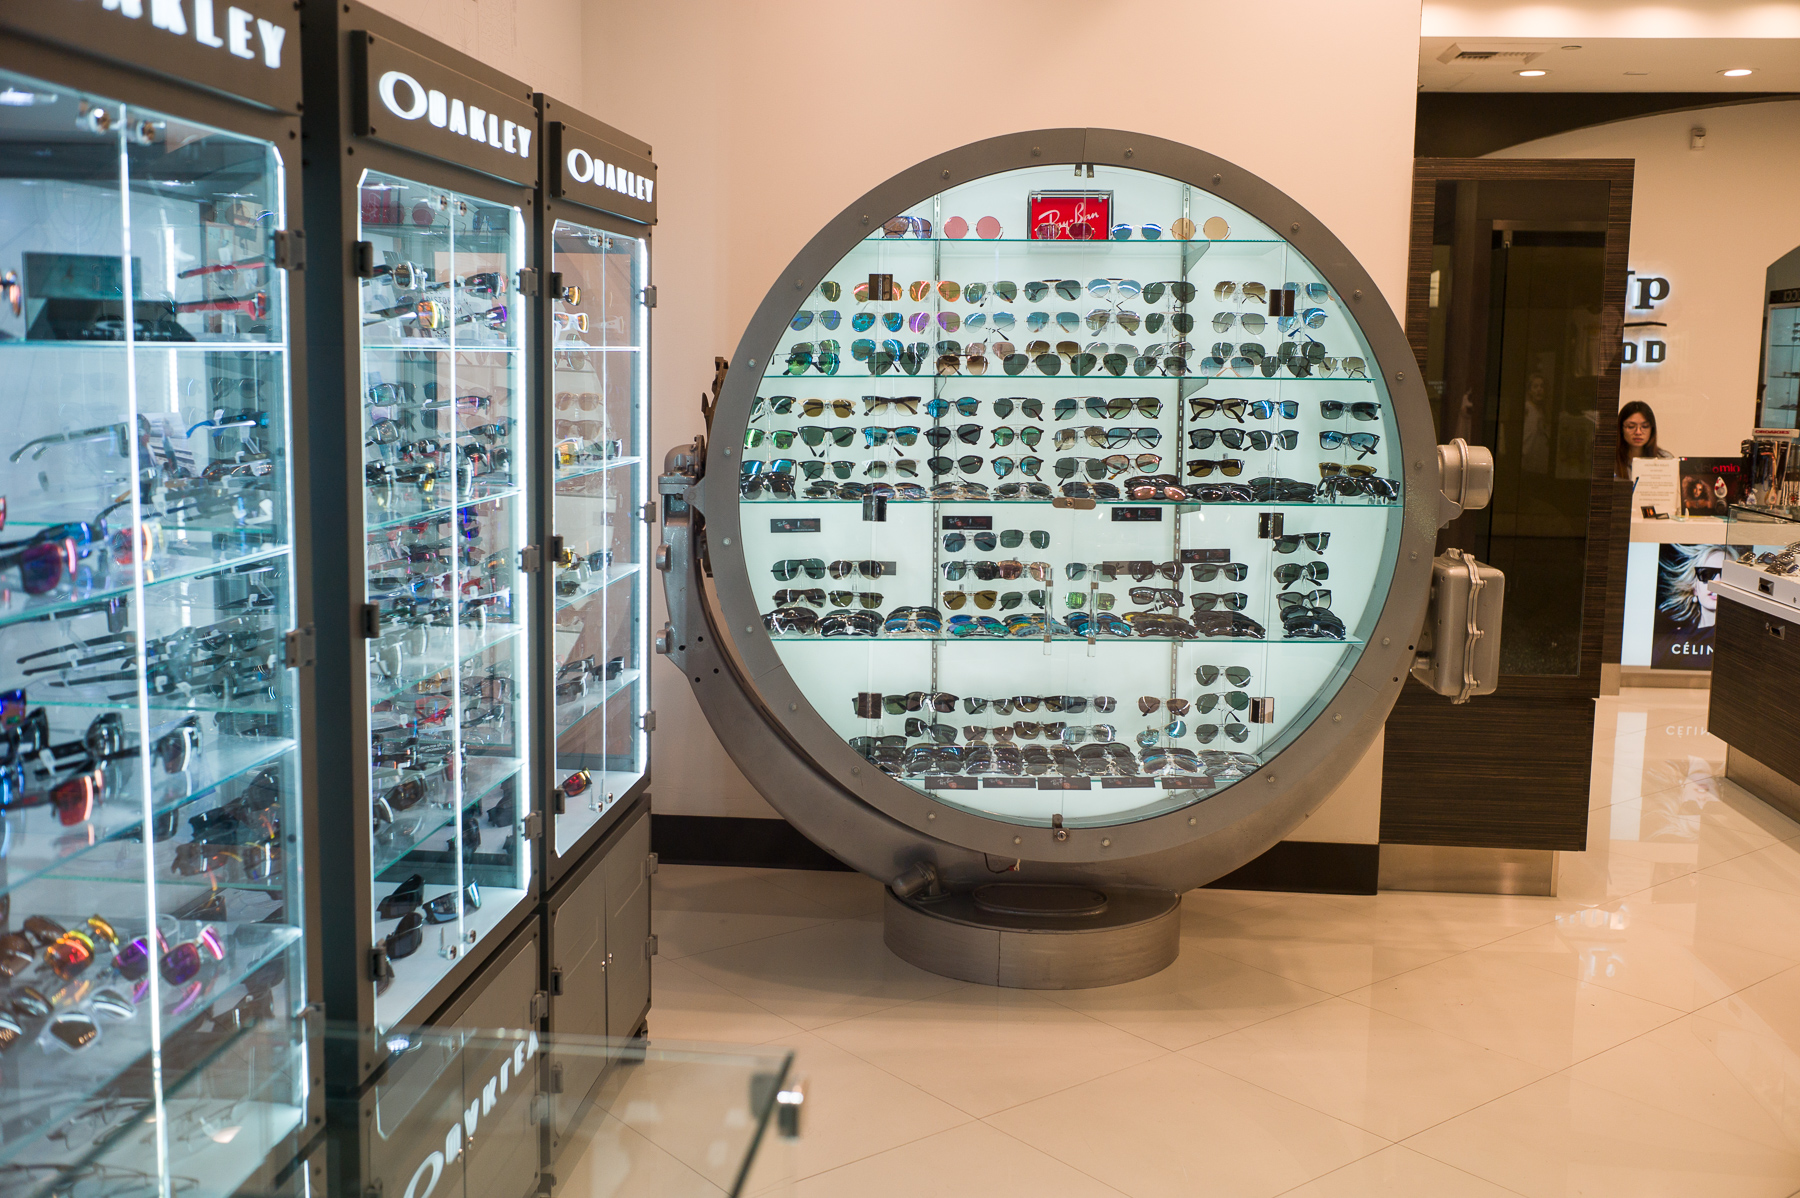
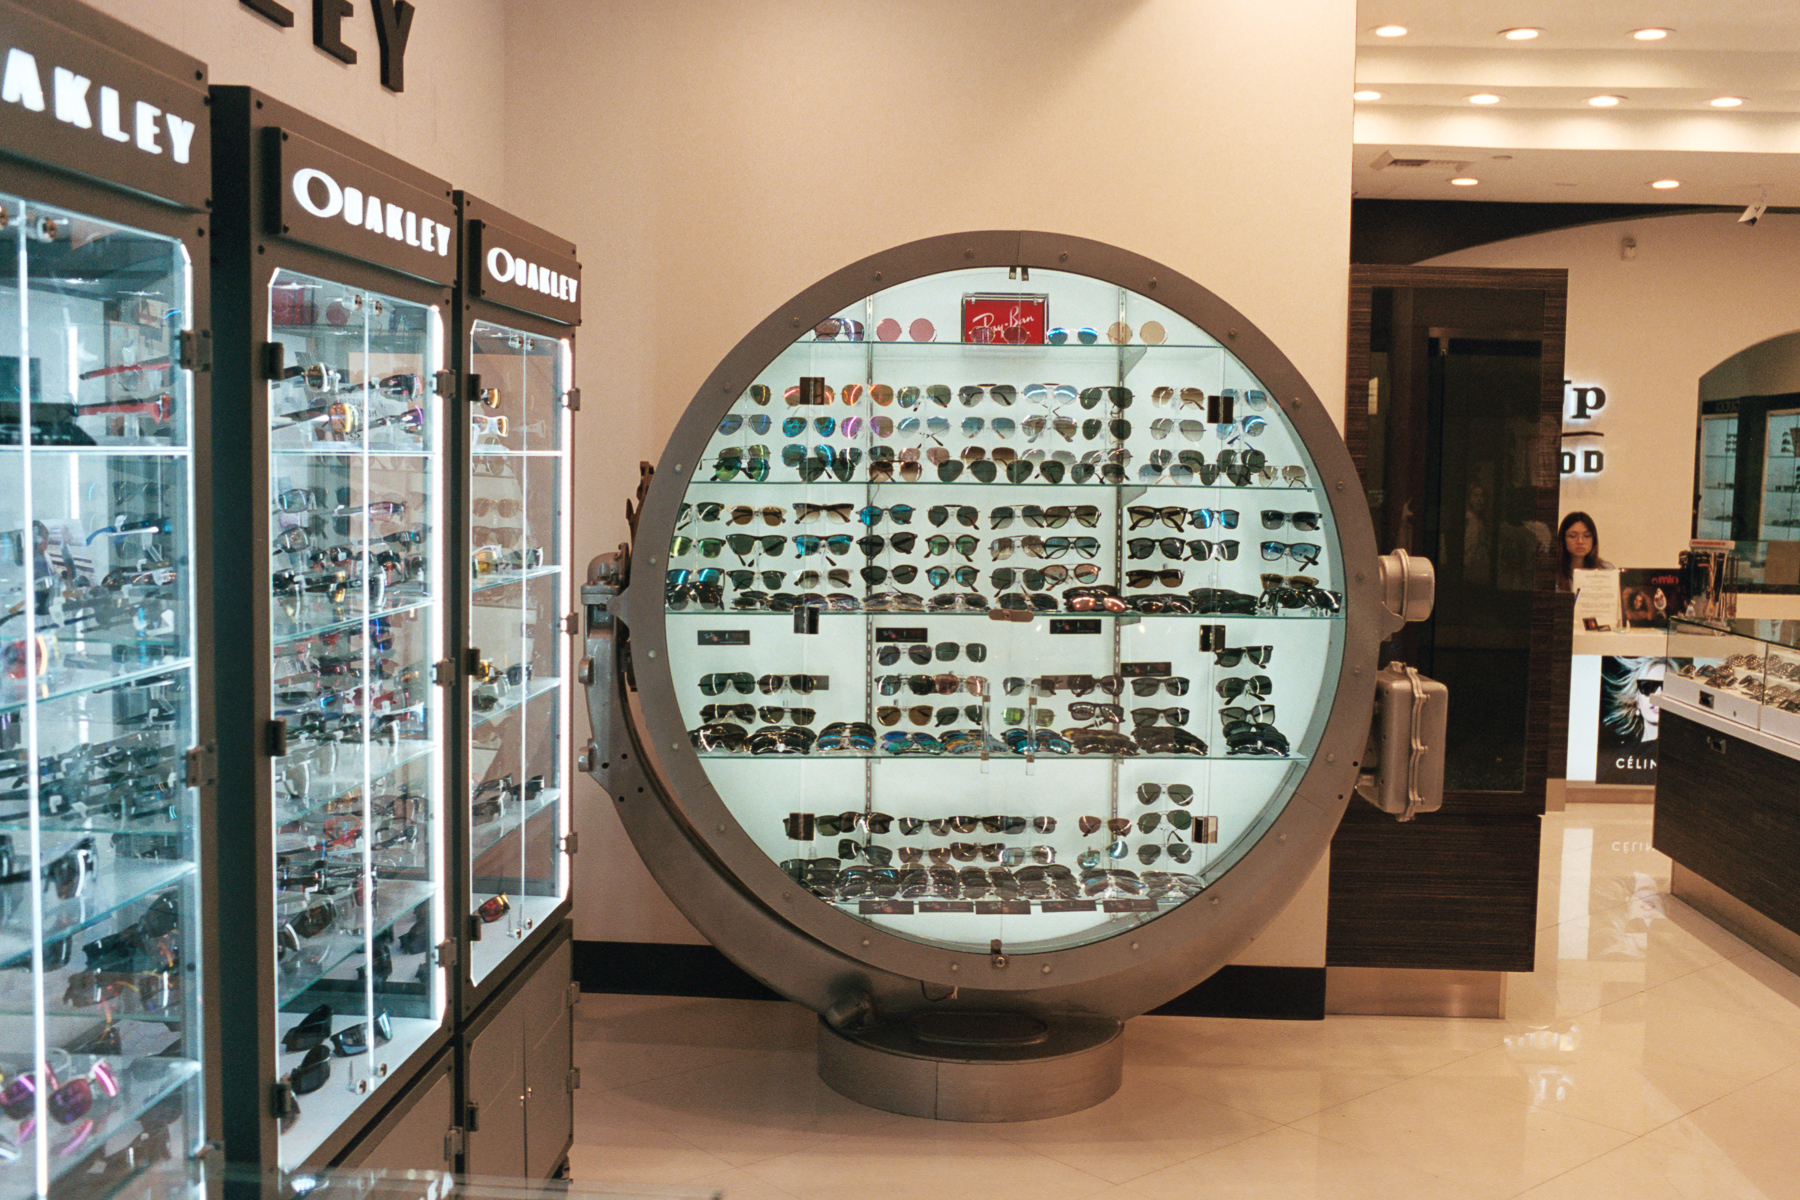
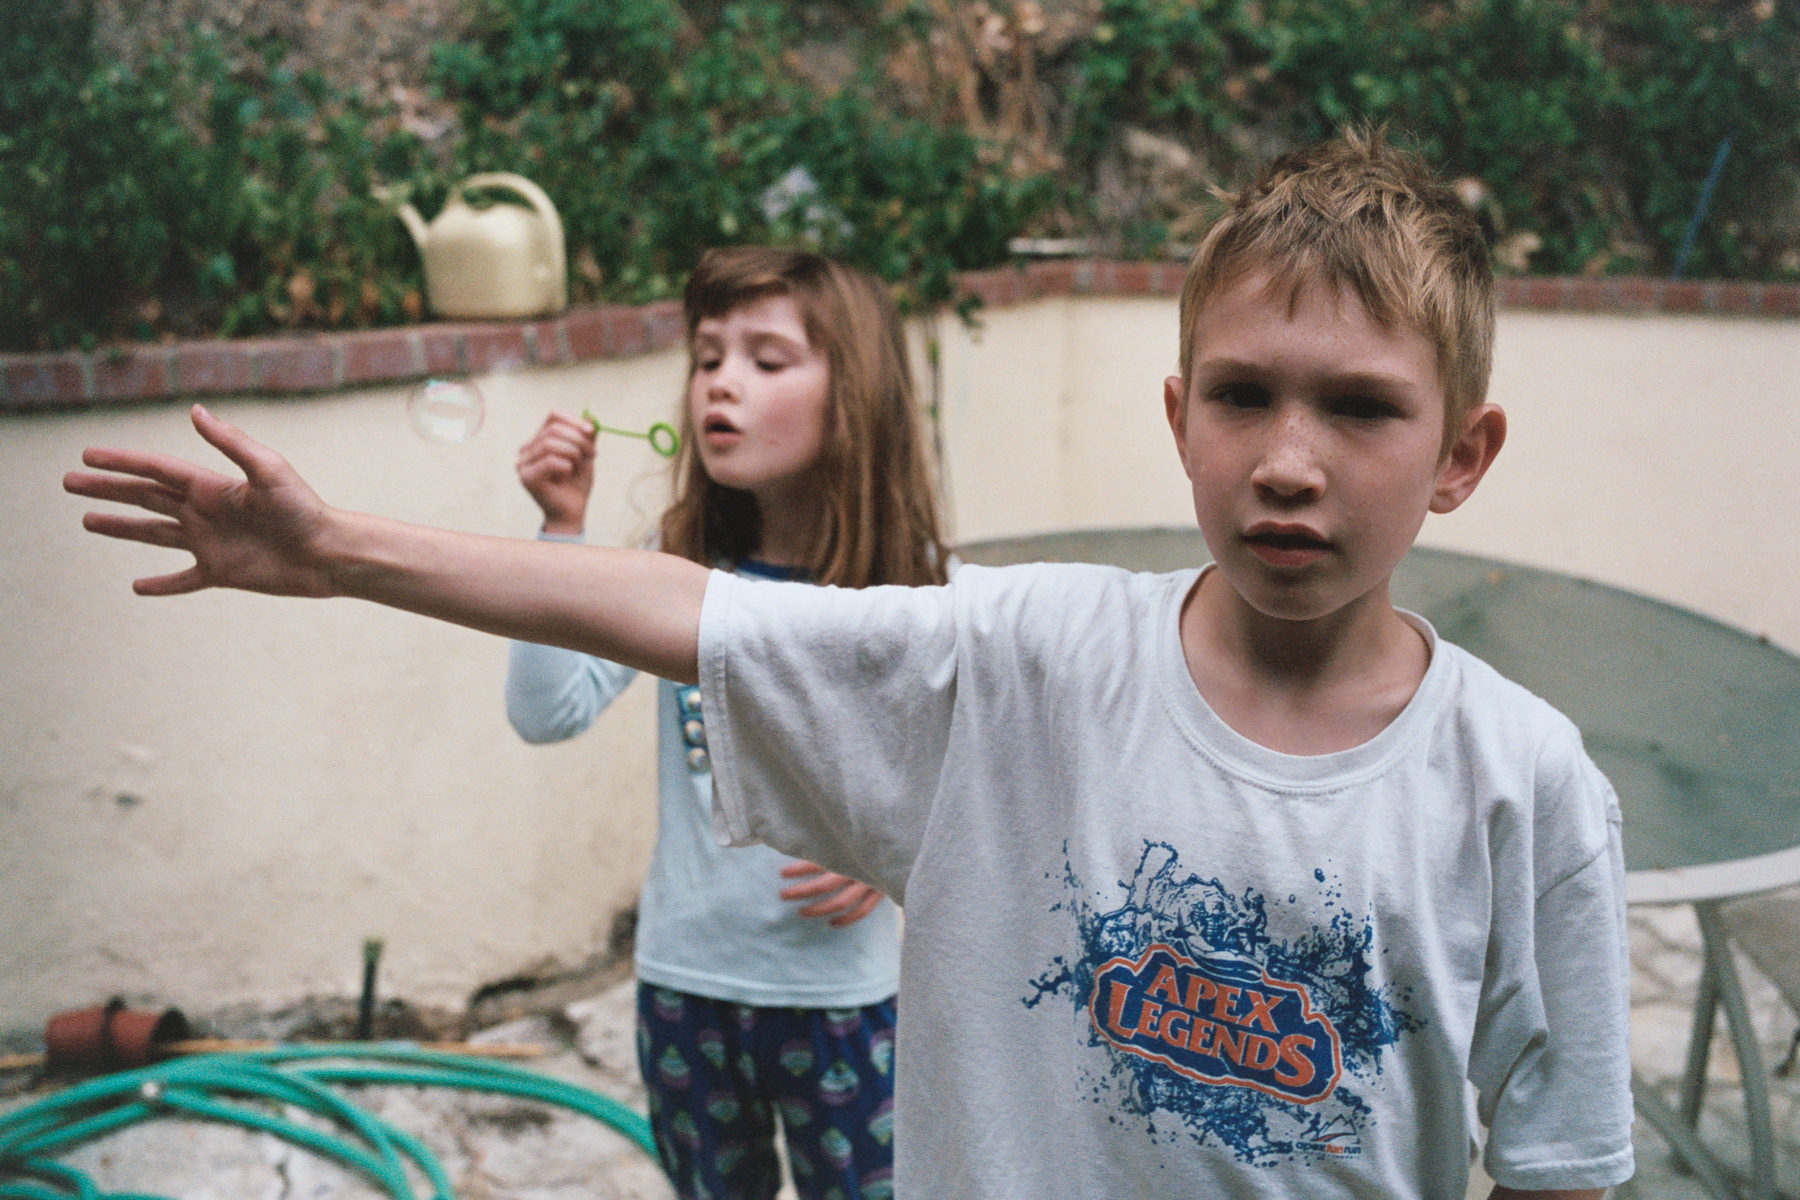
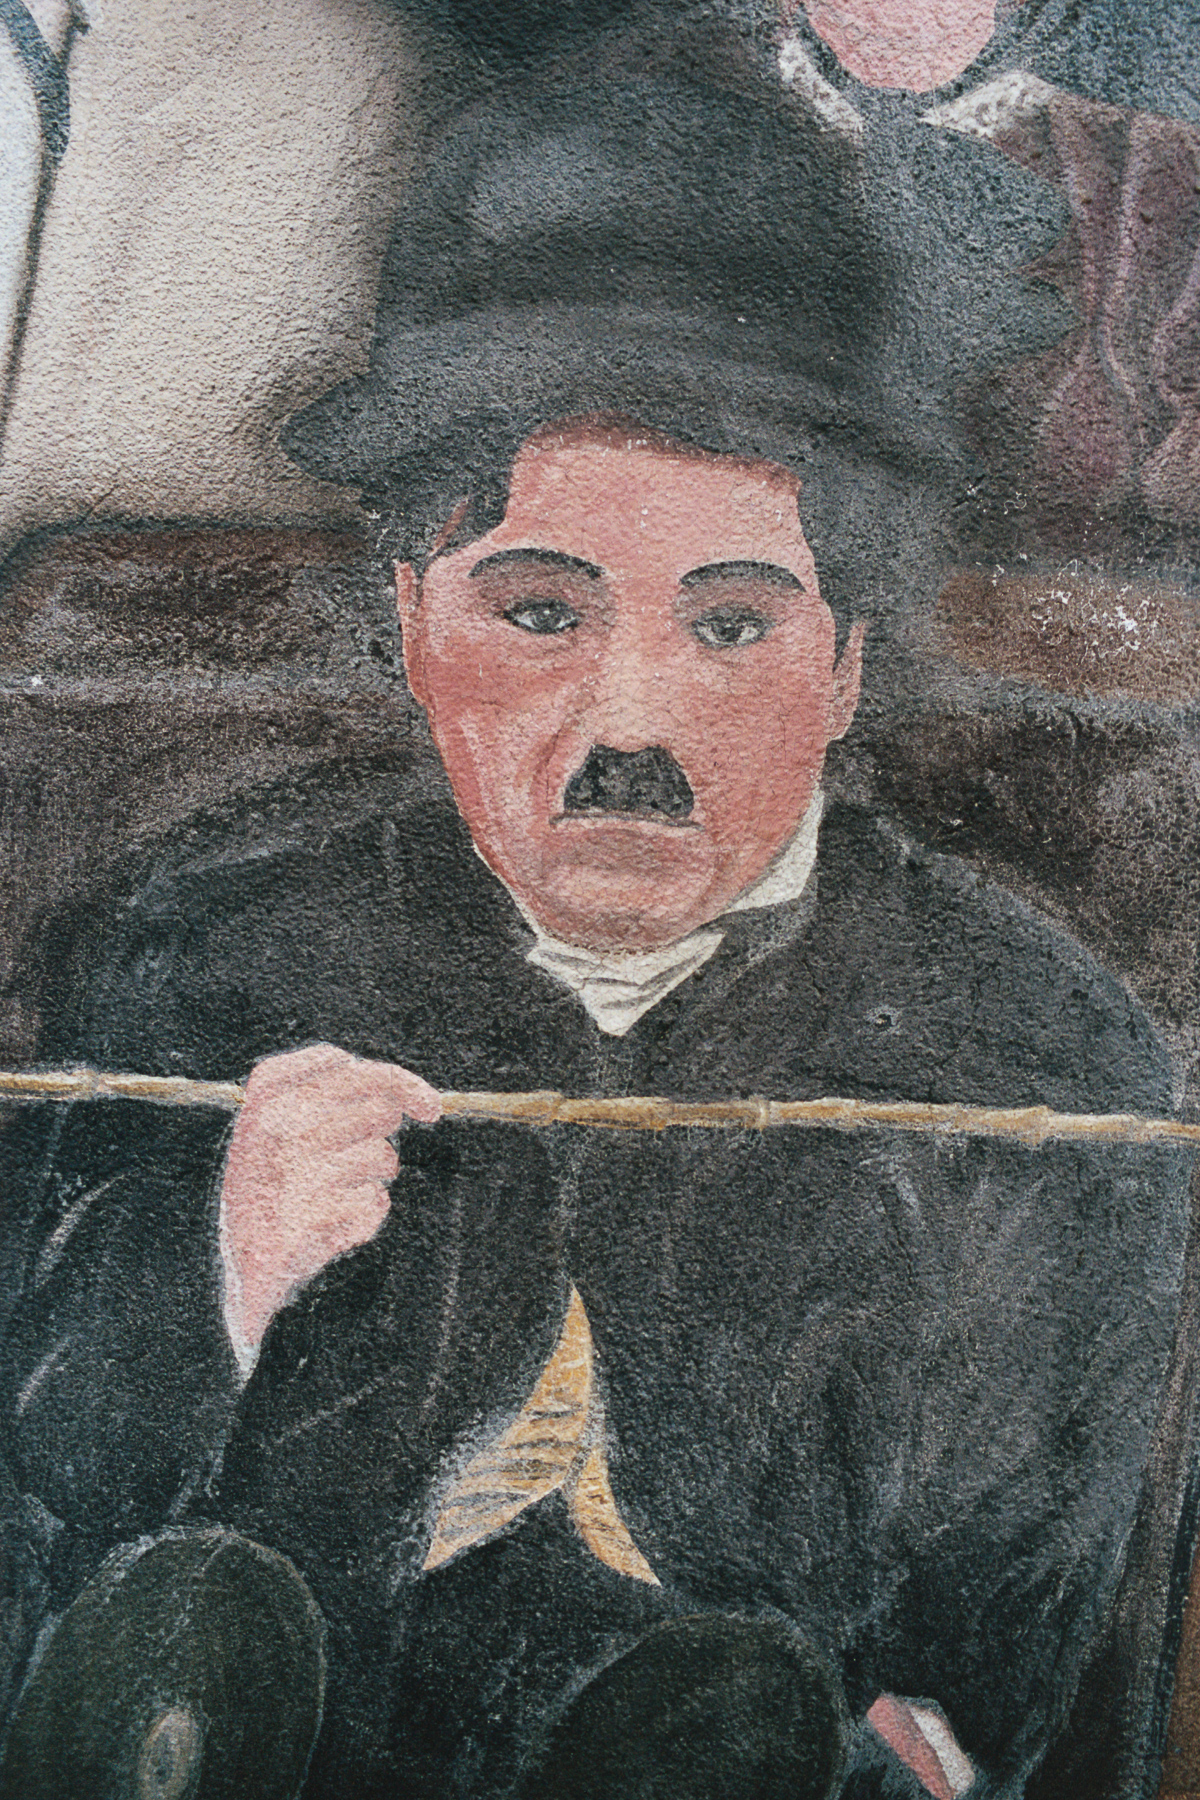
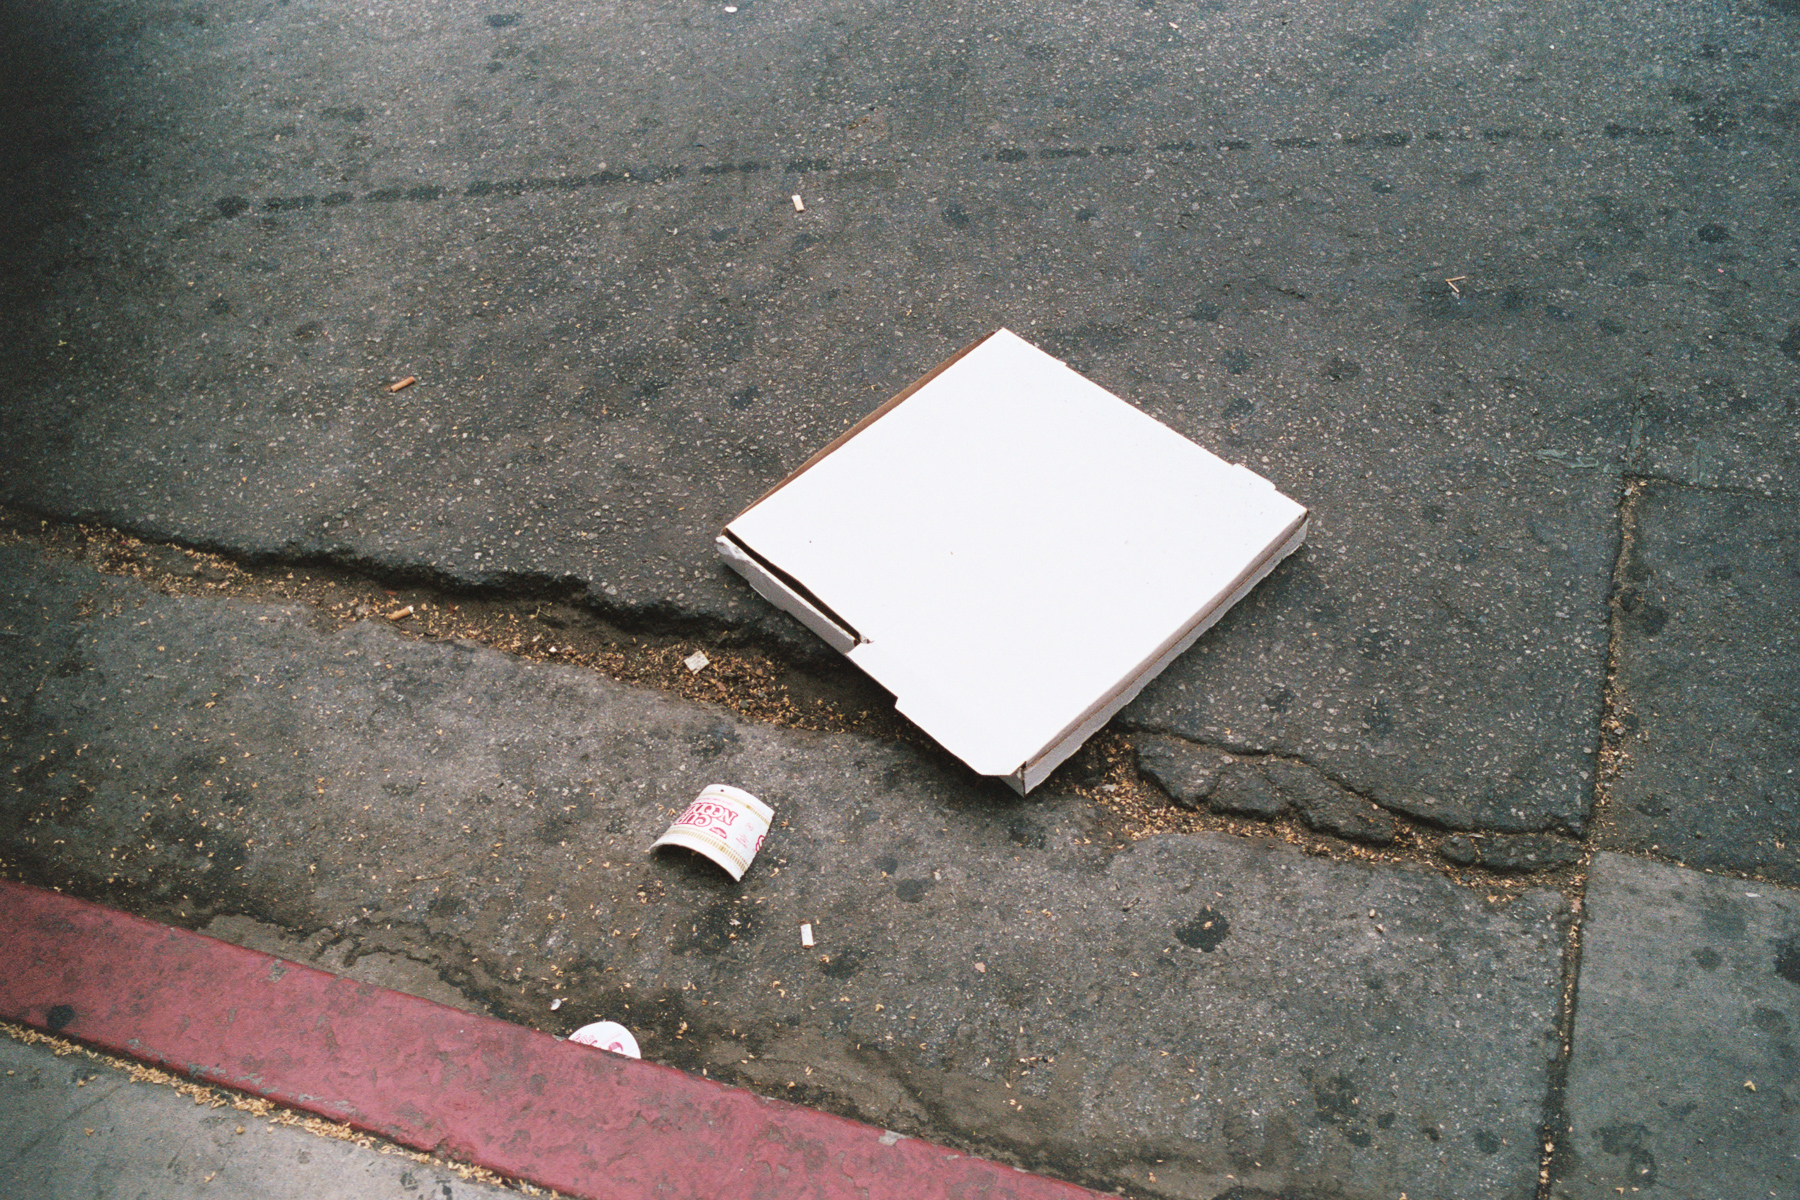
1st image in each series of two will be digital, 2nd the film image. Leave a comment with your thoughts
– 
–
set 2
–
–
set3
 –
– 
–
set 4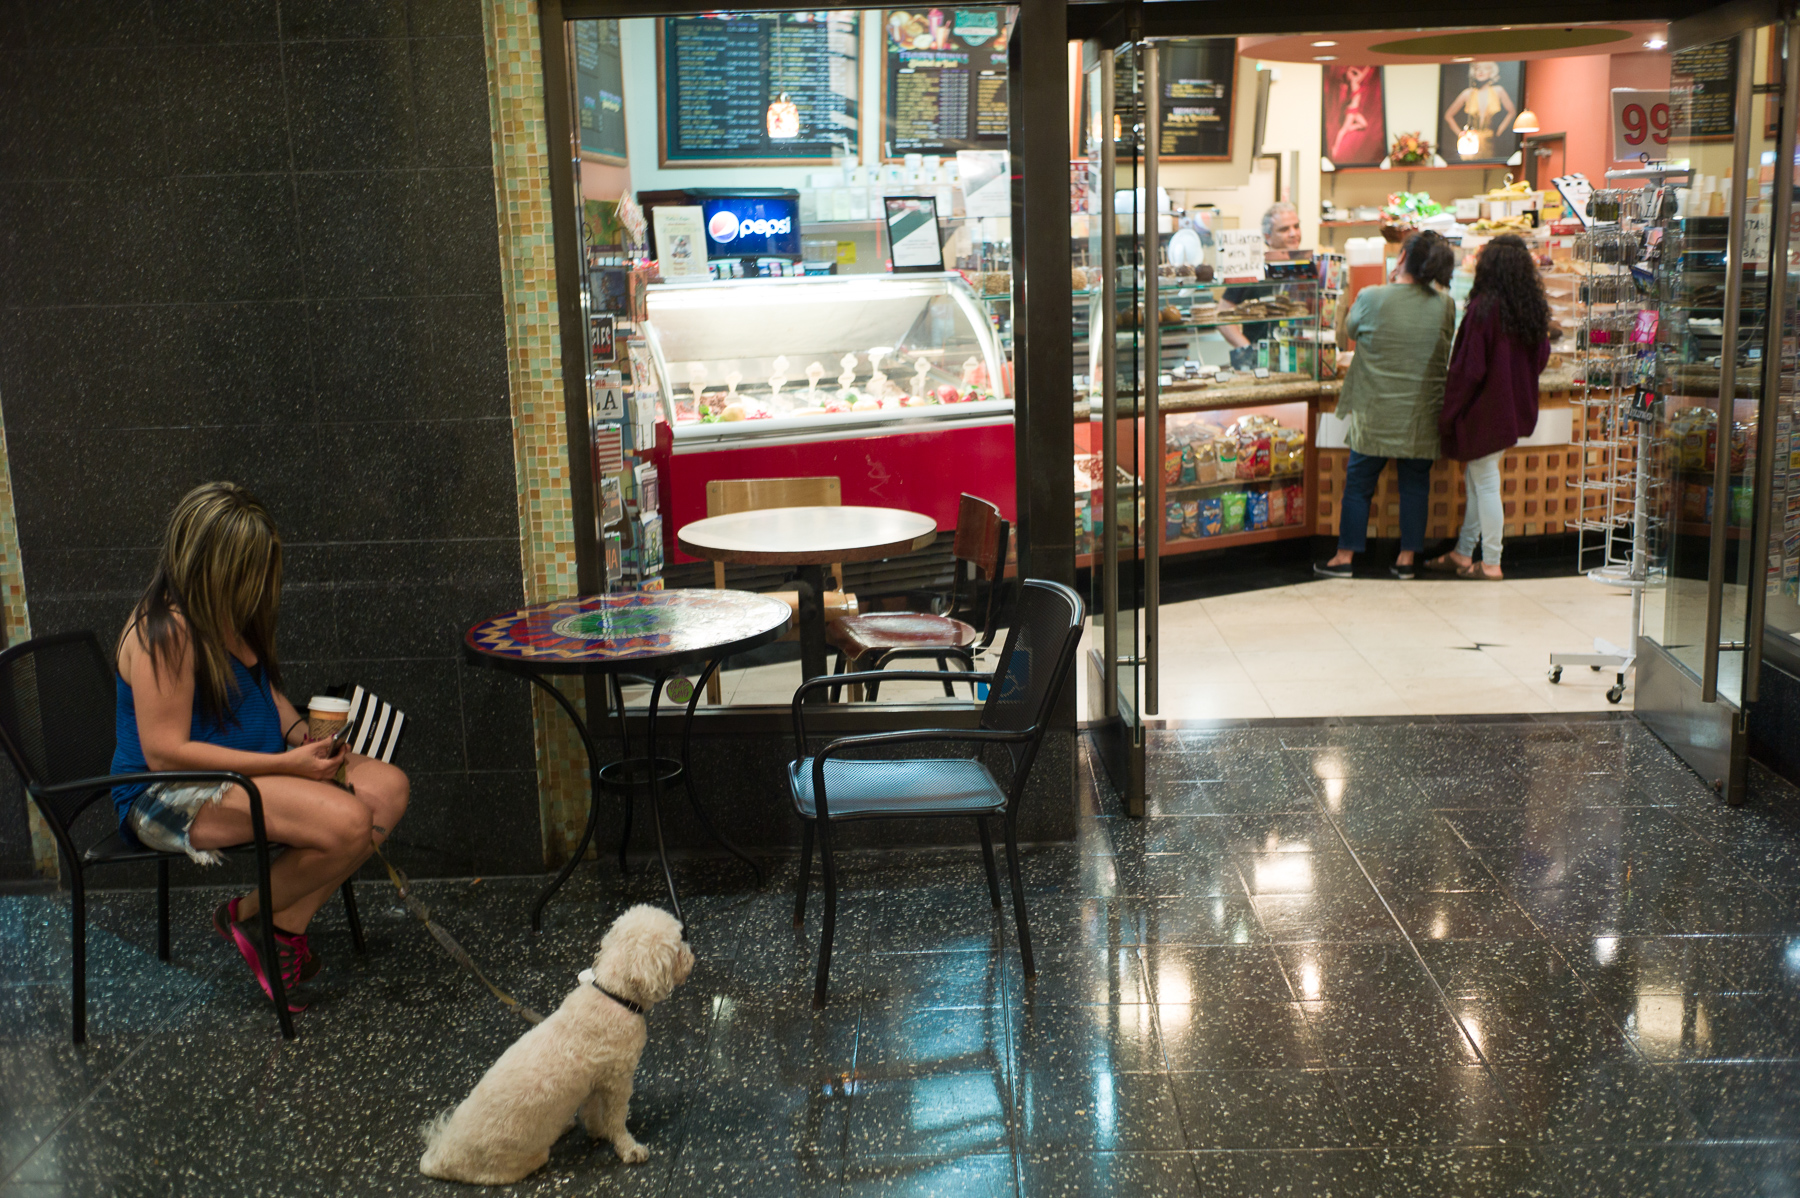 –
– 
–
set 5
 –
– 
–
set 6
 –
– 
–
set 7
 –
– 
–
set 8
 –
– 
–
set 9
 –
– 
–
set 10
 –
– 
–
set 11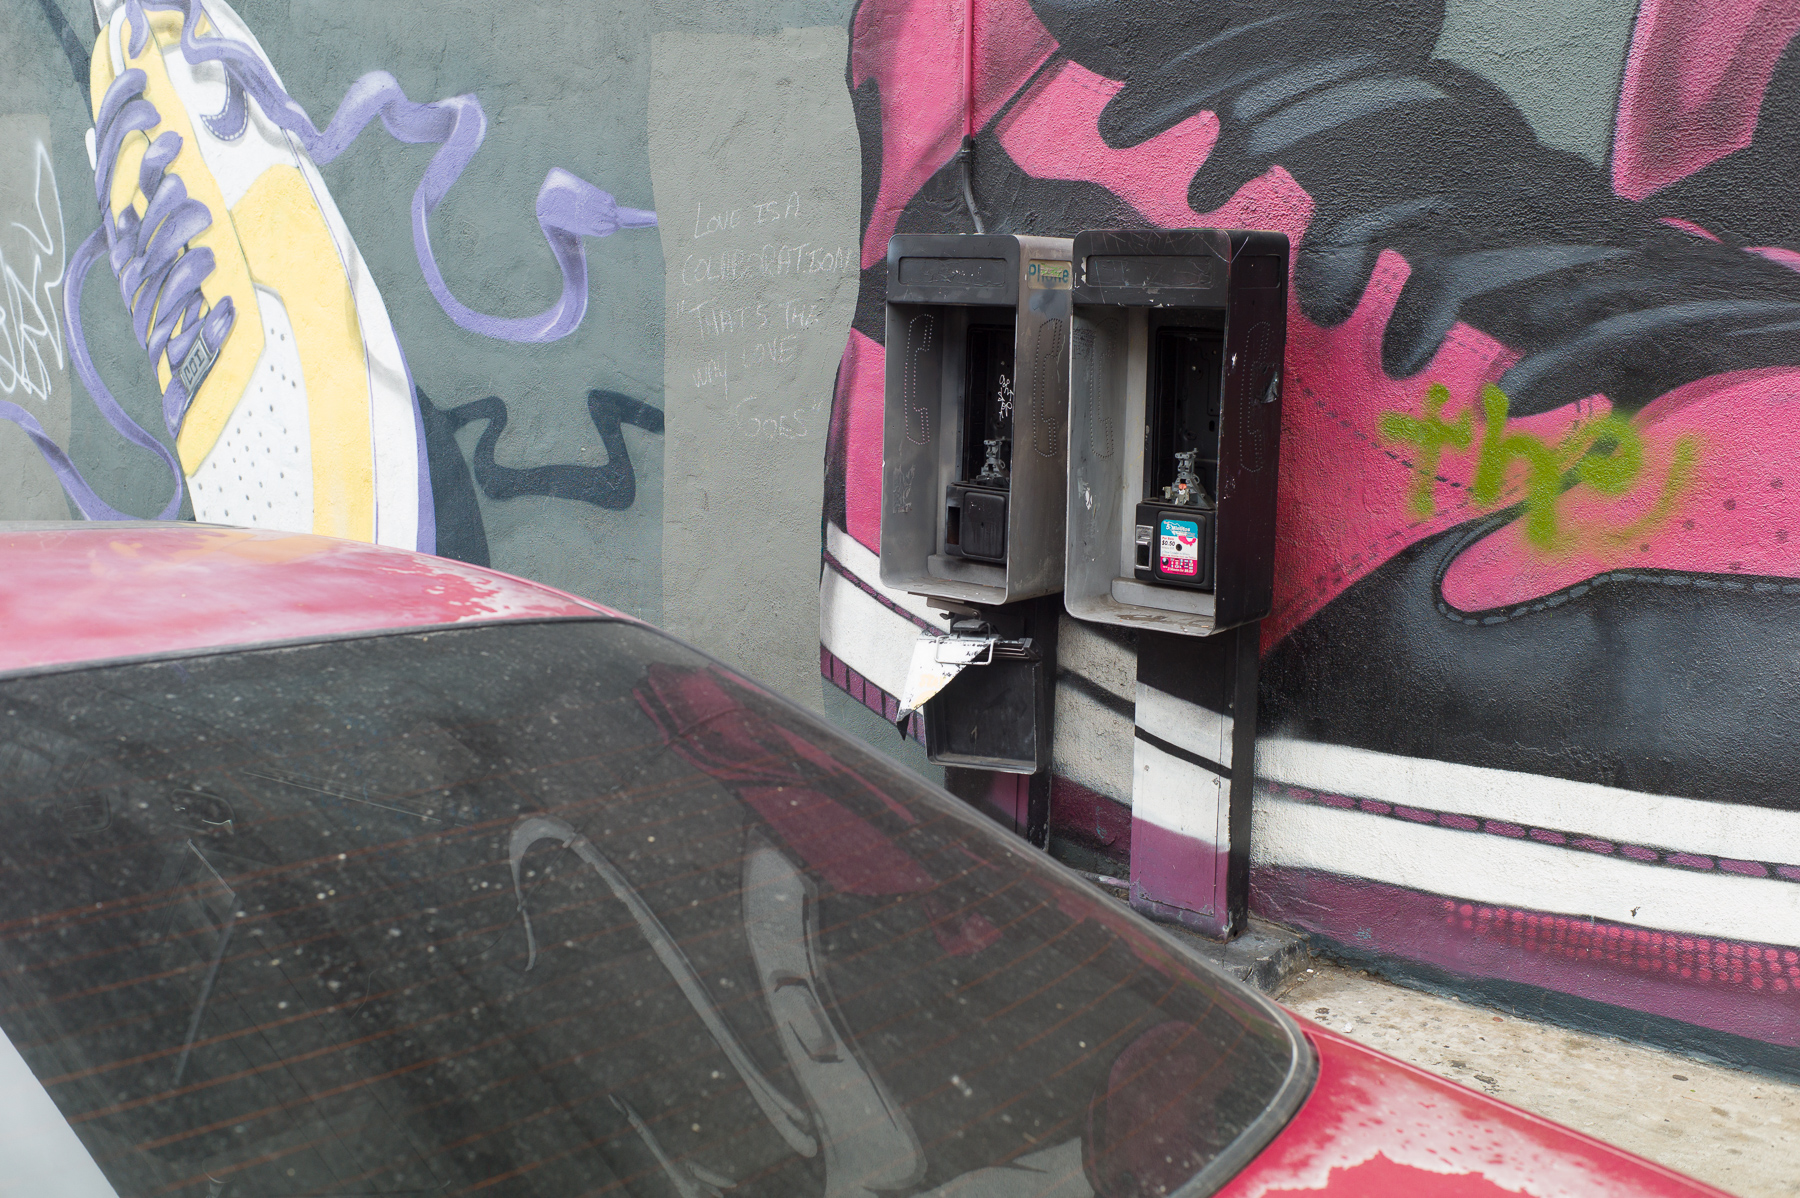 –
– 
–
Set 12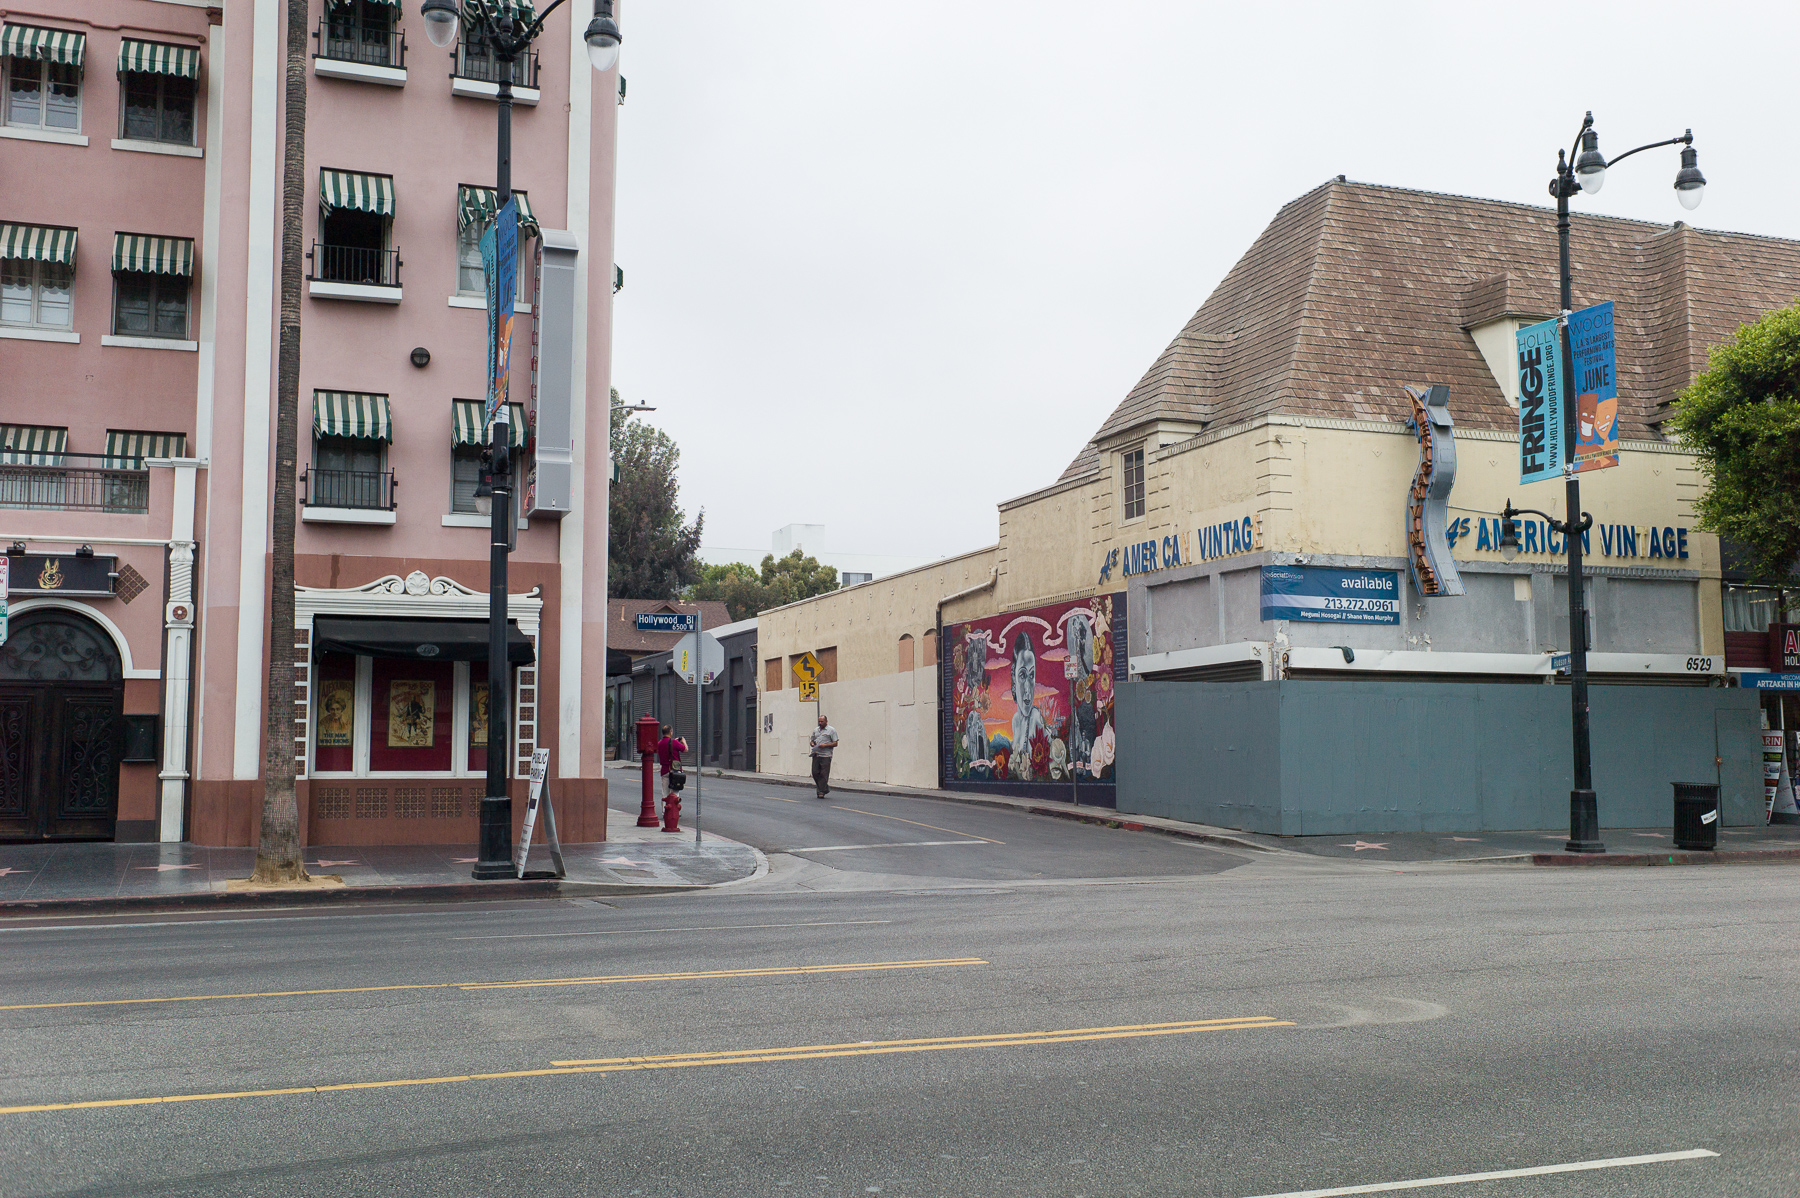 –
–
–
set 13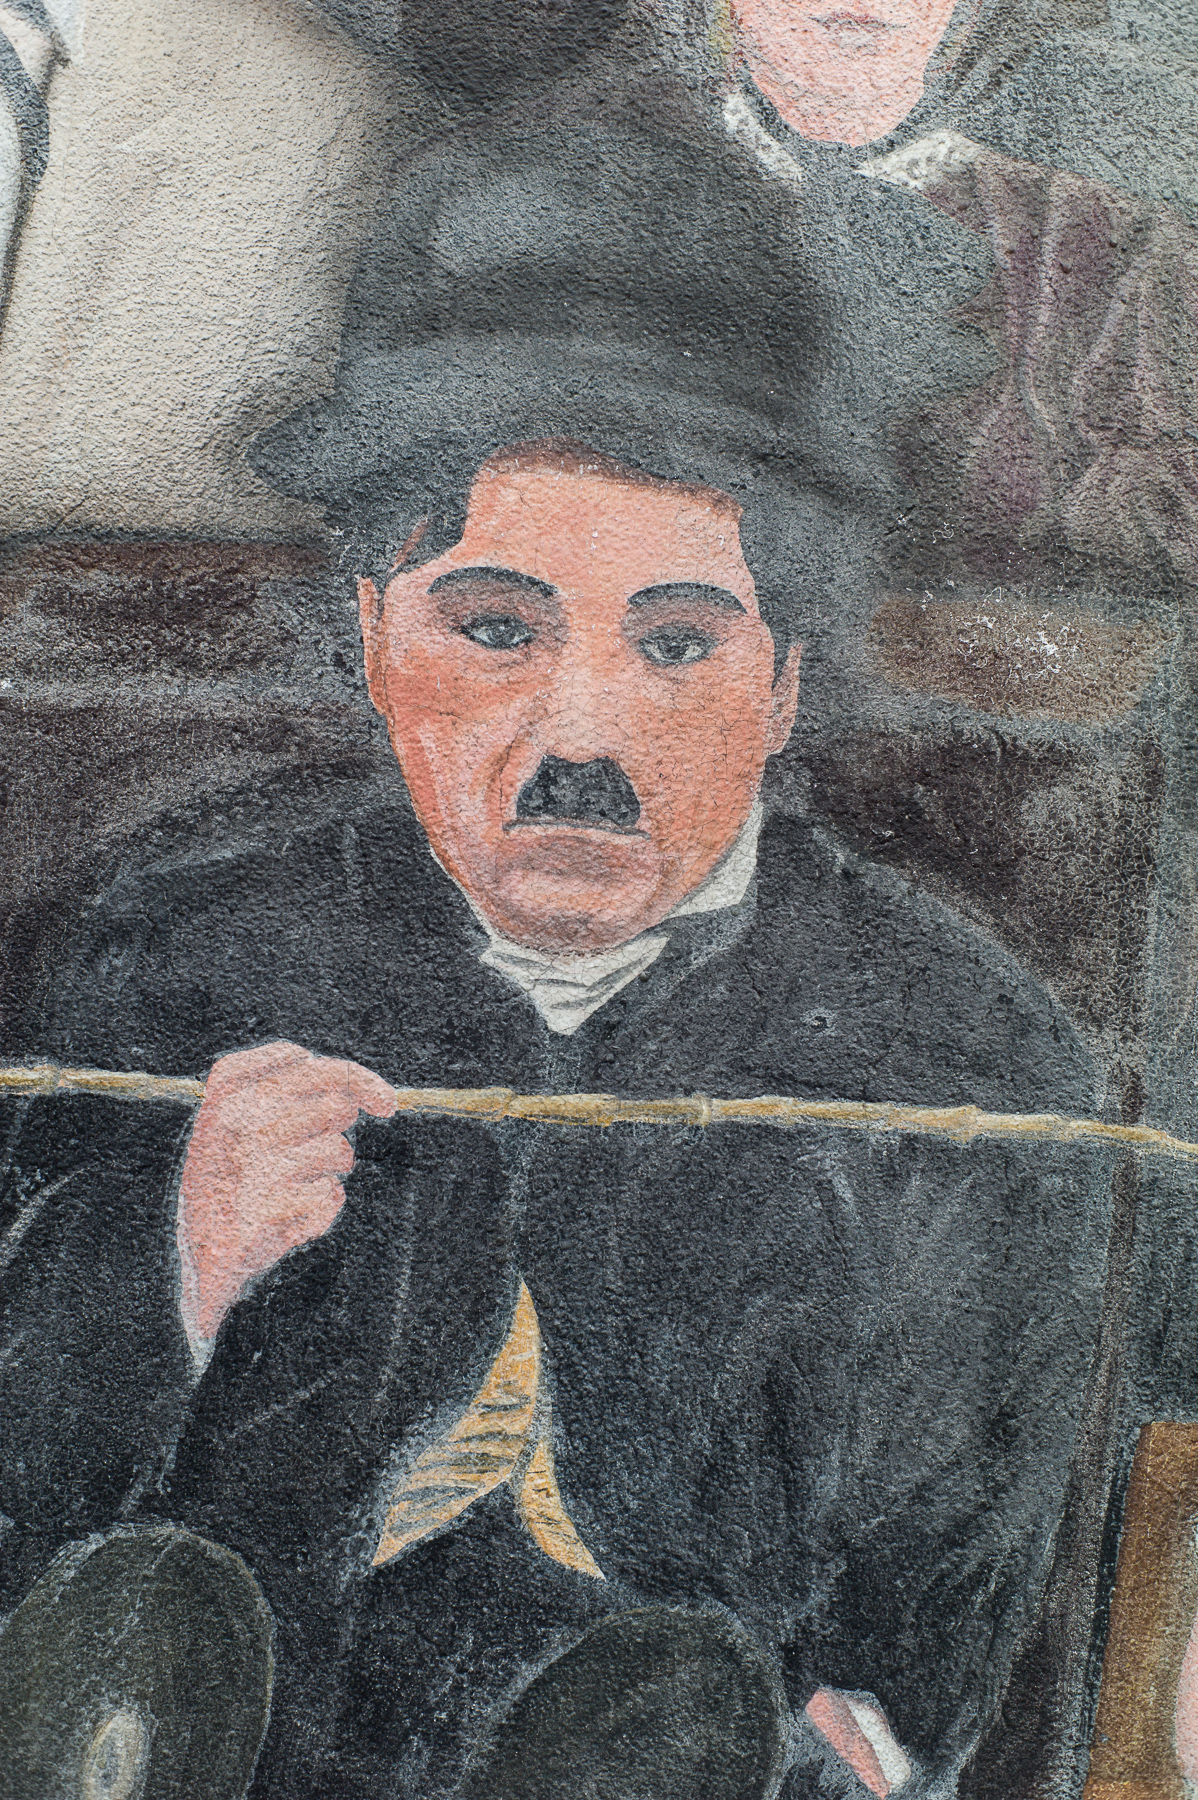 –
– 
–
set 14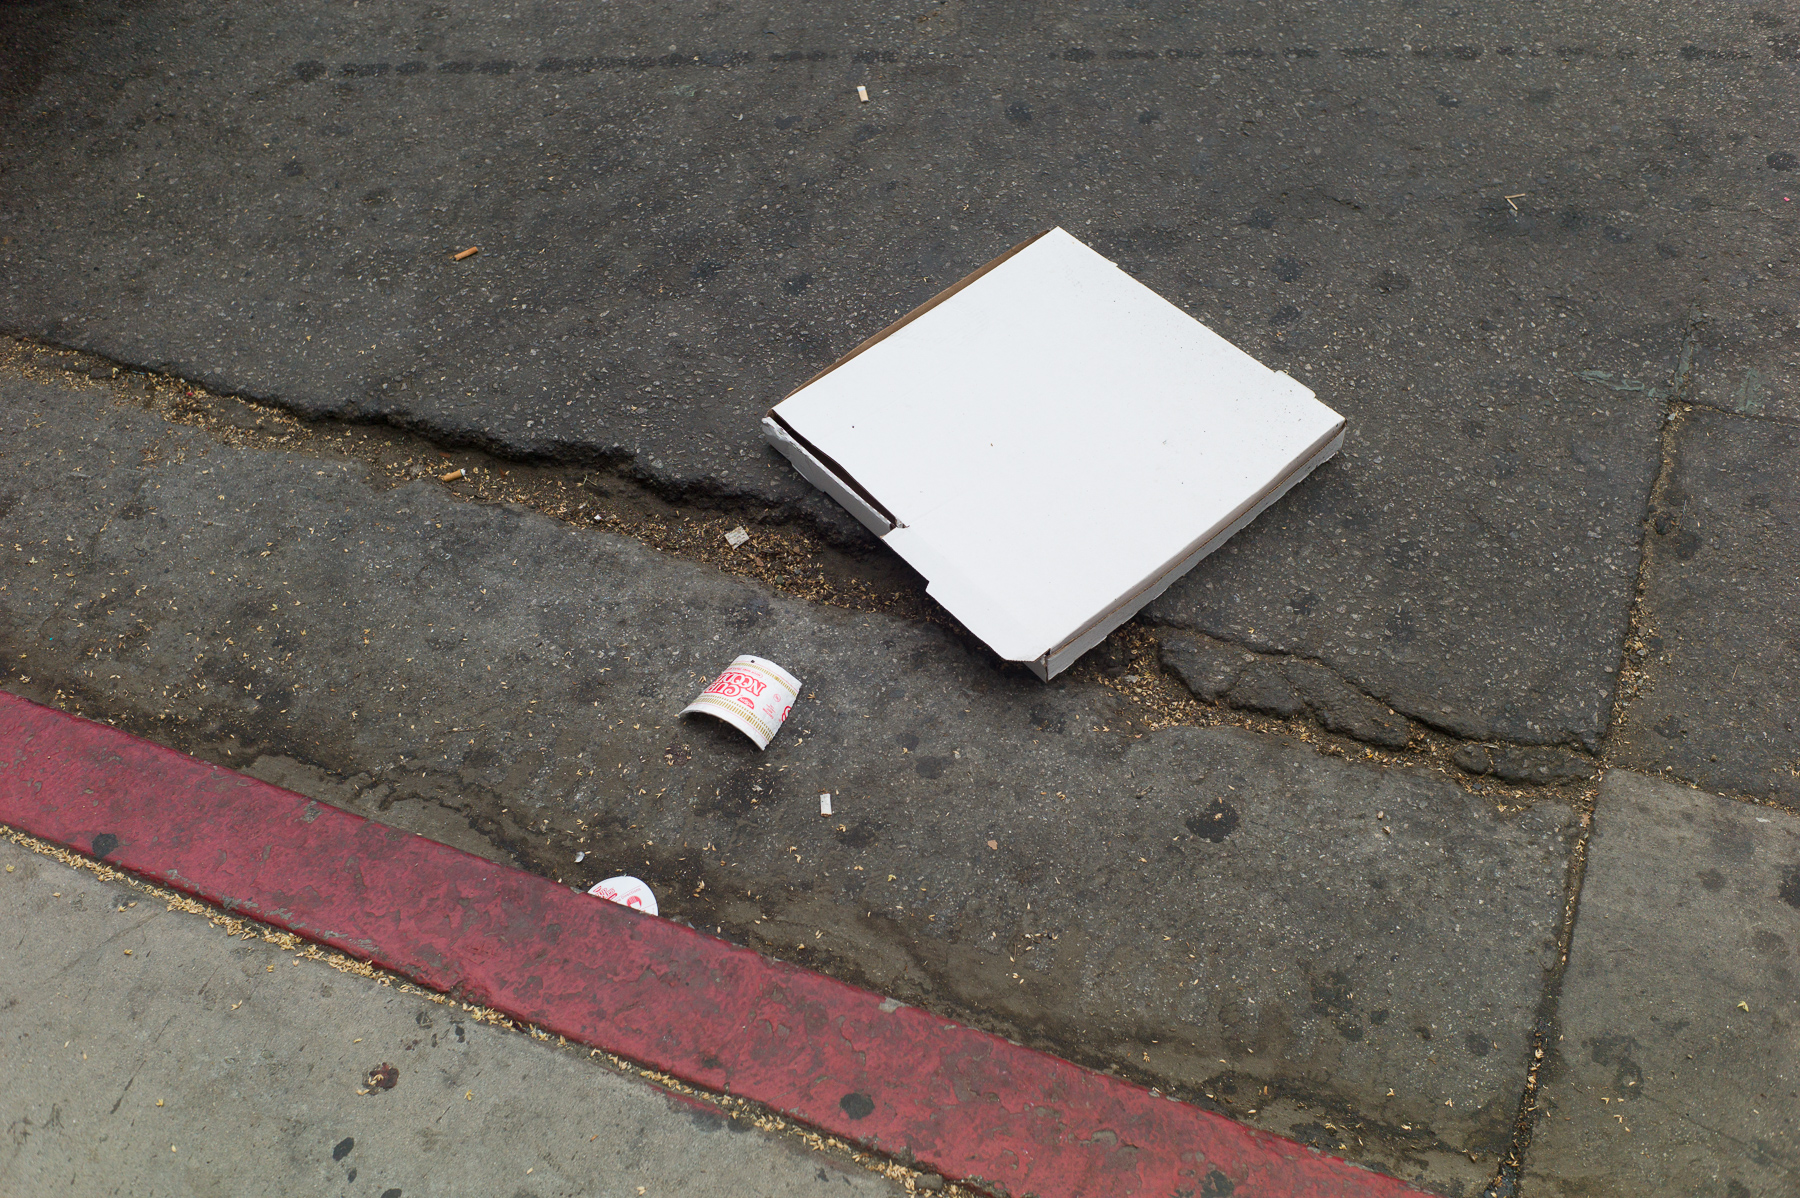 –
–  –
–
set 15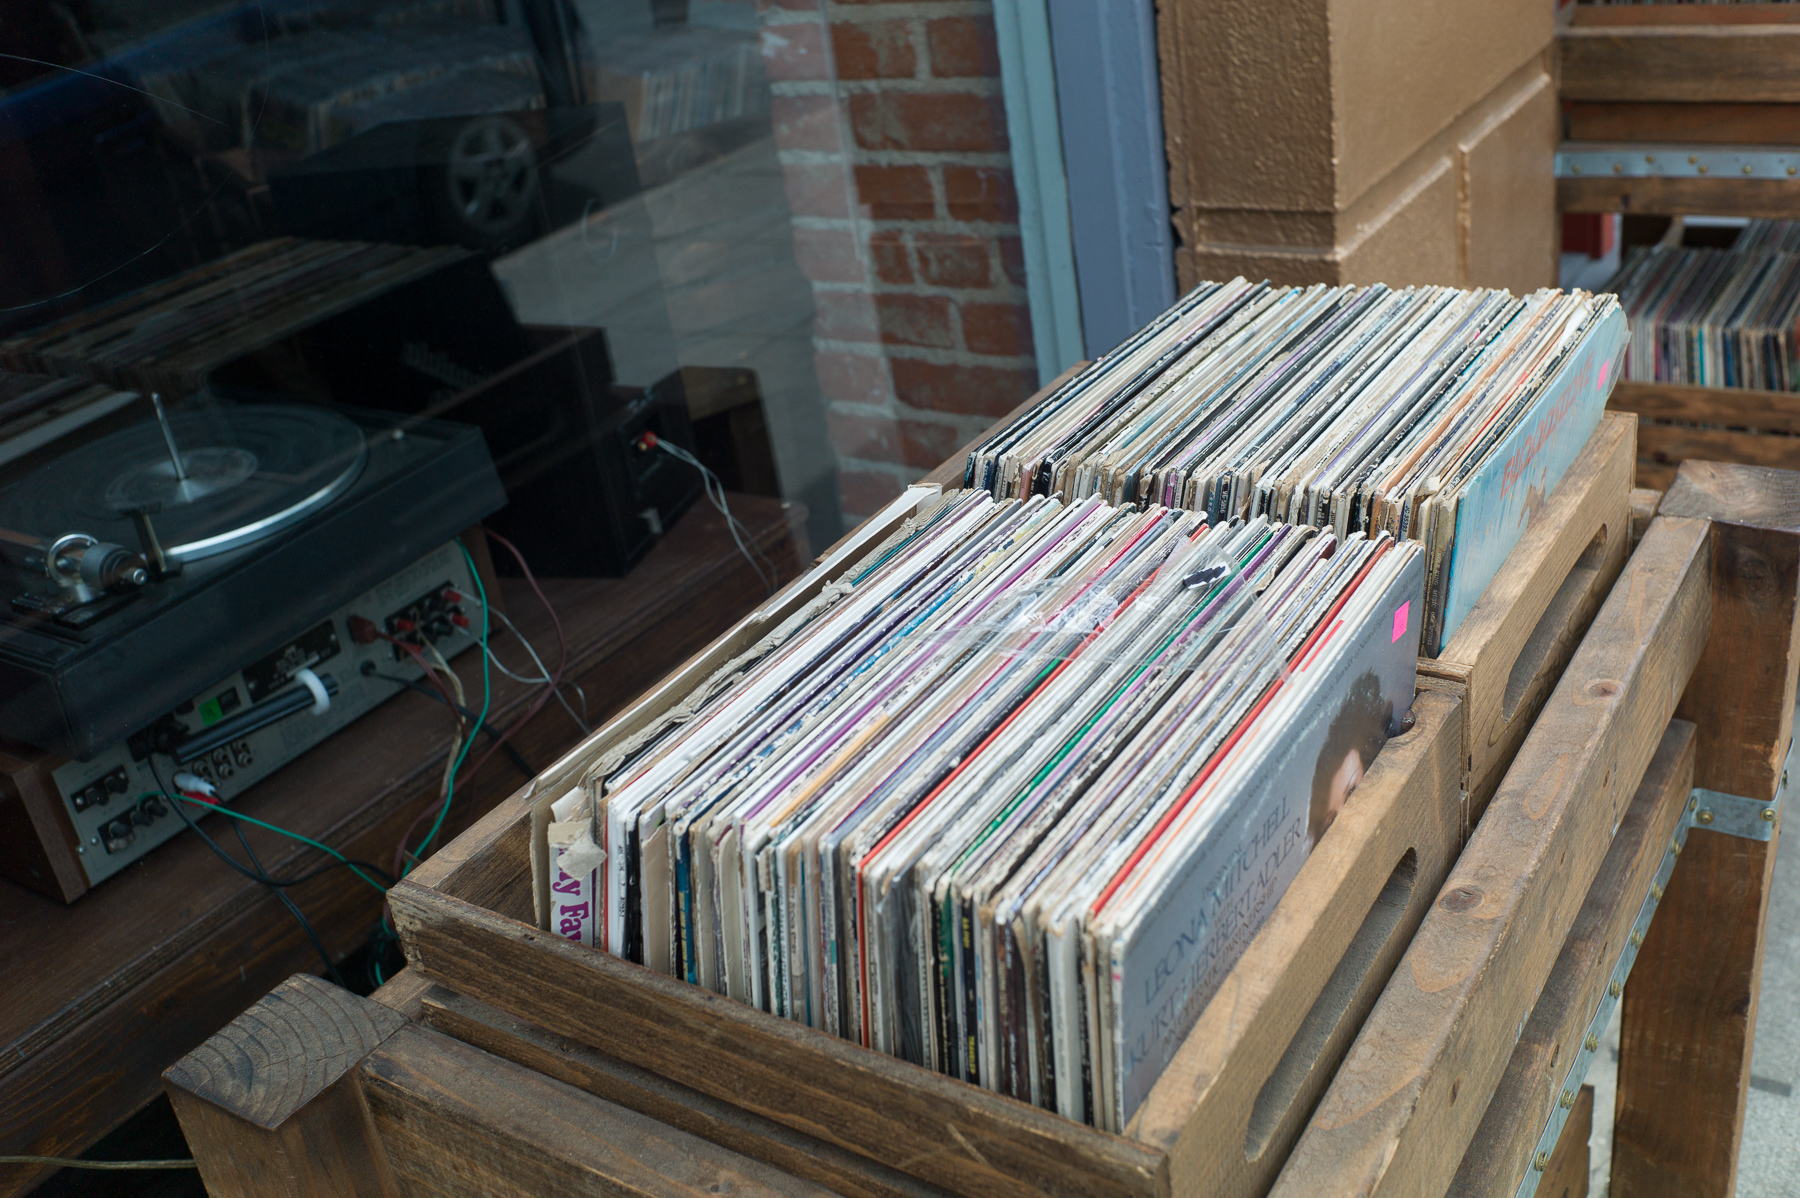 –
– 
–
set 16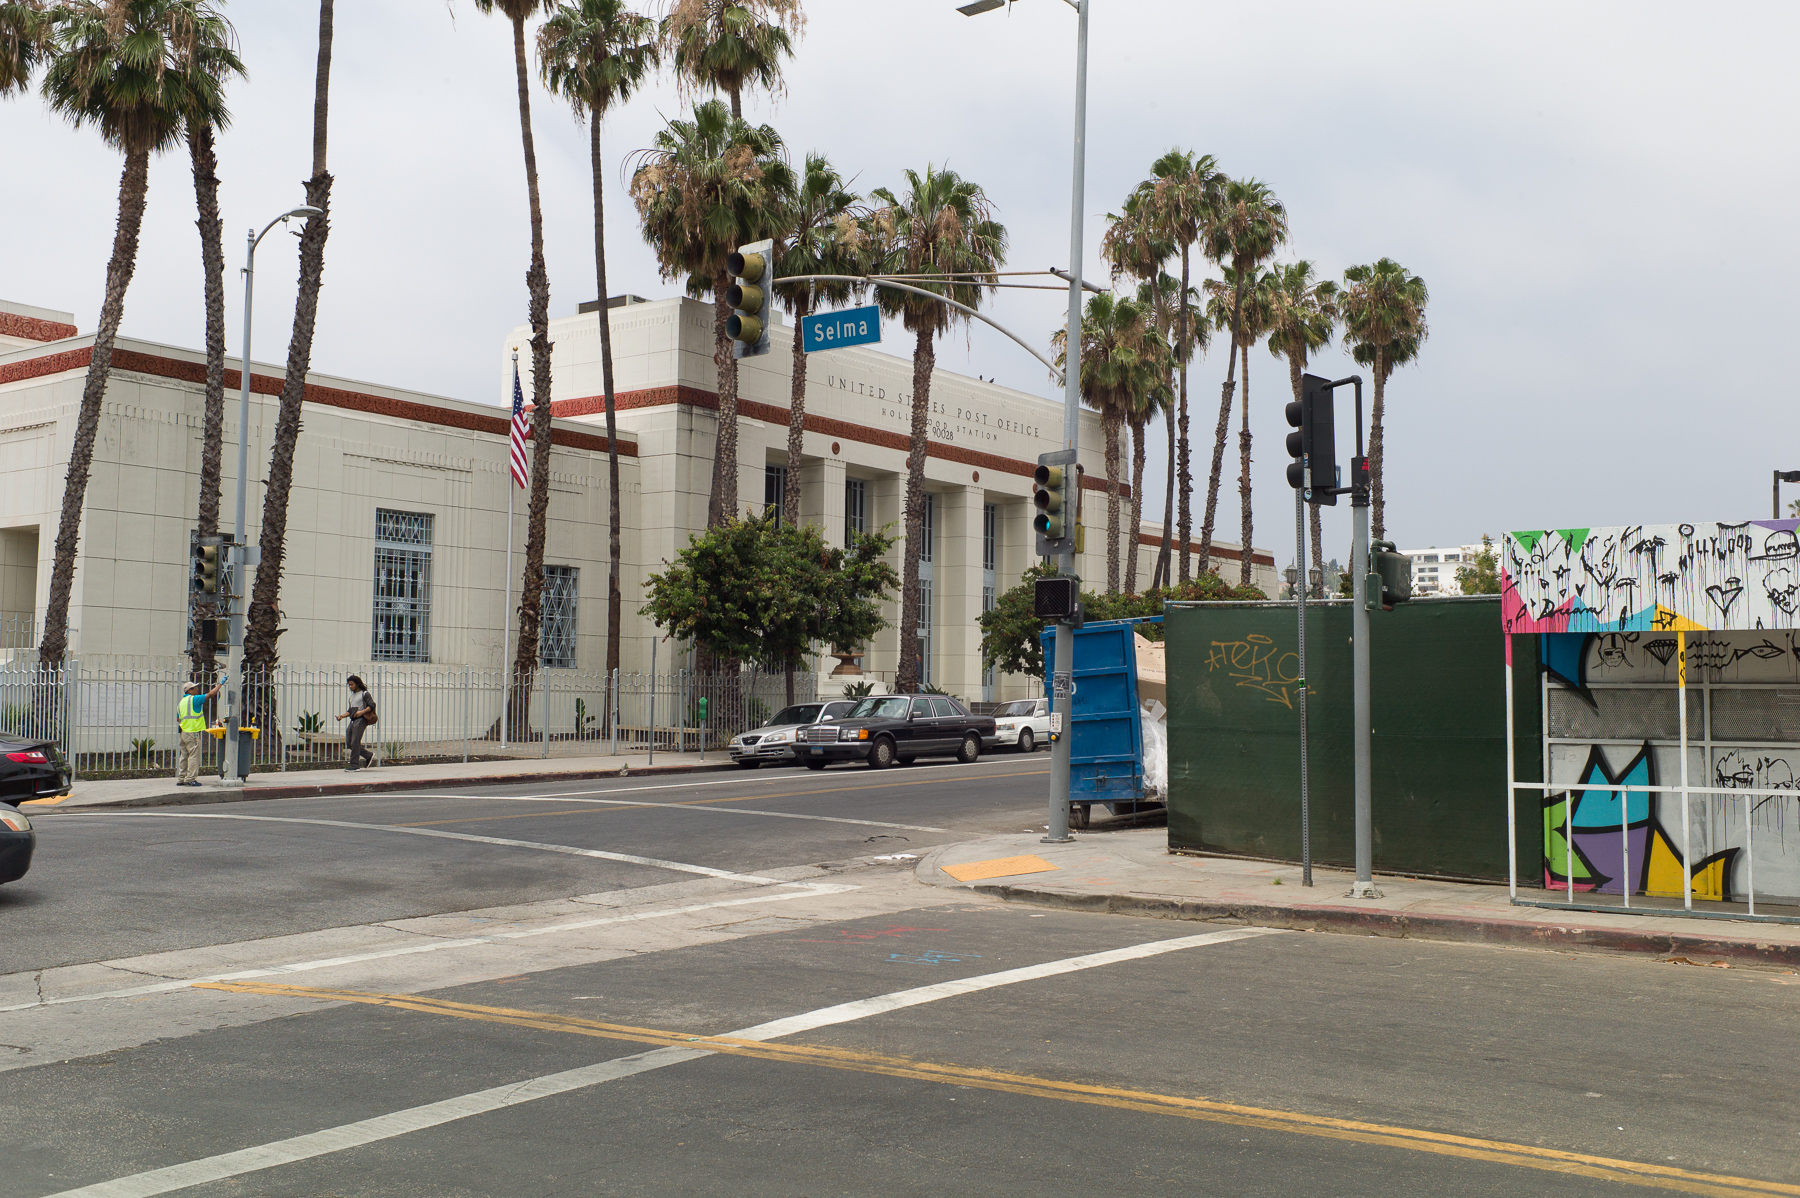 –
– 

Thank you – not to say which is better, it is very helpful to know how these compare. I shoot and enjoy both digital and film, but when it comes time to organize a collection/print, I feel like I need to understand the similarities/differences more and adjust my shooting habits/style if necessary.
One thing I noticed: From set 12-16, I notice the left side of horizontal images are consistently dark – your M7’s shutter curtain’s may need some adjustment? I’m not sure if that is the issue, but I had a film M that exhibited the same issue and it needed shutter curtain adjustment. I hope this helps.
Thank you so much for pointing this out. I will certainly check and see what’s going on. I just saw your comment and I am leaving in two days. This is certainly throwing a wrench into my system.
I like something in the middle; the “digital only” image is very clear and fine, but colors are a bit too saturated; on “analog 2 digital” image, the granulation VS scanning had a bad effect, but the colors are almost natural. And I presume the focus not quite good on analog, or some good aperture differences between shots.
If you used a 320 ASA, I say the colors are right for its gama/saturation, also the granulation is explained (more acceptable on a big granulated paper – I already forgot the right terms, also I never new them in English), but yes it is a kind of HDR film which is more “modern”. Realy?
In your place, I will try other samples series, with an 200 ASA=24DIN film. Then scan with at least 4800 dpi, this could be much more close to reality as color/saturation/gama.
BUT, I would go DIGITAL ONLY, with a bit cut from color saturations, something as in middle between these samples.
The main advantage, you do not need few cameras with different film inside, as with ASA 50 and ASA 200 and ASA 800 (or more, also my experience was between DK3 = 3DIN =…yeah… about “one point six ASA” to about 32DIN about 1200 ASA – I still consider myself an “amateur” after 50 years of photografic experience – but it was just for my own soul), and if for low light, digital is the master not only switching instantly to high sensibility, not only with a much more resolution versus a huge granulation, but being able to see the results right then, with the help of an external monitor, and if the case just redo the shot, while on film there are also many extra dangers, open camera by mistake and over-light the film exposed, bad procesing if something wrong with chemical / light / temperature and so on.
I am configure right now a “system” having a field 7″ monitor (Atomos) connected to a mirorless camera (NX1), something taking a lot of time since I am at my job from 9:30 to 20:30, so week days are lost and week-end days are managed by wife… 🙂
this is why i’m always confused by all those presets that try to make digital files look like film. why would you want to do that when digital looks so much better, sharper, less washed out, less drab? i’ll take the digital in every instance you posted, plus it has the benefit of being vastly more convenient.
But, as T.S.Eliot wrote (Four Quartets) “human kind cannot bear very much reality” – we actually like images to have ‘individual character’, so we choose grainy film, or monochrome, or we shoot with ancient uncoated lenses with massive spherical aberrations, etc. 🙂
A very interesting look at two very different ways of shooting.
I have to point out that the scanner, whatever it was, is not very good. Actually, most photo scanners are garbage. They exaggerate grain and they take too long. Cinema scanners are the only way to extract the best scan from a piece of film. The Flextight X5 is probably the closest you’ll get to a cine film scanner, although it’s much slower.
With a proper scanner, the Portra files would be less grainy and they would be showing more fine detail in the scene.
I am curious about set 7: I am guessing that the highlight detail is still there in the film image – would that be correct? Portra has a lot of headroom, and can be overexposed by a lot.
I prefer to copy transparencies by using my camera with a macro lens and adapter to hold the slides. Diffused light is needed, to avoid exaggerating the grain. This is probably where many scanners fall down, because of their ‘small source’ lighting.
I find negatives are more difficult to copy in this way, because of the colour mask. Perhaps a blank frame on the film could be used to set the colour balance?
To MikeOxon, “… because of the colour mask. Perhaps a blank frame on the film could be used to set the colour balance?”
The density of the colour mask in the colour negative film is not evenly distributed over the whole frame but varies according to the recorded colours in the picture (this is not visible by eye inspection alone), which leads to the intented colour correction for which the mask is for.
Althought I don’t have experience with the software “Color Perfect”, this software has good reputation in exactly doing this kind of colour correction with camera scanning files from colour negatives.
Thank you for the information, Lothar. I shall look into it.
Have a look at Vuescan, it may provide a Windows 10 driver for your scanner. I suspect the somewhat restricted dynamic range may be down to your scanner/software; in my experience it is virtually impossible to lose detail in Portra 400. I have recently carried out a similar experiment in black and white and found that T-Max 100 developed in Rodinal using the “semi-stand” technique really did make digital look like the poor relation.
Digital seems to be more clear, less noise.
As expected, there were differences, but nothing worth shouting about. With this in mind, I’d go for the digital any day – so much more convenient in every respect.
They almost look the same to me. Of course I could expand the photos to 100 percent but that would me meaningless as I care more for the composition than the technical details (I am not a master printer lol)
What I consider remarkable is that in set six is clear that digital has more dynamic range than negative film. Of course probably with another way to scan the negative one could get more dynamic range but then again it would be not fun to me but a chore so if I had the resources I would go digital, alas that’s not the case so I still use film for some effects.
The film shots look underexposed. The shadows are all blocked up. Could be the scans. Its always better to overexpose negative film. It can handle it, and you won’t get these muddy shadows. Try shooting Porta at 200 – it’s much nicer there.
Hank, I agree that overexposure is the way to go, but Portra tends to go very warm when overexposed, which is something that won’t work for what I’m working on. I am actually shooting a couple of rolls of Fuji Superia right now for that reason. Also, rating it close to box speed gave me some good indication how it handles over- and underexposure. I sometimes end up in situations when I am shooting handheld in very low light, in which case I just open the lens all the way and shoot at the lowest shutter speed I feel comfortable with (usually about 1/15s with a 35mm lens). Then I just get what I get.
Although you put a lot of effort into this test I find it interesting and valuable to me personally, I don´t really see the point as to how we can help you to make a decision. You did not tell what your project will be and what your workflow ist. Plus, you would be scanning the film anyway! In terms of aesthetics, the choice has to be a digital camera because this way you can simulate not only Portra, but any other film.
In two parallel worlds you would end up with two different sets of images. One would be more flexibel. The other more thoughtful.
Thanks for the pictures!
For many photographers, myself included i learnt photography using film cameras as a kid from the age of 10 and spent 15 years shooting film, then went digital about 12 years ago, but in the last 3 years have found myself shooting film again. why, for me the i love the film look, plus ive been digitizing my old film work, and and have been scanning negs from the late 80s early 90s, but the best part of it, knowing the shooting film, processing them myself at home then scanning them, the negs will still be around in 50+ years when every current digital format will have changed at least 2 more times, and i do not have to worry about loosing all those image if i have a hardware failure. The Digital images look to perfect, to processed where the film has a nice warm look to them
Hayden, I understand your hybrid aproach very well and I sympathise a lot in doing the same but I have accumulated close to 100 000 film negatives of all common formats, mostly B&W and a few thousands of color negatives over the last 50 years. After doing intensive investigations about the scanning route to take, I decided to go for camera scanning, the quality is quite good, if you know how to do it.
I started one year ago, several hours per week and my project will take around 2-3 years in total and I can live with this.
I think it doesn’t make sense to look for and scan only the “good ones”, because my judgement about this might change over the years.
I would be very interessted to know how you doing your scanning work, you surely have and will have in the future quite a lot of negatives / slides too. Scanner?, which one?, camera scanning?
Thank you in advance …
I like the abstraction of film on certain of these photos because the subject matter lends itself to it. It also reminds me of other past photographers, like the color of Eggleston, so there is a tapping into that aspect, as well. With some of the others, I feel the contrast, treatment of darkened eye-sockets and overall M9 pop brings out the most in these.
Very interessting and valueable test, thanks a lot for sharing!
The results were quite astonishing for me, because the color negative film did worse than I did expected. In general color negative film has a broad dynamic range, much more than most sensors, but in your examples the pictures from the film has weak and empty dark zones with very litte detail in them and in some cases blown out highlights, which is very surprising.
In former years I did lots of test myself and came to the conclusion to give color negative film generally 1 stop more exposure than the nominal speed. This improved the blacks and overall tonality tremendously and all this without drawbacks. To stick with 200 ASA in your Portra 400 case is no tragedy, especially if we consider the impressive work of respectable photographers who work with Kodachrome 64 for decades, just to name Steve McCurry as an example.
I don’t know the pakon Scanner in detail so I wonder if there is a possibility to scan with a lower gamma curve to save all the dynamic range which is in the color negative film and do the final adjustments in post processing.
So, even if it’s additional work, I would run a further test with Portra 400 exposed to 200 ASA and check out the possibility to scan with a slightly reduced gamma resp. to set the white- and darkpoints differently than before.
Lothar, I will certainly do that whenever it is possible, and I will do some exposure testing of different film stocks. I wanted to rate the film as close to its box speed for this test to see what flexibility I have in underexposure. I often shoot an interior portrait wide open at a shutter speed of 1/focal length of the lens or even a little bit slower. So I needed to see what I can get away with. I definitely have a lot more room for underexposure with the M9.
I will also probably go with Fuji for this project because Portra has a tendency to go a little warm when overexposed and I don’t think I want this for this project.
If you have the time to think about your shot, go the film. If you want instant feedback, m9. For me, I like the look of the scanned film and feel there is better subject isolation with what you have presented. Thanks for the article.
Bernd,
I really appreciate the effort you put into all of this–The images are each beautiful in their own right!
Thanks for sharing,
Mark
thanks for sharing!
I use last couple years film only,
and sold all digital cameras but from this set I prefer M9
This is one of my favorite articles ever on Steve’s site, and there have been some good ones over the years. I spend a lot of time agonizing over film vs digital: the cost (digital wins), the results (mixed bag), the flexibility (digital wins), the magic (film all the way) etc This article really highlights what one gets when one compares the two formats.
When i first started experimenting with film a few years ago it really ruined digital for me. The digital images are just too clinical. Film photography is expensive and can be frustrating, but when one gets a good film result it is like a chemical high.
A couple of years ago I went to England with an old olympus rangefinder and a bunch of portra. In retrospect it was a naive and crazy thing to do because any number of problems could have left me with bupkis. The photography gods must have been smiling because i have image after image of gorgeous genuine portra files from England – even street stuff which is harder to pull off with film. I feel like it is my greatest photography accomplishment.
Since then I bought the vsco film packs of which i was previously skeptical. I’ve found vsco treatment allows me to have the best of both worlds: digital price and flexibility with almost film results.
Next time i go on a big trip like that I’m going to bring my main digital gear (micro 43) and just bring a simple little film camera (maybe a ricoh gr1) as a back up for a few select frames here and there.
What strikes me is, despite some obvious saturation differences in some shots, just how close many of them are.
That said, there are just too many variables at play to give scores to digital-versus-film, out of this set. And like someone said, even the film shots we see are digital renderings!
Everybody’s got an opinion, but ultimately we’ve all got to make our own choices about process. Like: which work-flow, and which results, please us the most? How much manipulating – and which kind(s) of manipulating – do we want to do, to get results we like?
Good luck, Bernd. Good luck to us all – modern life floods us with choices to make!
I did a similar comparison in B&W. My friend and I took the same shot at the same time of the same subject (our favorite bartender) with the same lens, same settings from the same basic position. We used an M6, Ilford HP5+, a 50 F2.0 Summicron at 400ISO and a Monochrome set the same with an identical lens. Both were printed by professional printers. We took them to the bar and set them out on a table and asked which was the preferred picture. It was clear to me that the digital print had a far greater level of detail and the blacks seemed “blacker”. The vote was unanimous – the film print was the preferred picture. Of course this test meant nothing but it was fun and I always like to see other folks comparisons and the feedback on them.
I did a similar comparison in B&W. My friend and I took the same shot at the same time of the same subject (our favorite bartender) with the same lens, same settings from the same basic position. We used an M6, Ilford HP5+, a 50 F2.0 Summicron at 400ISO and a Monochrome set the same with an identical lens. Both were printed by professional printers. We took them to the bar and set them out on a table and asked which was the preferred picture. It was clear to me that the digital print had a far greater level of detail and the blacks seemed “blacker”. The vote was unanimous – the film print was the preferred picture. Of course this test meant nothing but it was fun and I always like to see other folks comparisons and the feedback on them.
This is really cool, and you’ve taken great care with comparisons. The film pictures have a faded graininess in the blacks that I would attribute to the scanner. My two cents: take the M7 and Provia 100 slide film over Portra. It has a finer grain, scans amazingly well, and the lower ISO makes it safer for travel. UNLESS you’re going somewhere very shady, in which case the slides will be very blue. As digital formats change, I think you’ll be happy to have something tangible and “forever” in the film.
Currently, I prefer most of the M9 images, but I question whether the quality of the scanning is optimal. I’ve been at this a long time, and the color rendering of the Kodak Portra 400 doesn’t seem quite right.
Very interesting comparison. Thank you for sharing. The reds are quite different between the two, the analog looking almost orange, the digital reds appearing oversaturated. I find the M9 images most pleasing, except possibly for set 2, where I like the slightly less saturated colours better.
scanned film are digital
The film images are less sharp and noticeably grainy.
That’s as I expected. On a square-millimeter basis, digital way outperforms film. You need to use medium format film if you want film to be competitive with full-frame digital.
I am sure that any difference in the color signature can be mimicked with one of those plugins that are supposed to make your digital images look like real film.
…….and printed Digital is Analog then right ?
I agree that to compare both we should use results that came
out of the original workflows – not mixed !
Means film printed by a laboratory with enlarger and digital printed out
from a file by a inkjet printer like maybe the Epson Pro Stylus 7900.
I am a great sucker for old mechanic cameras but when I go for a idea
the digital way to get it I would pick first – always !
Well, you got me with that first one, Marilyn! I’m such a sucker, and love her movies.
Thanks for doing this, because I’ve occasionally wondered how nice it might be to step back to film. Based on these samples, I don’t see resolution issues, but do see color and contrast differences. As someone previously mentioned, you could probably tweak them in post to be very similar, if you so desired.
And as someone has mentioned, ultimately you’re taking the analog film information and posting digital, which makes shooting on film merely an inter-negative. That is unless the film image is bringing you something you feel is unique, which digital can’t duplicate.
It’s so nice that you have both, and thus can choose. Id say pick the work flow that pleases you most, and film, if it gives you something unique. Me…I’d stick with digital and skip the inter-negative scanning process.
Good luck and enjoy! Say Hi to Marilyn for me!
Fantastic post. I prefer the M7. The M9 images have an unnatural look to them
compared to the M7. Maybe it´s not the right term to use, “natural”. The digital
images have distracting edge sharpness, like shapes having been outlined. They
also have a distracting distribution of luma. The eye is jumping between different
areas of light. The digital files have a cupboard figure flatness to them, whereas the M7 files have a look of threedimensionality.
With the processed RAW the results will reach the quality of attributes of the M7 .
Its lack of the filmic attributes stems from the nature of incamera Jpeg processing.
Great post, again.
I’m glad to see Marilyn is alive
It’s silly to compare a digital image with a film image that has been scanned digitally. The reality is you’re only comparing one digital image with another digital image. All digital cameras scan the analog scene coming in through the lens and convert it to digital, just as a digital film scanner converts the analog film image to digital. It would make more sense to compare a digital image that has been printed with a professional grade inkjet printer with a film image that has been printed in a traditional wet darkroom. Only then would you really be comparing digital with film. But of course that’s not possible to do on a website.
I can not express in words how much I agree! 1000% !!
100% correct.
I say this for a long time.
Carlos Carvalho, Portugal, EU
I’m sorry but I disagree with that completely. Scanning film provides a different kind of image. It’s more evident in movies than it is in photos, but the qualitative differences are usually apparent.
That is not to say that film is better. That’s a different issue.
I assumed you used the same lens. In set 10 both have the same bokhe.
In terms of dynamic range M9 is better, no doubt. But that also can be a consequence of the scanner used, other scanners can be used with multiexposure to give a better dynamic range.
Both cameras are so close that definitely pick up the easier or most enjoyable to use.
Bye and sorry for my bad english (writing from Chile)
A noble and fine effort.
Folks will choose results close to their usage!
Film users like self, prefer the “Look” of film.
Better 3-D imaging, greater colors in some!
Digital here and there way better!
So in end there is no winner..
Film for me means more permanence.
Too many drives crashing, even back ups.
Doug, you might think it is silly, but I am comparing the two mediums for my personal workflow. I will not wet print a color negative ever again, therefore it is irrelevant to me what the film negative would look like in a wet print. It is simply not a process I am interested in anymore.
If a digitized film image can preserve the unique qualities of the original analog film image it only confirms the superiority of digital imaging. I challenge anyone to take a film photograph of a digital print and have the resulting image look like a digital original. Digital to film doesn’t work nearly as well as film to digital.
You can of course do that successfully, but you would probably want to print to a 645 negative (or use a high res ink jet printer onto plastic film). You might be able to improve the aesthetic quality of the digital file by doing this, but in some cases you won’t get an image as nice as a film original.
Film printers certainly exist, and they will print a digital file to film. This is still done by movie productions, and was very common for any movie with CGI elements before digital projection.
Film is more realistic and communicates much better emotionally. i.e. the sultry gaze in set 8 and look and detail in set 13. Digital is artificial and plasticky with poor colour and depth. Digital looks like images cut and pasted together vs the organic whole of film, and it’s Portra 400 with it’s classic look so it’s an easy decision in my opinion.
My Go 2 camera is the Budget M9/ Pana-Leica w CAD SLR Lens (Pentax Nikon)
I Also shoot with Leica LTM’s. This I term Hybrid (Old glass Optics) This tech is basically 19th Century W/ modern Optic lens manufacturing.
I also have two refurbished Minolta Rocker (leica copy lens)
I prefer theM9 Brighter colours details are more highlighted and overall Show more detail…But I STILL Prefer the Film look Not as Electronic
Film oil painting Digital Water colour Hope this helps. Thanks for sharing your passion in Film. Steve Good luck with Project Keep US Posted Click and Advance!
I own the M9 and shoot digital only.
If you look at set 6 there is clearly more “soul” to be found in the M7 analog file.
The background rendering is way more “organic”.
Depending if your projects include many people shots I would actually go with the M7!
The M9 is no loser of course, I just think the analog vibe adds more charm in case of street shooting and portraits.
good luck!
Victor, I would say that set 6 is unfortunately not a great example as far as background rendering goes. Since I was photographing my kids, I must have rushed and the M7 shot was taken quite a bit closer to my kids. This makes for decreased depth of field and the background being more out of focus.
Well,
First of all , thanks for doing this.
My take on this comparison:
1. As I have noticed in many other occasions, the M9 tends to shift REDs towards the left (more megentic).
2. The M7 (Film) is more grainy and has the blacks “lifted”.
I’ll bet that if you take the M9’s RAWs, lift the left side of the Curves adjustment and add grain in the right amount, they would look almost like the M7 photos.
Cheers.
…Of course, there are some other minor adjsutments that would to be done, like moving the M9’s reds towards the left, and disaturate the yellows a little.
Cannot make edits on comments here, so I need to correct myself here:
I meant moving the REDs slider towards the right, to make it more “orangey”.
sorry, but the M7 can not be grainy or have the blacks lifted. Not the camera is responsible for the quality of the pictures, but the lens, the film that was used, the develop lab, the scanner, the scanner software. but I suppose you suggest that mentioning “(Film)”
Subtle differences in each. Slightly more clarity in the digital version.
This ‘testing’ is best done with them printed out side by side rather than a digital screen.
What sets analogue apart from digital is the film grain, mostly, rather than sharp definition. I love looking at old mono film photos which probably would have the same ‘feel’ if it wasn’t for that grain.
It’s all personal preference but not a lot of difference in your samples.
Besides personal choice! The type of photography can be decisive choice.
For portrait work, I would choose M7.
For publicity and architecture photography I would choose M9.
If I had an Optician’s shop, I definitely choose M9.
Black white photography was not discussed in this comparison.
My gut feeling thinks M7 but with the digital software you can take a quicker and deeper action in the post-processing. With the old glass filter you do not get away so quickly.
Honestly in looking at the pictures in some of them I thought the M9 ones were better and in some the M7 and in some I saw a tie. I would have to agree with one other reviewer who said pick the camera which gives you the easiest processing experience because to me the pictures are that close.
Although I appreciate the technical superiority shown by the digital M9, as demonstrated by the increased dynamic range and better controlled noise, I subjectively prefer the film sample in all of these sets save for set #10.
My preference: M9. This is a great comparison, even if both these cameras have become somewhat niche cameras. In Set 10 is where I see the added contrast provided by the M9. Of course, I’m not sure that if these photos were not standing side-by-side, we would notice the slight differences.
Bernd, this is just a great comparison and I applaud you for the effort you’ve taken to give us multiple “real world” sets of images. As you described, they don’t each perfectly match up for comparison purposes but there is a wealth of information to be gleaned.
Somehow, I’m ultimately left appreciating each of these cameras/sensors a little more than I did before. There are differences for sure, but I could go with either camera/sensor for many of these.
In the end, the deciding factor for which camera you will take with you on your upcoming trip may come down to the photographic process itself, rather than the output (though the differences in output are important and may influence a particular project).
—Peter.
Sorry, I prefer the crispness of digital and the better dynamic range of digital. I really dislike how shadow information in film scans can tend to block up or look cloudy. Sure “Curves” and other tricks in Photoshop can help control that but, too often, the dynamic range still isn’t there. I often complain about how I get the same cloudy shadows issue (and cloudy extreme highlights as well in very high dynamic range images) from the film scans made with my Nikon Super Coolscan 9000. The “knee curves,” for shadows and highlights designed into all film stocks, is old engineering, and those knee curves in film stock are traditionally designed to play nice with the knee curves designed into darkroom paper stocks. Digital imaging isn’t burdened with multiple stages to get beautiful results. IMO, out of the gate, modern day digital cameras just get so much closer to the truth. I cherish my old film negatives and slides, so I’m glad to have a decent scanner, but when taking photos, I have no interest in looking backward and using film any more. I am one who firmly believes that it is a rare photo. digital or film, particularly for art printing or publication, that doesn’t need some degree of Photoshop intervention, but correcting for film’s deficiencies is a lot more work and doesn’t necessarily bring the image closer to what one can actually start off with when shooting digital. Romancing the look of various film stocks and film grain is fine but it’s expensive in time and money. With digital, there are great software tools that do a remarkable job imitating film stocks and pulling digital files into an “analog” look. And, romancing what one can achieve in a darkroom is fine but at this point in time it has become a fine art, just like an investment in a printing press, copper plates a one-off inked prints is a fine art. It has become an expensive hobby or passion in both time and money.
These are far more similar than I would ever have imagined . I shoot black and white only with my old M8 but I know that it and the M9 produce very film like results in both colour and mono .
Just a quick comment on the scanner . I have an old Nikon CoolpixED film scanner that I could only use with Windows XP but later discovered that I can use it with Vuescan on Windows 10 – maybe Vuescan will work for you as well . I find it better than the Nikon software.
I have a Lumix G that I use for Colour but presently have no film camera !!
Your post here simply must inspire us all to search our attics and flea markets for a usable film camera .!
Thanks for a very interesting post.
Thank you very much for this comparison, in most cases the difference is hard to see and I would take the M9 with no hesitation for the trip. For an almost the same result you may save time and money. Has Benarou suggested, could you please tell us what lenses have been used?
Personnally, I think both are wonderful cameras but I would recommend playing with them for different purposes, as each medium excels in some particular fields.
– On a sunny day I would take the M7 and would shot Portra or Fuji Pro 400 H two stops overexposed. With Fuji you would get a beautiful pastel tone, with Portra you would get a warm, more saturated look. And I would recommend a Frontier scanner
– On a cloudy day I would also take the M7 and a roll of Tri-X, overexposed one stop, and scanned with a Noritsu scanner
– and I would pick the Digital Leica for those times that I would need conveniency (for example changing conditions, indoor locations) and I would leave its colour rendition as it is. I would not overexpose it, perhaps slightly underexpose for a dense look. I do not own a digital Leica but I admire many photographers who do not retouch its files.
Just my two cents…
I prefer the M7 .
Having said that , though , due to the cost of film/processing , I would shoot the M9 and pp with VSCO analog series .
For me, the biggest difference showed in Set 7, where the first image (presumably digital) has kept detail in both highlights and shadows. The 2nd image has bleached-out highlights and hazy shadows. This tendency is present, though not as obvious, in many of the comparisons.
In both cases you mentions the film got obviously more exposure then digital, heck the difference. One important point in this comparison is forgotten. Film is a sensor in each roll. You don’t have to spend some 3k (used) to get comparable results. Any fixed lens or SLR for less then 100 bucks will do.
The M9 is famous for being as close to film as possible and it shows. Great looking images from both cameras. My M9 never reproduced the reds like it should, so the M6 may even be closer to the real thing. All in all the images from the M9 seem to have bolder color but only by a bit but other than that they are very comparable. Even today i am a big fan of the way the M9 renders images and so it is a compliment to film being so close. Some may even prefer the images from the M6.
Film is not dead that is for shure. I am even more amazed of what medium format or large format film cameras can produce. They put some modern cameras to shame.
In most pics, I prefer the M9.
You did not mentioned lenses used in each case. Are they the same lens on each body? Because I think that would be an important factor.
You are right, I did forget to mention that. I used the 35mm summicron IV (pre-aspherical) on the M9, and the first version 35lux AA (double-aspherical) on the M7. They are both ‘vintage’ lenses. I used the higher quality lens on the M7, mainly because I wanted to also make sure there weren’t any focus issues with my rangefinder. I did shoot them both between f5.6 and f11 though, which for all intents and purposes makes the difference absolutely negligible.