
170 Megapixels with a Sony NEX camera and Vizalex RhinoCam
by Dierk Topp – His flickr is HERE
Hi Steve,
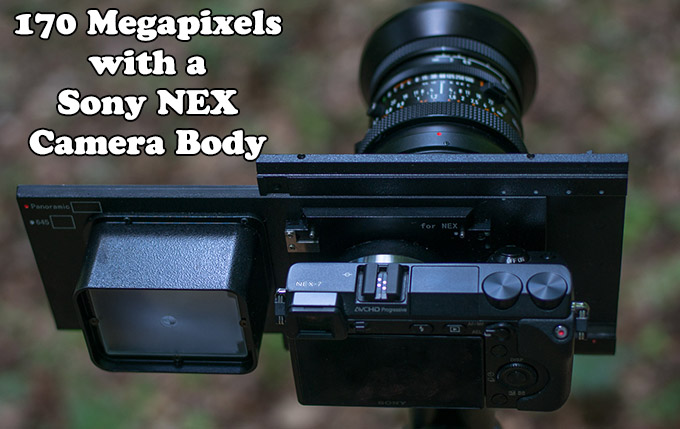
today I have a very special topic again, the “Vizelex RhinoCam for Sony NEX E-Mount Cameras“.
The Rhinocam is more or less an adapter for medium format lenses on NEX cameras – but much more than just an adapter! When I read about it, I ordered the next day and got it about 4 weeks ago – and I am very exited.
But let my start from my beginning more or less.
My very beginning was in 1956, when I did my first photographs with the Agfa Box of my mother and I got exited the first time. To make this long story short, my analog time ended with 6×6, 4×5 and the panorama cameras Horizon 202 and the last one was the ultimate Seitz Roundshot, shooting up to 360° (and even more).
Then I switched to digital. After some Nikon Coolpix I got the Nikon D70 with 6 Mpix. I love big prints but the resolution was very low for big prints. So I got a Panosaurus panorama head, adjusted it for the nodal points of my lenses and started shooting and stitching panoramas (with PTGui and TPAssembler) and printed and sold 150x50cm panorama prints. That was great!
When Gigapan offered a beta program for their Epic pano head, I participated and used the tiny Leica D-Lux3 with 10 Mpix. and stitched up to 200 images giving up to 800 Mpix images:) You may see them at gigapan.com (search for -dierk-)
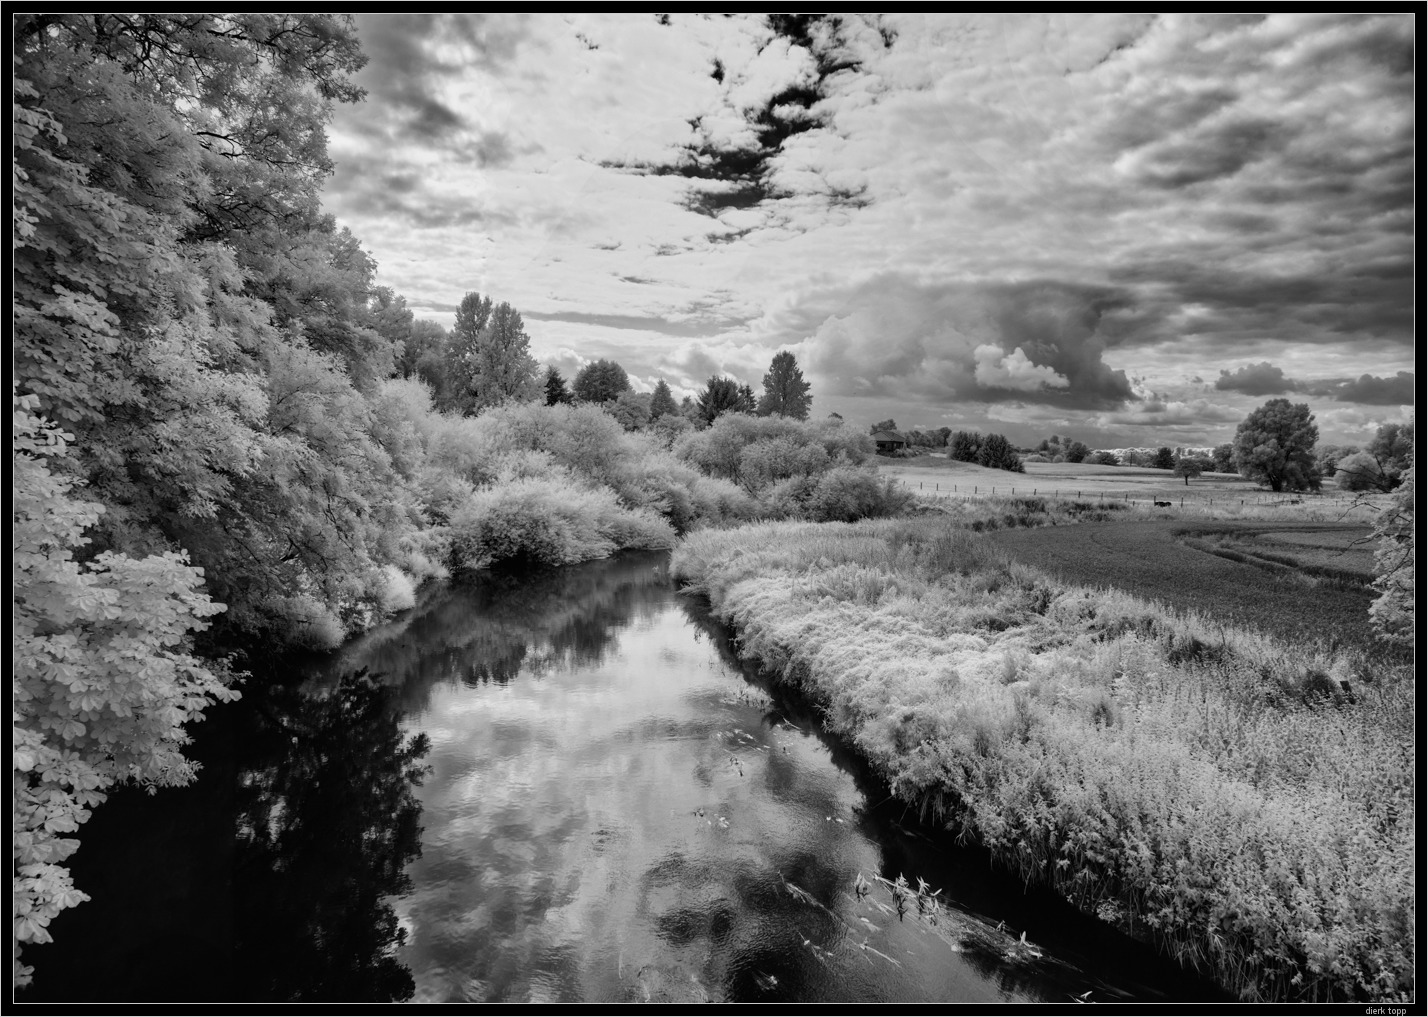
During the last years I was shooting many stitched landscapes with Leica M9 and M Monochrom and the NEX7 and now the NEX6. Prints are now up to 1x2m on my wall:) Allmost my landscape and nature images are stitched images. Going out with the Leica and one or two lenses (most of the time 21mm and 35mm) I can get any angle of view by just shooting one or even two rows hand-held.
[ad#Adsense Blog Sq Embed Image]
As sad, I love big prints. I stitched also from shifted images of the Nikkor 24mm PC-E and lately with the Canon 17mm TS-E for higher resolution and wider angle of view, especially with the 17mm TS-E. But that is a new story.
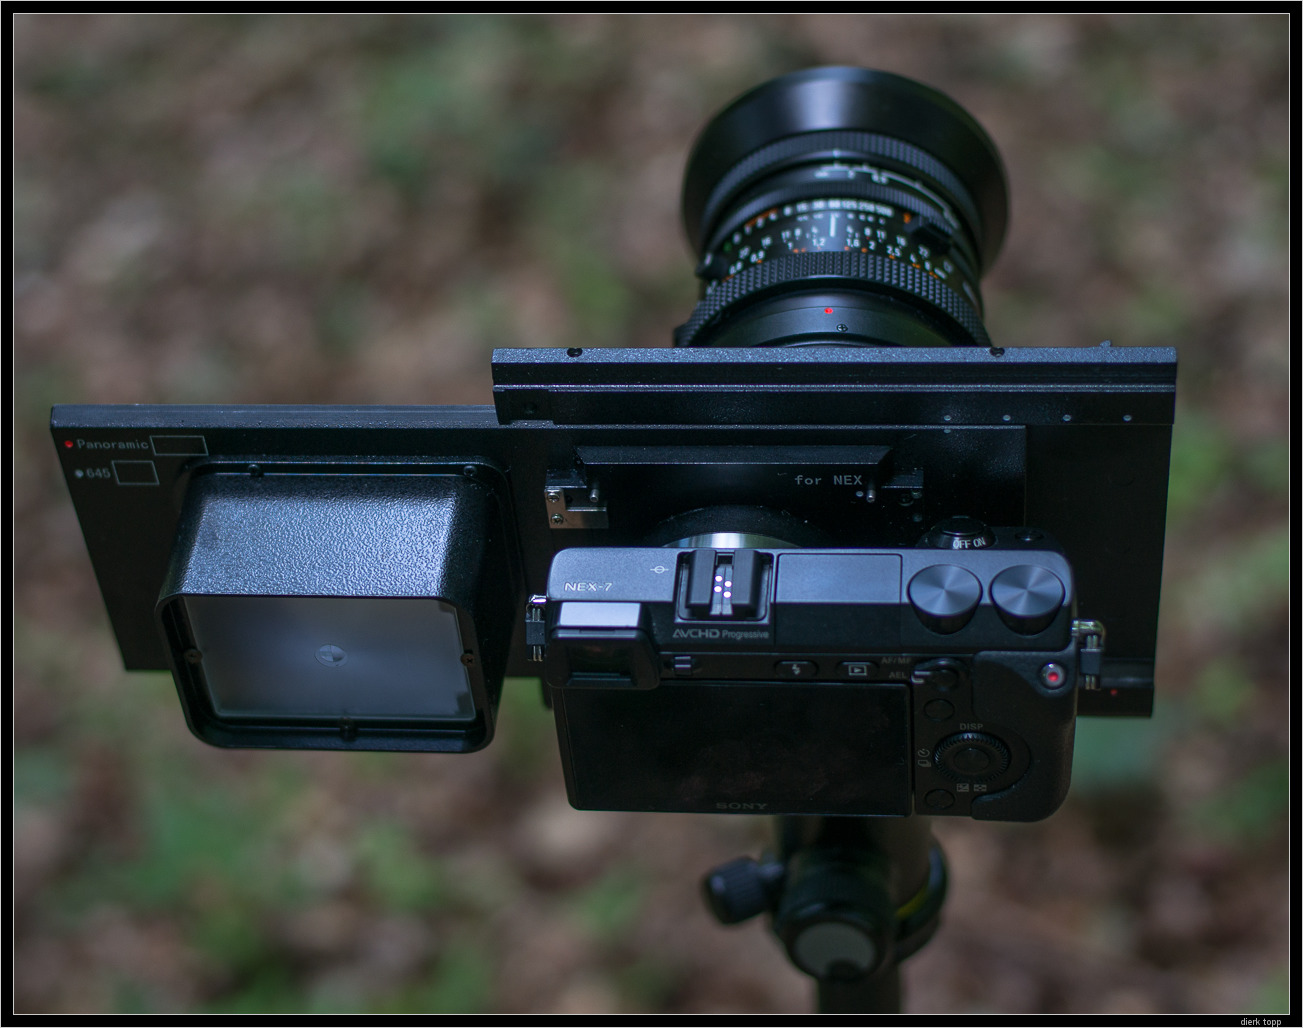
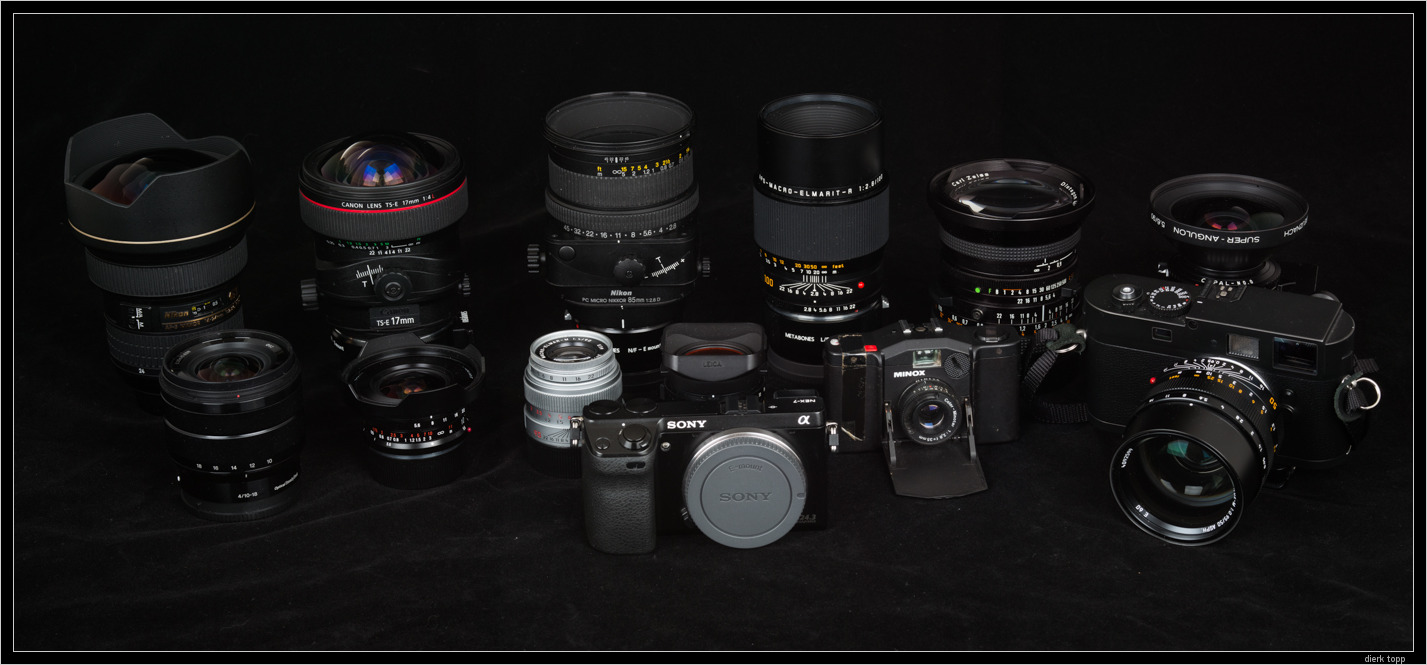
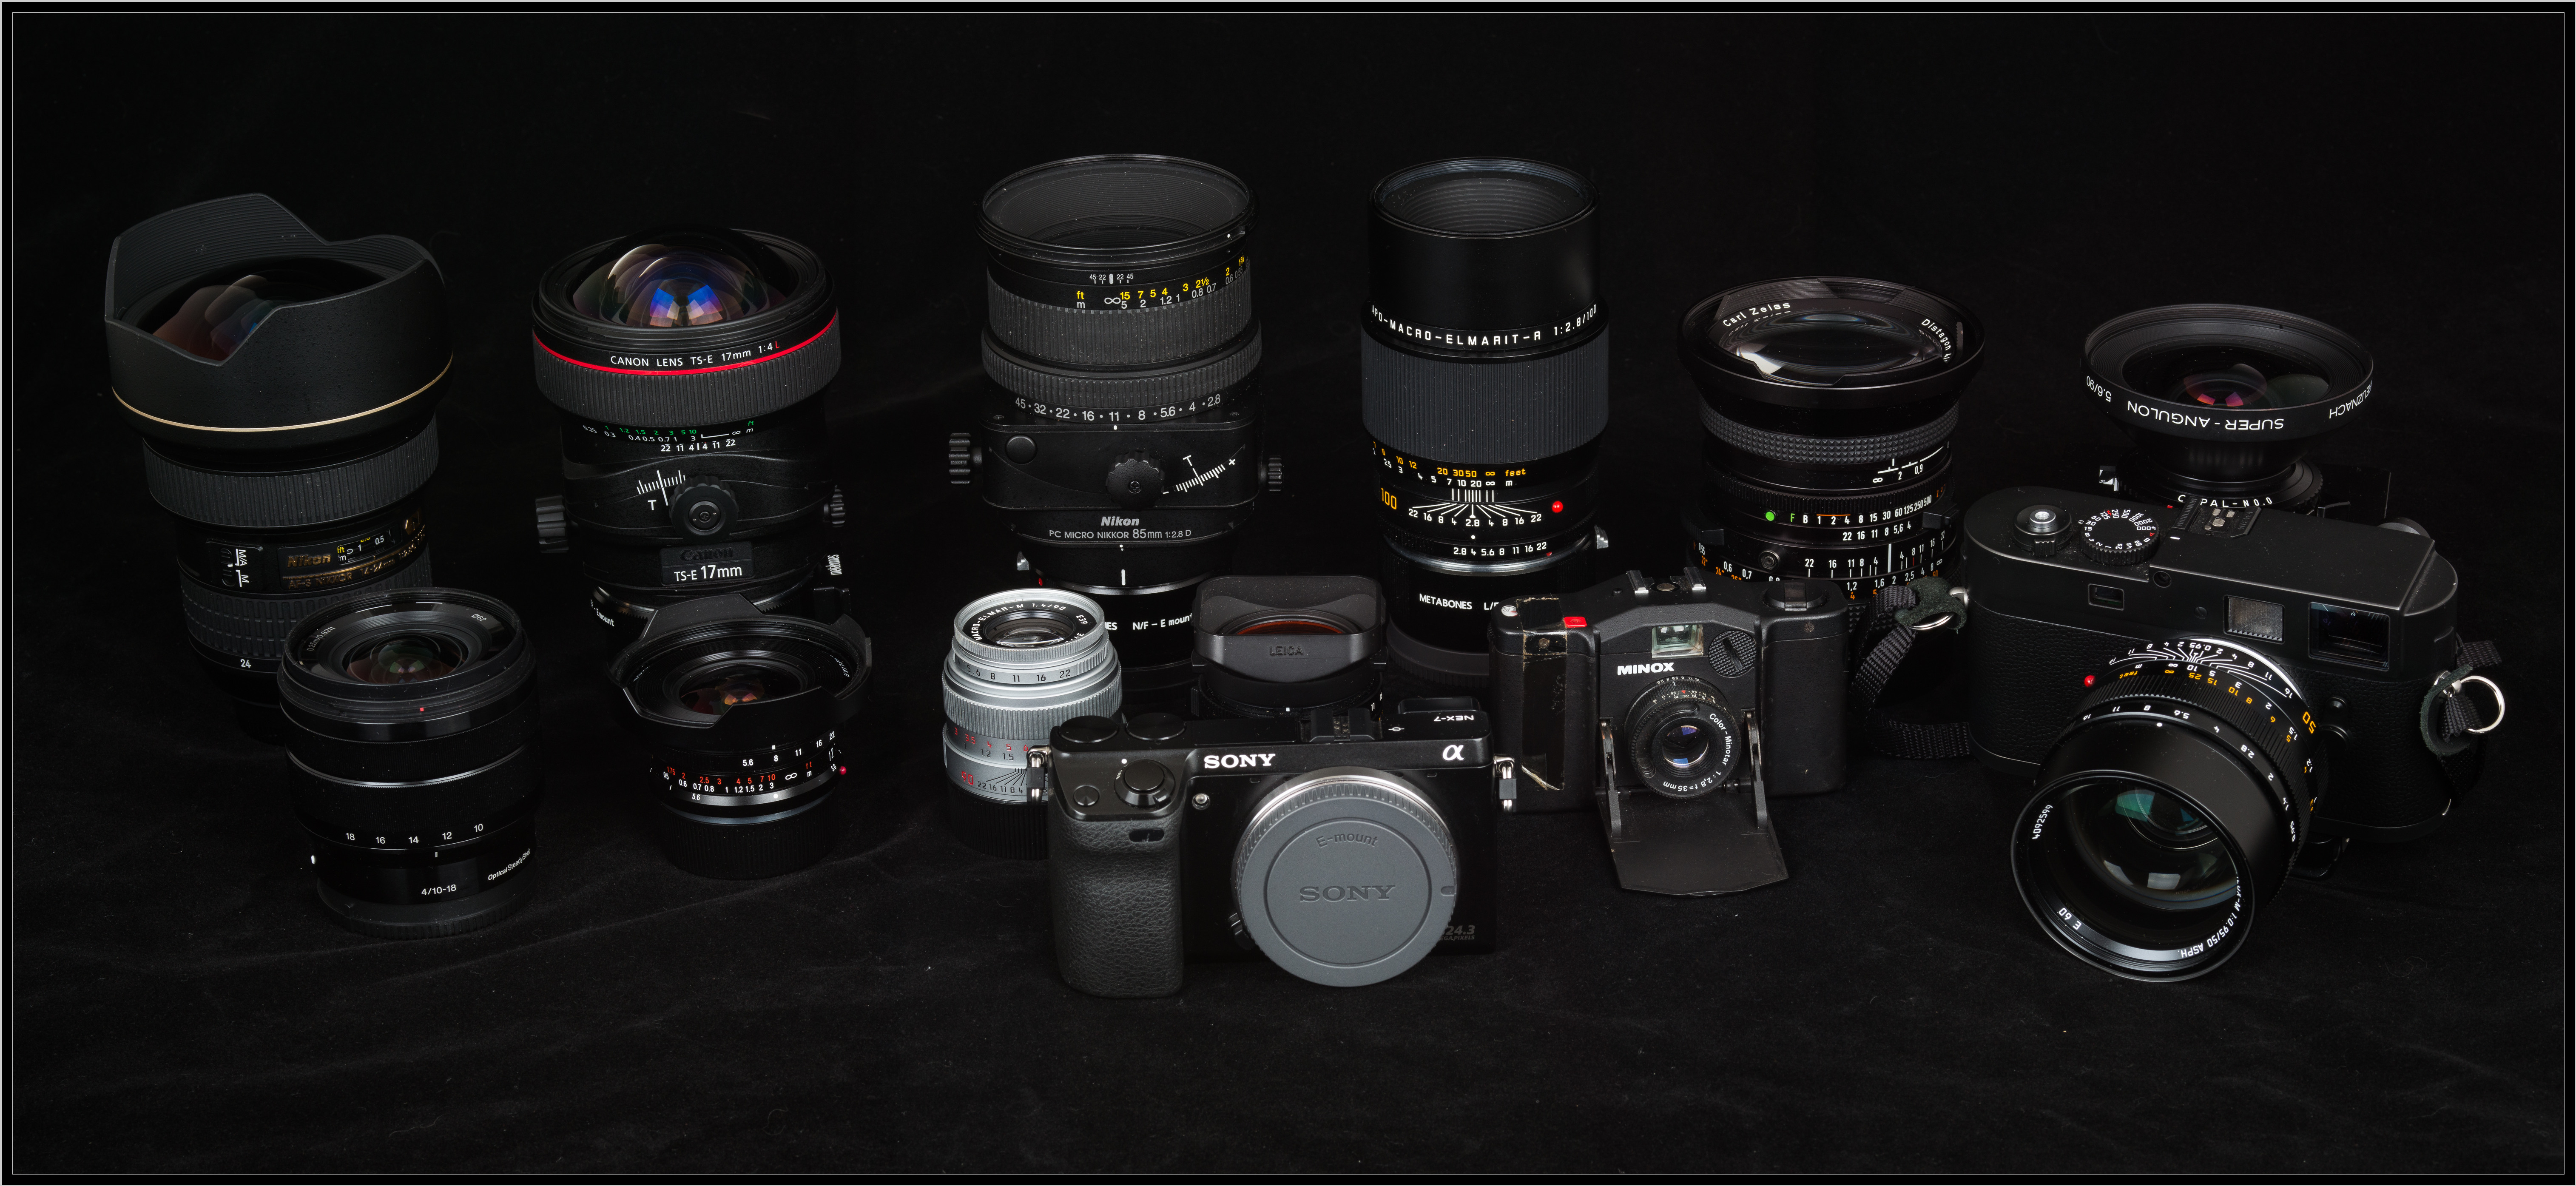
When I saw the Rinocam, I ordered it the next day and bought two Hasselblad lenses, the Zeiss Distagon 40mm and the Zeiss Makro-Planar 120mm. I want to do landscapes and architecture and stills with the macro lens. For the resolution of up to 140 Mpix the best lenses are just good enough and these Hasselblad Zeiss lenses are very big glass value for the money! For the price of the Sony Zeiss 24/1.8 you get the excellent 40mm Distagon, like about 21mm on 24×36 FF. Finally I bought the superb Zeiss Sonnar 150mm/4 for less than 400€, a collector’s item like new!
How does the Rhinocam principle work?
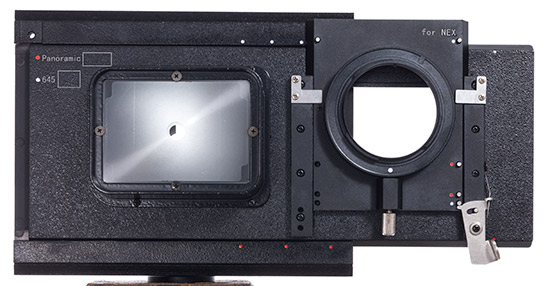
On the front part you find the exchangeable adapter for the lens with the tripod foot, I have the Hasselblad V adapter. Adapters for Mamya 645 and Pentax 645 are also available.
On the back of the Rhinocam is the mount for the NEX E mount cameras. This part can be rotated by 90°. For “Panorama” taking 2 rows of 3 images with the NEX in landscape orientation, and for so called 645, taking 2 rows of 4 images with NEX in portrait orientation.
The camera is now positioned within the images circle of the lens and where the film plane used to be in 6×6 or 645 cameras. For the pictures you move the back with the camera to any position. For guidance there are marks for the horizontal and vertical movements. But as said any position is possible. Sometimes I use additional positions, when for example the unstructured background of stills or the sky will make problems for the stitching. Additional pictures can connect those areas for the stitcher.
You will find more explanations an a movie on the page of Fotodiox Inc. or you can see it below:
Some thoughts and comparison of the Rhinocam/NEX versus digital medium format DMF.
Besides the price the obvious difference is, with stitching several images together, you can only shoot more or less static objects. Witch is obvious and normal for anybody, who used stitching before.
I would like to look at the resolution (there are many more aspects – besides the price 🙂 ). The Rhinocam technique uses 6 to 8 (or more with more overlap) stitched images of 24 MPix/image of the NEX7 or 16 MPix/image of some other NEX models.
- The effective sensor size results in 4.5×6 mode of the Rhinocam is about 58×48 mm compared with 48×36 mm of the Leaf Aptus 75S for example (there are bigger and much more expensive ones)
- the resulting resolution is about 11700 x 9300 = 108 MPixel with the Rhinocam and the NEX6 versus 6726 x 5040 = 34 MPixel of the Leaf 75S – the NEX7 even higher (140+).
- ich made a test with NEX7 and shooting 10 instead 8 images (in 4.5×6 mode) and got 17.000×11.300 pixel = 192 MPixel.
- If you downsample the NEX6/7 files to the resolution of the 75S, you must get some very good IQ (if you start with a good lens like Zeiss glass of course)
- another aspect is high ISO: the high ISO of the NEX cameras is good and getting better. What I read and see, the high ISO on DMF seems to be very limited
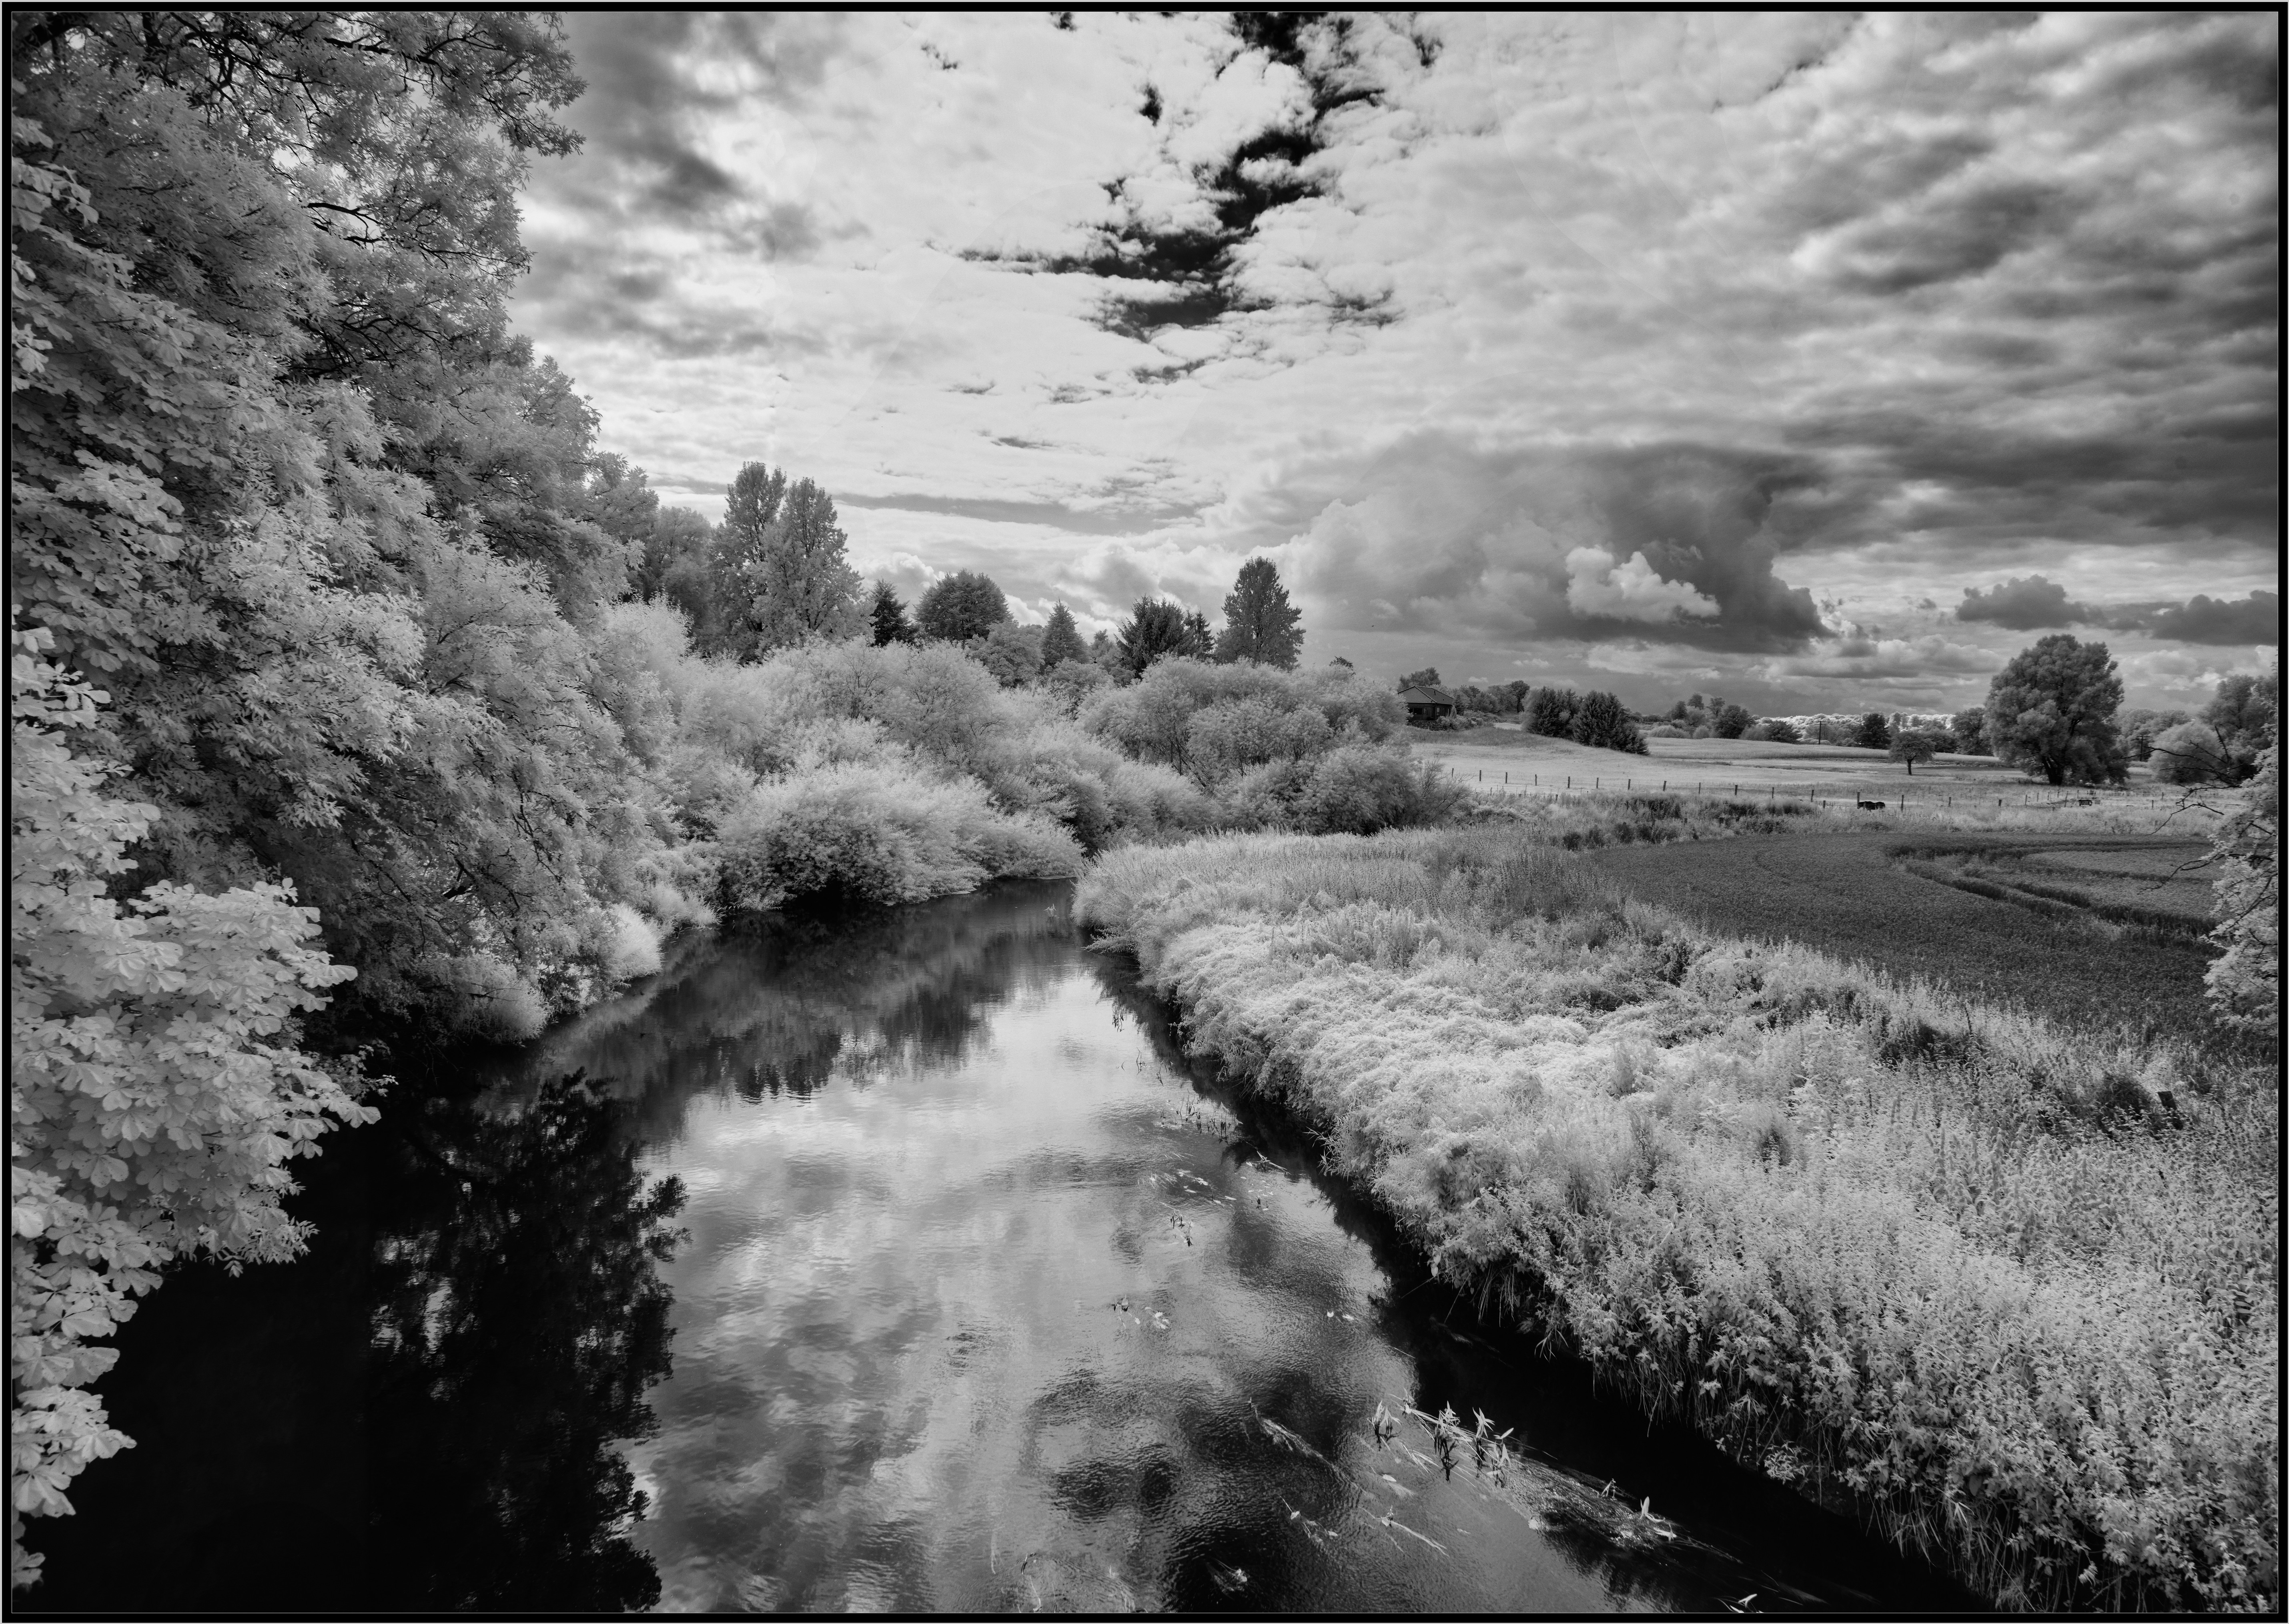
- and one more: my NEX7 is converted to infrared and I can use it on the Rhincam as well. That gives me IR images with this impressive resolution of 140+ MPixel
- by using the big image circle of the 6×6 lenses you don’t get any problems with parallax and foreground, as you may know from stitching images by moving the camera. You move within the same image and “simulate” a much bigger sensor
- shooting the Rinocam is fast! Setting up the picture is the same as with any other tripod shooting, and the shooting of the 8 images does not take more than about 15 seconds (or even less). Moving clouds and changing light is not a big problem. Shooting large format takes far more time and preparation
- stitching is like any other stitching. On my 3 years old AMD quad core WIN7 with 16 GB using the free MS ICE takes about 20 seconds.
There are really strange arguments in some post and “reports”:
- you need a good tripod – wrong! no problem, for stitching images you even can shoot hand-held. The stitcher takes care
- even Fotodiox says: shoot auto WB and auto exposure: shooting RAW auto WB is unimportant, auto exposure give you big problem with light and shadows. Experienced pano shooters use manual exposure (or even bracketing)
- focusing on the ground glass is a problem: wrong! The ground glass is just for first framing. I control the exact framing of the final image and the focusing with the perfect liveview of the NEX.
Last, but not least: who needs this high resolution?
- not for the Web, life could be easier!
- but for real big prints, where you can walk around with your eyes on the picture and enjoy the details
- you don’t have to be Andres Gurski! My prints are up to 1x2m and I love them 🙂
- with all these pixels you can use parts of the image like a shift lens
Please, all the PROs making money with DMF cameras out there, don’t kill me, I make fun – not money with my gear :))) I bought the Rinocam like anybody else and don’t get payed for my typing.
You find more information and a movie about the Rhinocam on the site of Fotodiox Inc.
You may find my images with the Rhonocam here or on my flickr album: www.flickr.com/photos/dierktopp/sets/72157634801332367/
Amazon sells the RhinoCam HERE
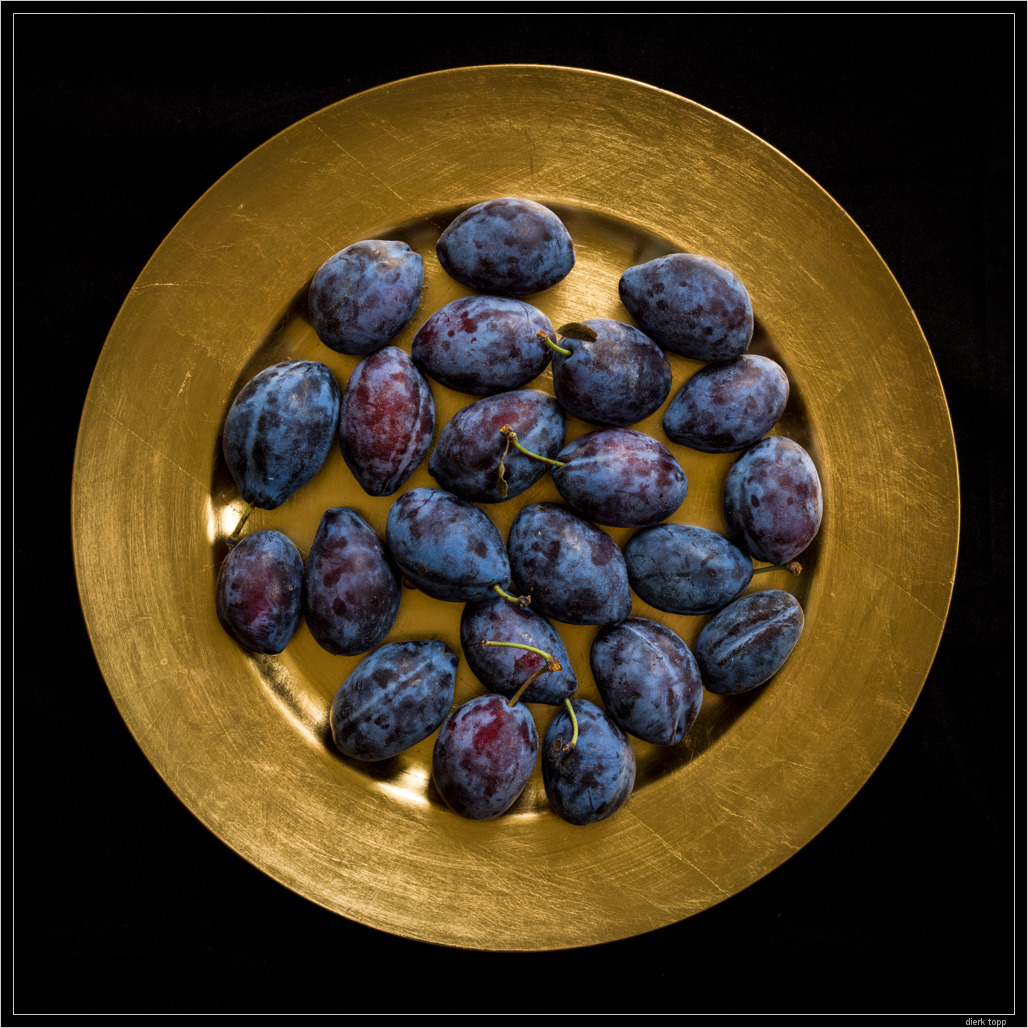
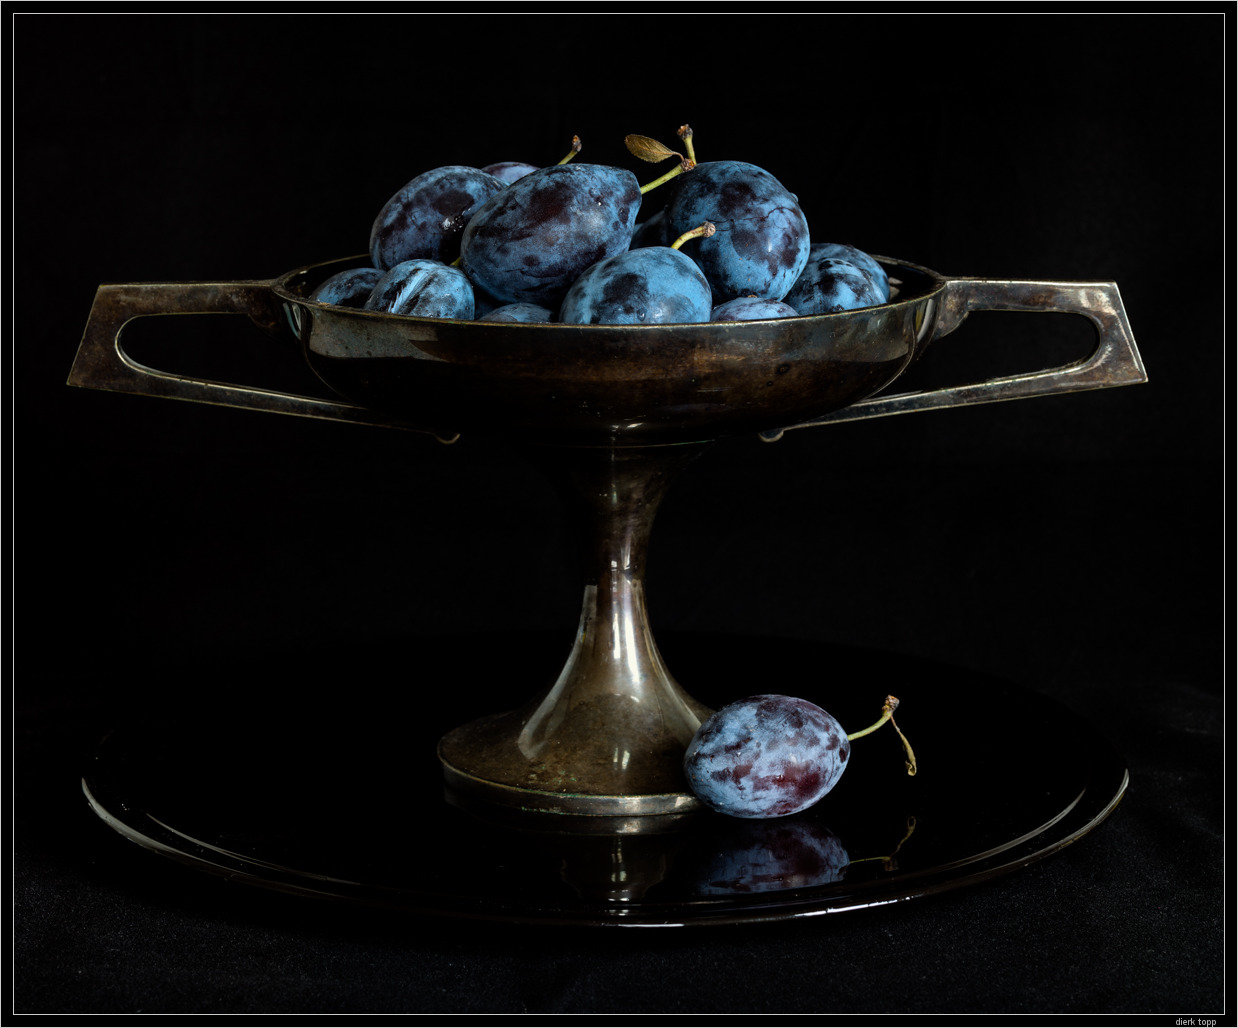
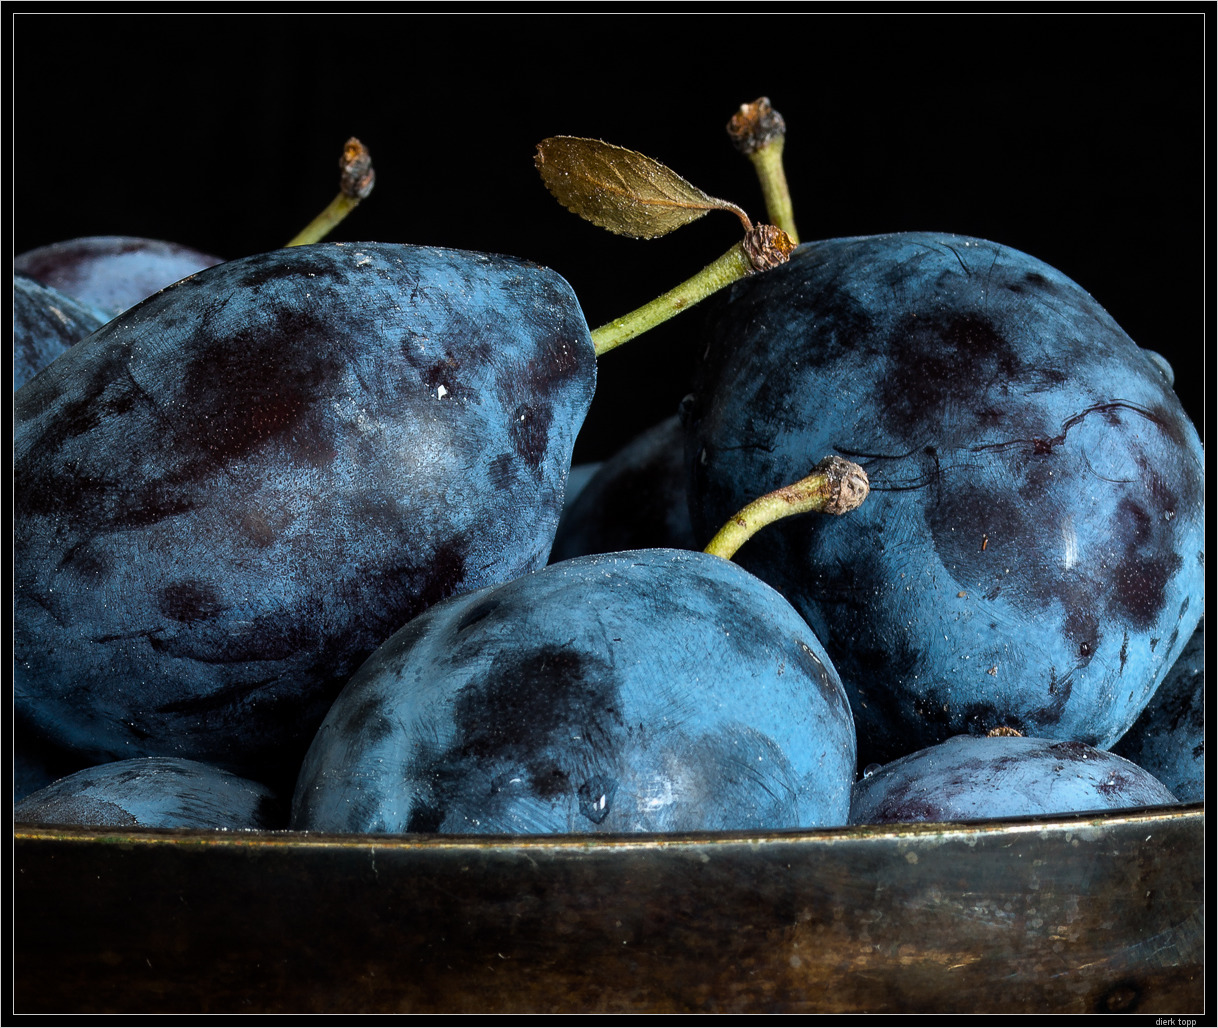
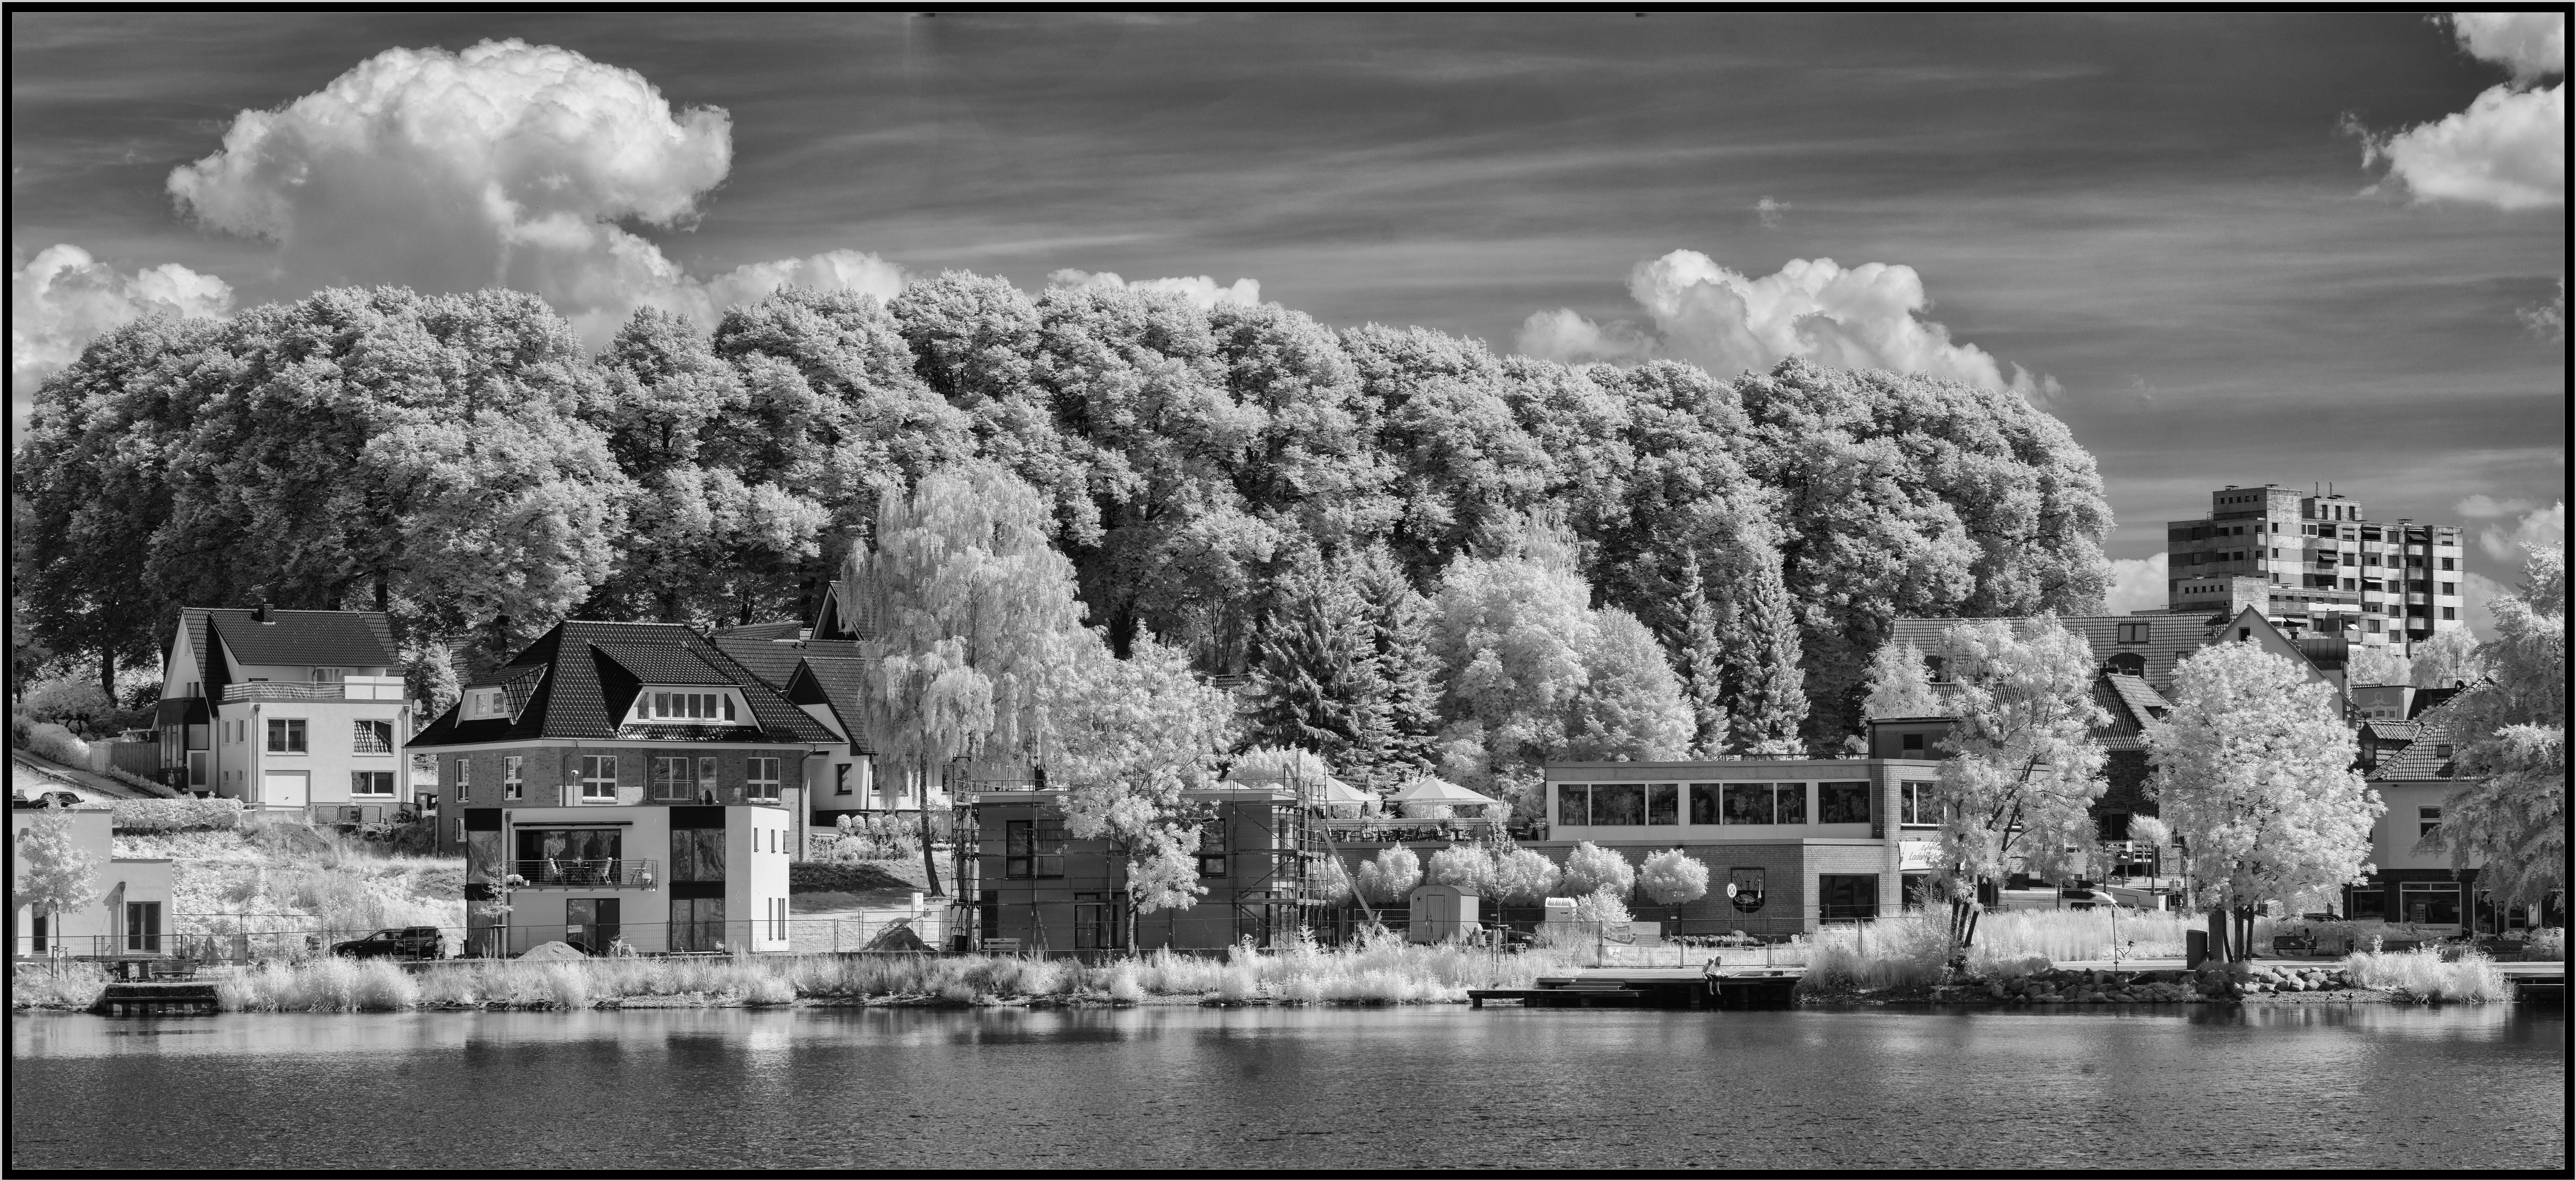
Too many words, here are some examples:
First, here is the “monster” on location
With my special NEX7-IR (converted to infrared) and the Zeiss Distagon 40mm/4. You see the ground glass for the first rough framing and the old-fashioned focusing aid in the center. It works for the first focus but for exact focus you use the NEX with the magnification. For the exact control of what you will get on the image you also use the liveview of the NEX and slide the camera to the outer positions.
–
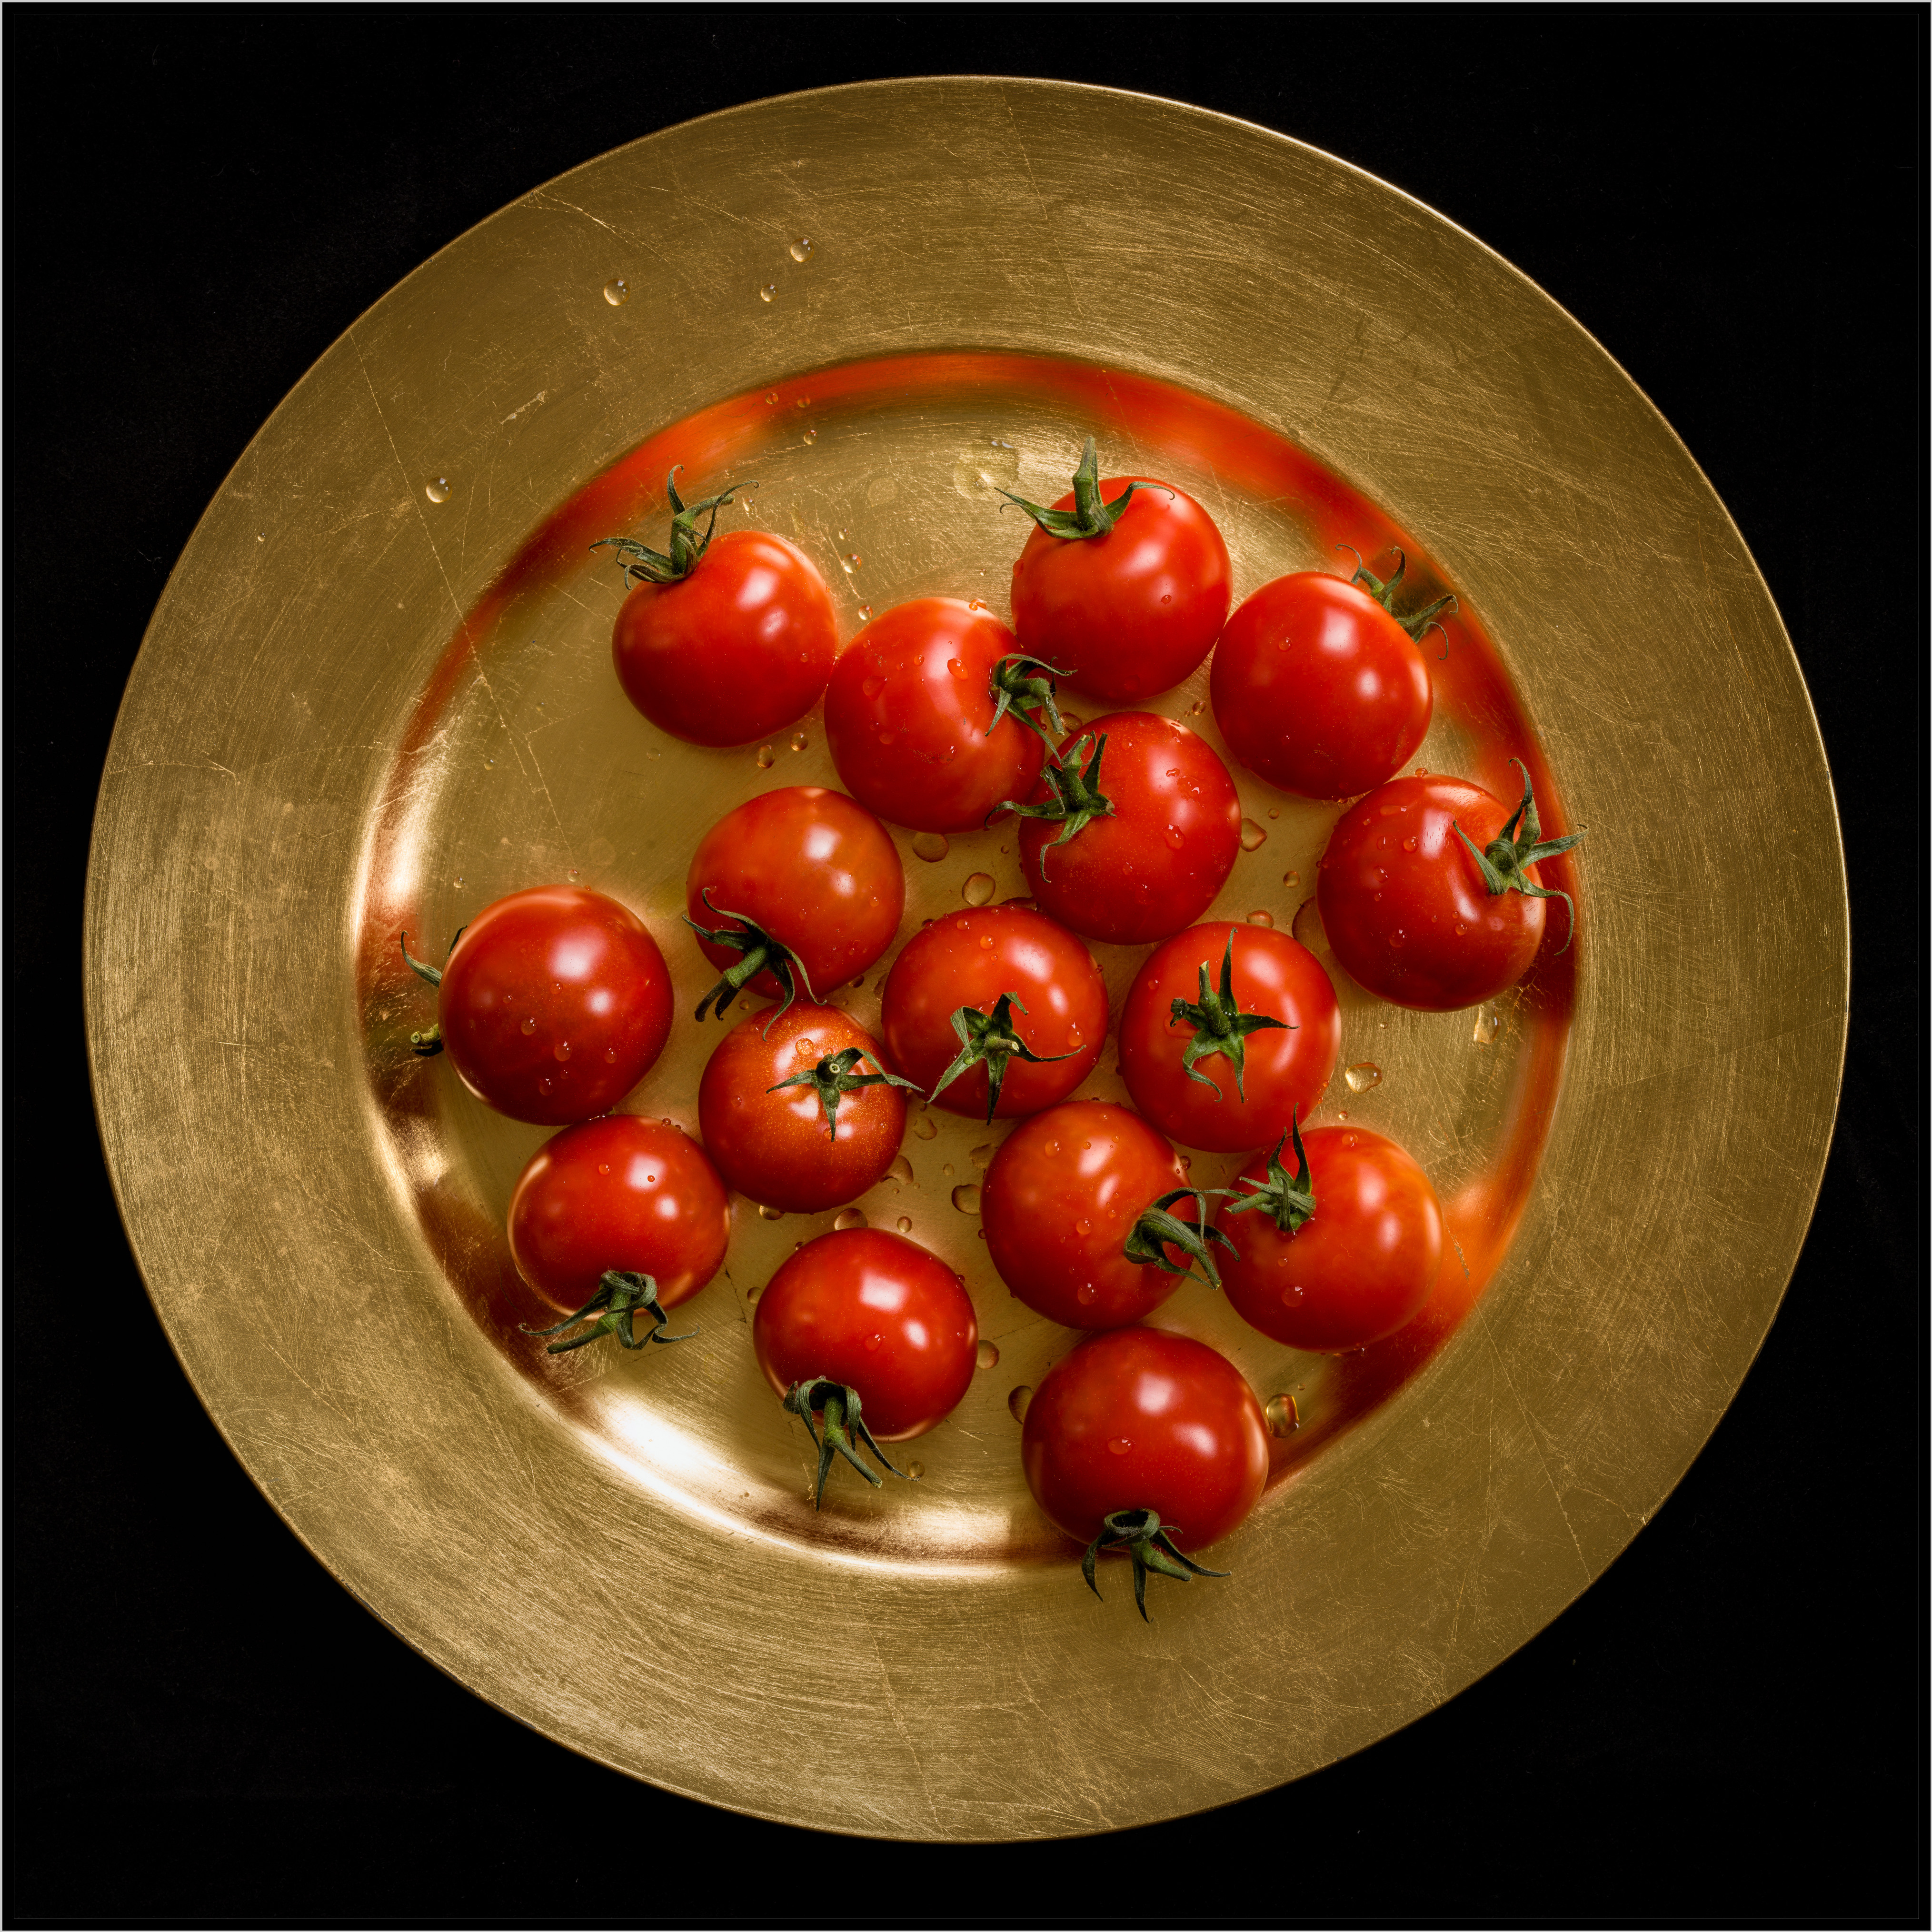
NEX6 with Hasselblad Zeiss Distagon 40mm/4
stitch of 10 images (2×5) from Rhinocam = 14.000×9.300 pixel. A higher resolution of about 6000×4000 pixel is here

–
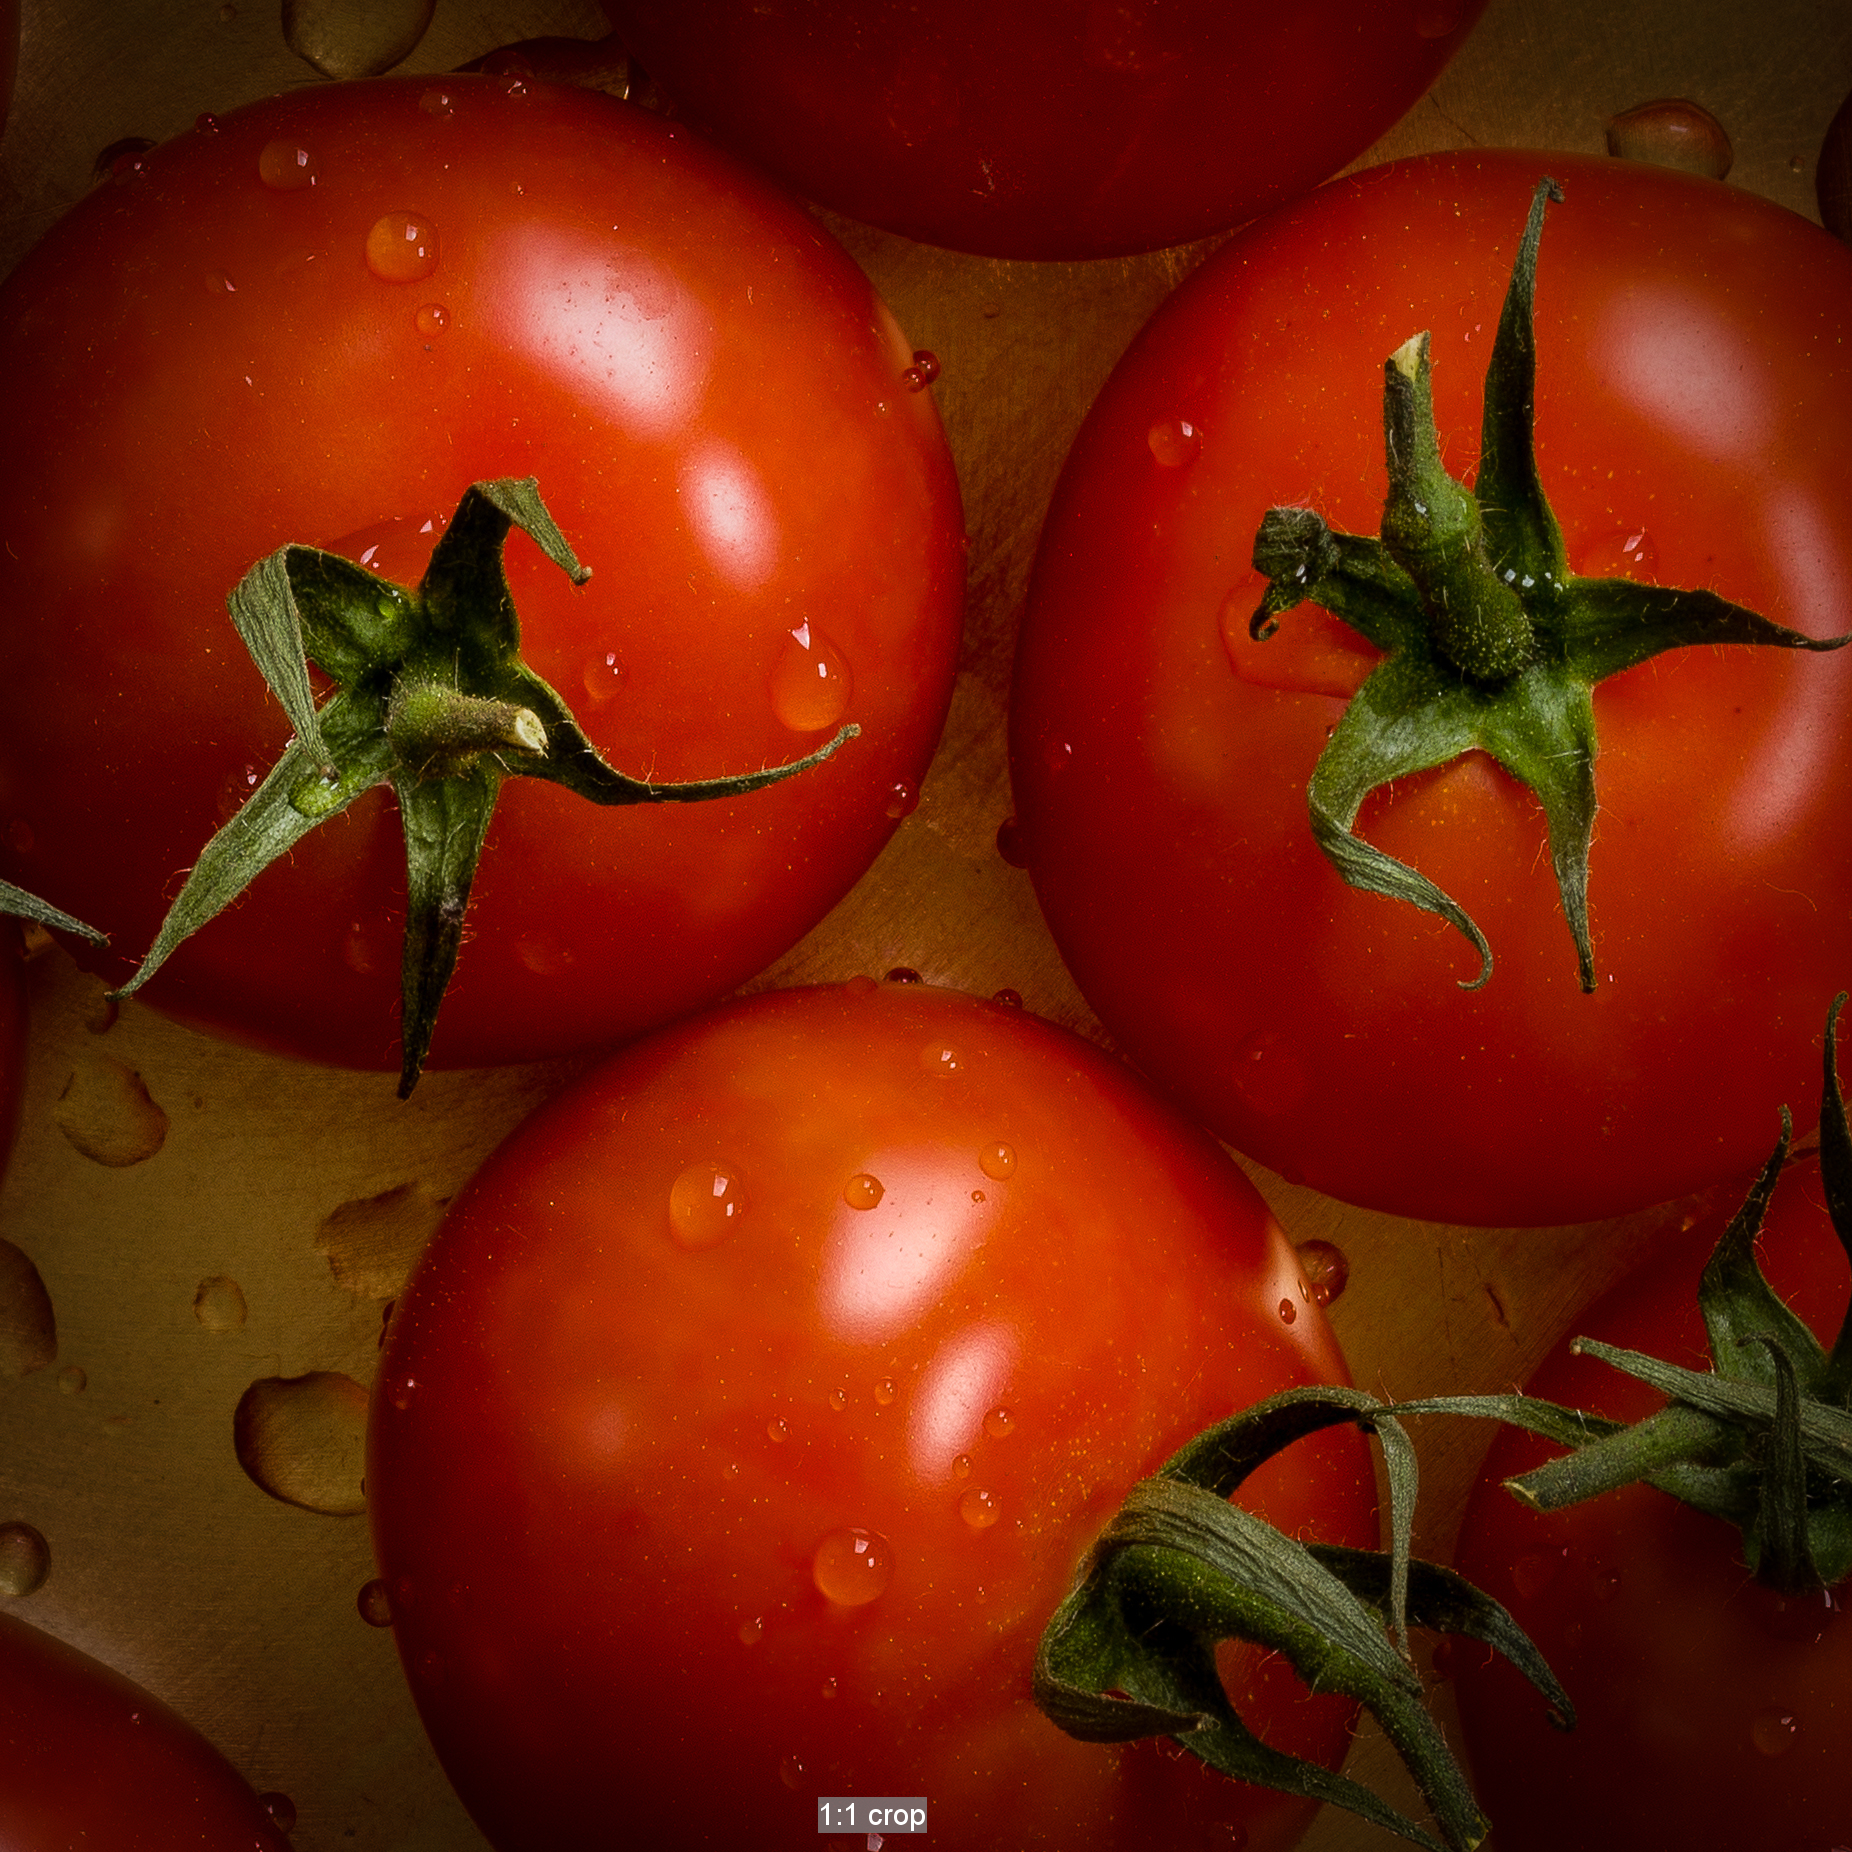
a crop (the real 1:1 is here)
–
NEX6 with Hasselblad Zeiss Distagon 40mm/4
stitch of 8 images from Rhinocam about 110 MPixel. A higher resolution of about 6000×4000 pixel is here
–
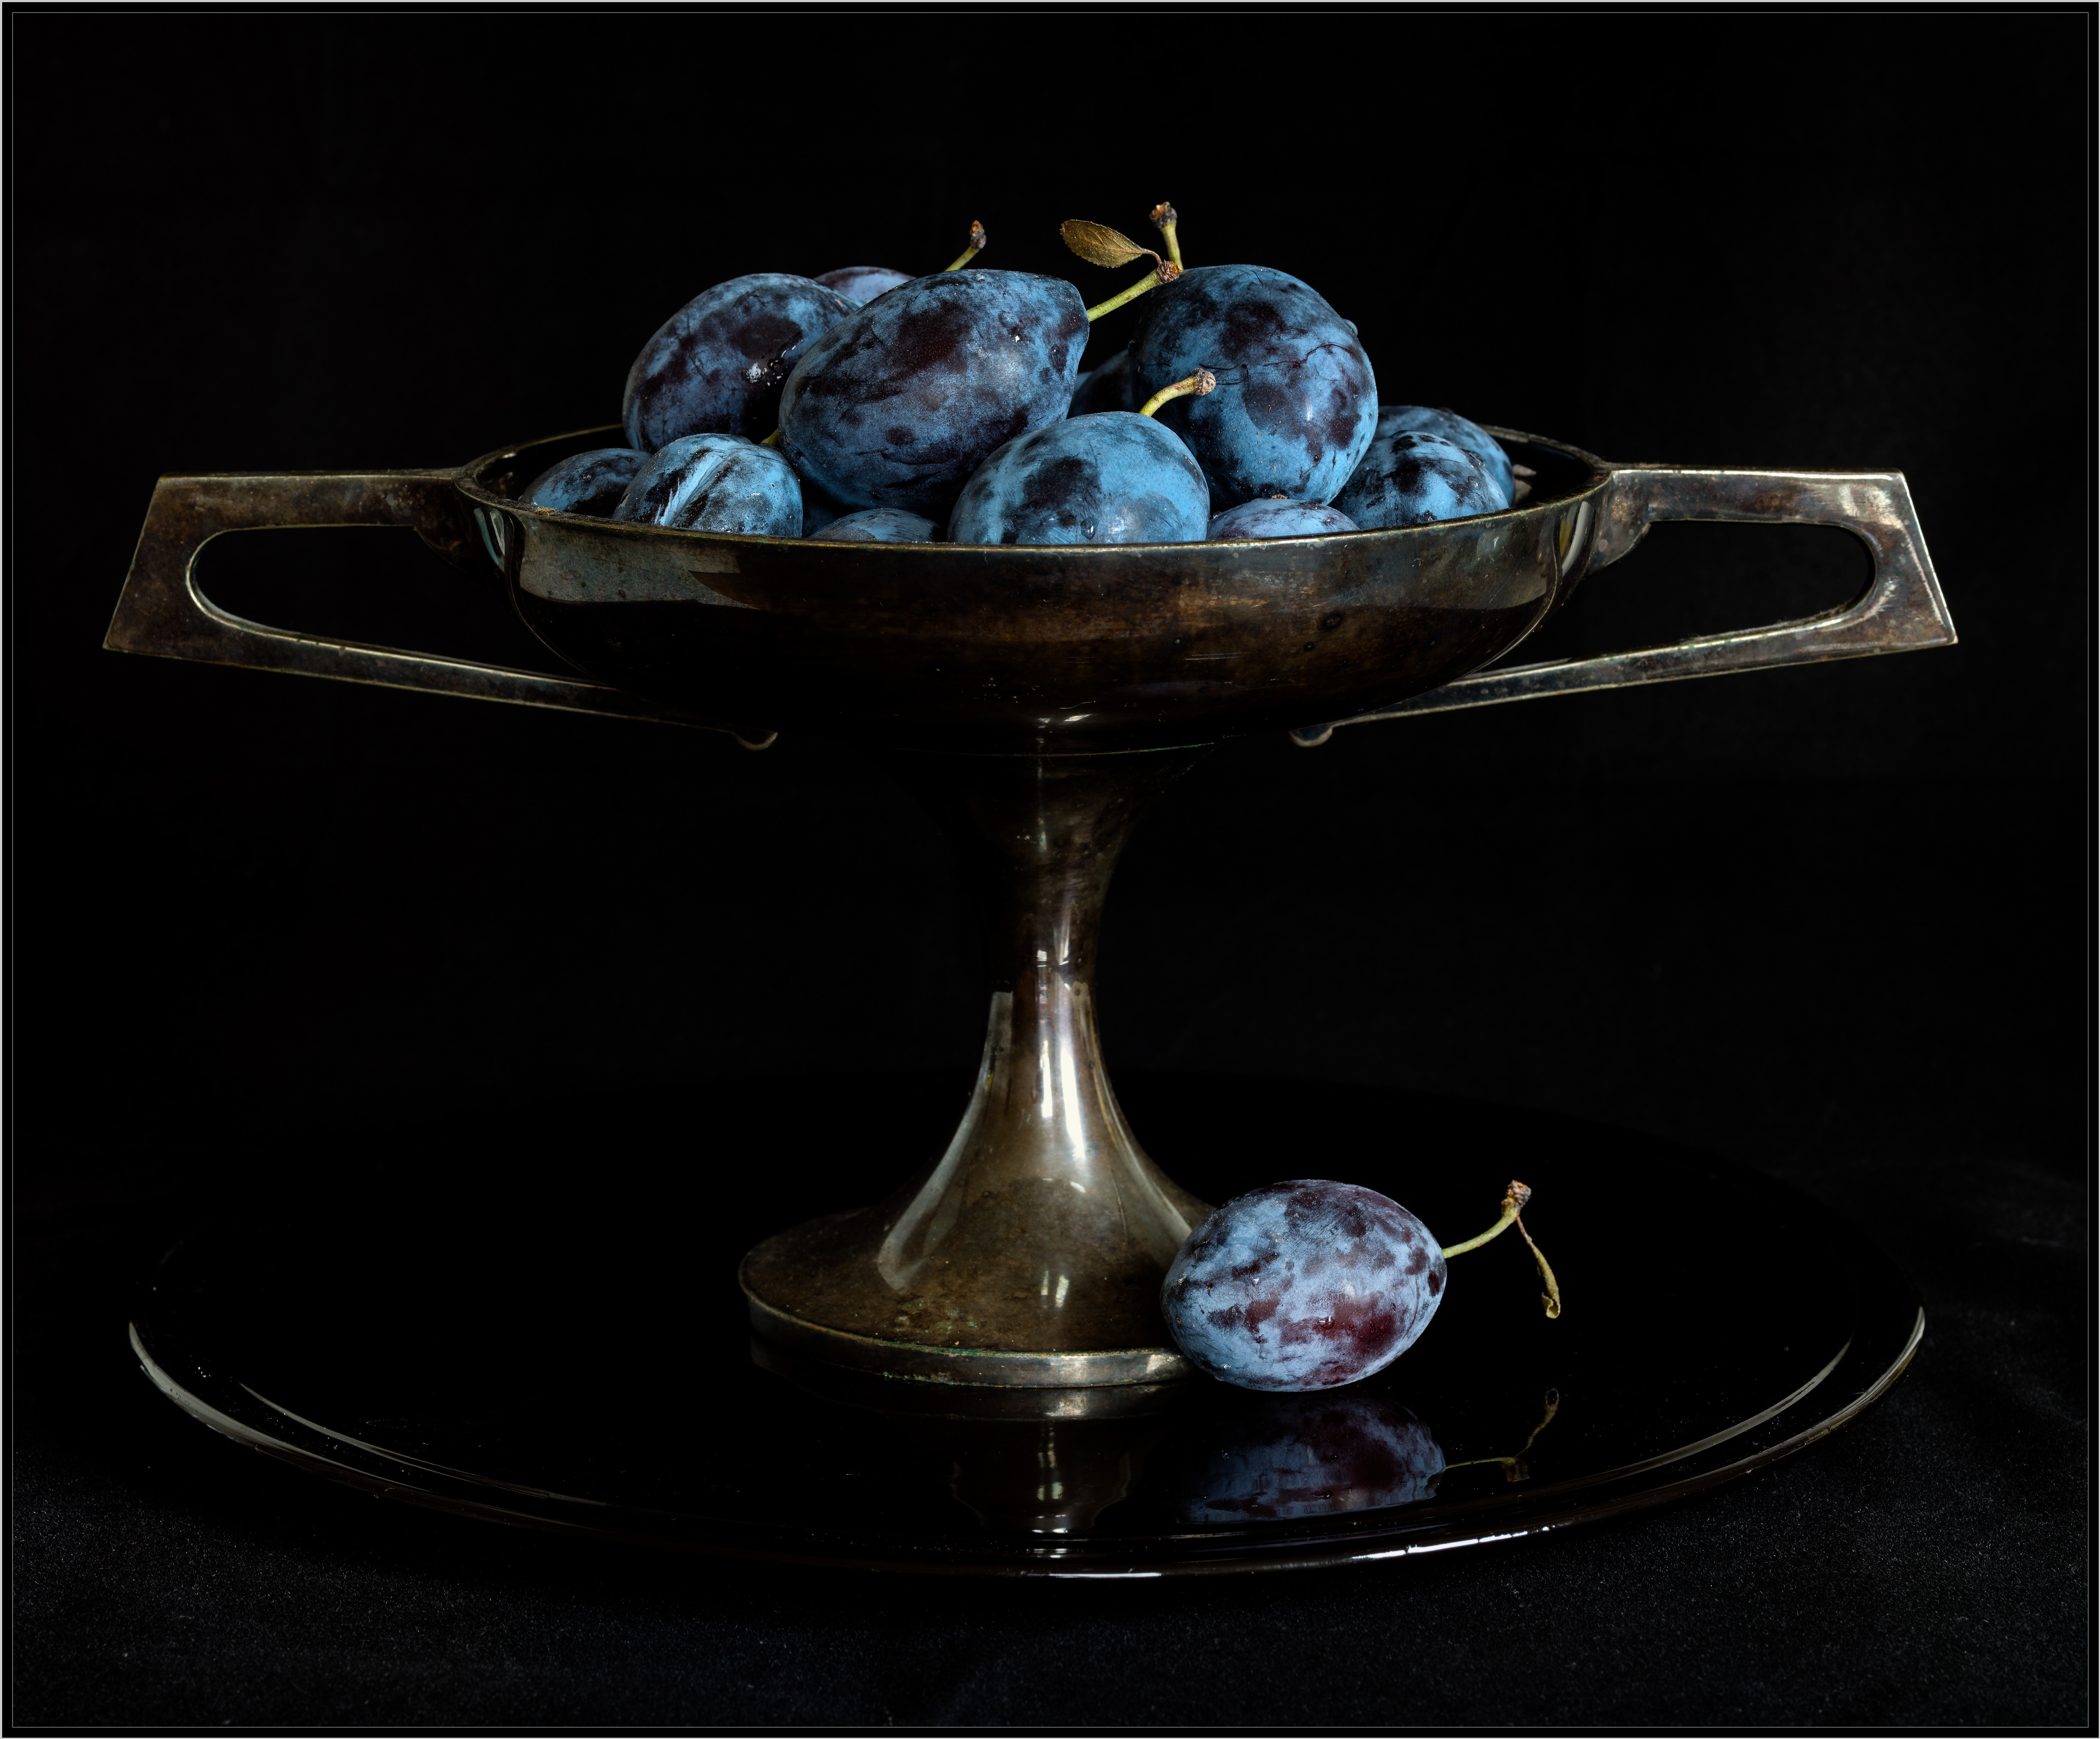
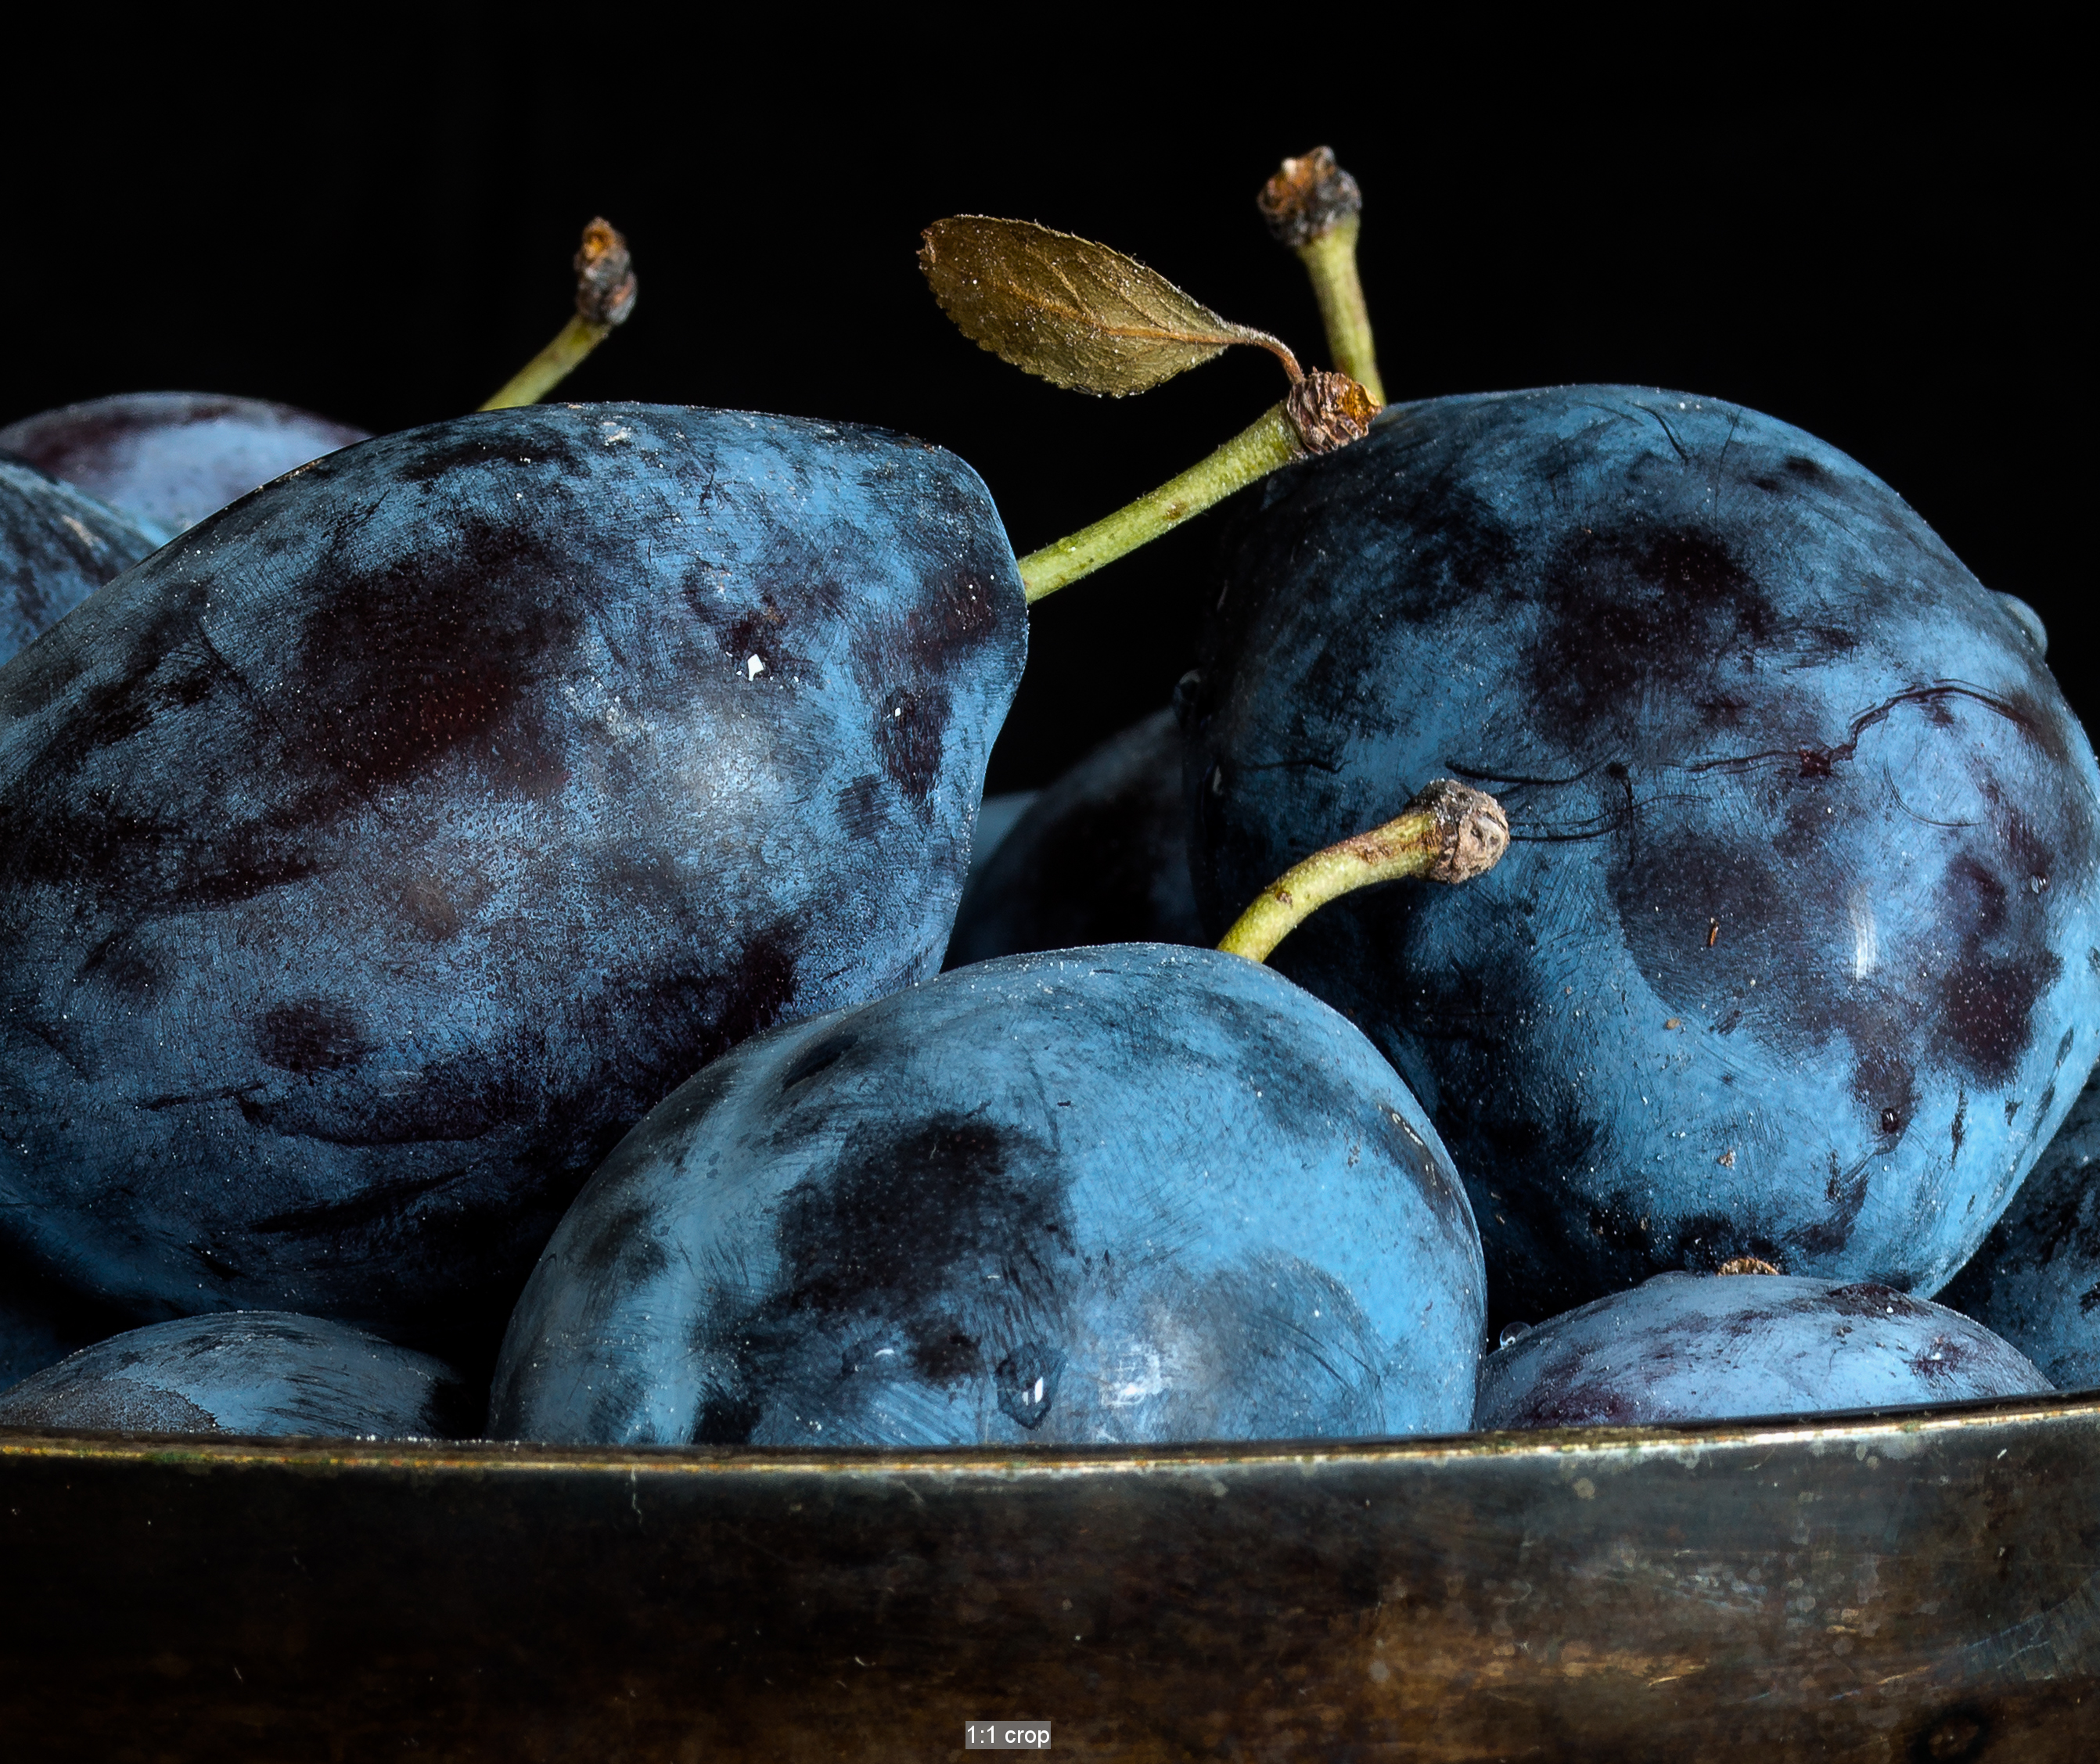
NEX6 with Hasselblad Zeiss Sonnar 150mm/4
stitch of 2×4 images from Rhinocam about 110 MPixel. A higher resolution of about 6000×4000 pixel is here. If you look at the upper right part, you will find, that this part is blurred, as the image for this part was blurred. But I had only this shot.
–
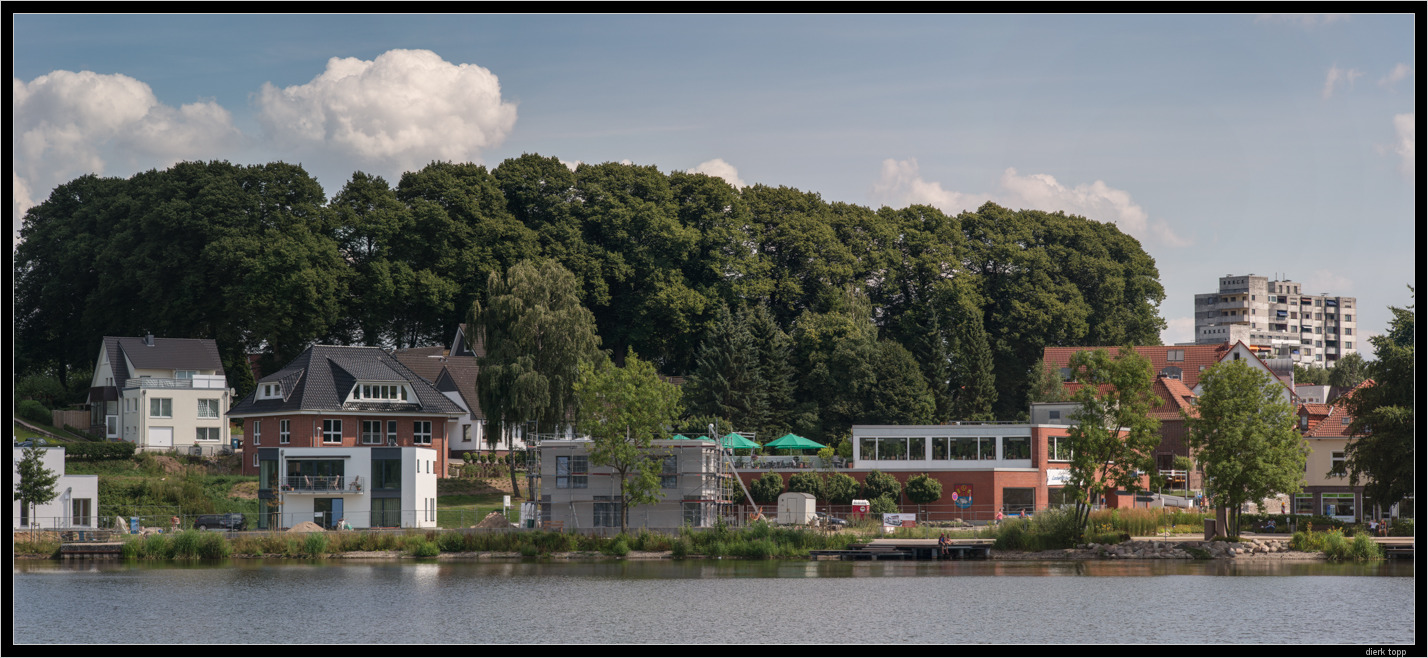
NEX6 with Hasselblad Zeiss Sonnar 150mm/4
stitch of 2×4 images from Rhinocam about 80MPixel. A higher resolution of about 6000×2700 pixel is here. The distance to the houses is about 200m
–
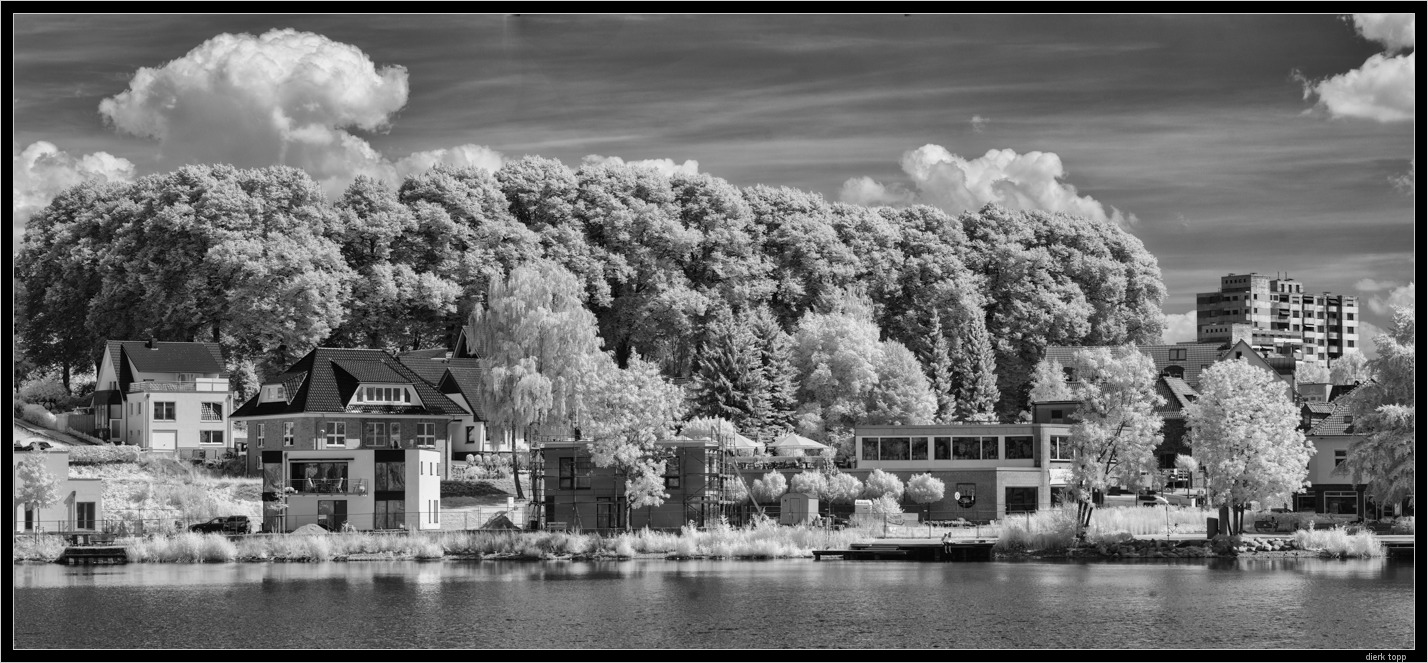
NEX7-IR infrared with Hasselblad Zeiss Sonnar 150mm/4
stitch of 2×4 images from Rhinocam about 123 MPixel
a higher resolution of about 6000×2700 pixel is here
–
170 MPix –
NEX7-IR infrared with Hasselblad Zeiss Distagon 40mm/4
stitch of 10 images from Rhinocam about 170 MPixel
a higher resolution of about 5700×4000 pixel is here
–
NEX6 with Hasselblad Zeiss Makro-Planar120mm/4
stitch of 2×3 images from Rhinocam about 80 MPixel
a higher resolution of about 6000×2700 pixel is here (here on the big image on flickr you see, what is on the picture with your mouse over for “who is who”)
yes, I know, but I was too lazy to clean up the dust 🙂
a real picture of a 1:1 crop is here
–
NEX6 with Hasselblad Zeiss Makro-Planar120mm/4
stitch of 2×4 images from Rhinocam about 100 MPixel
a higher resolution of about 5000×4000 pixel is here
on this one I “invented” another trick: focus stacking 🙂
the camera and Rhinocam was on a macro rail. After shooting the two vertical shots I moved the rail by three cm to the back
this makes the whole picture like focus stacking and sharp from front to back.
Normally you do focus stacking with the whole picture and let the software find the sharp ares for stacking. Her I just took only the sharp areas and let the stitcher put it all together.
Uff, hard to explain, I hope, somebody will understand, what I mean 🙂
–
NEX6 with Hasselblad Zeiss Makro-Planar120mm/4
stitch of 2×4 images from Rhinocam about 95 MPixel
a higher resolution of about 4000×4000 pixel is here
a real picture of a 1:1 crop is here
–
NEX6 with Hasselblad Zeiss Makro-Planar120mm/4
stitch of 2×4 images from Rhinocam about 95 MPixel
a higher resolution of about 4000×4000 pixel is here
 –
–
NEX6 with Hasselblad Zeiss Makro-Planar120mm/4
stitch of 2×4 images from Rhinocam about 95 MPixel
a higher resolution of about 4000×4000 pixel is here
 –
–
a real picture of a 1:1 crop is here (it is still 2600×2200 pixel)
I hope, you enjoyed it and have some neu ideas for your/our passion photography 🙂

Well I am another person who got excited about the Rhinocam and tried it with both Hasseblad and Mamiya lenses + sony a6000. One thing is that with a shift lens Mamiya 55 shift lense I stopped down to F8 or F11 – I get some different tones or color hues on the edge photos … is that because of the shift? (of course everything in manual, white balance, iso, shooting – using a sony a6000 – i hope it’s not a camera issue but setup issue. I also don’t get 100% same light exposure on hasselblad – (at least some of the pano images need some corrections in photoshop – the center ones being noticeably brighter in long exposure)… if anyone has comments to help me with my frustrations please let me know!!!
Thank you Dierk – you are really great! Thank you everyone for this exciting post
Let Photoshop resolve the colour problems, it balances things out quite well.
Every shot will be slightly different from the other.
If someone was interested in getting a Fotodiox Vizelex Rhinocam I am selling my Hasselblad V lens – Sony NEX body adapter, two lenses (40mm f4 FLE CF and 250mm f5.6 CF), two extension tubes and a pro shade. This is located in Europe so no extra tax is payable if shipped within the EU.
Ebay item 191245062792
I have found this very useful, the only reason I am selling it is I am doing more video, so I bought a programable head to use for both still and video with my Sony A7r and 17mm tilt/shift lens. I found that PTgui was easily the best for stitching images from the Rhinocam.
I also asked Fotodiox about the A7r and they said that it can be used with existing NEX RhinoCam system but that the ground glass unit needed to be removed.
I don’t understand Fotodiox.
They know the problem with the A7 for a long time.
They only have to move the ground glass a few mm to the left and the problem with the A7 would be solved.
Just ordered the RhinoCam for Fuji X from Fotodiox, today.
Will be using it with the Hasselblad 120mm Makro and the Fuji X-Pro 1.
FYI: Fotodiox told me that they will now be stocking RhinoCams for various camera bodies.
congratulations!
the 120mm Zeiss Makro is a great lens,
if you want go closer, you can use a Canon 77mm close-up lens 500D with a 62-77mm Hasselblad adapter
Closer is good, adaptor would have to be 60-77mm. Thanks for the suggestion.
Hi!
Could I please ask you to say, where you ordered the camera?
Thank you.
Ilya.
“camera” = “RhinoCam for Fuji X” 🙂
Direct from Fotodiox.
If it’s not shown online you’ll need to phone them.
I am very much obliged to you, bkootchin.
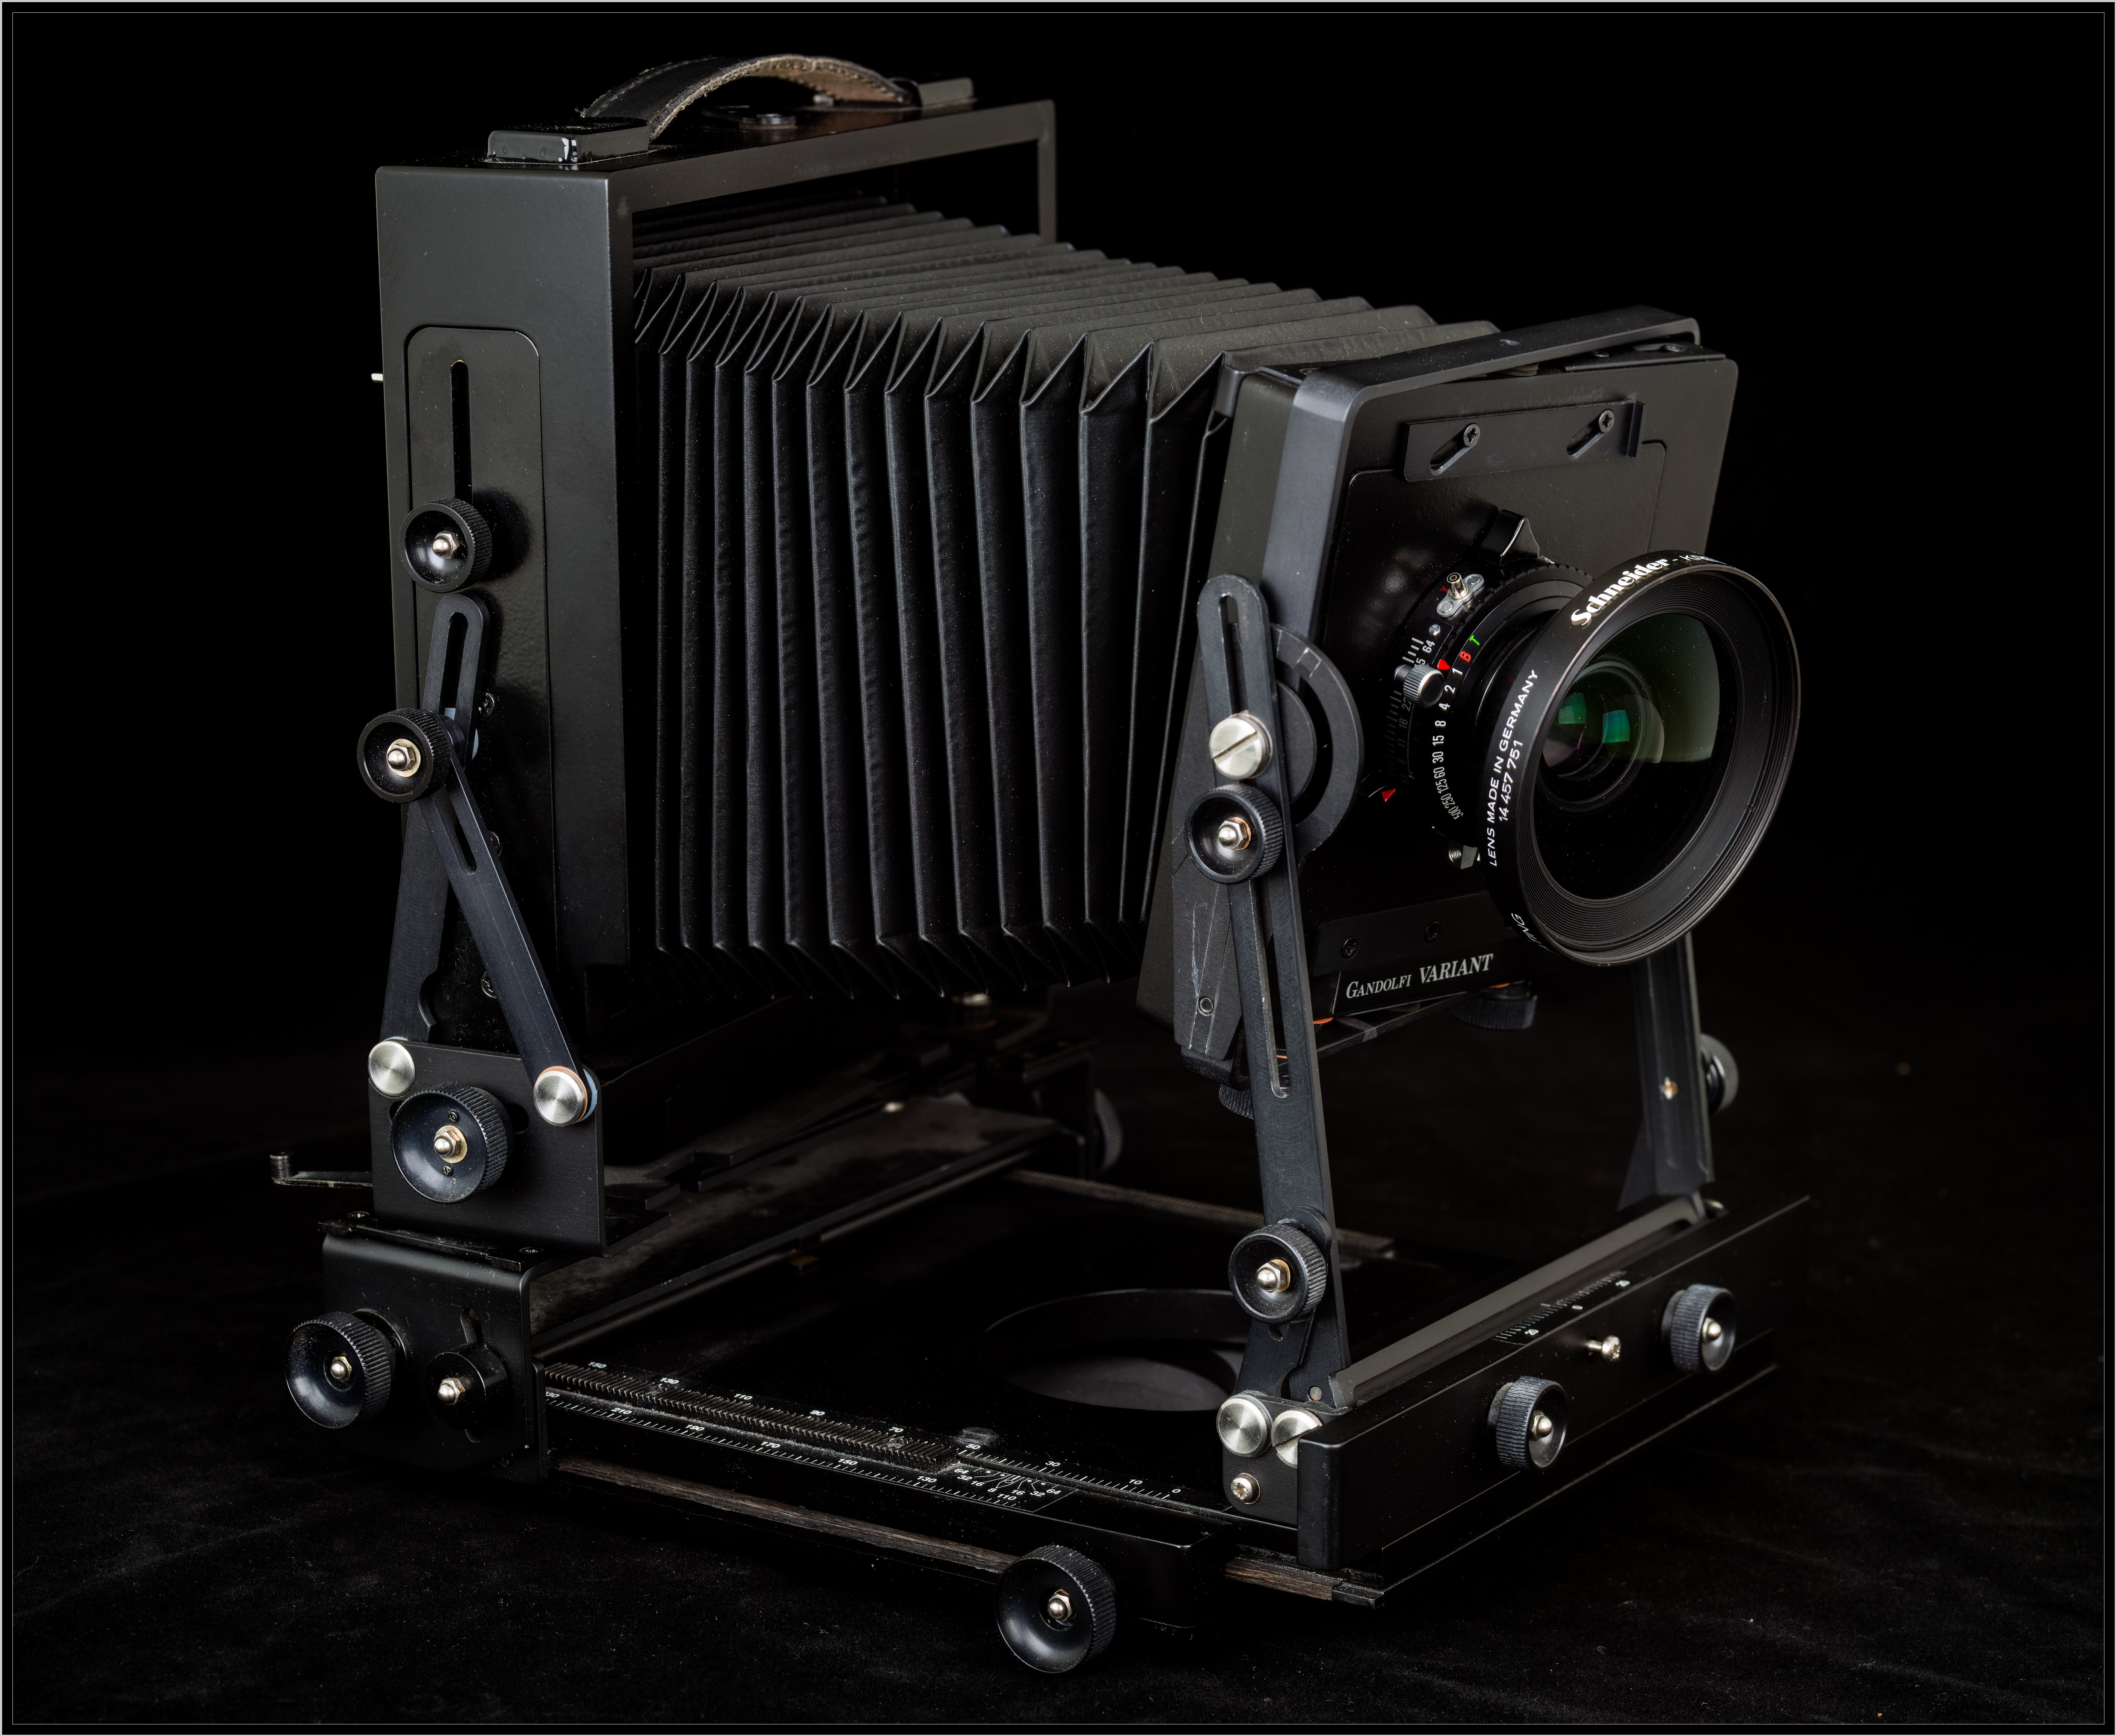
I read Dierk’s article here and immediately ordered one from fotodiox in the U.S.A. Even with import duty in the U.K. I saved around $300 from the U.K. Price. The camera is great and I already used it with Hasselblad 80mm planar and nex5 body to copy a large detailed artwork for a client with great success. I found like Dierk that the various index marks do not leave room for error, the overlap is small, so I shot more images with greater overlap and the stitching in photoshop was perfect. It would be better if the positions were click-stopped, and a cover of some kind protected the exposed imaging sensor while framing up the shot. I have made one out of black vinyl sheet and it attaches with velcro so I can remove it for transport. I do studio product shots for a living and this has saved me $6000 plus over a digital back for my Sinar. Btw, it does fit on a 5×4 camera, you have to unclip the focus screen on the back, easy to do on a Sinar etc.
Hi Howard,
thanks for the advice.
Today I tried and mounted the NEX-6 on the Rhinocam and on my Gandolfi Variant 4×5 and it worked. But you can not shift too much, you get shades of the Rhinocam into the image (hard to describe).
I loaded e set of pictures of the setup and here is the result
http://www.flickr.com/photos/dierktopp/12528749874/
But this setup is not really good for professional work, the control of the focus is too unsure. You can not use the normal ground glass, the ground glass of the Rhinocam lies on a different plane.
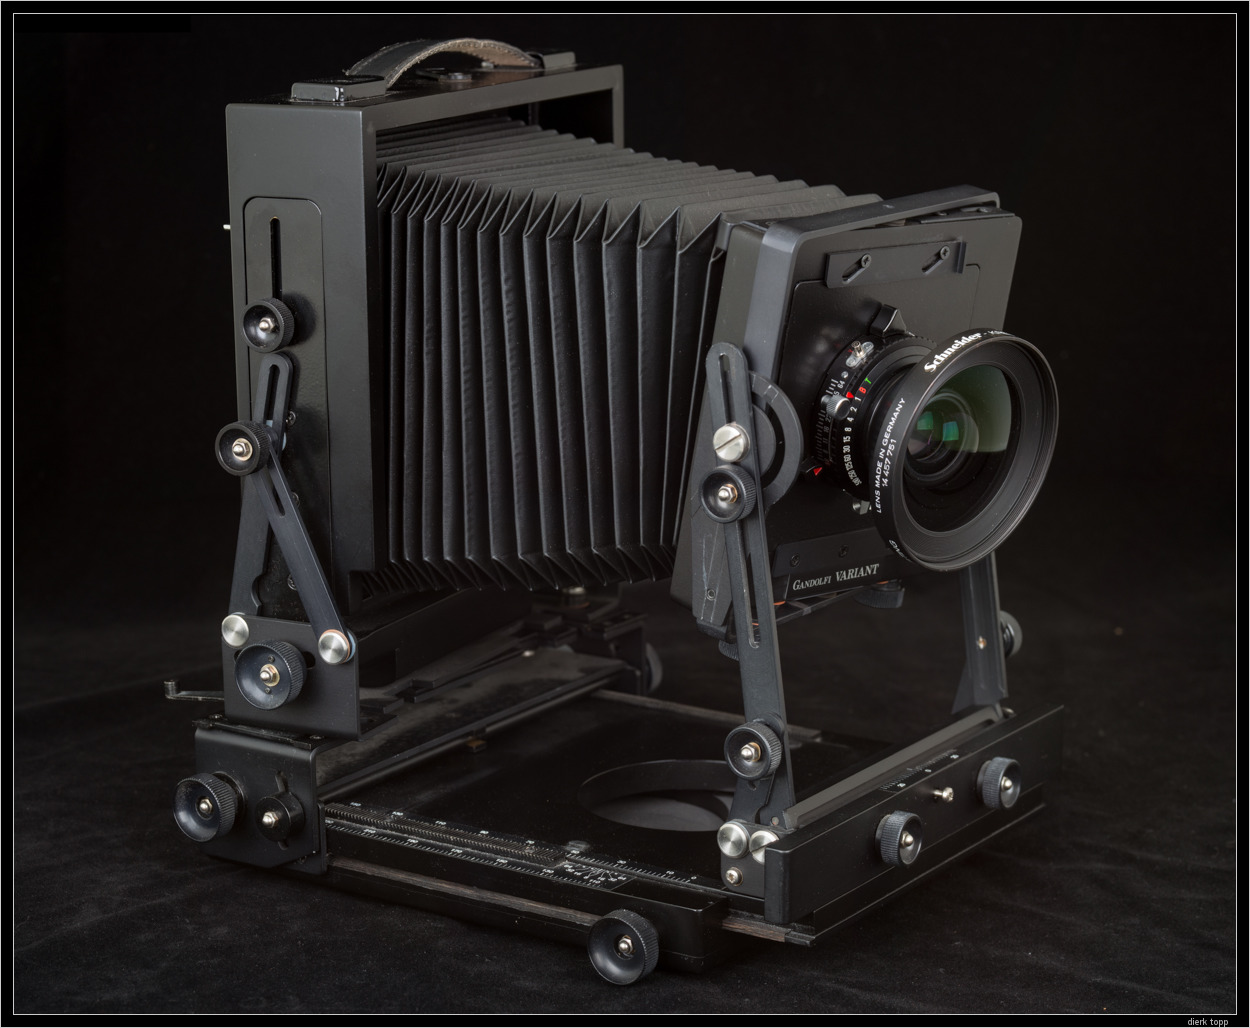
in the mean time I got a Sinar P 4×5 and use it with the Rhinocam and 150mm and 210mm Rodenstock lenses – and I love it 🙂
here are some pictures:
https://www.flickr.com/photos/dierktopp/sets/72157641670093123/
What adaptors are needed for the various 4×5’s? Cambo?
I am not sure, if I understand your question.
The Rhinocam has the standard size, you just mount the Rhinocam instead of the ground glass, that is all!
I hope, you can see it on this image:
https://www.flickr.com/photos/dierktopp/12841789045/in/set-72157641670093123
Excellent
Just looking at a Toyo 4×5 and FC 4×5 today.
Is it simple enough to remove the ground glass and attach the RhinoCam?
my comment from yesterday is still awaiting moderation 🙁
yes, the ground glass is removable with a click.
Just picked up a Cambo with Schneider 90mm lens.
Had to remove the ground glass holder and do a rebuild but got the RhinoCam to fit.
Found that the 90mm wouldn’t focus unless a few inches from the subject.
Anu ideas as to correcting that problem?
90mm is not working because of the extra about 6cm of the adapter and the sensor behind the normal ground glass position.
Even with 150mm you need a wide angle bellows for infinity 🙁 For studio shooting a normal bellows would be ok. for 150mm.
Doesn’t take much distance to render the lens ineffective.
I also picked up a 210 that is working well.
I’m trying to get everything in focus but that’s proving challenging.
Excuse my ignorance, what is and what would a wide angle bellows do for the 150?
I did get a ballon bellows with the kit.
I’m also considering getting the Fotodiox 4×5 to Nikon adaptor:
http://www.fotodioxpro.com/fotodiox-pro-nikon-f-to-large-format-4×5-adapter-offset-camera-mount-fits-cambo-linhof-calumet-horseman-omega-toyo-kodak-with-graflok-back-on-digital-nikon-bodies-d100-d200-d300-d300s-d700-d1-d2-d3-d3s-d3x-d40-d50-d60.html
then adapting my Fuji X camera to that to get a larger image area.
Any thoughts on that?
it works, but with 150mm there is almost no space left to move the back or front standard. The bellows is almost completely pressed together. Without any movement I prefer to use the Rhinocam only and my Hasselblad lenses.
I can not comment on the Fuji question but the Nikon adapter seems to be an interesting offer, but not for me any more, I sold my Nikon gear a year ago 🙂
I installed the bag bellows and put both standards on the same side of the tripod post. This allowed me excellent focusing and excellent depth of field with the 90mm. Now it’s happening.
I think the advantage over Gigapan is that lens ‘character’ is perfectly preserved. Gigapan relies on perfect lenses (Think Zeiss Otus …) – any off-axis distortion, aberration, coma, vignetting, flare spots, ‘swirly bokeh’ etc. can re-appear at different points across the image. Rhinocam will look natural, even with imperfect lenses.
It’s more a highest-quality rather than widest-angle thing.
Thanks for your reply, Dierk. I am somehow fallen in love with those XXX megapixel pictures! 😀
Can you imagine a comfortable way how to shoot and stitch such pictures with an A7R?
Balduin,
I asked Fotodiox about using the A7. They don’t know jet, they don’t have an A7 jet.
To answer your question, I only know of using a good pano head with perfect adjustment of the nodal point. But still you get the “fisheye effect” with round lines.
Next toy for a Sony A7R. 😀 THX for sharing!
Greetings from Germany
Balduin,
I don’t think, it will fit on the Rhinocam, the grip seems to be much thicker.
And besides better colors and DR there will be no advantage for a bigger sensor, you just shoot less frames to cover the whole 6×6 area. To make it clear, if the sensor is 6×6 you just shot one frame 🙂
Greetings from Hamburg
very interesting article, dierk.
viele gruesse aus HH
rick
Terrific work and interesting article, although it may be overkill for most of us. I have done many panoramas (handheld) with Sony NEX cameras and stitched the images very quickly in Photoshop with the Photomerge function and come out beautifully.
But seriously, this piece should have been proof-read. Too many typos! And sadly it detracts from the professionalism of the piece. It is a flaw that has become all too common in the age of the internet and blogs. Perhaps with people losing the ability to spell it is moot.
the article would have been perfect in dierk’s native language – german. as it is, i think the content about equipment and technique comes through 99%, and that’s what should be important to us.
I just noticed this comment today.
Thanks very much, Rick!!
I have the impression, if someone does not have experience in writing in a foreign language, she/he can not imagine the effort for an article like this (at least for me).
Rich, if my typos distract you from what I am trying to say, just look at the images – or read something else 🙂
Regards from Hamburg, Germany
dierk
Hi everyone,
i wonder if is possible to use the RhinoCam with a Sony Nex VG900,that is a videocamera but takes pictures too and it’s a full frame. Anyone has samples?Because i’m an owner of that videocamera and should be cheaper only buying the RhinoCam instead a new Nex camera.Thank you so much.
I can not imagine, that it would make sense. This huge camera connected to 1000+ kg Rhinocam plus lens, all connected with the tiny E-mount ??
Besides that there are only a few mm between the NEX6/7 and the box this the ground glass. I would buy a NEX6.
I am afraid, that even the coming NEX FF will make problems!?
dierk
Thank you for your answer,Dierk.
When I had a NEX7, it didn’t work too well with adapted wides because the light rays were coming in at too much of an angle and it caused smearing and color shifts. With this adapter and a wider MF lens, I would have to wonder if there would be some color shifts when your at the far edges of the frame, and if that would be difficult to stitch vs images taken from the center of the image circle ?
Perhaps a NEX5 or 6 might work a bit better, even though it would be a lower MP pano, because those seem to have less color shift issues.
I had the same problems with wide glass Zeiss-M or Leica-M (below 35mm) but you can correct almost all with cornerfix (free SW).
With wide angle glass from DSLR there are less or no problems, because the construction is different.
Wide lens for 6×6 means 50 or 40mm (I don’t know of any wider besides the 38mm on the Hasselblad, but that is not interchangeable).
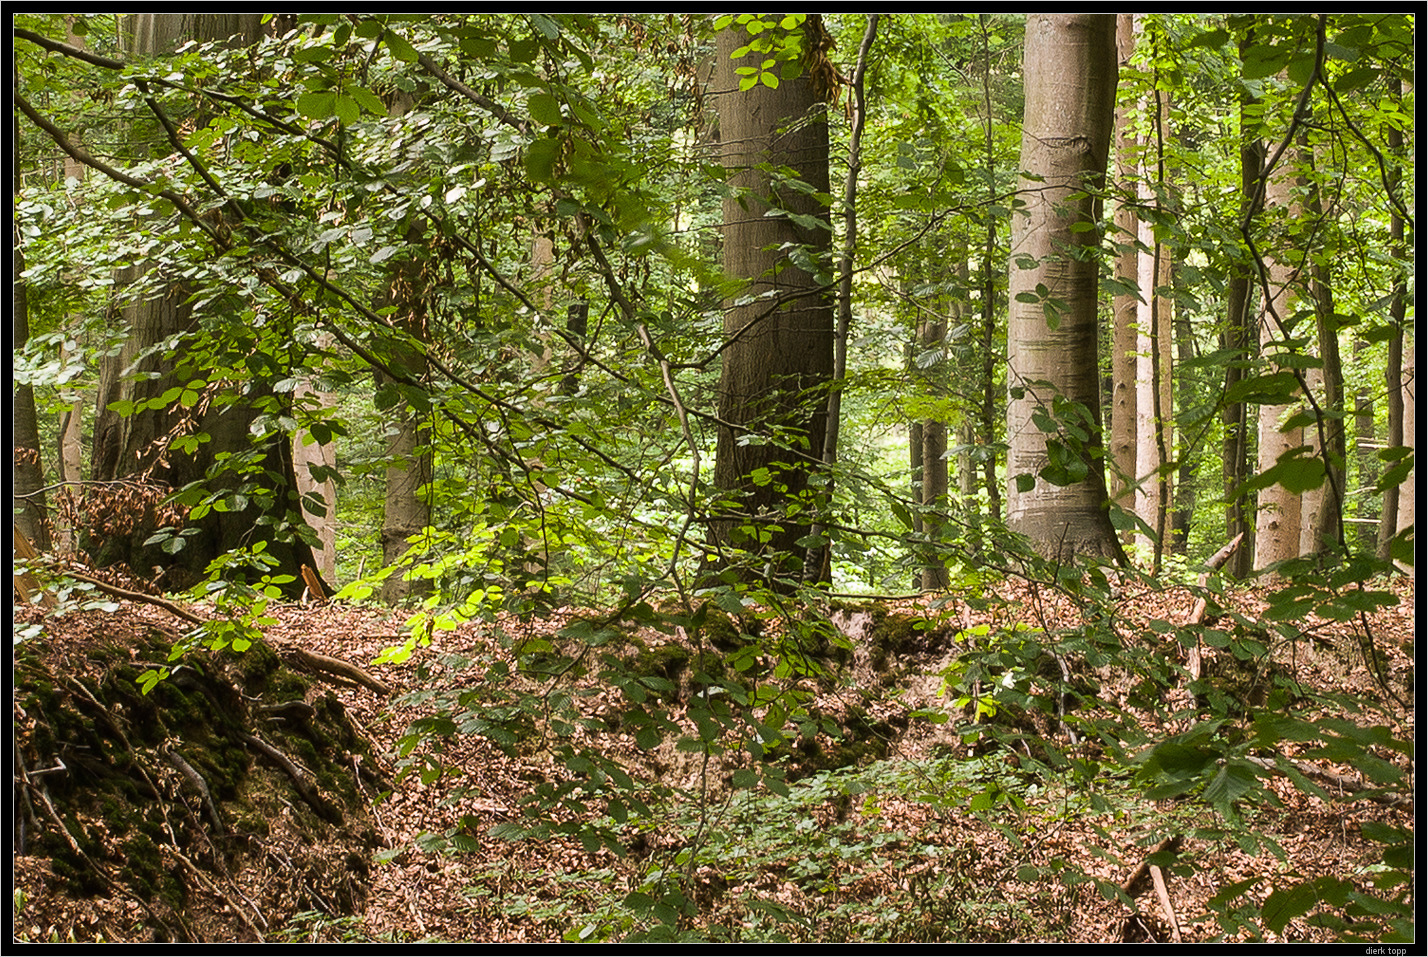
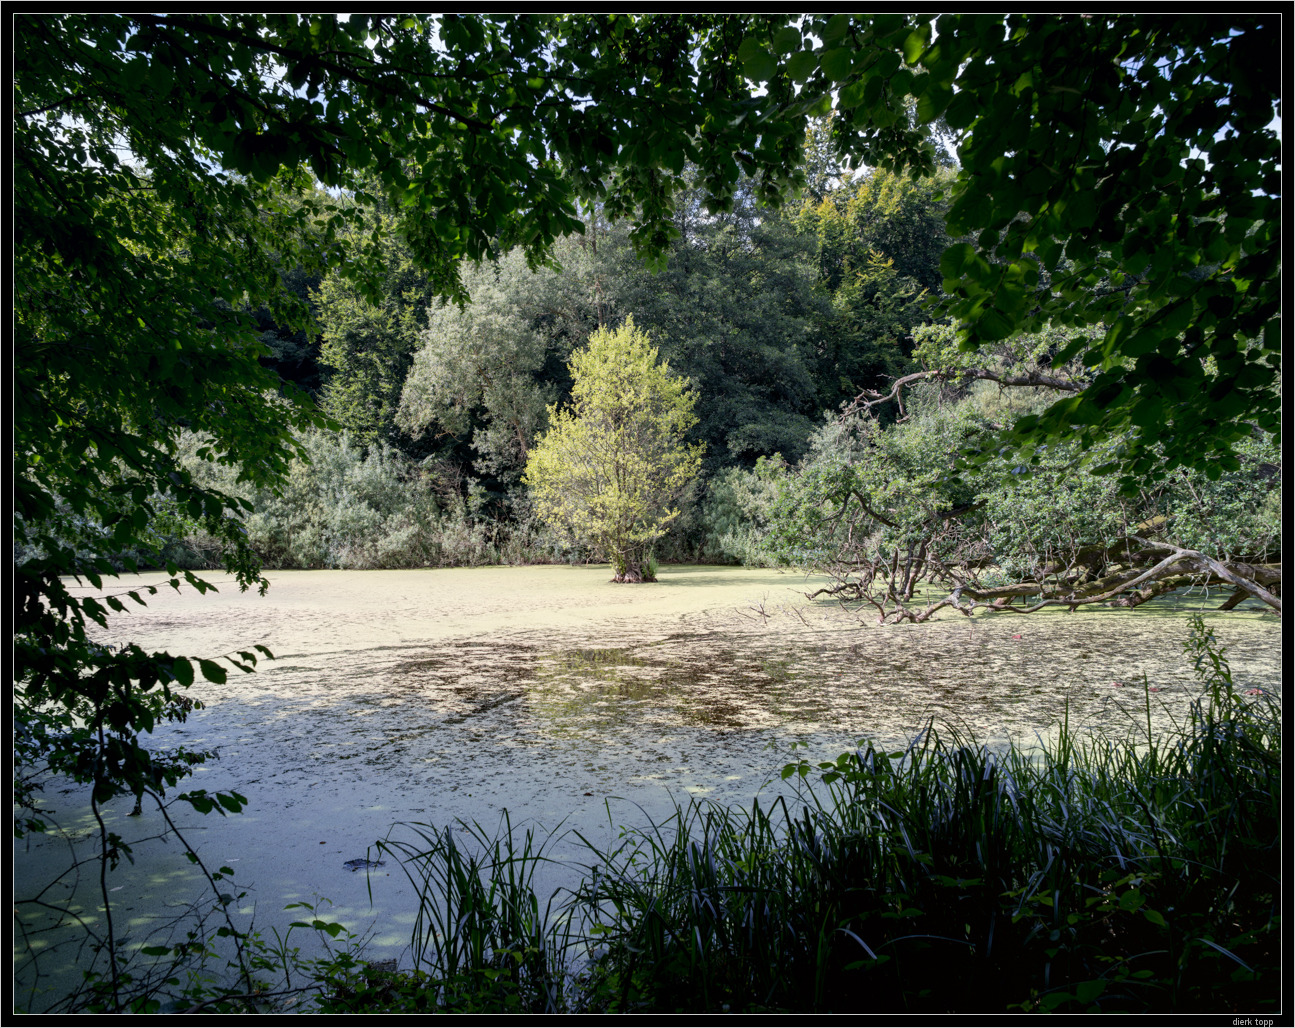
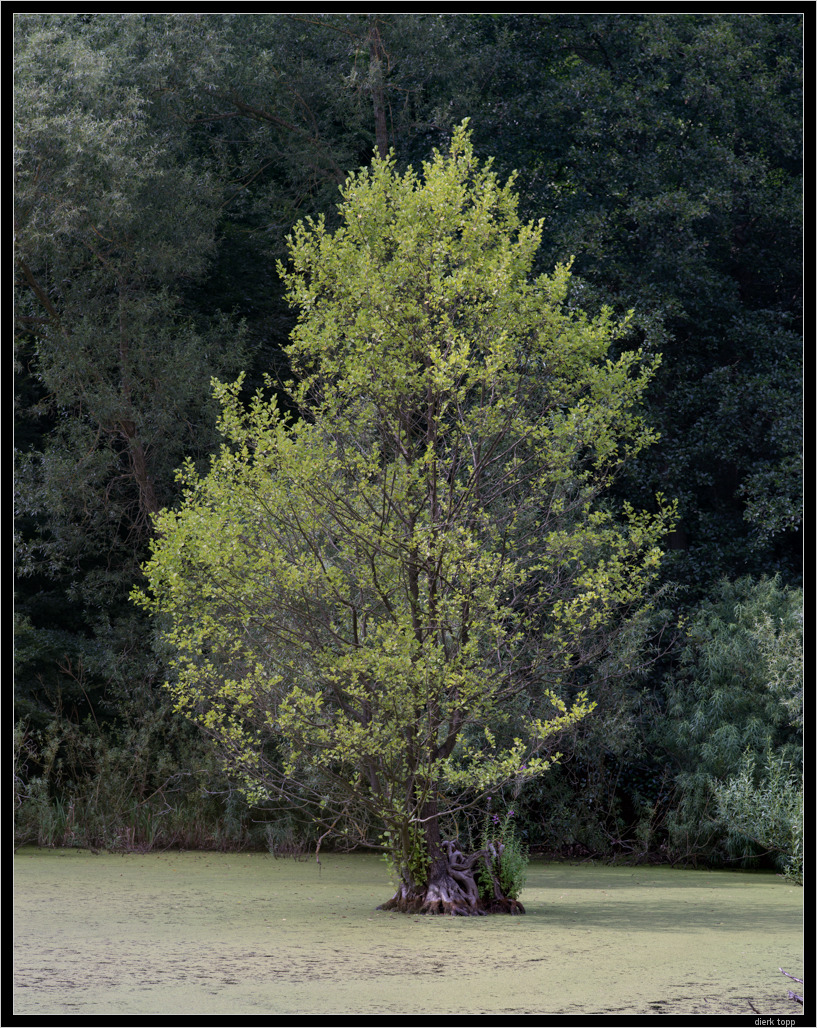
Using the 40mm on the Rhinocam is like about 24 or 21mm for 24×36. That is pretty wide. On the image of the wood with the big tree on the left, I just moved the pano head of the tripod a bit to the left and shot an other row of images. In that case the result is not out of one single image circle any more, but I got my tree on the picture 🙂
dierk
Do You think i can use Mamiya 7 lenses hére ??
Greg
they offer only an adapter for Mamiya 645.
Why not asking them?
dierk
Really impressive!
They lost me at “stitch”. Nonetheless, it is an interesting idea.
Very cool! Great pictures and thanks for sharing. I have an NEX-7 and I continue to be amazed at how versatile the camera is. From using old lenses to speed boosters for Full Frame effect to this.
Really interesting project and amazing pictures, Congrats!
I try to explain this principle versus Gigapan.
In the beginning I wrote, that I used one of the very first Gigapan EPIC during the beta program. If they did not change it too much, with my model there was no way to adjust is to use the correct nodal point. That makes it sensible for foreground/background parallaxes.
With my D70 and the Panosaurus I used the exact nodal point for my lenses (marked it for the different focal length), no problems with parallaxes.
But:
with all methods, using moved lenses (even with the analog Horizon and the Steitz Roundshot, where the lens is rotating) you get distortions. Some of them may be corrected with PP, I don’t have much experiences with that.
With the Rhinocam principle you don’t have any of those problems (of course besides moving objects)!!
As I wrote above:
by using the big image circle of the 6×6 lenses you don’t get any problems with parallax and foreground, ….. You move within the same image and “simulate” a much bigger sensor
that means, you keep the lens in the same position and move the sensor in a parallel plane. That means, after stitching the images, you get a result as if you had a big sensor, covering the whole image. The sensor size, you get, is much bigger than with the very expensive medium format digital backs.
The only distortion you get is the native distortion of the lens, you use.
Pros, please correct me, if I am wrong!
dierk
You are absolutely right…I’m developing my own motorized VR mount controler (using hardware made by Canadian Greg Nuspel)….I’ve seen the Rhinocam as well and it shoots with the lens in the same position for all 8 shots. Now software like Autopano Pro/Giga is great in correcting lens distortions but since you shoot basically in a sphere you are stuck with great IQ in the image circle and not so great IQ in the edges of the frame since these need to be streched into the square….now that can be corrected somewhat by using longer lenses and a longer distance from the subject (and thus a smaller overall shooting angle), but as we all know that is not always possible….in that case a medium format stitching solution is great. In fact there are more options like the Shen Hao DLSR adapter for 4×5 large format camera’s (were you use the back drop and rise in combination with a shift on the adapter to get to large format photo’s). And if you are lucky enough to own a GX680 (like I do) and a medium format back (like I don’t) you can also go the Kapture Group route they have this baby which coupled with a 66 Mpixel back does create 110 Mpixel images in 2 shots.
P.S. It’s Andreas Gursky……and he is not alone in shooting ultra large……I’m exited to go to Düsseldorf for Candida Höfers show in september. She is using a Arca Swiss solution and I believe she stitches as well.
http://www.roundshot.ch/xml_1/internet/en/application/d77/d122/f123.cfm
Of course if you have deep, deep, deep pockets (and have them filled as well) you can buy this baby which essentially is a scanning back extended to the hilt…..no parallax and no distortions (except for a distorted relation with you wife and/or bank manager).
Greets, Ed.
Hi,
Wondering if using for interior photography? instead of tilt-shift lens
Like on mamiya 645, 35mm?
Thank you
Oun
I forgot to ask, what does the unit weight ? One thing I never really enjoyed about my Gigapan is that it weighted 3+lbs for just the unit itself, so when you add on a tripod, camera, lenses, leveling base, it becomes a pretty heavy item for hiking.
I switched to a Nodal Ninja (using with my Sigma DP2m) and that is a good deal of weight savings and pretty easy and quick to do things like a 3 or 4 frame stitch, but being able to do a flat stitch would have some nice advantages of not having to level the head first.
I always rather enjoyed using my PC-E lenses on my Nikon’s but those were a bit limited in range. This could actually be a pretty cool system for me….. NEX bodies are quite cheap these days after all
the weight of the unit with the Hasselbad lens adapter ist 700g.
My Zeiss lenses 40, 120 and 150mm are also about 700g. The normal 80mm will be lighter (but boring 🙂
If you add a reasonable tripod you have 3 to 4 kg at least.
BTW: my d3 is about 1200g and the 14-24 wideangle is another 1000g. that’s, why it is at ebay in the moment.
This is not made for hiking (unless you want to do it like Ansel Adams with 30kg 🙂 )
I did almost all my landscape with the Leica and 21mm or 35mm (and some with 75mm) in one to 3 rows hand held with big overlap (30%) and never had a problem in stitching.
Very cool, didn’t know anything like this existed. I’ve got a gigapan and some other manual pano heads which work pretty well, maybe even faster, but this is quite the novel way of going about stitching
I read on a review that one of the cons (or things you need to be careful with) is that the sensor is exposed when you are using the framing window. Is this true? If so, they should address a way to protect it while framing in a new version.
this is right,
the sensor is uncovered during framing. I had no problems, I set up everything and then do the framing, that takes only a few seconds, open the aperture first! 🙂
And then don’t forget to close it again :)) like shooting a large format camera.
To cover the sensor during framing would make the unit much wider and bulkier.
Besides that, they mention 4×5 and the body of the Rhinocam looks like that. But it does not fit into my international 4×5 back 🙁
How different would this be from a Gigapan?
wonderful work!