Casual portraits with the Phase One IQ3-100
By Andrew Paquette – www.paqphoto.com – His Instagram
Last week was Carnaval, leaving me with nine days to do some shoots. Unfortunately, I was only able to set up shoots for four of those days, but was satisfied with some of the pictures. Before talking about the images though, I’d like to respond to general comments on medium format images in comparison to images produced by a DSLR.
The differences between medium format and 35mm format images can be very strong, but they are much harder to see at web resolution. Resolution, of course, is the first quality lost when full frame medium format images are reduced to web-friendly sizes. The default resolution for the IQ3-100 is 11,608 x 8,708 pixels (101 MP). The Nikon D850 boasts a maximum image size of 8,256 x 5,504 (47 MP). This website requires images that are no more than 1500 pixels in either dimension. The difference between these is readily apparent when comparing side-by-side shots of the same subject with the same framing. If, however, a half frame crop of an IQ3-100 image is compared to a full-frame image from the D850, the resolution would be identical. One of the advantages of the higher resolution on the 100 MP system is that it provides more flexibility when cropping. The other is that it can print at larger sizes. Either way, this isn’t something you can easily see at web resolution.
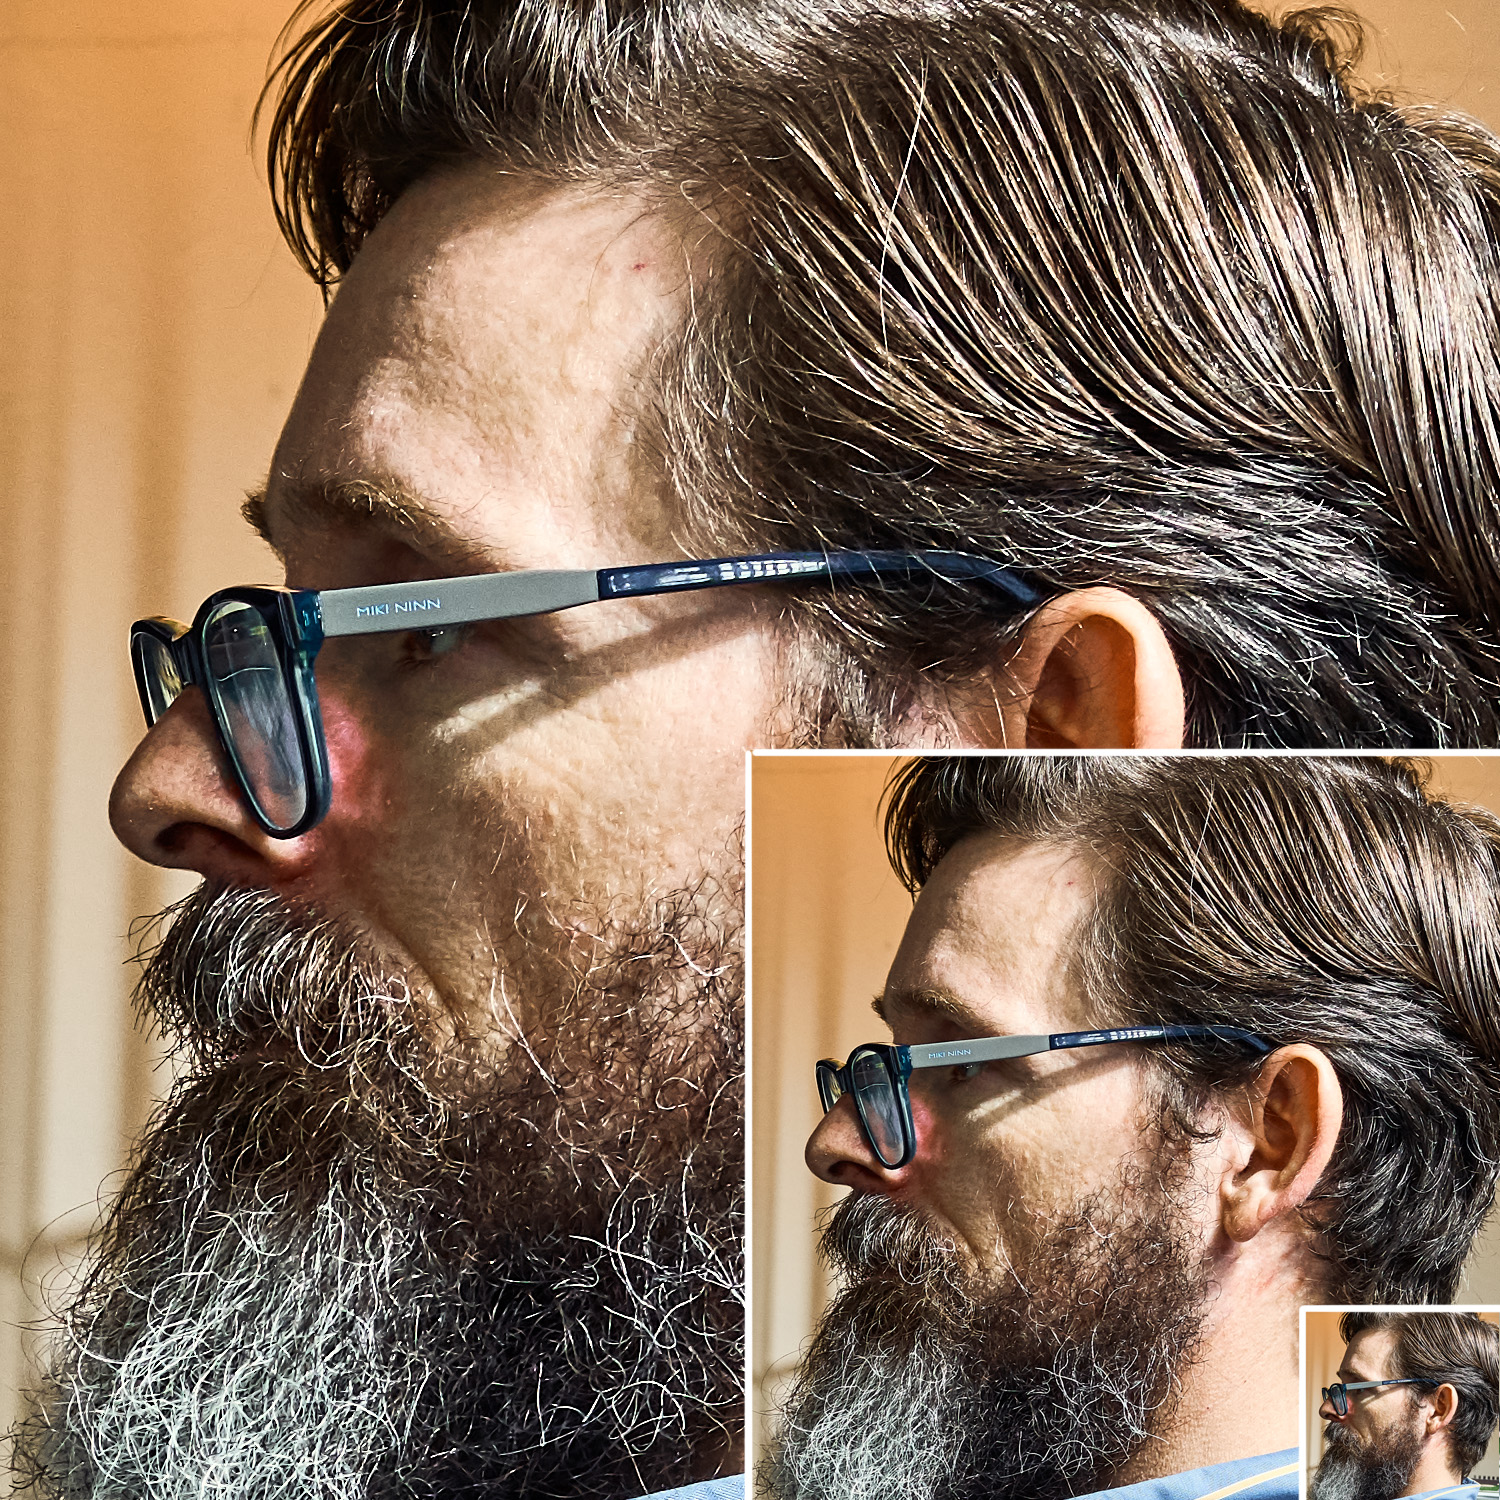
Sharpness can be enhanced by reducing a high-resolution image to a lower resolution, but this is most obvious when the high res image isn’t perfectly focused to begin with. Reducing its resolution can make it look just as sharp or sharper than a perfectly focused image from a DSLR, like the D850. The high level of sharpness you get in a perfectly focused 101 MP image vanishes at lower resolutions. To see it, it has to be full resolution (figures 1-4).
Figure 1 Andrew; Source image used for full-size crop in Figure 2

–
Figure 2 Sharp image, full-size crop at 1500 x 1500 pixels, with half-size and web-resolution crops inset
–
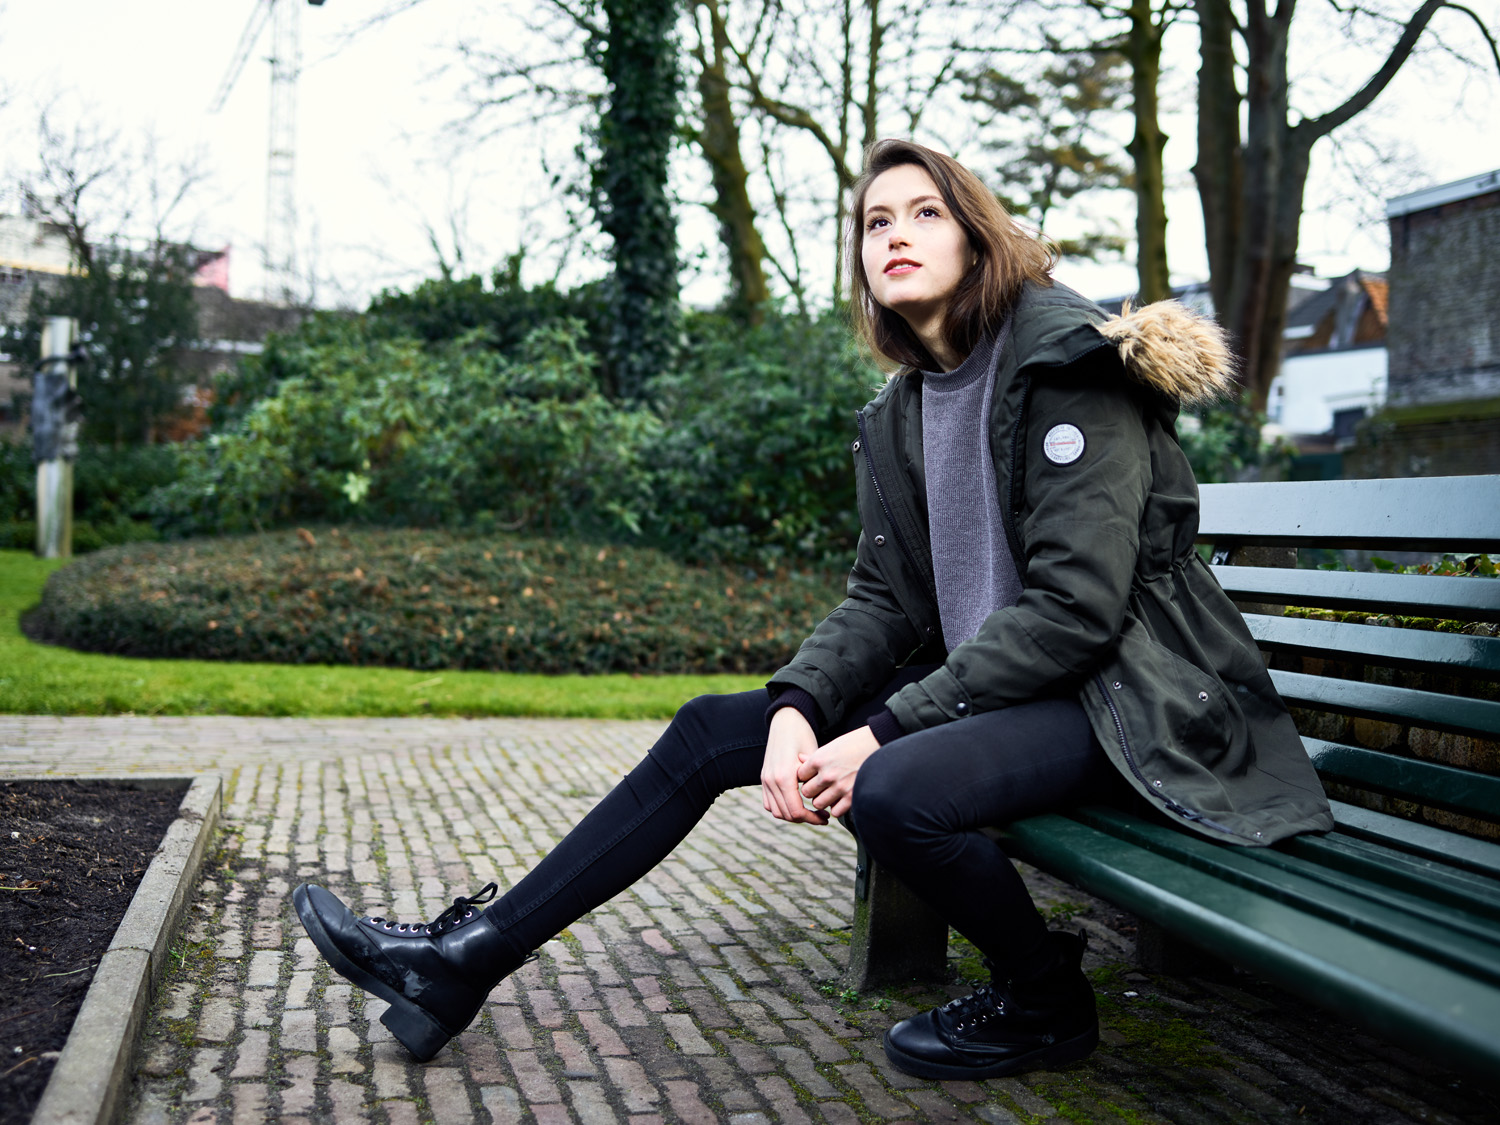
Figure 3 Merel on bench, source image used for full-size crop in Figure 4
—
Figure 4 Blurred image, full-size crop at 1500 x 1500 pixels, with half-size and web-resolution crops inset
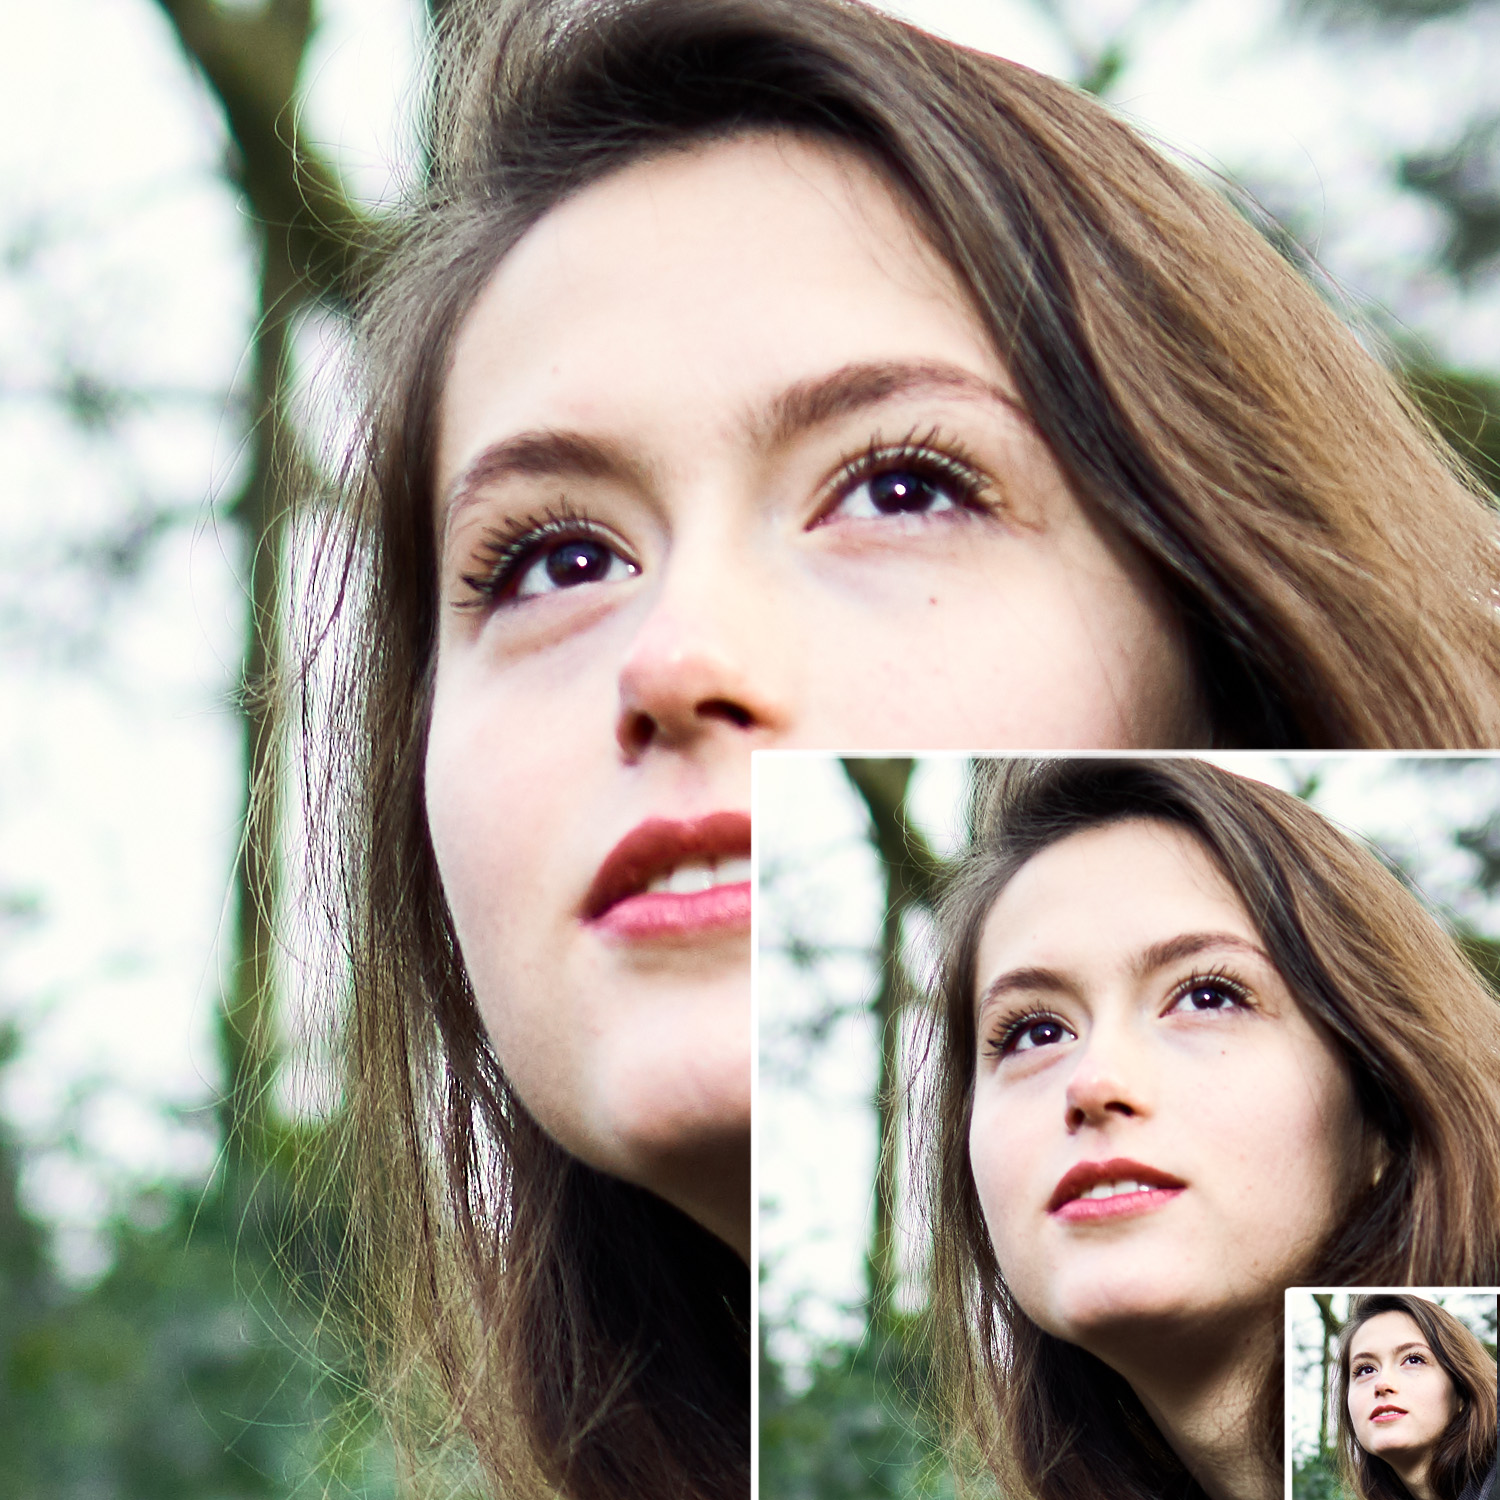
What the example images demonstrate is that the blurred and sharp images look about the same when reduced to web resolution, but the sharpness of half and full resolution images can be differentiated. This means that the difference between the resolution of an IQ3-100 digital back and that of the Nikon D850 or comparable camera cannot be detected when both are reduced to web resolution. In addition, questions of sharpness as a measure of quality cannot be answered or estimated with any accuracy at web resolution. That said, full resolution crops of similar subjects can provide an idea of what can be expected as a reasonable upper limit of resolution and sharpness (figures 5 and 6).
Figure 5 Sharp test source images figure 6, resolution comparison. Nikon D800 on left, Phase One IQ3-100 on right
–
Figure 6 Full resolution crops (750 x 750) of source images (figure 5)

Colour depth on a medium format sensor (16-bit on the IQ3-100) is another significant advantage over DSLR sensors (12-14 bit). This is best seen by shooting the same subject with test cameras and viewing the results on a colour-calibrated monitor. I haven’t prepared such a test, but mention it for the sake of pointing out a difference that cannot translate to the web. This is because a 16-bit colour file will be converted to 8-bit and then compressed to become a JPEG image. Once these two things have been done, as happens with a photo made by any other camera, the colour depth will be identical. There may be a bias toward colours that are more accurate in images made from 16-bit originals, but the depth of the colour (the number of colours) will not give a true representation of the actual difference after conversion for web viewing.
That is the end of my tech notes for this article. My apologies for including them, but it seems that every time I see a post on medium format photos, someone comments that they can’t tell the difference between what they get on an iPhone vs. what they are seeing in the article. There is one obvious reason for this, and one less obvious. The obvious reason is that changing the resolution and colour depth of an image, and then compressing it into a jpeg file, makes it very similar to the output of an iPhone. This does not mean that the iPhone could have captured the original image from which the low-resolution image is derived. Quite plainly, it can’t. The less obvious reason has to do with the kind of RAW editing that becomes possible with a high resolution, high bit-depth image. Again, the output is in many ways the same, but medium format raw files are more robust than their DSLR counterparts, and allow more freedom for editing. This may be visible, even on the web, as higher quality colour, contrast, or dynamic range.
To give an example of where this makes a difference, there is an iPhone landscape photographer that I follow on Instagram. His compositions are excellent, the images impressive. However, I would never want to buy a print of one because they were shot at such low resolution that they would look awful at anything above a tiny size. When I look at this photographer’s work, I often wish he had an MF system, so that he could make print-quality images on his journeys. On an artistic level, he knows what he’s doing, but could benefit from a tech upgrade. My own work has been used for oversize advertising, and every time they contact me for the highest resolution images I have, so they will print well. I saw one of these, a shot I took over the summer, at an event last week. It was one of six images printed at about 60 cm x 100 cm. Good thing the original was 100 MP, or it would have looked soft.
The images in the rest of this article were shot with the following equipment: Phase One XF camera, Phase One IQ3-100 digital back, Schneider-Kreuznach 55 mm f/2.8 LS lens, two ProFoto B1 lights, a MacBook Pro, and an iPad Pro. The MacBook Pro was used in the first shoot, tethered to the camera. For the remaining two shoots, I used the iPad Pro instead, to check focus and exposure. The MacBook Pro is more accurate for focus checking, but it is less reliable and clumsier to use because of the cable. My preference was the iPad Pro, though it was frustrating to not know for sure if focus was perfect until I got home. The 55 mm lens is a new addition to my gear, purchased specifically for portraits in smallish but interesting spaces.
Shoot one: Interior
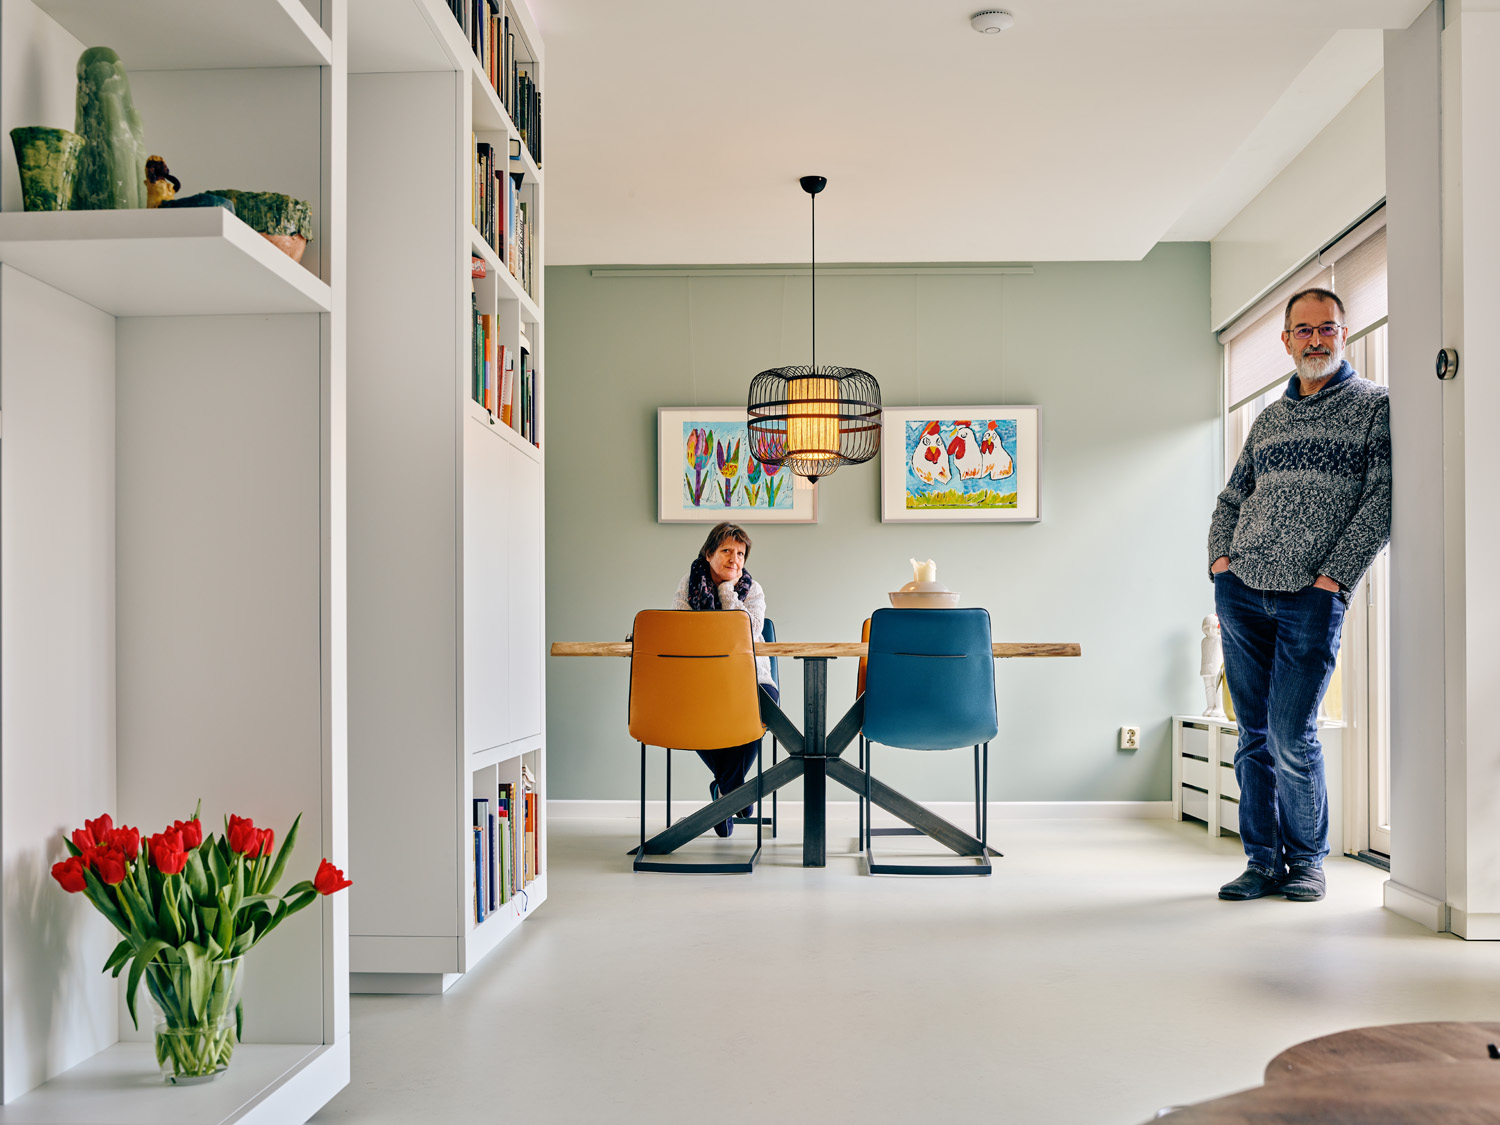
This shoot was officially an interior design shoot, but I got one portrait out of it (figure 7). I liked the other shots also, but want to do a few more interiors before I post anything on that subject. This shot was lit with a combination of natural light from the windows and a B1 strobe in a hallway that provided fill for the figures.
Figure 7 Interior decor, and owners f/11, 1/3s, ISO 200
–
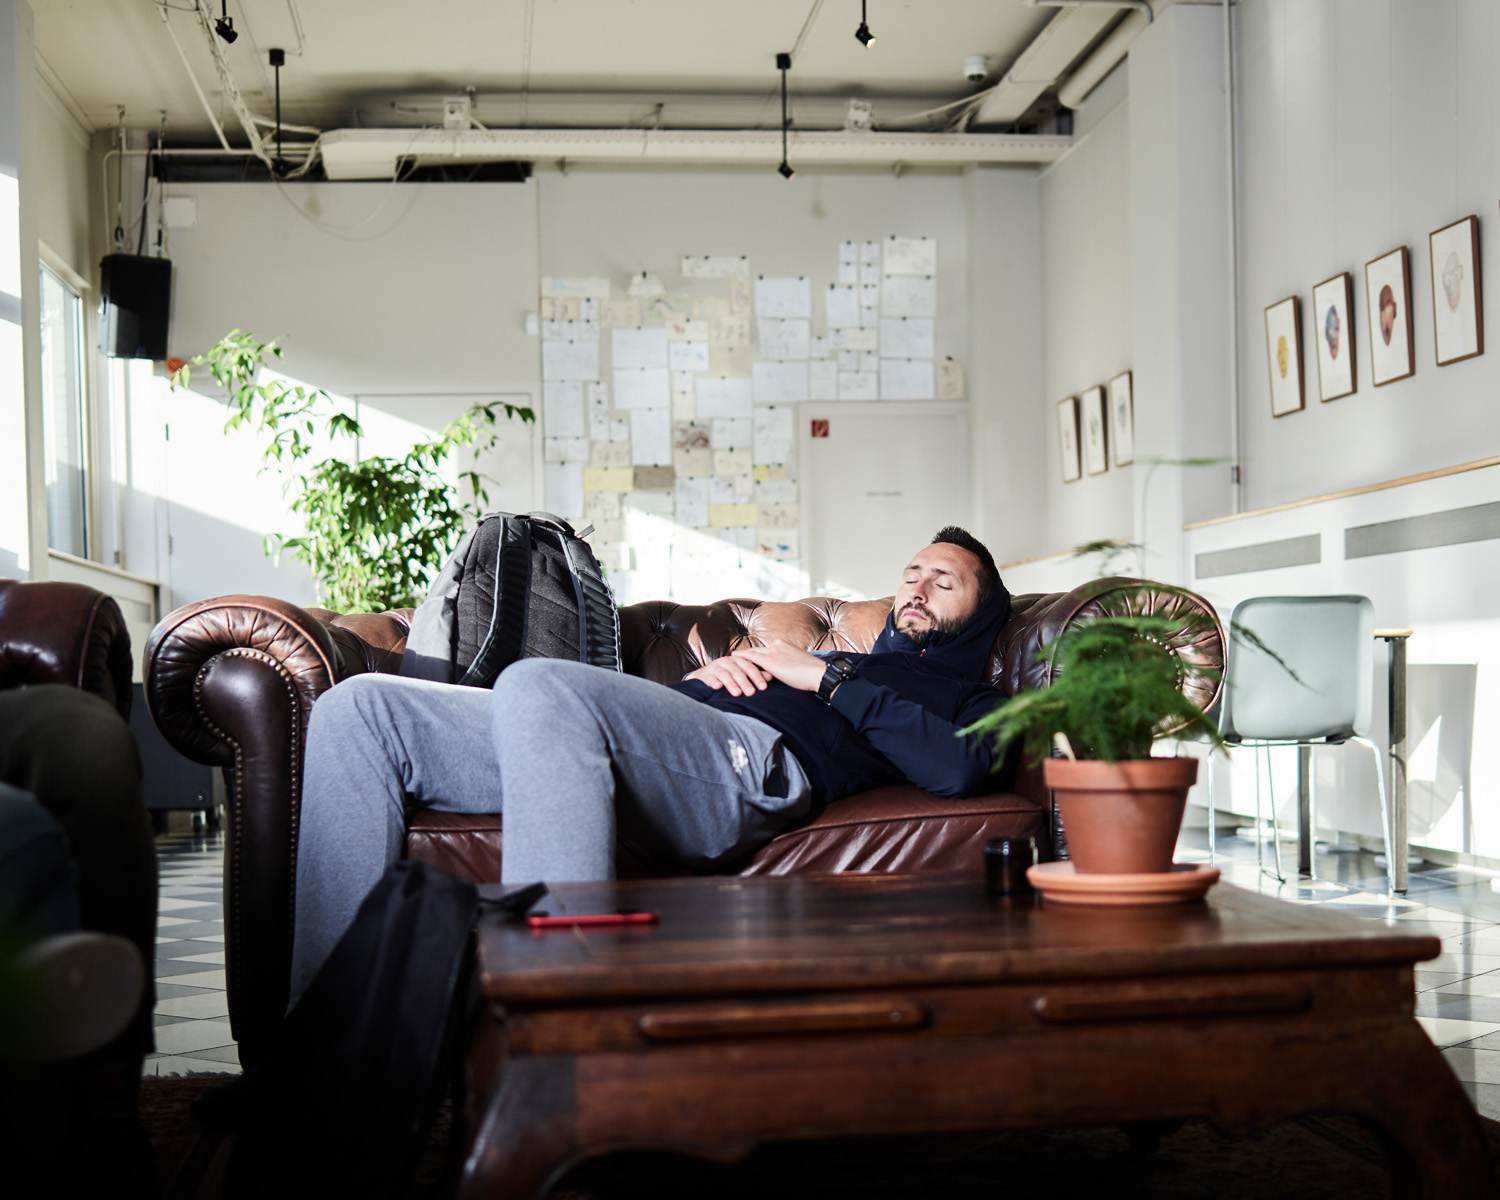
Shoot two: Dejan
I was invited to an invitation-only basketball game between the world’s third-ranked 3×3 basketball team (Serbia) and the local Dutch team (rank 7). The man on the couch here is Dejan Majstorovic, the world’s #1 ranked player, resting before the game.
Figure 8 Dejan, f/2.8, 1/500s, ISO 200
–
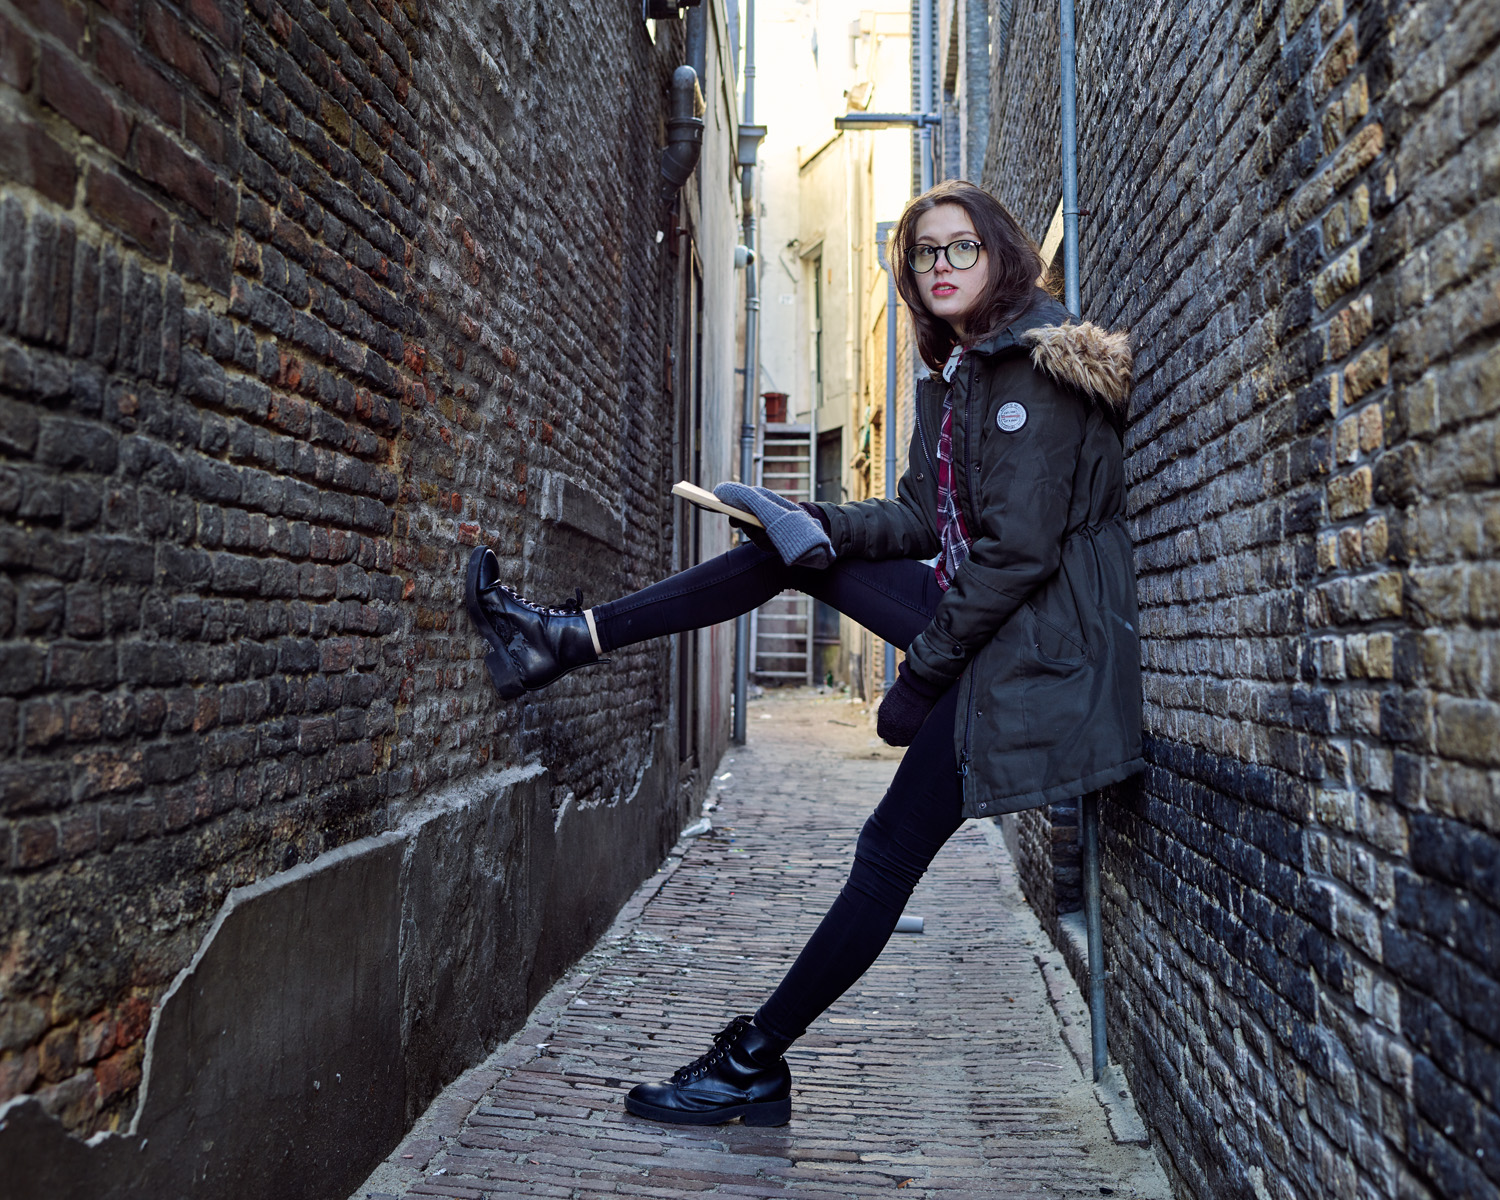
Shoot three: Merel
This was a test shoot, to see what I could get just walking around a quaint town with a light, a model, and an assistant. My goal was to get natural looking light by balancing the B1 unit with natural light.
Figure 9 Merel in alley f/6.3, 1/15s, ISO 200
–
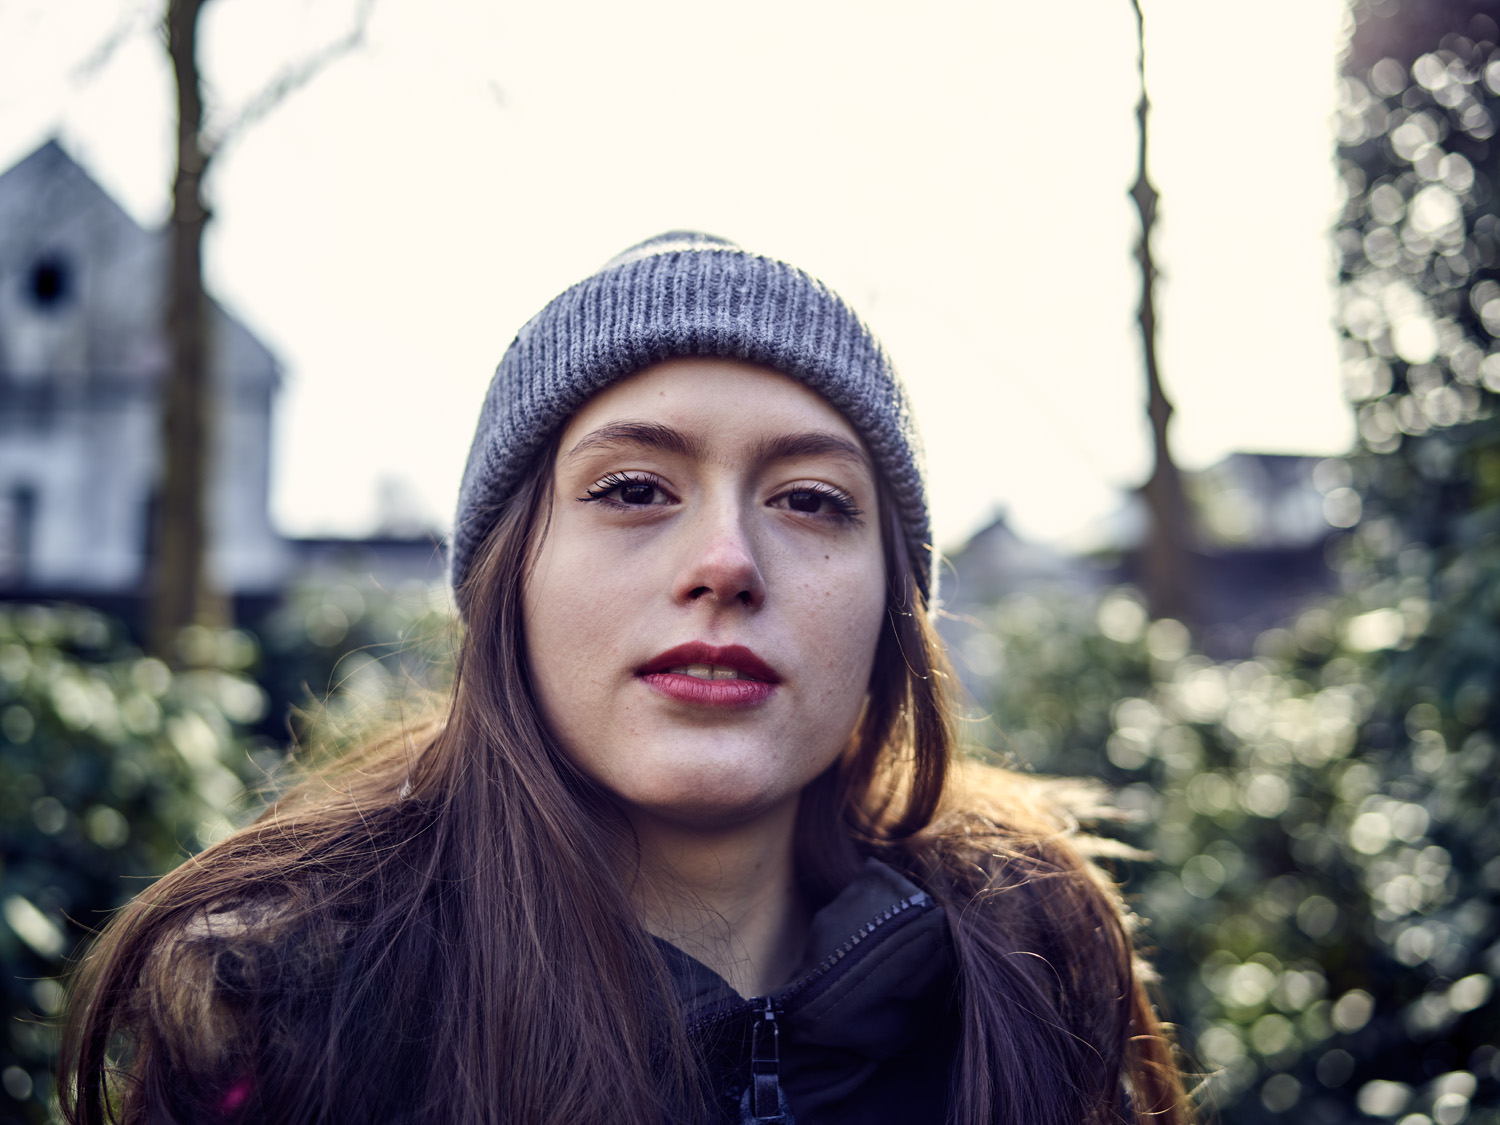
Figure 10 Merel in cap f/3.5, 1/400s, ISO 100
Shoot four: Jonathan
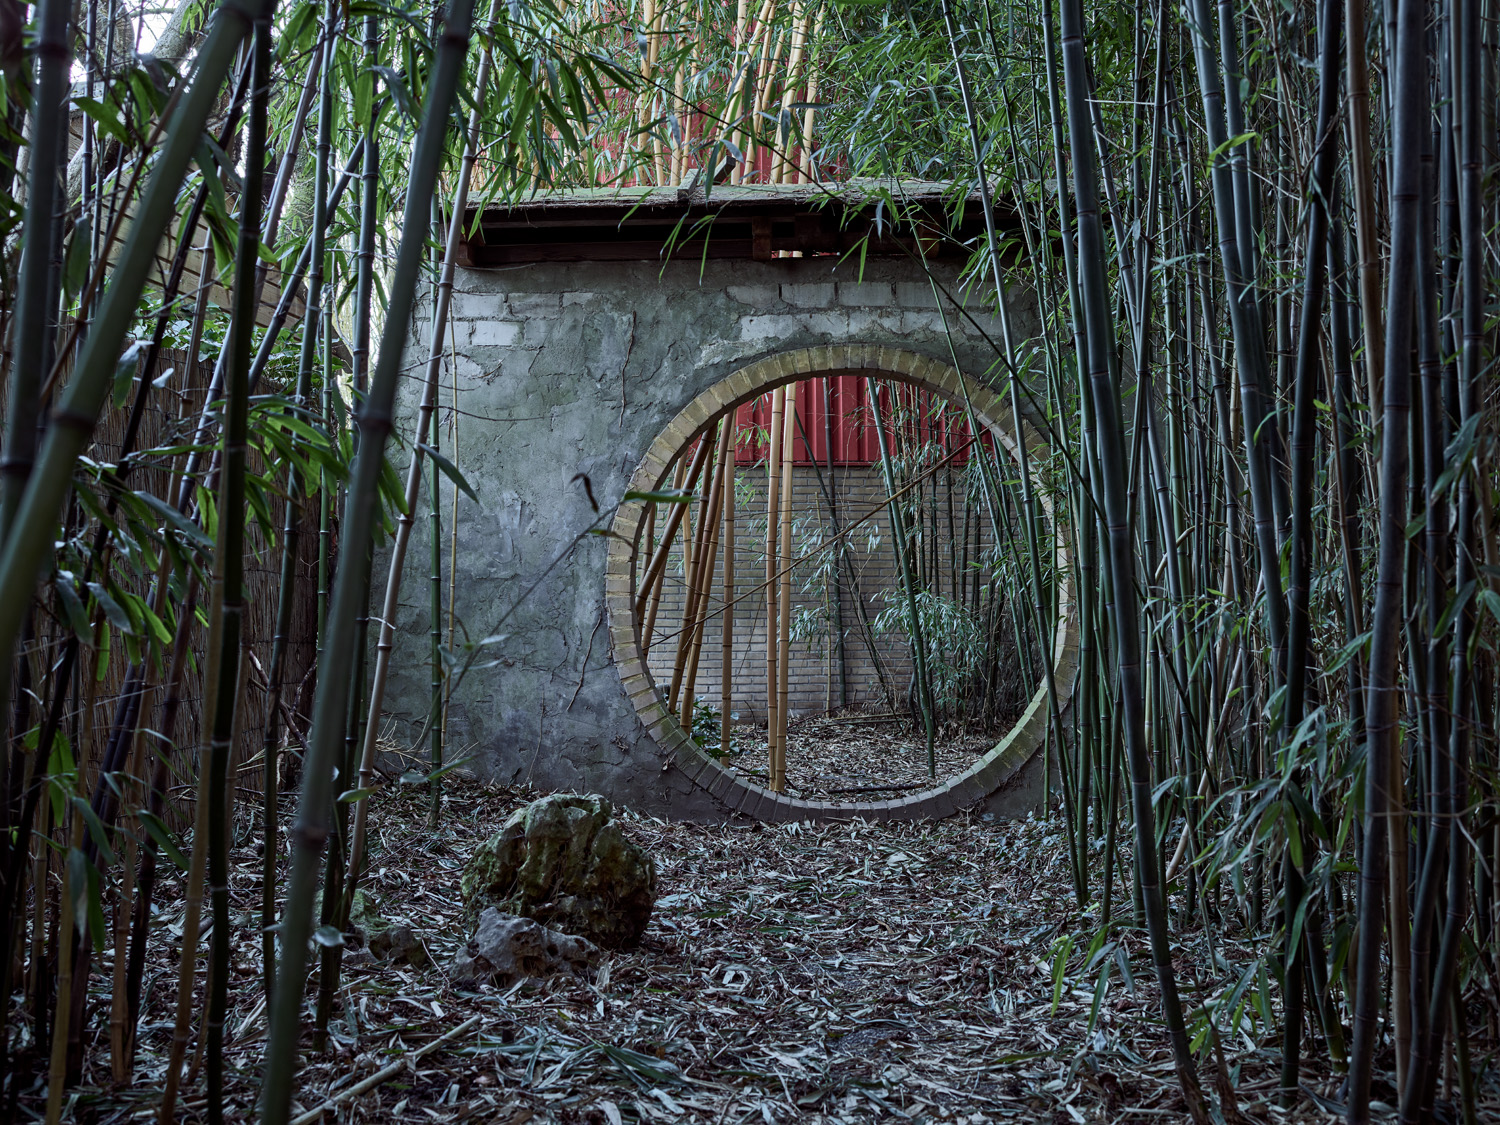
This shoot was done at an amazing kendo dojo in Tilburg, the Netherlands. Who would have thought a place like this existed in the Netherlands? As soon as we walked in, it was as if we were in a different country. I wanted to use natural light as much as possible for these shots, but because of the tall bamboo all over the place, most of the light was only visible high up on the building. By the time we finished, it was dark and freezing cold. For the model, Jonathan de Croon, this meant holding quite still to avoid motion blur. As we were testing the lights, a full power flash went off. I reset it and continued, but realised at home that the full flash had an interesting look. Next time I do something like this, I’m going to use a strong flash and get more motion into the images.
Figure 11 Jonathan outside dojo f/6.3, 1/10s, ISO 50
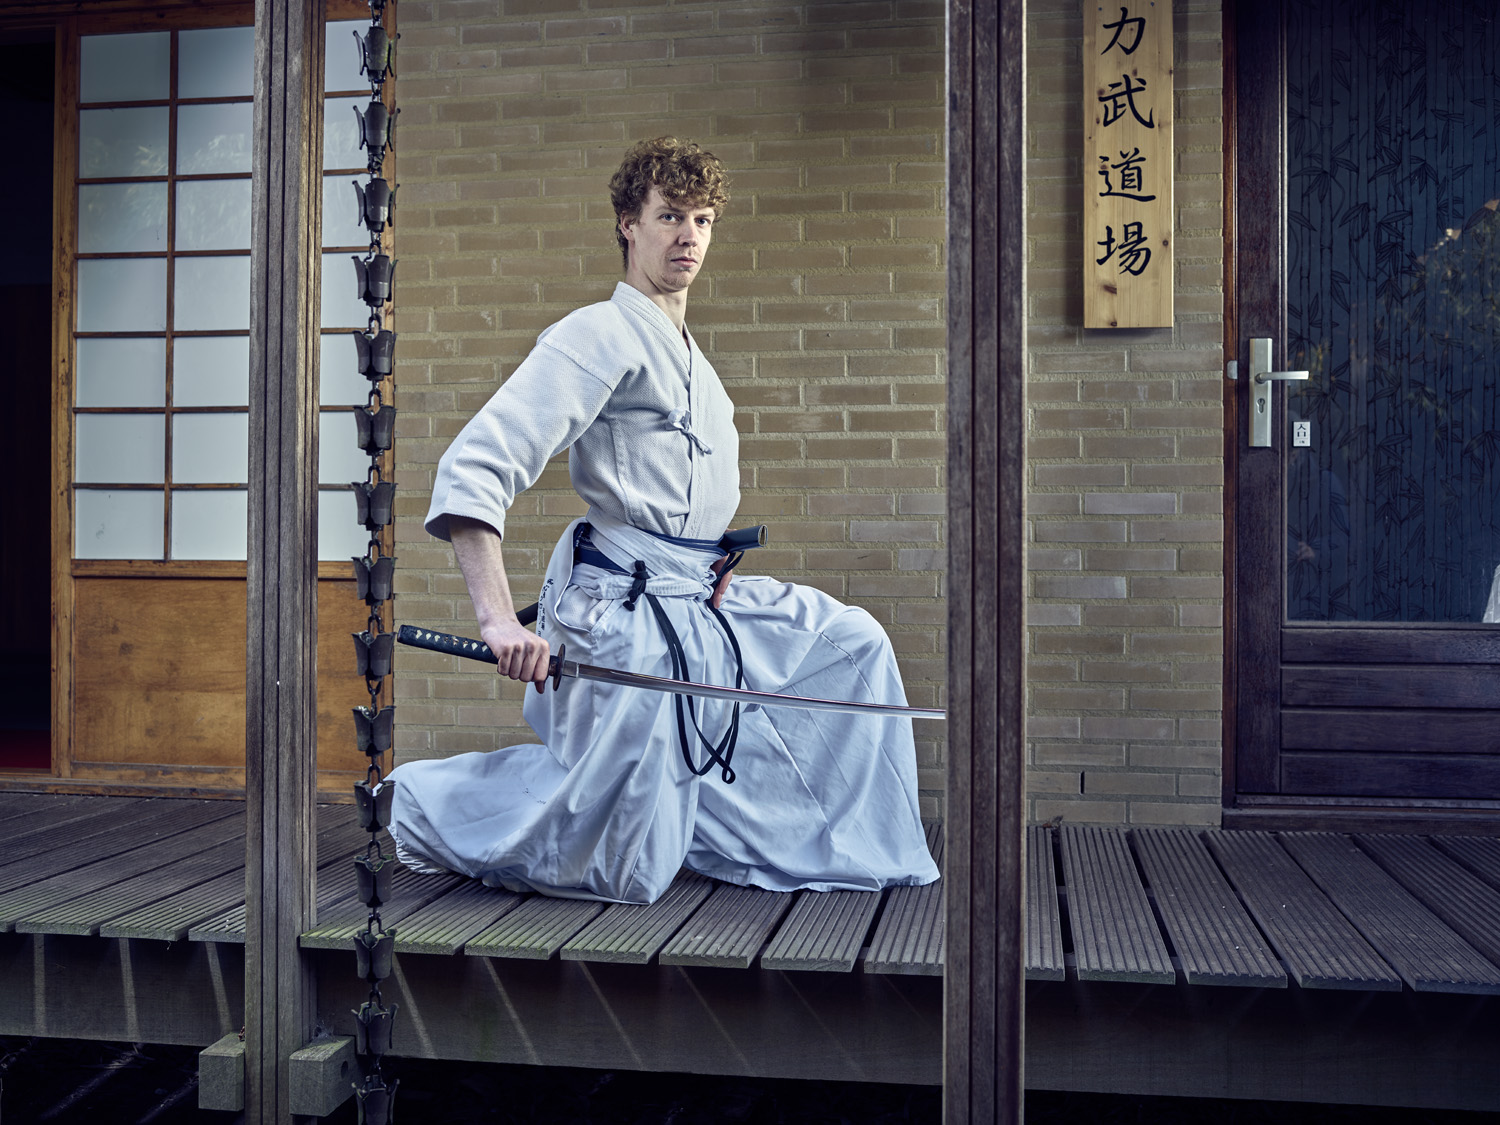
Figure 12 Jonathan in dojo f/2.8, 1/4s, ISO 400
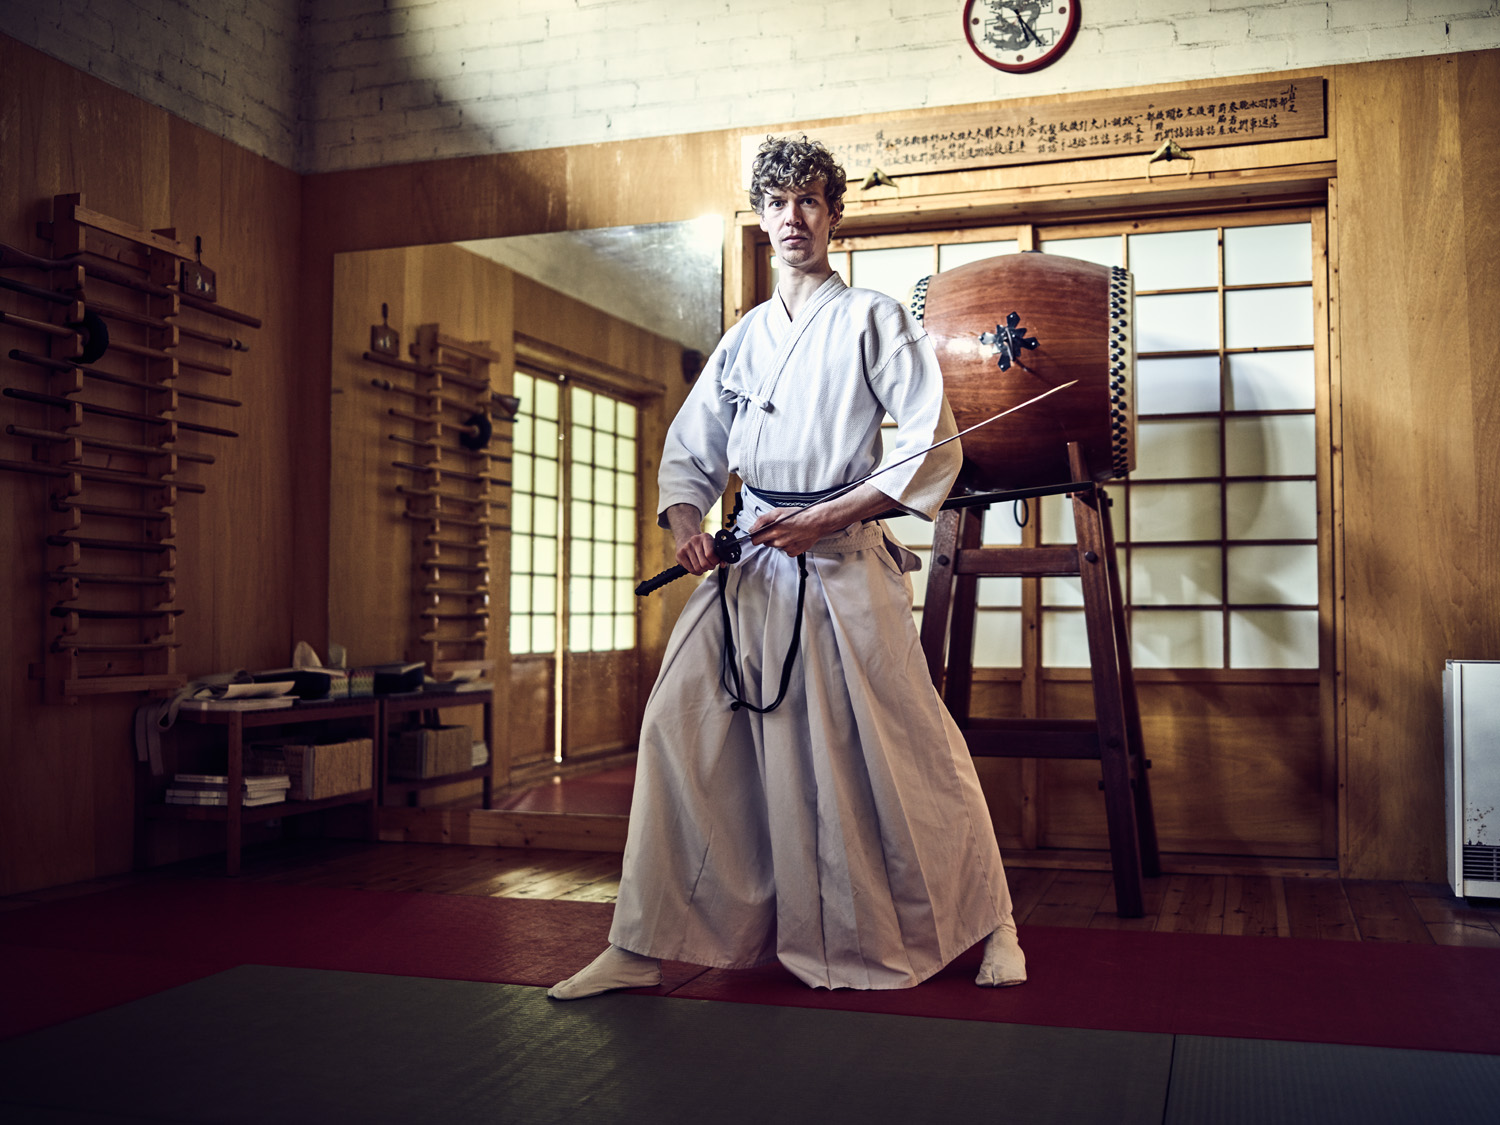
Figure 13 Jonathan in suit f/2.8, 1/2s, ISO 400
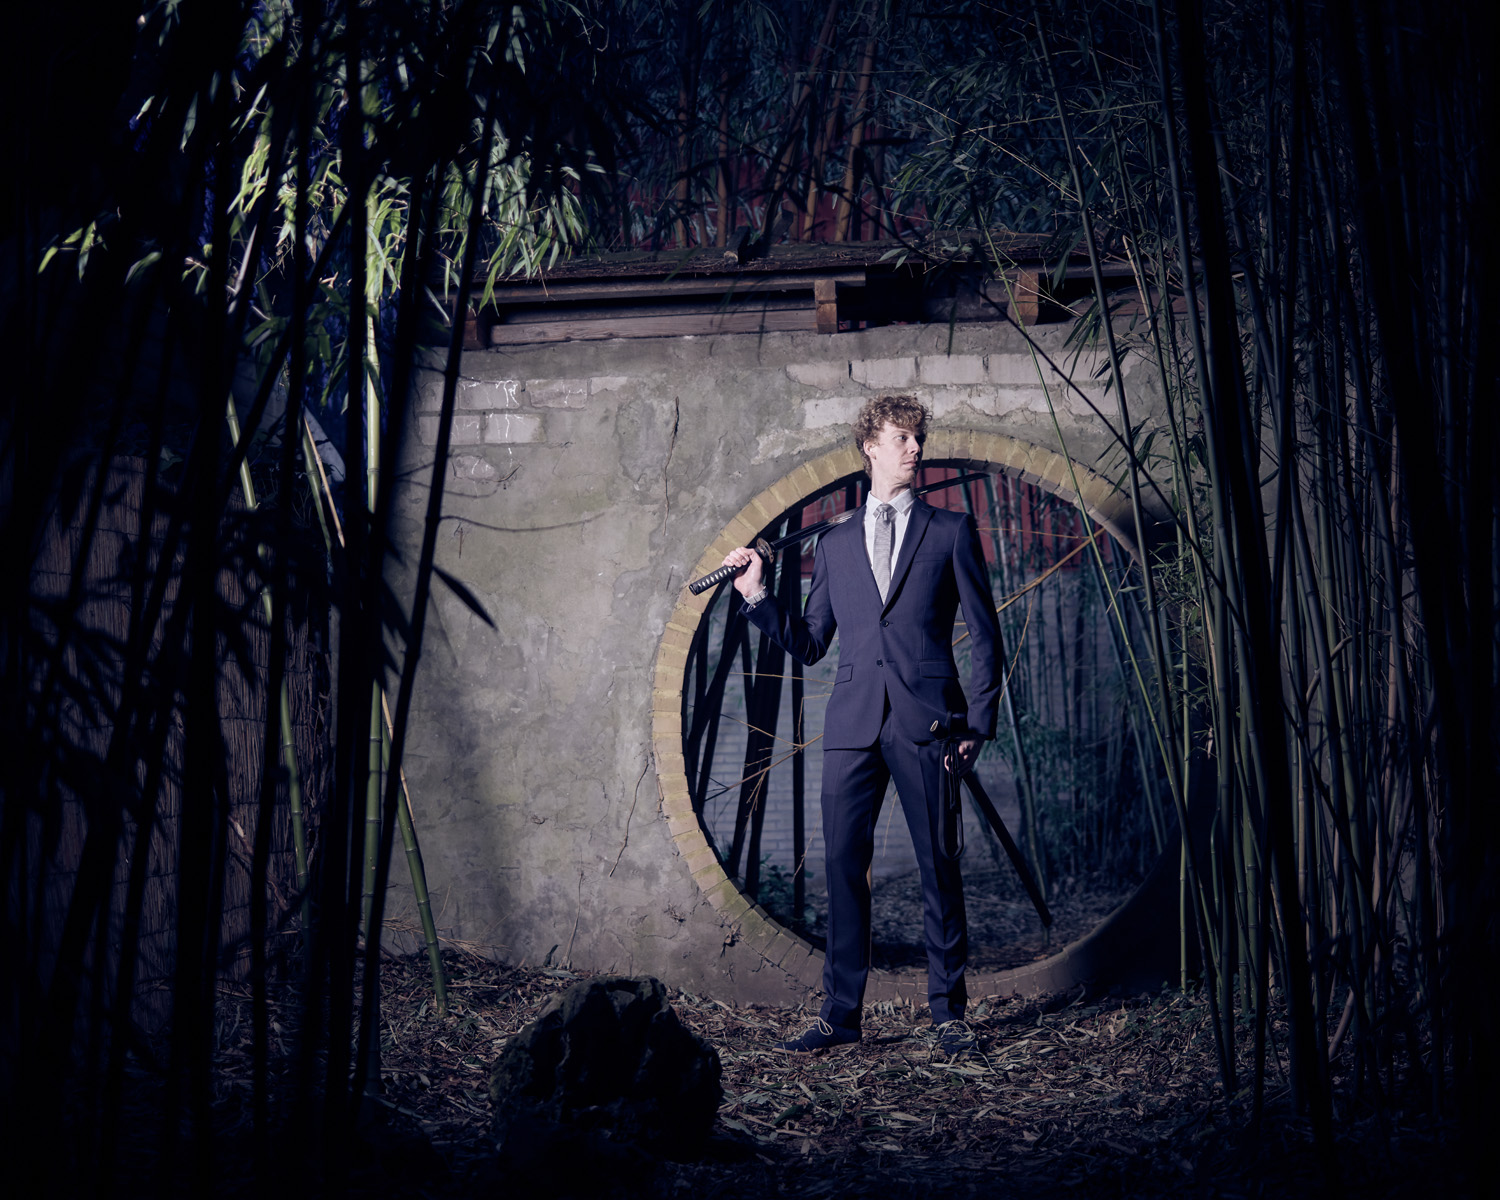
Figure 14 Circular door f/9, 4s, ISO 100