
My Fuji X100T Experience
by Vasu Jagannathan
Hi Steve,
Here is my User Report on the Fujifilm X100T digital camera.
My X100T is black. It is beautiful to behold and, as befits a Compact, it is easily carried in the hand. But, as I did not find the grip to be super comfortable while shooting, I will be attaching Fujifilm’s MHG-X100 handgrip in the near future. Since that’s my only real caveat one can guess that I really like this camera!
I took it out just one day after receiving it without making any prior practice shots. As I’m one of those who never had either one of the preceding X100 or X100S cameras in the series, it says a lot for the X100T that I was able to get comfortable with it within the space of a single photo shooting session. Just by way of background, the X100T is a 23 mm (or a 35 mm EFOV) fixed-lens camera with an APS-C sized XTrans II sensor packed inside a compact body.
In taking the pictures shown here, I used Aperture Priority, changing the f values as needed. I also used the Auto ISO option with the range 200 to 6400. For Metering I chose the Spot option and Focus was Auto. In order to feel out the camera’s performance, I shot some pictures wide open at f/2.0 (see Pictures 3 to 6), pushed the ISO to 1600 (see Picture 5), and fired off handheld at 1/40s (see Pictures 2, 4 and 5).
I also switched in the built-in Neutral Density Filter for Pictures 7 and 11. All pictures were shot in Raw Mode and converted to Jpeg in Adobe LR 5. One small point. When it comes to those Fujifilm cameras that use a XTrans digital sensor, I am really not sure whether Adobe LR is really the best thing to use for demosaicing the XTrans Raw files. I haven’t yet explored using other software such as Iridient which may be more optimal for Xtrans. I believe that aspect should be taken into account when looking at the color rendering in these pictures.
By way of background information, the attached pictures were taken in Washington DC – some inside the National Gallery of Art where the use of Flash is prohibited – and some outside. I am not going to describe every picture word by word as that would be boring. Rather, I would like to point to certain aspects of some of the images that speak to the performance capabilities of the X100T camera.
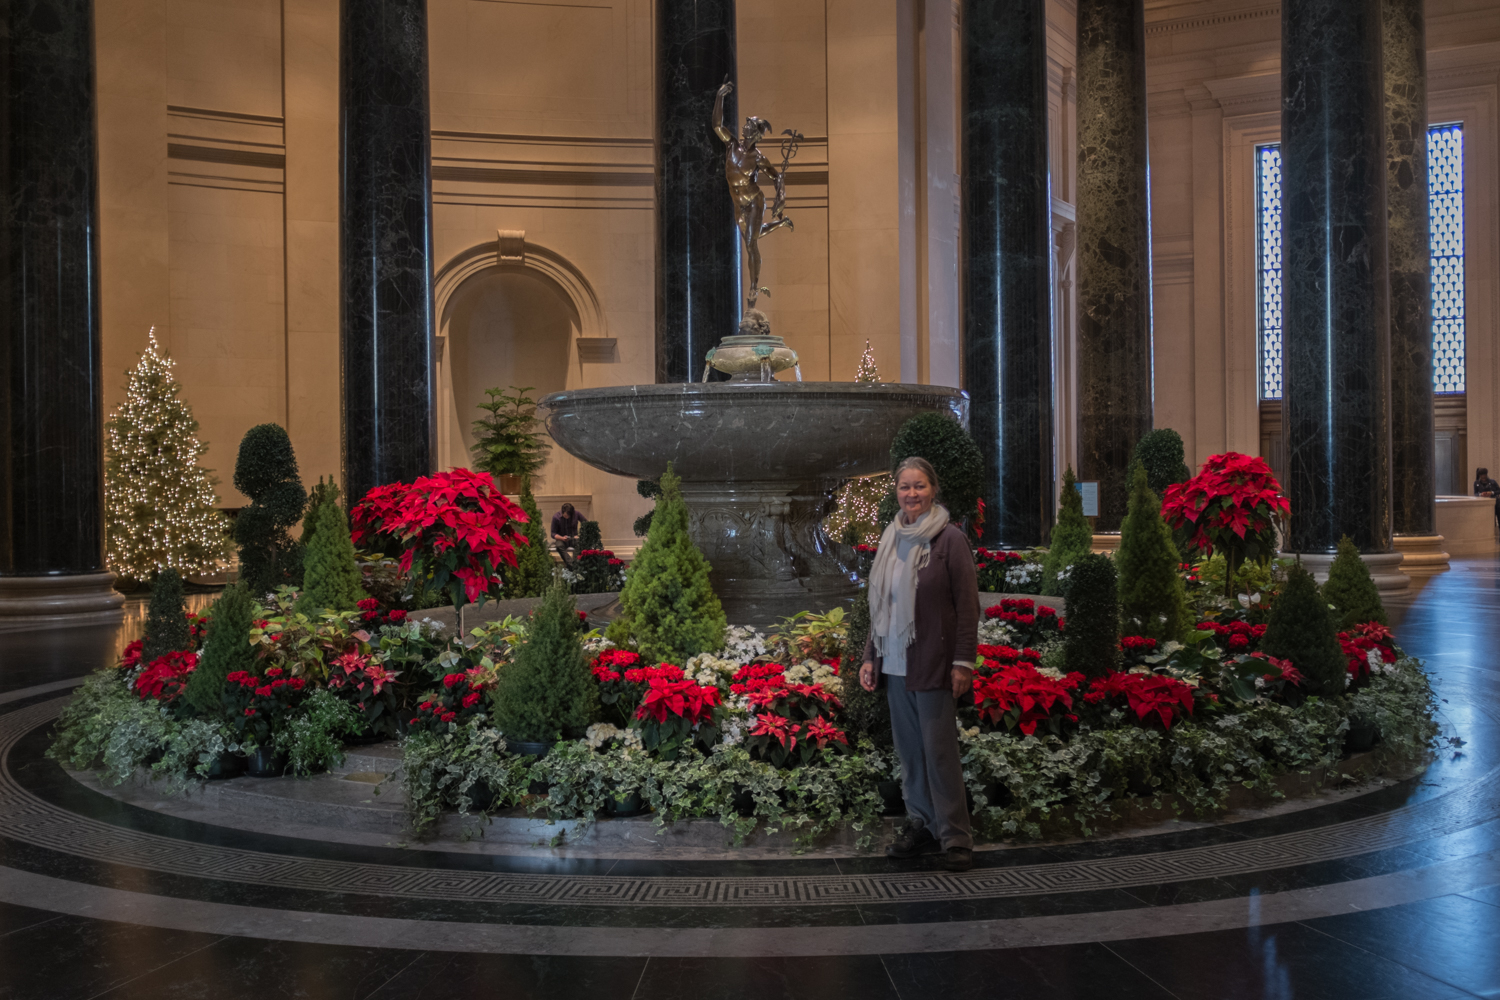
Pictures 2 through 6 were taken inside the Gallery where the light is subdued mostly for the sake of preserving the paintings. More specifically, Picture 2 was a bit challenging for the X100T because it was shot in a dark tunnel between two wings of the Gallery with myriads of small decorative type of lights that went on and off.
Picture 2 – 1/40ths
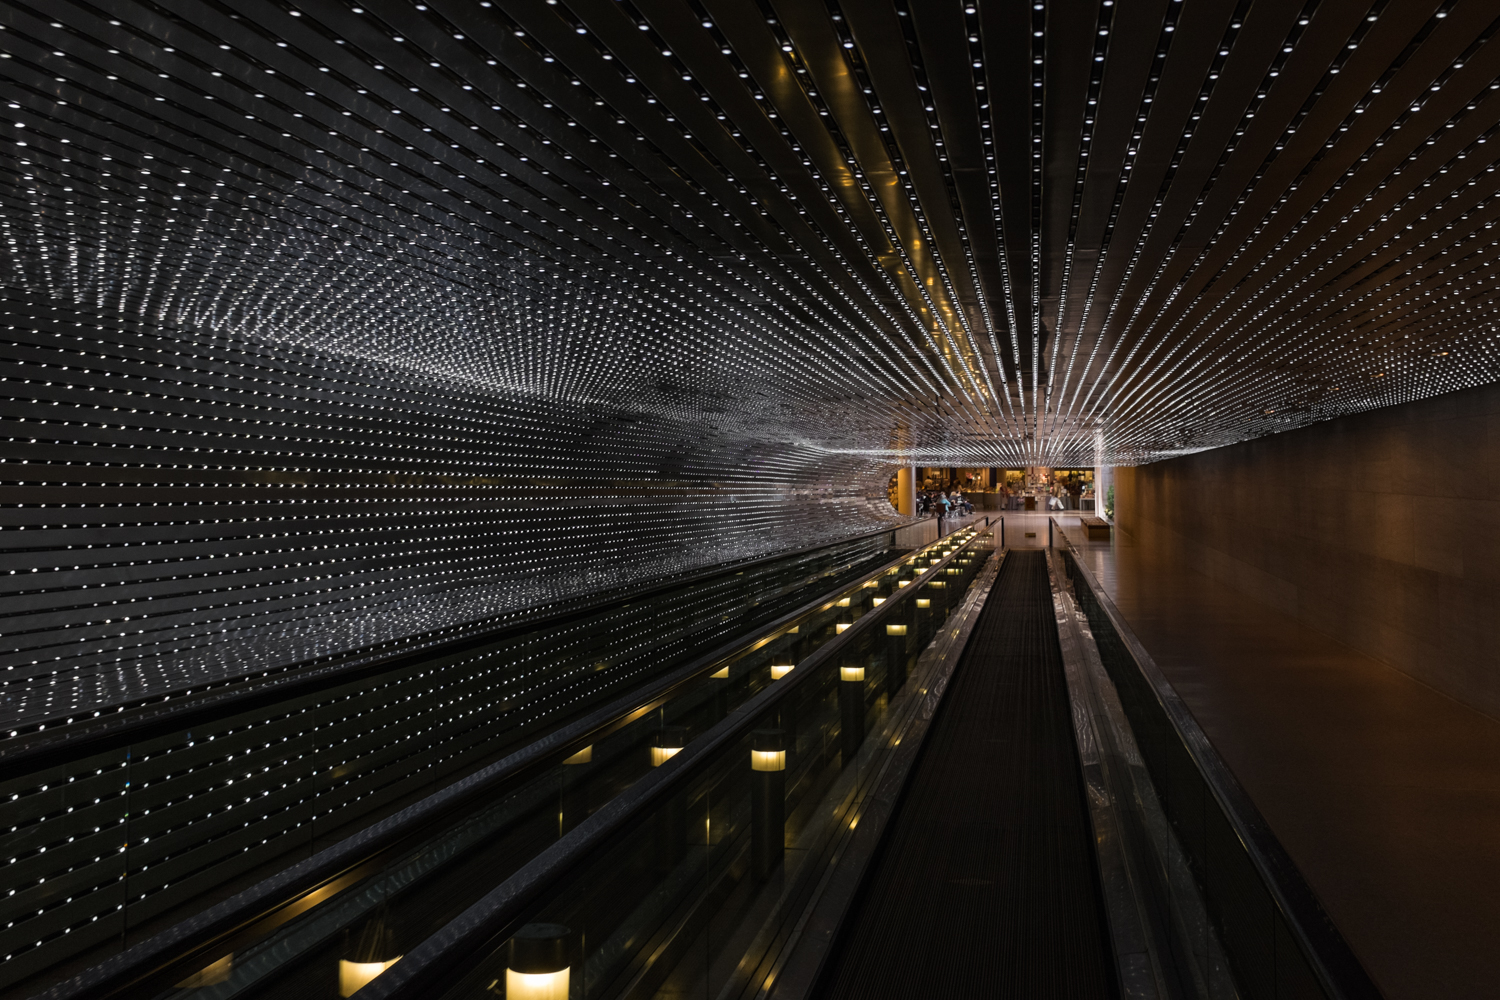
I must have gotten this one in the full-on cycle. The ISO was 1250. Even so, the camera took this in stride at a shutter speed of 1/40s.
Below – Pictures 3, 4 and 5
Picture 6 which shows the original Little Dancer sculpture by Degas currently on exhibit here.
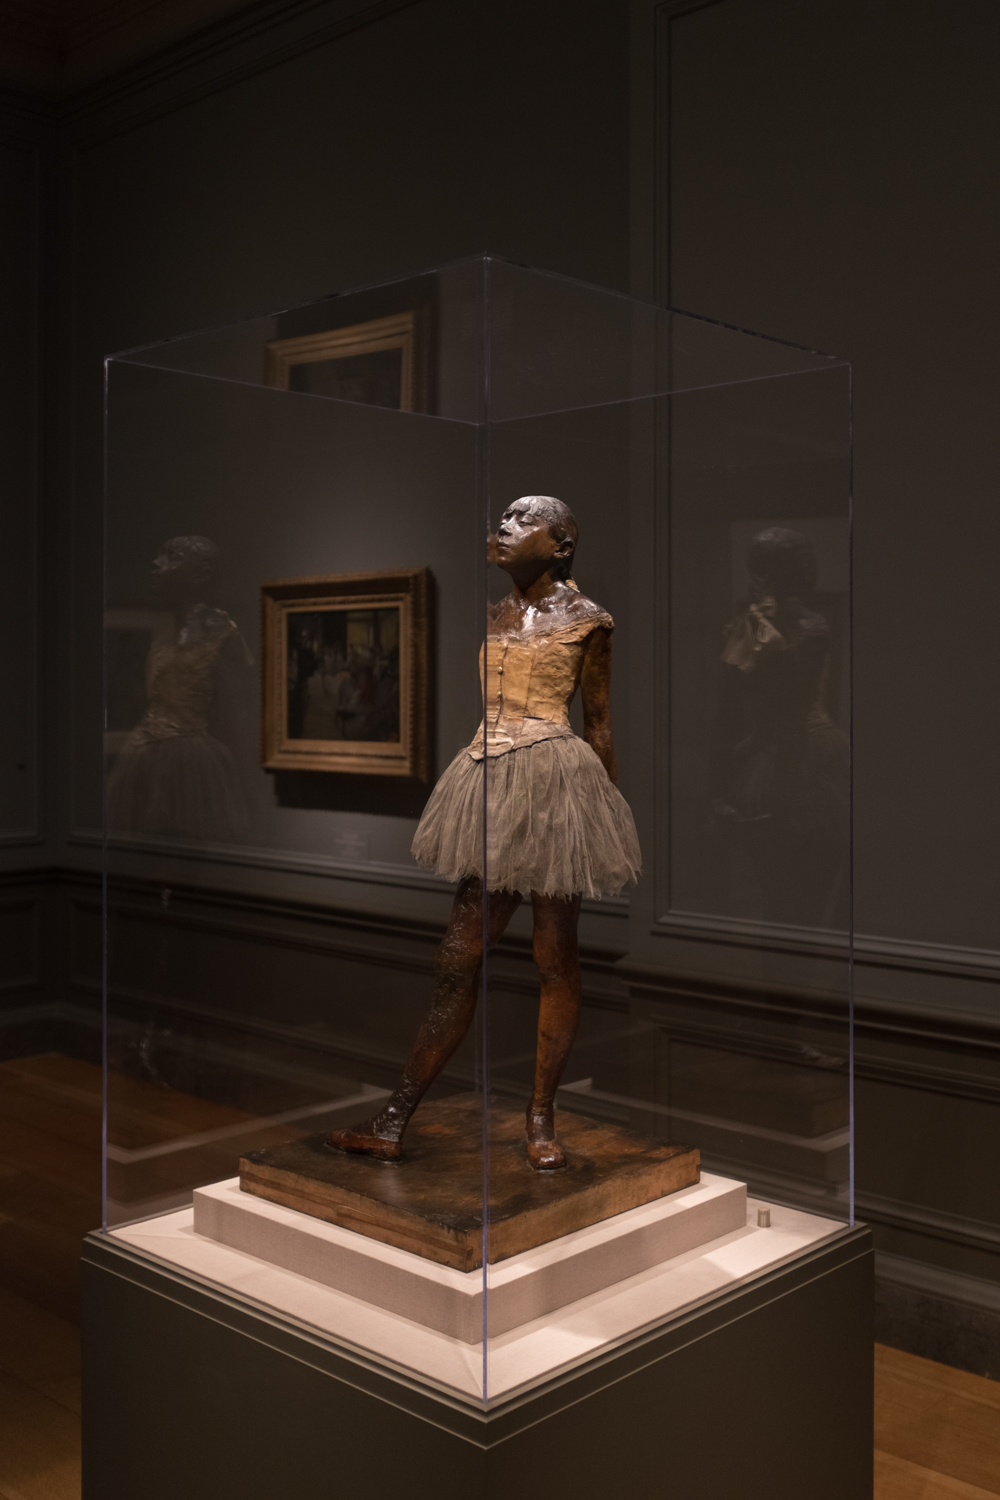
The lens was held wide open at f/2.0. Among other things, I think the X100T nicely captured the Dancer’s reflections in the surrounding transparent box. All in all, the light and shadow aspects seemed to be well-handled by X100T in these indoor set of pictures.
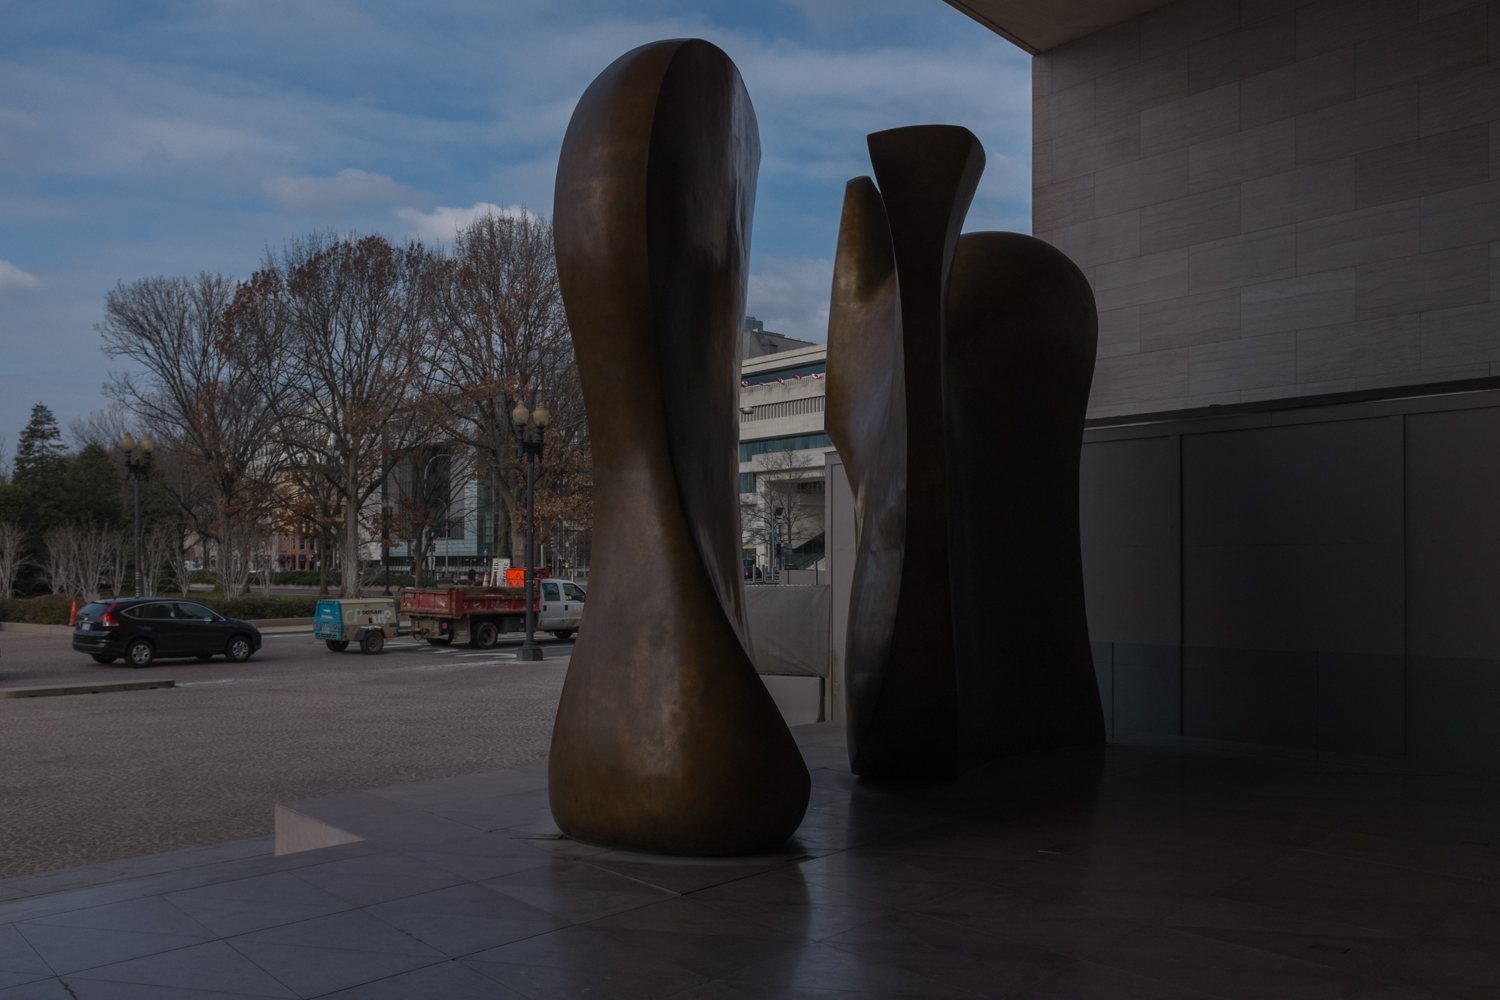
Stepping outdoors, Picture 7 was taken in sunlight so bright that I decided to trigger the built-in Neutral Density Filter for this one.
Picture 7, ND filter engaged.
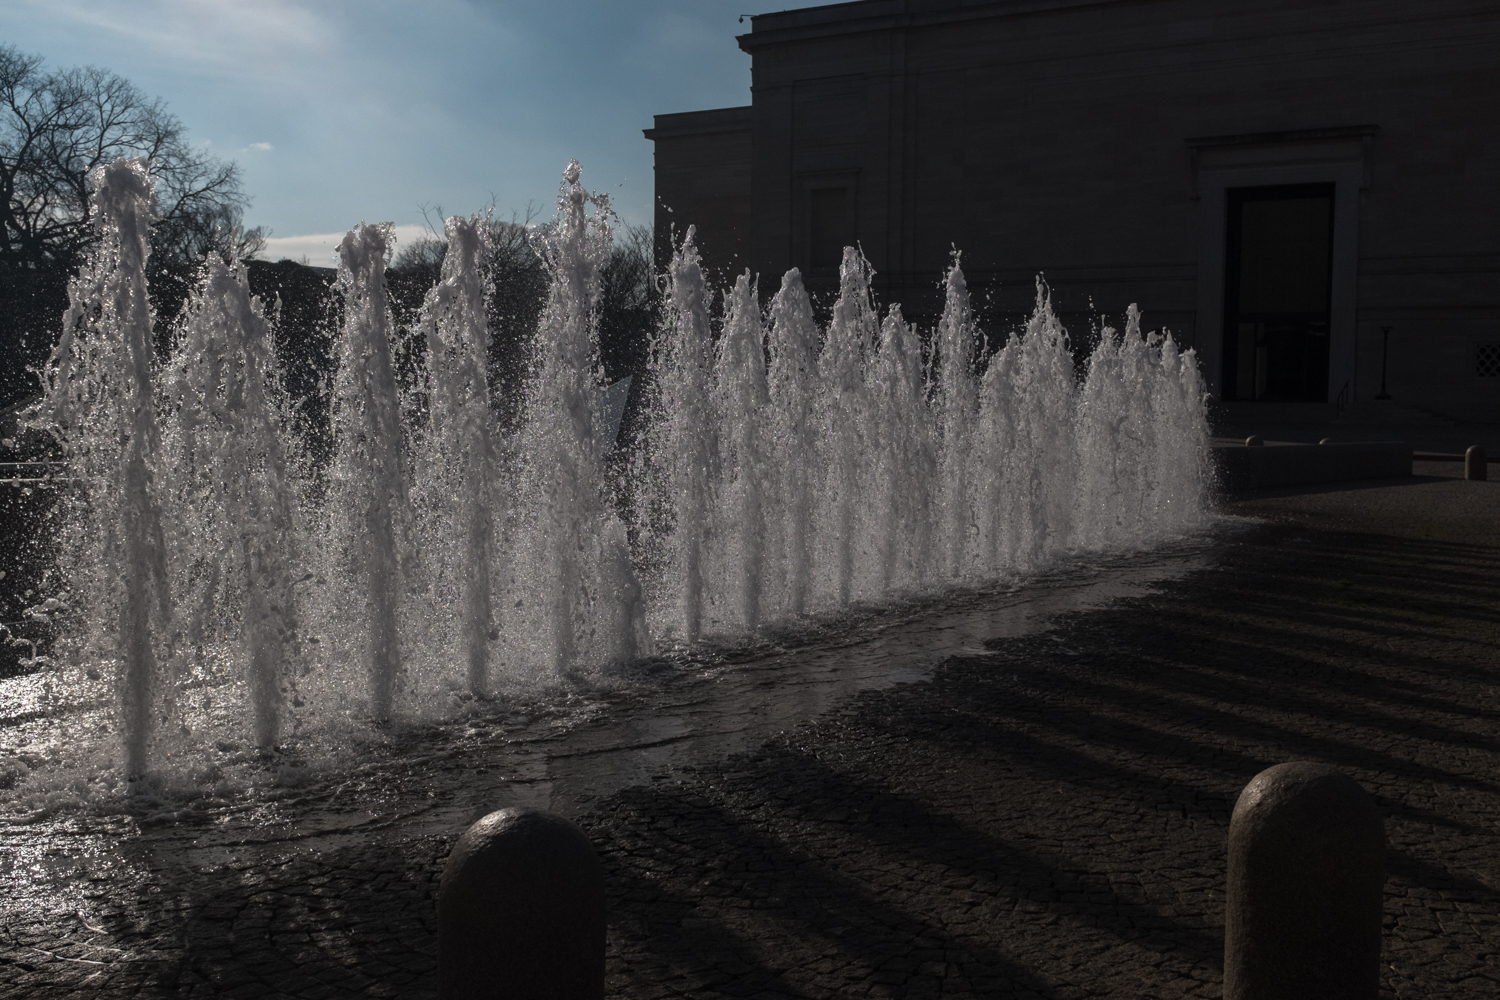
Additionally, I shot this one with a shutter speed of 1/2500s just so I could freeze the motion of the fountain’s water jets. In this situation, the X100T set the Auto ISO to 850 and captured a good quality image. In all these pictures, the actual exposure values used in developing the Raw via Adobe LR 5 are of course very subjective, being my personal choices. Someone else may have developed the light and shadow differently but I believe that the intrinsic quality of the image produced by the X100T would still have been just as good.
Pictures 8, 9, and 10
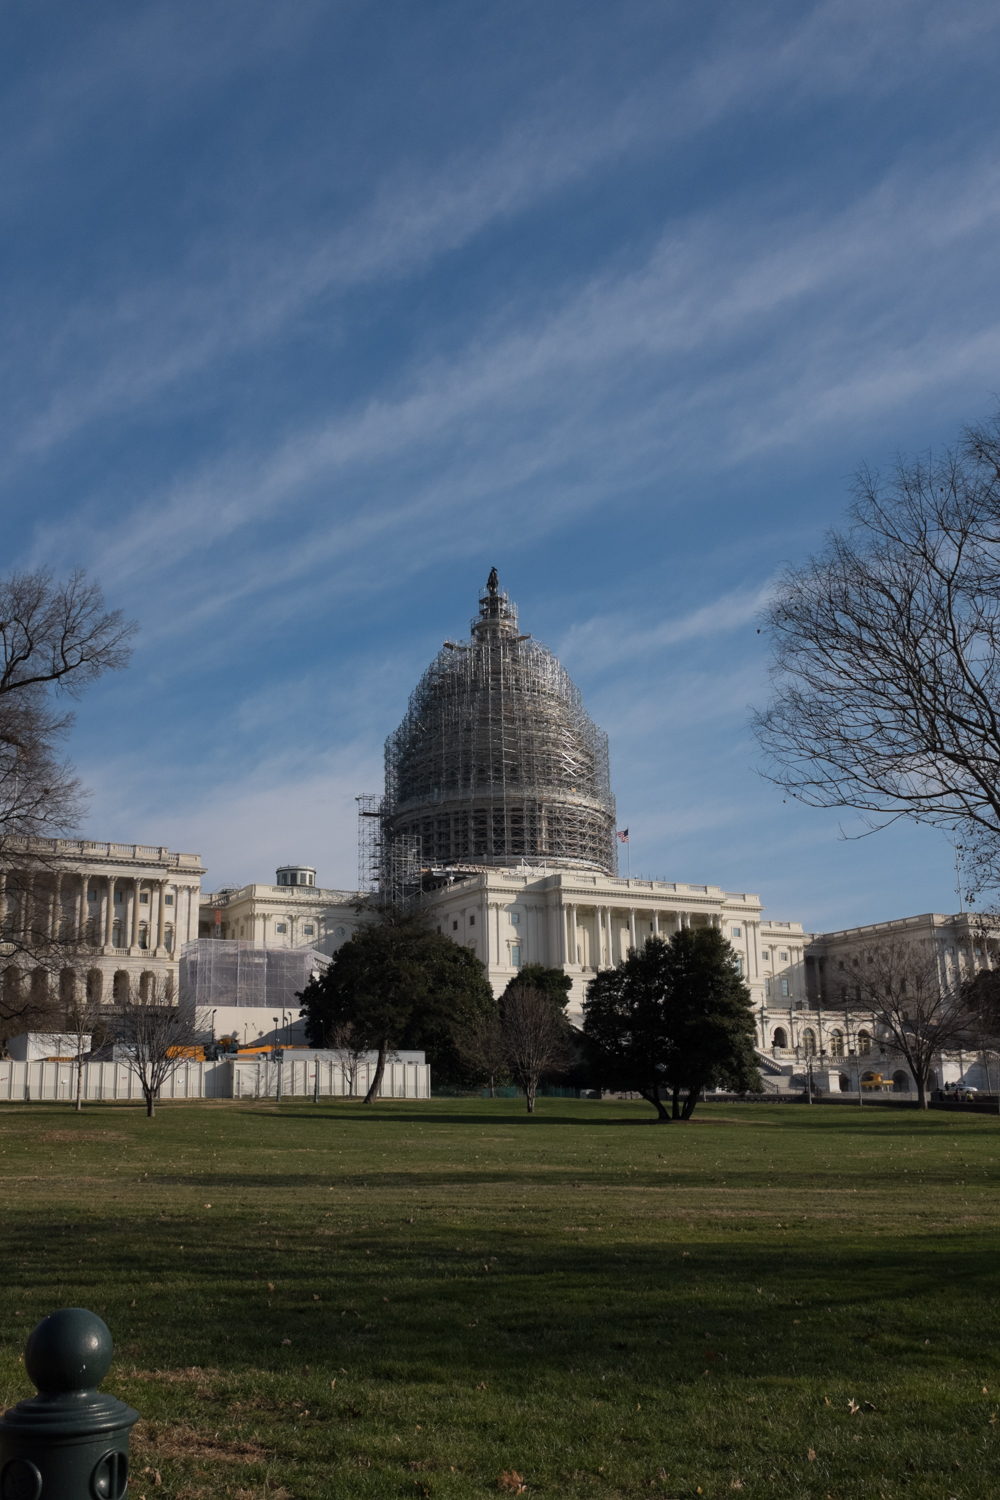

Picture 11 was a challenge for the X100T due to a great contrast in light (the flaring sunlit cloud) and deep shade (the Library of Congress’ Jefferson building).
Picture 11 – f/16
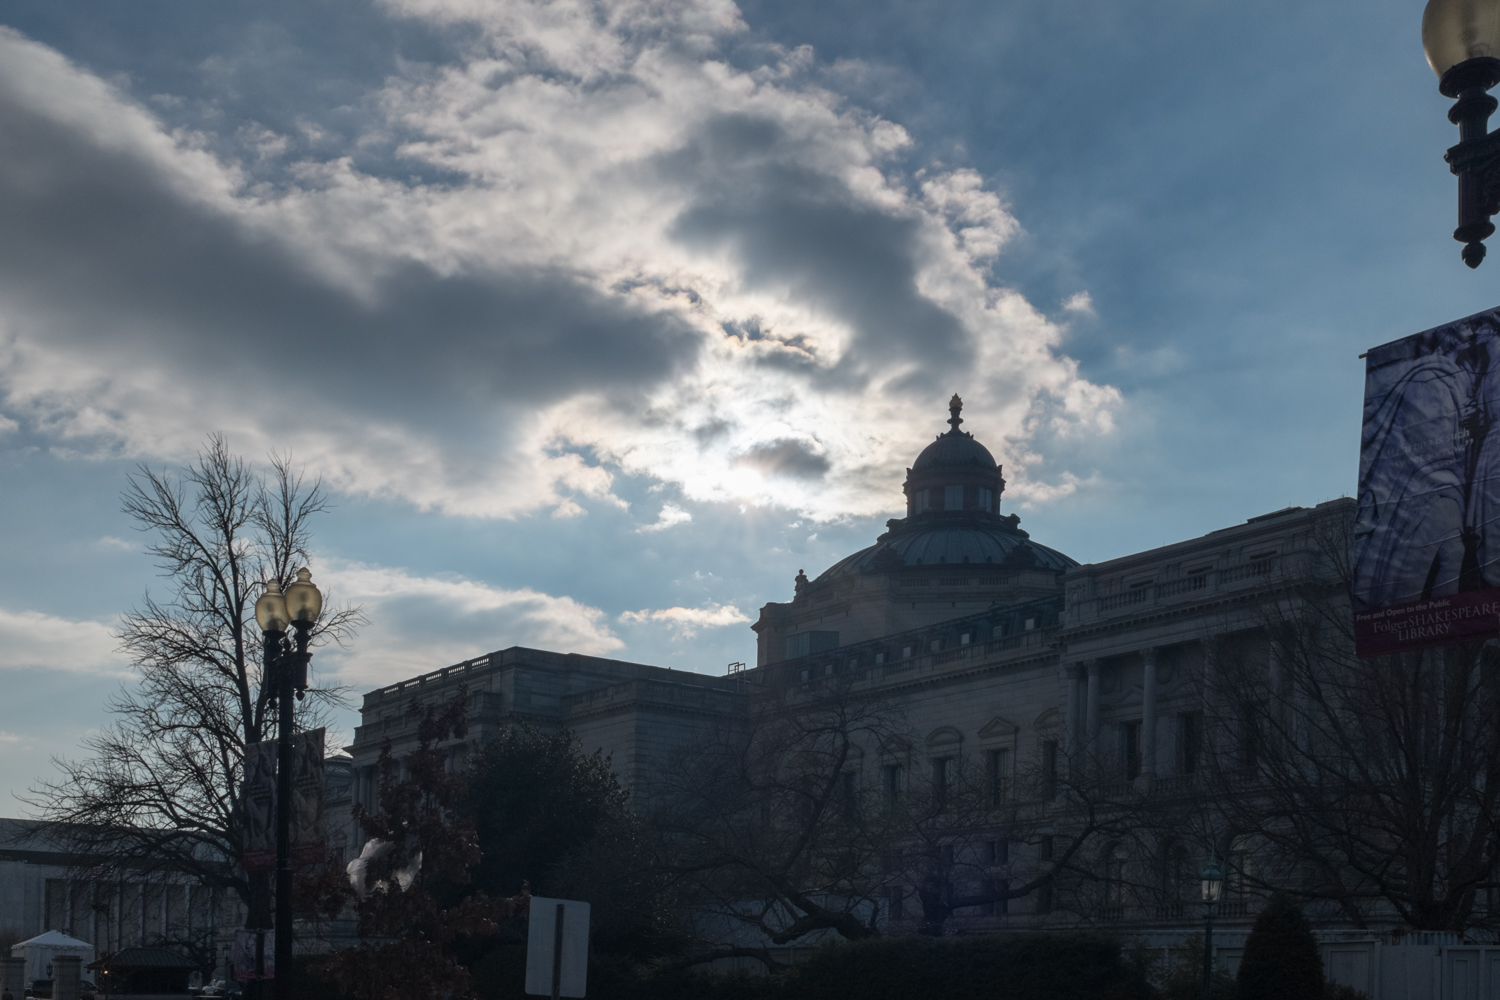
I switched on the built-in Neutral Density Filter for this one and stopped down the aperture to its smallest f/16 value. I hope the picture is suitably dramatic as well showing a nice performance by X100T. The inspiration for the last picture, Picture 12, was the interesting cloud hovering over Union Station.
Picture 12
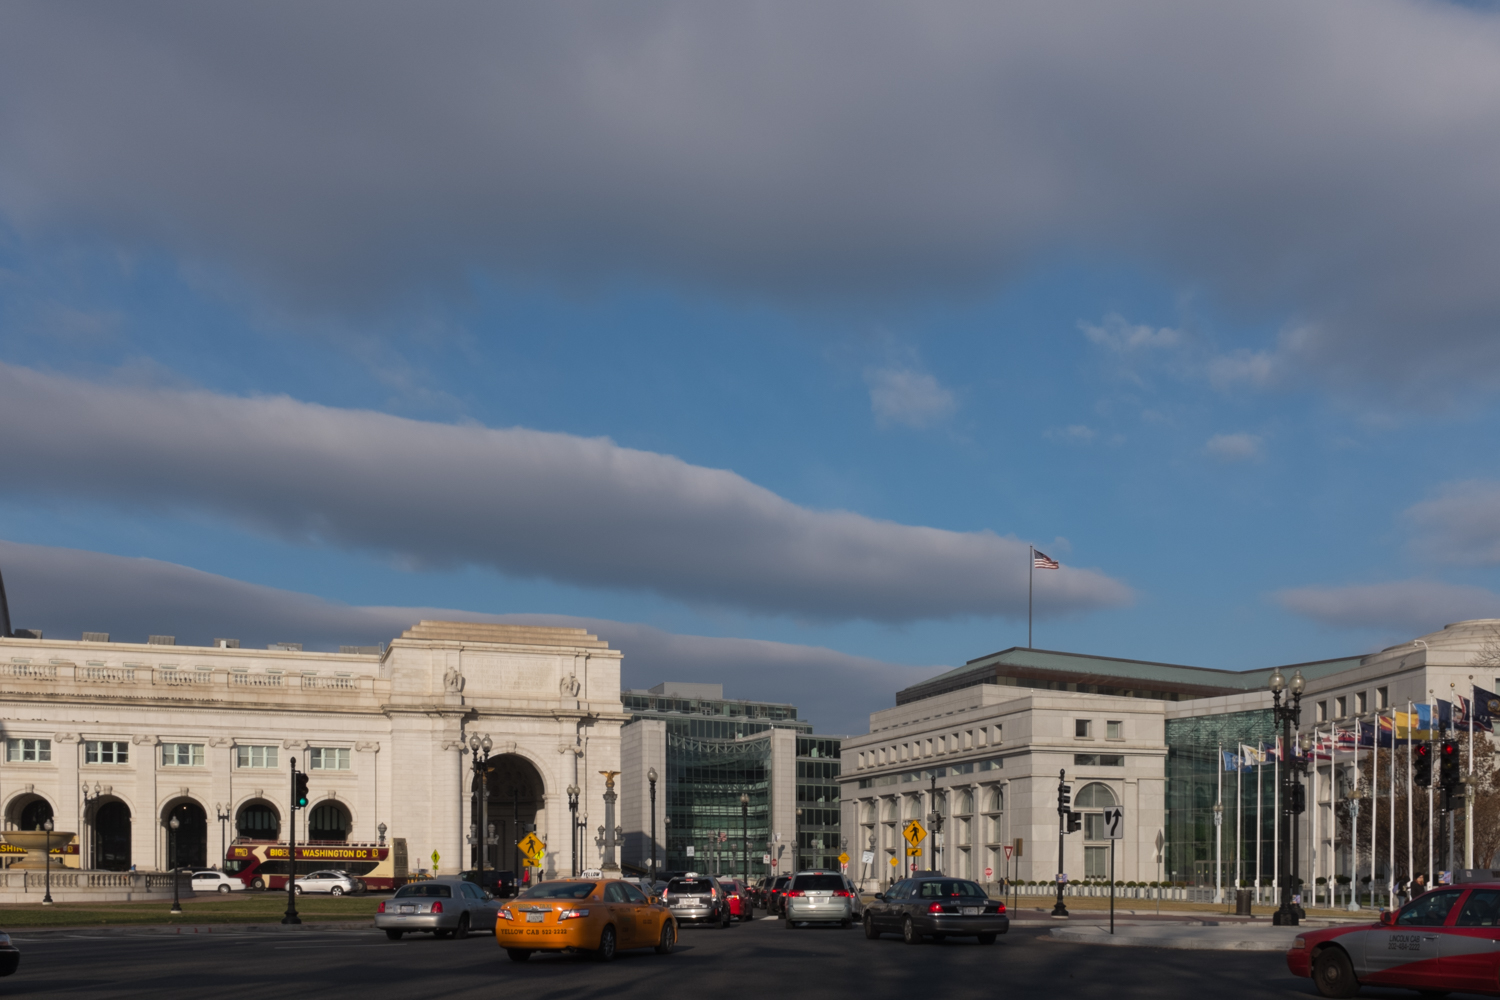
It’s the kind of situation where a Compact like X100T comes perfectly to hand and the fact that it has a large APS-C sized sensor gives one the confidence that you can pull off a good shot with a decent workable dynamic range in the Raw file. To finish up, I believe that this camera will not substitute for a top notch full frame DSLR or a Leica M Rangefinder in situations where that type of camera is needed. But what the X100T does, it does well. While it is not a pocket camera like the Ricoh GR, still it is easily carried in one hand or in a briefcase or messenger bag.
Its greatest asset, perhaps, is that someday when you are out there and see something so totally photoworthy that it would be a shame to depend on a cell phone camera with all its inherent limitations, then out comes your X100T and, then and there, you will be able to capture a high quality image that is all yours to savor at your leisure. Yes, from that perspective at least, this camera is a keeper.
You can purchase the X100T at Amazon HERE or B&H Photo HERE OR PopFlash.com HERE
The new Thumbs up is now available for the X100T as well, HERE.

the notion that lightroom is not suitable for xtrans raw files is a mere myth these days. I can read it often in threads, but I never saw significant differences as these people do…
I should say, consider the pictures of an earlier post http://www.stevehuffphoto.com/2015/01/08/me-and-my-fuji-x100-original-by-jonas-luis/ before making comment on this camera. This guy nows what’s he is doing.
Fuji makes great cameras with very good lenses. ?You need to now how to process these raw files! When I see this pictures there is still a lot to learn! I am not a Fuji promoter but some base about processing files is a must before rating a camera whatever which brand.
Hi,
This is me – the one wrote the original post to begin with. First and foremost, I want to thank everyone who commented. The very fact that you wrote-in is important to me as a learning experience. But I’m afraid there’s been some misunderstanding, perhaps?
That said, here is the crux of what I was, and am, trying to impart in my post which is supposed to be a “user report”. Namely, the thing that I struggled with is: how much do I let the X100T speak for itself and how much is imparted by the processing software?
For this particular post which is essentially concerned with the capabilities of the camera (cf. a user report) rather than prove how much improvement can be introduced via skillful post processing techniques, I consciously decided to err on the side of minimal processing other than my personal interpretation of the balance between light pixels and dark pixels in the luminance histogram. Yes, I tend to pile up the peaks to the left thereby moving the exposure to the darker side in post processing. Is that underexposing? Hmm. I am not sure.
While granting that the capabilities of the camera are visualized through the photographs it produces, what I am aiming for is for the readers to see the “bones” or underlying structure of the picture taking ability of the camera itself – if such were possible – without letting skillful post processing techniques distort the task that I had set for myself. If I threw in the full weight of the machinery of Adobe LR or some other processing engine would not that mask the actual capabilities of the X100T? That’s the nuanced part I had to contend with.
Now, to see some photographs that I took with the X100T where I worked in the processing to produce the best image that I could please see my Flickr at:
https://www.flickr.com/photos/vasu-jagannathan/sets/72157649876494589/
Hi Vasu, I’m not a professional photographer so this is just my humble opinion, you and others may disagree. To me RAW files are like 35mm negatives on film. You need to, want to process to get all the details and beautiful colors and highlights out of these files that are there. Using a Raw converter that shows smearing and blurs details and colors doesn’t say anything about the capabilities of the camera and it’s sensor especially with these uncompressed Raw files that the Fuji X-Trans sensor produces. Processing is not “masking” what the camera is capable of producing, it’s revealing it.
Thank you for article and the flickr reference: I very much enjoyed seeing the variety of shots you get out of that 35mm lens, which I have found difficult with my X100S. I’m much happier with the 50mm teleconverter on – though that makes it a different camera in some ways. But still very well balanced.
I was thinking Hmm then the photo of the dancer appeared!
PS: Processing Raws is quite a skill. You could also try RAW plus jpg to see how it goes. Especially as X-Trans seems tricky in RAW.
Thanks for sharing your photos. If I could offer a kind critique, when framing your photos, watch out for distracting elements. Pictures 7 and 9 in particular have unnecessary bollards at the bottom or the screen. Of course, they are your photographs, and you should do what ever feels right with them
Thank you for taking the time to review. With a 23 mm fixed lens camera I should indeed “zoom with my feet”. Thus, had I moved in closer I could have composed without the distracting elements. That would be a good thing to watch out for in future. I dislike cropping after the fact. Not only do I lose resolution, the framing also suffers.
Nice shot Vasu!
I am in Nice, France as we speak and testing my X100T. Leaving my trusty but rather clunky D800e back home, i feel light and free. I am still experience some annoying detail, for example; small buttons that easily change their position all by themselves. Other than that I am very pleased with the results ooc, especially the bw settings and high iso capability.
Will post some of my pictures when back home.
J
Thank you Jan. Enjoy the scenery in Nice. Now I “programmed” some of the function buttons in X100T for certain shooting parameters that I prefer. Occassionally, I hit the wrong buttons by mistake due to their small sizes and proximities. Maybe with more practice that can be resolved. If you are interested, I recently posted some shots I took with the X100T while sightseeing in Georgetown, Washington DC. That is nothing as fabulous as Nice but it has its charms. Here is my Flickr link to that: https://www.flickr.com/photos/vasu-jagannathan/sets/72157649526871739/
Seems like a lot of these shots are under exposed to me .
I am with you on this point.
I agree, sorry Vasu they are underexposed.
Perhaps your monitor is set too bright when you are editing the Raws?
I believe I treated these the same way I did the snapshots taken with the same X100T in the following Flickr link: https://www.flickr.com/photos/vasu-jagannathan/sets/72157647688704704/
Hi Vasu, I really enjoyed your article. As an X100 series veteran, I highly recommend the purchase of a thumb grip. They add no additional bulk and really help stabilize the camera for those moments when you’re using a slower shutter speed. You can buy cheap thumb grips on eBay, but the more expensive alternatives are really worth it in terms of build quality and looks. Match Technical makes a grip for the X100T and the Lensmate Online will be coming out with one very soon (make sure it’s an X100T grip that you’re buying – otherwise your grip will partially obscure the Drive button and command wheel).
I notice that many of the photos you’ve shown are somewhat dark, which obviously is to your taste. If you find yourself needing brighter exposures in some situations, don’t be afraid of setting higher ISOs on the X100T – I find that 3200 is excellent and 4000-6400 are perfectly acceptable, providing you don’t mind a little noise (I also find that Fuji’s noise has a nicely grainy look anyway, so a little bit here and there doesn’t trouble me).
Lightroom 5 is miles better than previous iterations for working with X-Trans files, but very occasionally it produces odd results. In some situations fine detail seems a bit smeared, which is particularly frustrating when you’re working with a lens as good as the one that comes with the camera. Sometimes I use Photo Ninja when Lightroom has trouble dealing with fine detail or low-light shots.
Aidan thank you for your perceptive comments. When I shoot I expose for the highlights and when I process I tend to develop for the shadows. The latter involves great subjectivity. I tend towards darker shades. For some reason, my pictures here were even darker that I thought them to be. But here’s a sample of four shots in my Flickr that give some idea of my idea of color rendering: https://www.flickr.com/photos/vasu-jagannathan/sets/72157647688704704/
Hi Vasu,
Thanks for sharing these nice photos. May I suggest using Capture One to process the Fuji RAWs? That’s what I did when I owned a Fuji X-Pro1. I also own LR but Capture One did a much better job with the Fuji RAWs. Those crapy looking Fuji RAW files turned out to look brilliant afterwards with very vibrant colors and a lot of detail if one didn’t zoom in too much (16 MP sensor). I sold the X-Pro1 and was guided by Steve’s great reviews on this site to try out a Sony a7r because I wanted a full frame camera. Also, because of Steve’s amazing reviews of the Leica Apo Summicron 50mm f2 ASPH. I bought a Leica M Typ 240 with that lens. That combo is like a full frame version of a Fuji with the Fujinon XF 35mm F1.4 :). Guess what, I still miss the Fuji. You can google Capture One and Fuji RAW. Have fun. And thanks, again.
Cheers,
Thank you W.P.. Coincidentally enough I “reactivated” my Phase One account and upgraded from Capture One Express to Capture Pro 8. Now I’m wondering whether the Nik plugins that I tend to use in Adobe LR, such Silver Efex, can be activated in Capture Pro. Of course, I could process my Raw files in Capture Pro, export them in Raw form to Adobe LR and apply the plugins there. But that’s too indirect.
Hi Vasu, I have no experience in that. I use the Nik Collection as standalone applications. I usually export TIFF files and then reopen them in Silver Efex, for example. I know it’s indirect but I just feel I have more control this way. I also found it makes no difference whether the Nik effects are applied to TIFF or JPEG files. One might as well export in the JPEG format due to file size.
Capture One 8 just added round tripping. I used it tonight and it is working pretty well so far. You can choose any program in your apps folder. it is not dependent on your program round trip being built in. It is making my transition from aperture even better.
Fuji makes pretty nice cameras.
The first one is some underexposed, the Met ones are all right.
11 has some dusty shadows, and 2 is the one wich better works.A reasonable holidays serie