

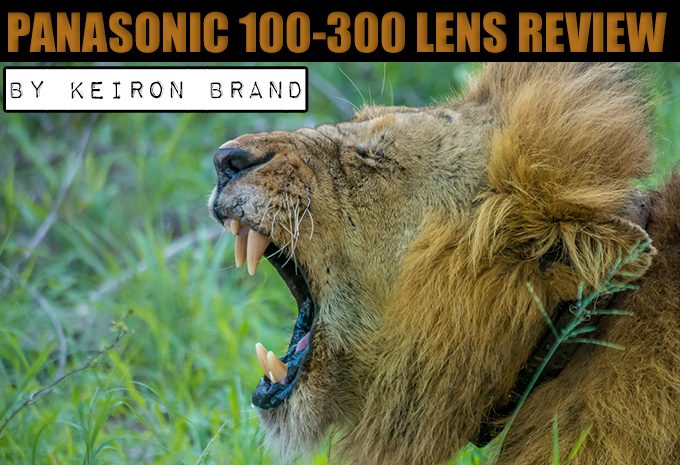
Unsung hero, the Panasonic Lumix G Vario 100-300mm f/4.0-5.6
By Keiron Brand
With the release of the Olympus 300mm prime and the sexy Panasonic Leica 100 to 400mm zoom I wanted to sing some praise for the, in my view, very underrated Panasonic 100 to 300mm.
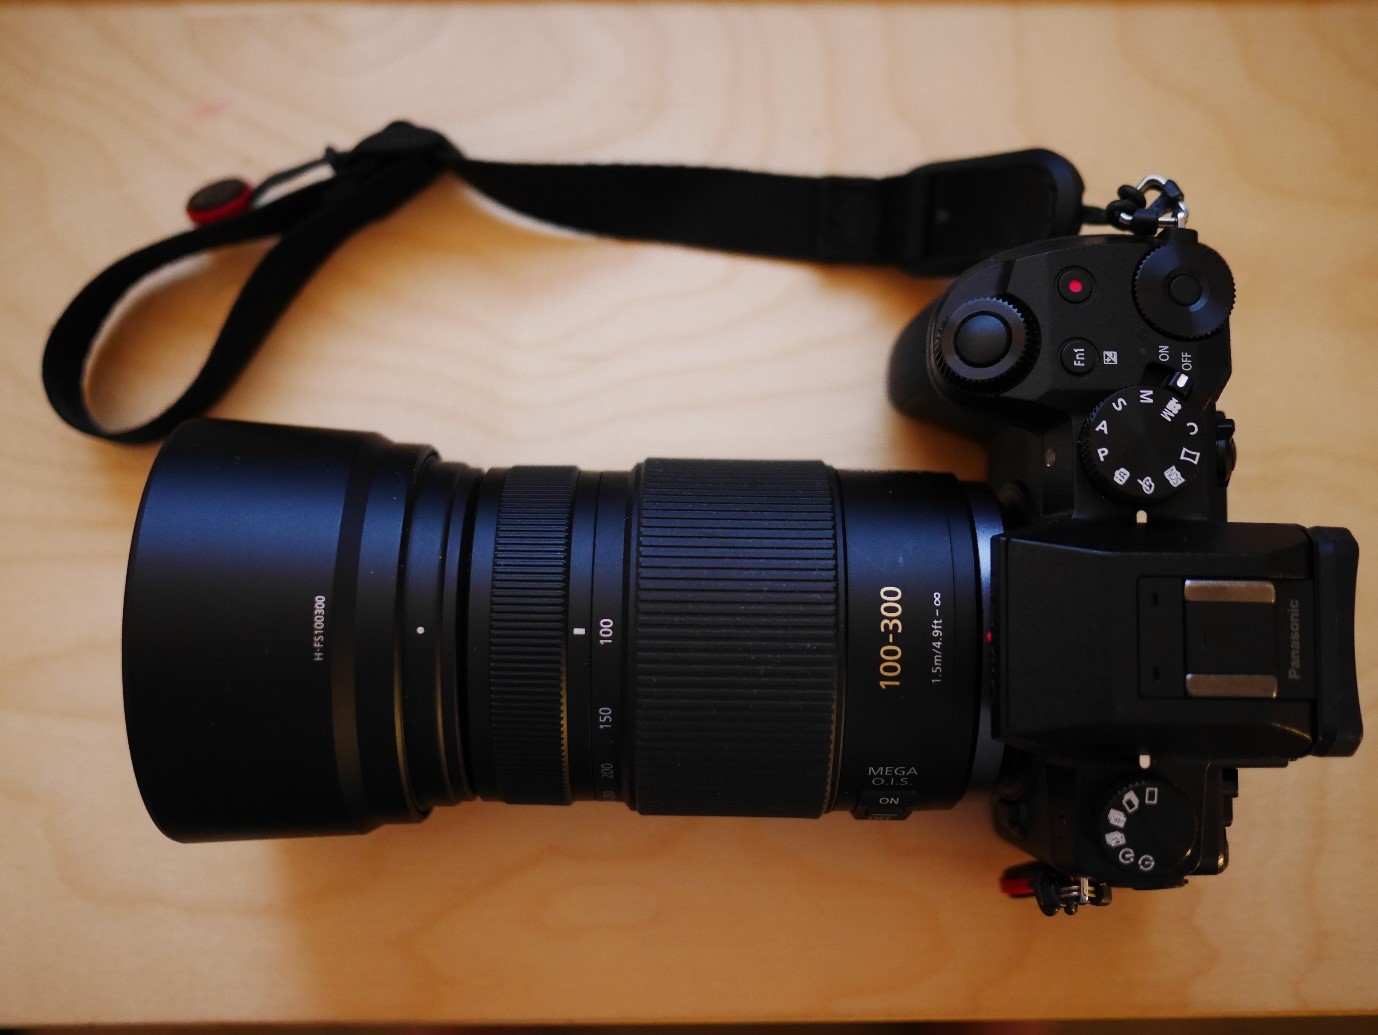
Picture 1 – The lens on the G7, a perfect combo in my mind
This lens has not done well in reviews and discussion forums and I see a lot of people giving up on this lens when they don’t get the shots they want. The complaints are generally around softness and slow apertures but I feel that this is a great lens when used in certain circumstances.
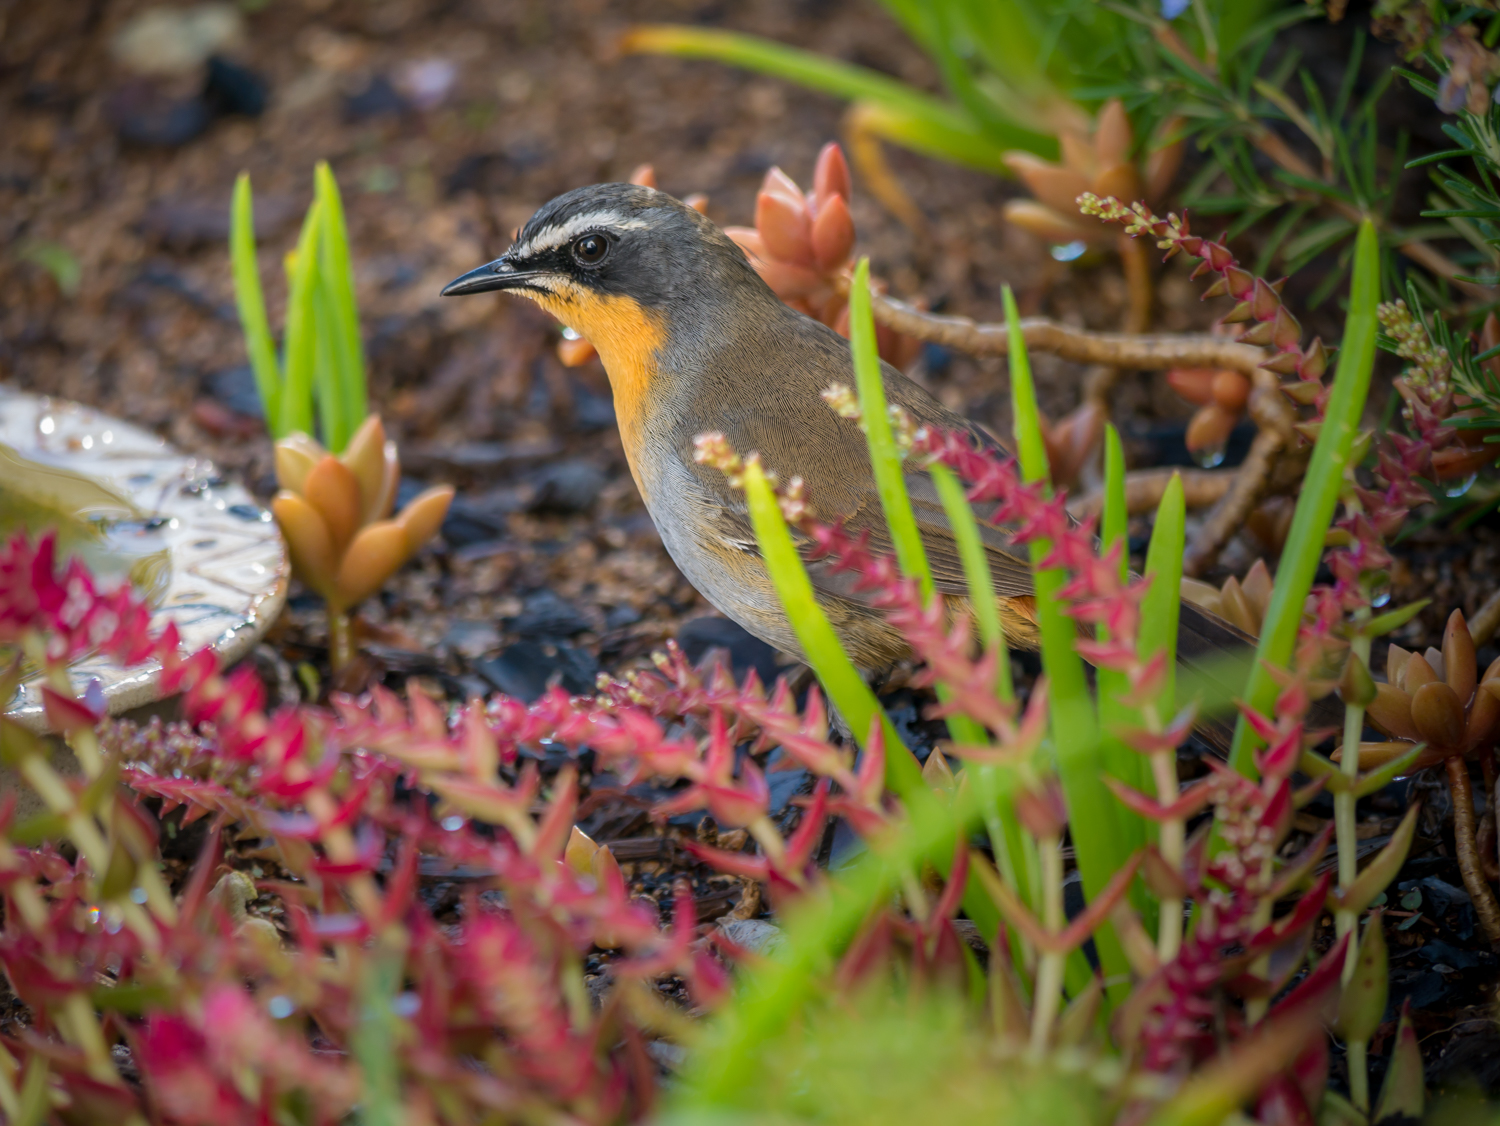
Picture 2 – Tripod 1/100 sec | f/5,3 | 246 mm | ISO 200
One of the issues is that the micro four thirds system has such good lenses, which are most of the time outstanding. This lens is a slightly less perfect lens that can still be great if used properly, you just need to acknowledge its short comings and leverage its strengths.
Let’s compare prices of long telephoto lenses in the micro four thirds system:
Olympus M.Zuiko Digital ED 300 mm 1:4.0 IS Pro Lens – $2,500
Panasonic H-RS100400 LEICA VARIO-ELMAR Lens, 100-400mm F/4.0-6.3 – $1,800
Panasonic H-FS100300 Lumix G Vario 100-300mm F/4.0-5.6 MEGA O.I.S. Lens – $580
Olympus MSC ED-M 75 to 300mm II f4.8-6.7 – $500
The latter two are cheap as chips compared to the first two so obviously there will be some quality differences, but the lens stabilisation was key for my Panasonic bodies so I chose the Panasonic lens.
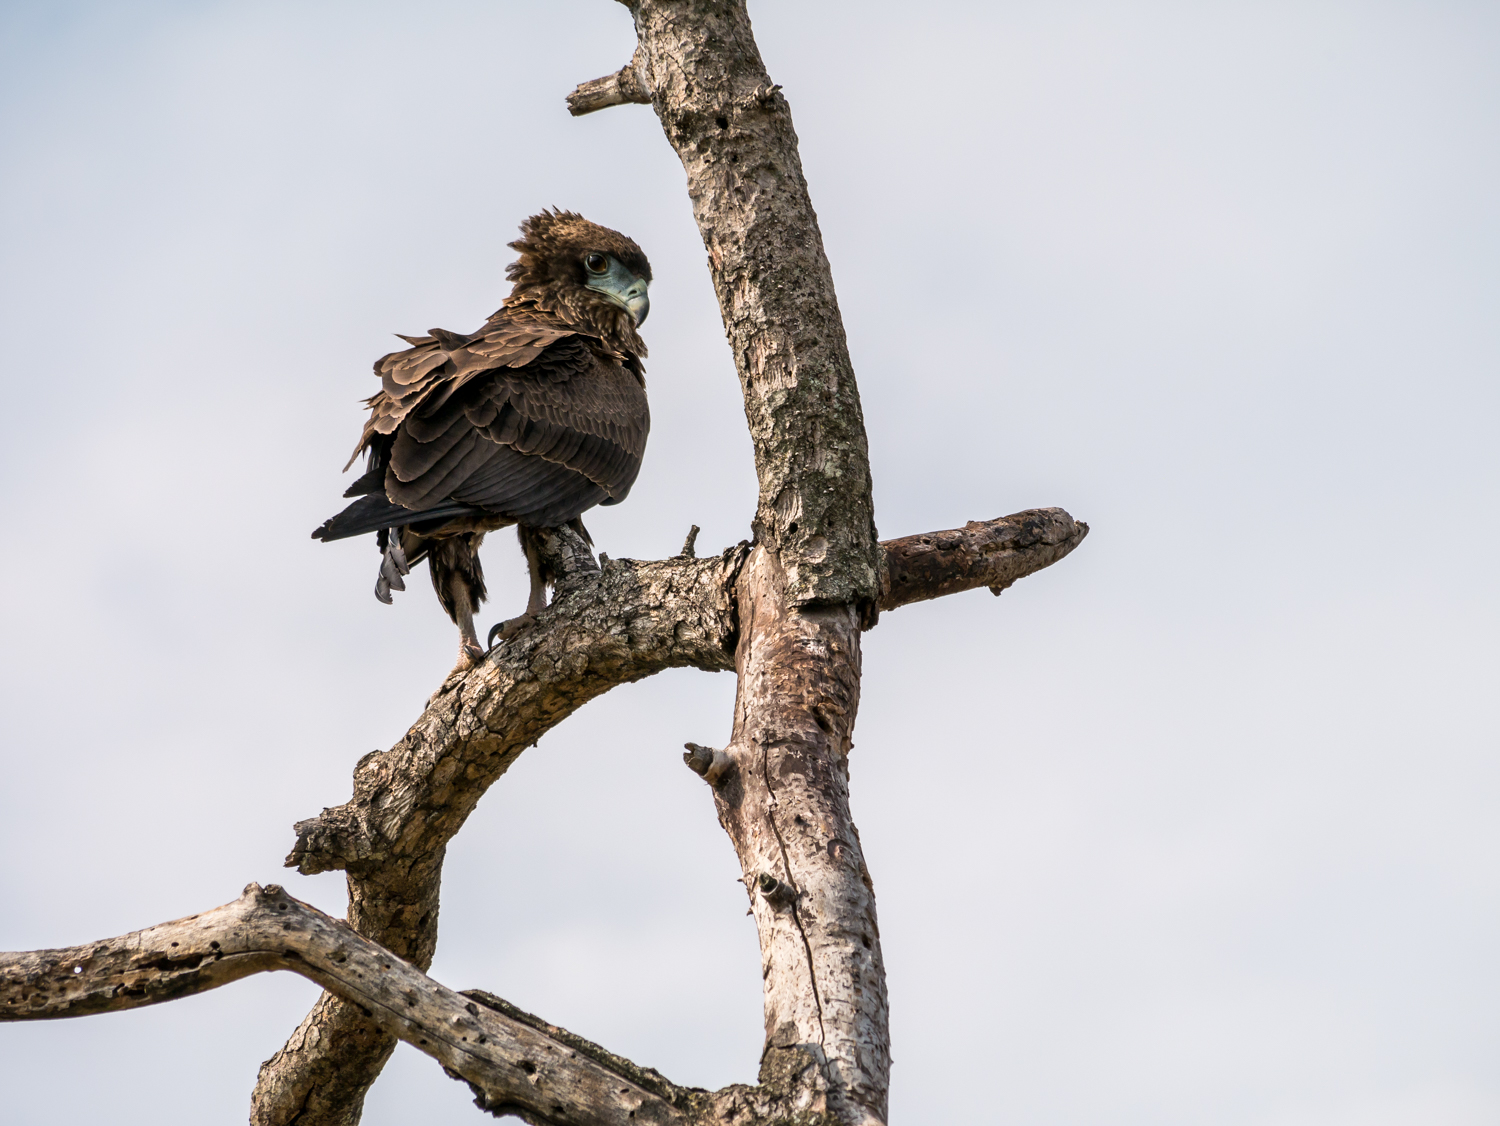
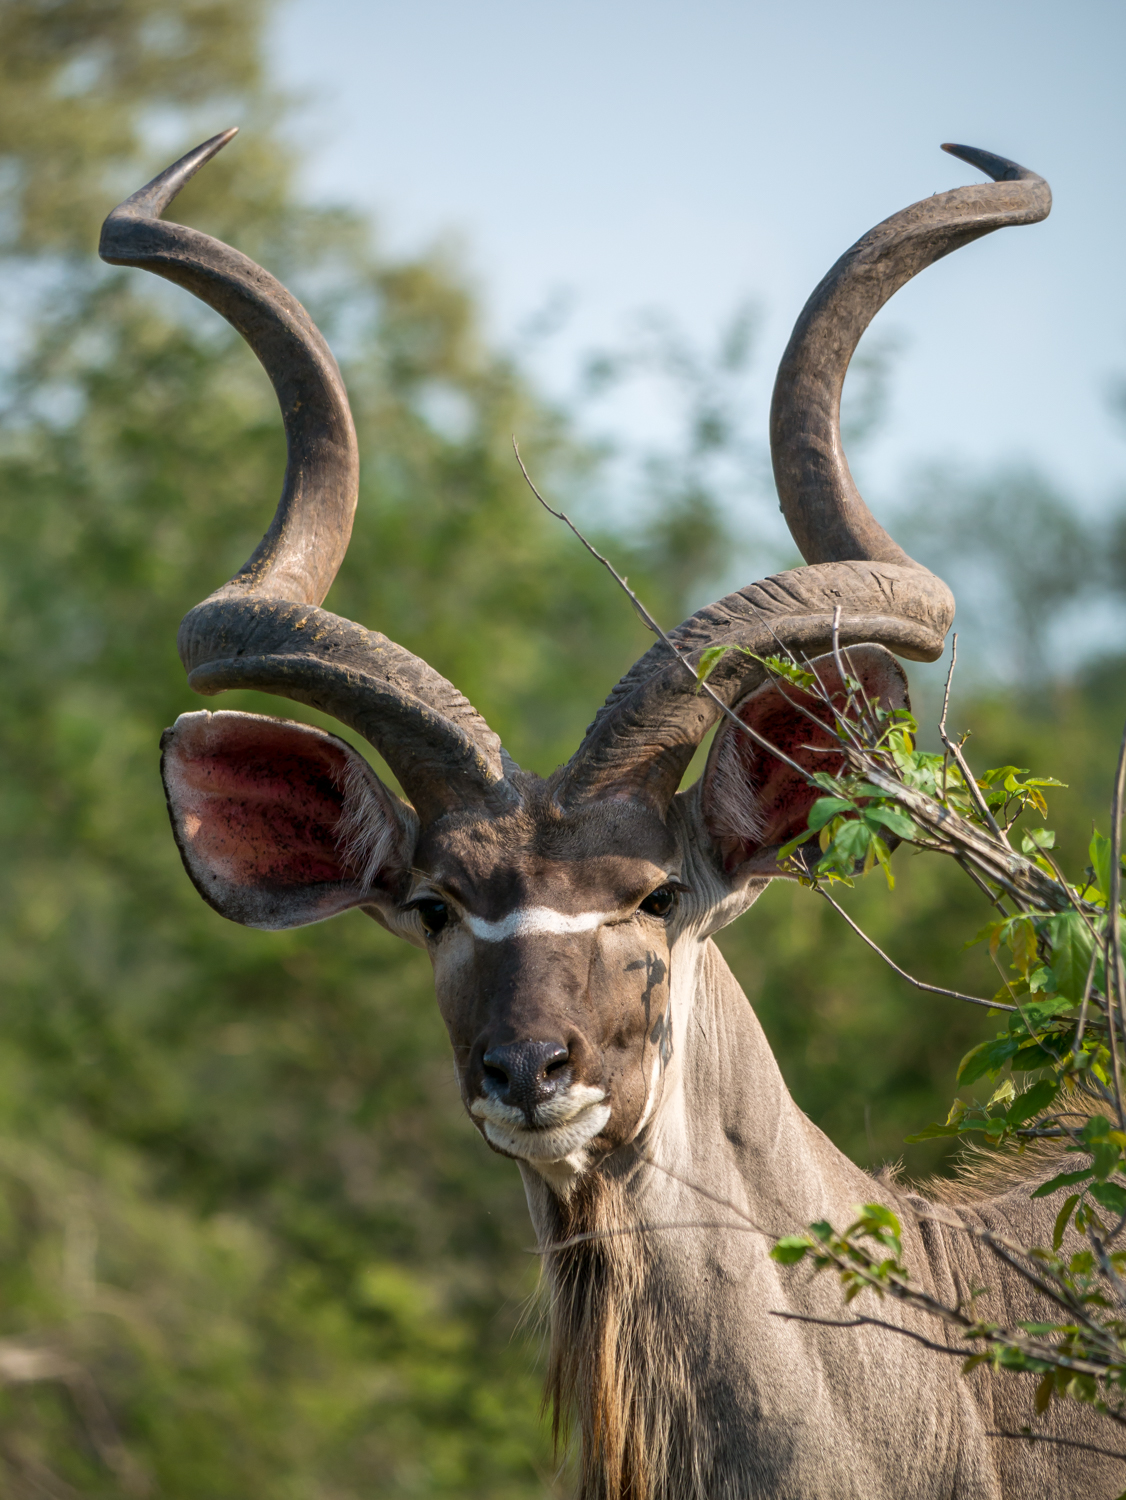
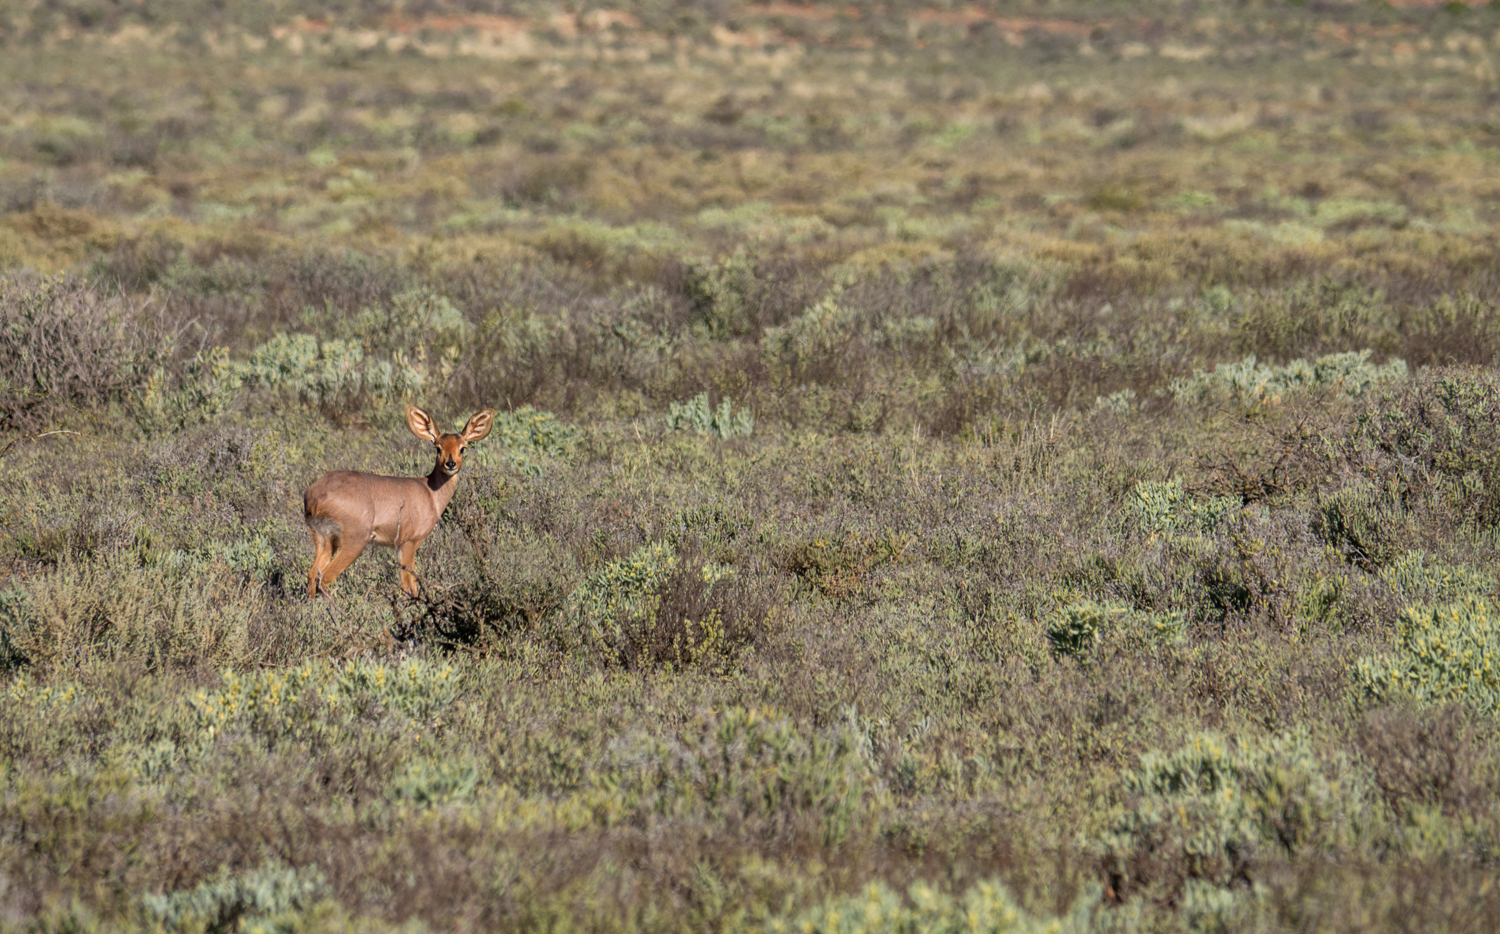
Picture 3 – Hand held 1/500 sec | f/5,6 | 300 mm | ISO 1000

For those who do not want to read my ramblings here is the summary:
Always use the lens stabilisation and turn off the in-body stabilisation (this may not be true with all Olympus bodies)
Crank up the shutter as much as possible. I found that the doubl the focal length rulefor the shutter speed is helpful but beware other movement (e.g. shutter clap)
Use the electronic shutter as much as possible
Try use a tripod (although most of my pictures are hand held)
Get the tripod collar from the German supplier if you use a tripod
Unless mounting it on a tripod always use the EVF so that you have another point of contact to stabilise it
Get into the habit of always taking extra shots to make sure you have a sharp one
Check the sharpness of each shot before moving on, i.e. zoom all the way in in preview mode
Don’t rush your shots. This is not a point and shoot lens; you need to take your time with each shot
Maximum focal length I use is around 250mm
Aperturewise I try shoot as wide open as possible but once I pass 180mm I set it to F8 and compensate with ISO and shutter speed
Try to use a body with a decent grip as the smaller bodies can be awkward
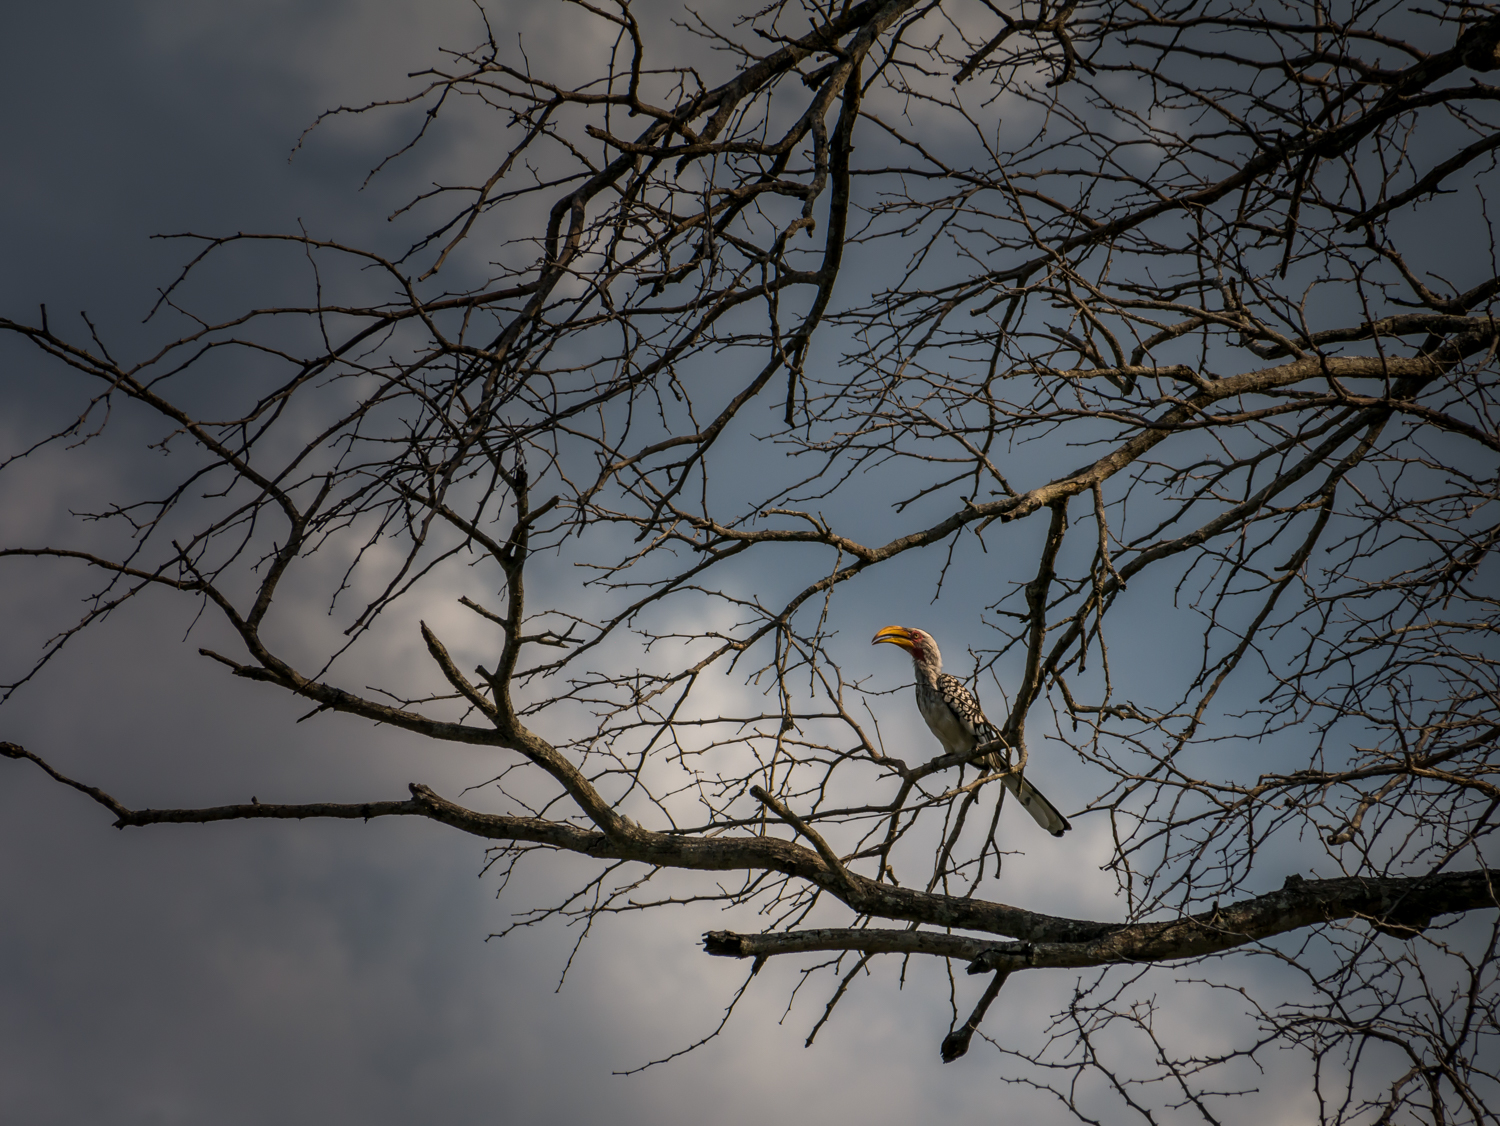
Picture 4 – Hand held 1/800 sec | f/8 | 228 mm | ISO 200
So let us start with some caveats, this is my first lens greater than 150mm (300mm in full frame terms) and this was my first foray into wildlife photography so I do not have years of experience to lean on for this piece.
This is also my first lens that feels serious. That may sound weird but up until this point I have had pancake primes (14mm and 20mm), the great but strange looking Olympus 45mm portrait lens, the cheap and plastic Olympus 45 to 150mm (which is surprisingly good) and then some 5 to 20 euro fun lenses from old CCTV factories and recycled plastic factories. All of these are very tiny, “cute” lenses which don’t ooze the seriousness that I felt when I received the 100 to 300mm. Once again, micro four thirds was my first system so I missed out on all the heavy full frame glass.
Picture 5 – Hand held 1/800 sec | f/5 | 205 mm | ISO 250
Settings
First thing I did was check DXO to see what they said about it. I fully understand that DXO is steeped in crazy maths and assumptions but it is a nice place to get a feel for a lens without taking a million pictures at all possible focal ranges and apertures. The way that I use DXO meets my needs perfectly but I am always wary of getting too deep into the numbers because I do not understand them fully.
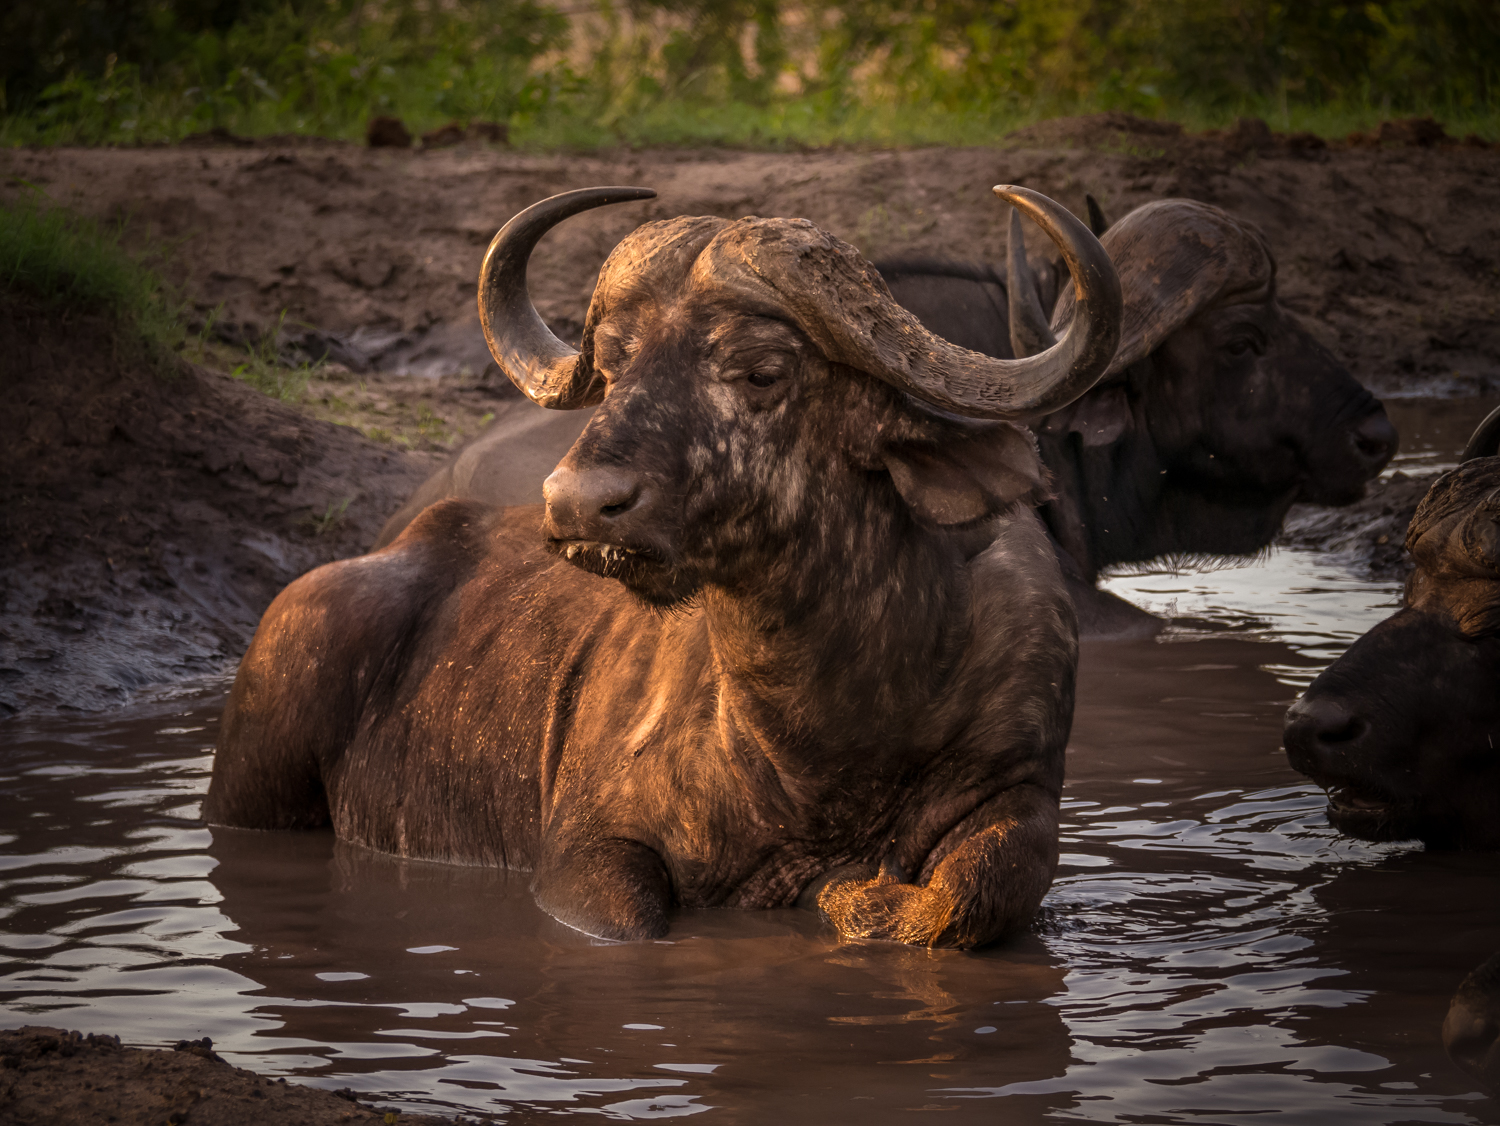
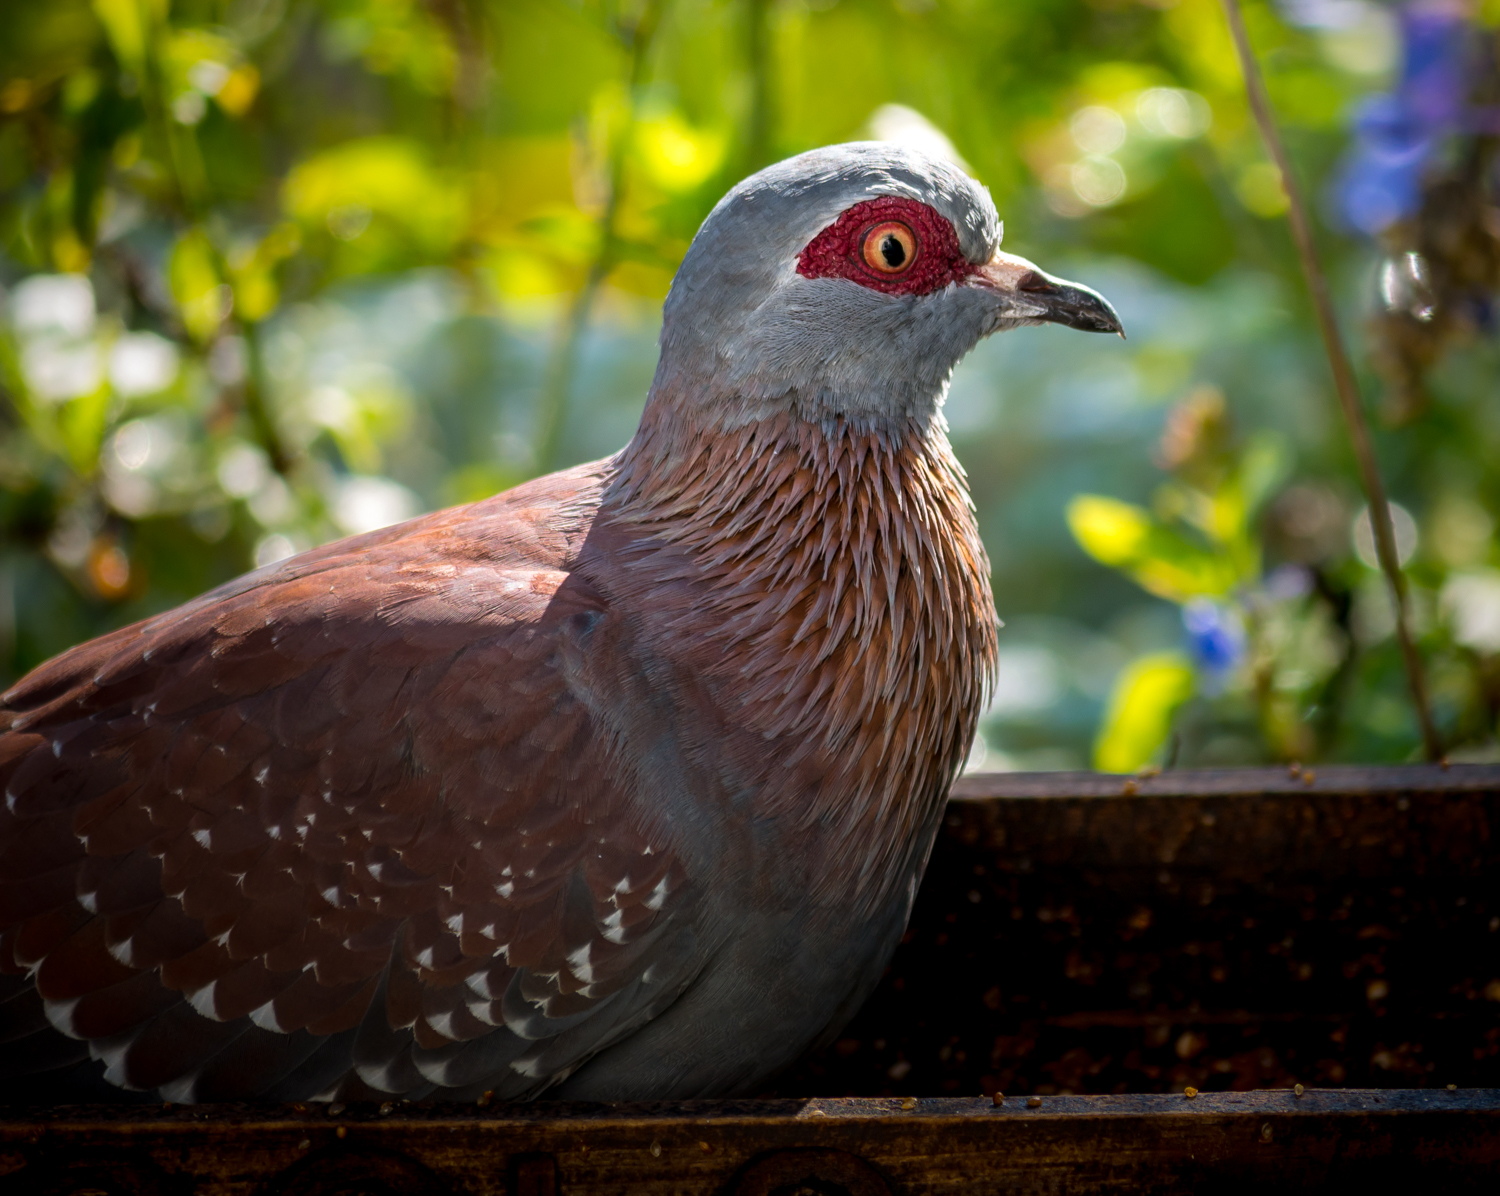
Picture 6 – Hand held 1/800 sec | f/4 | 100 mm | ISO 1600
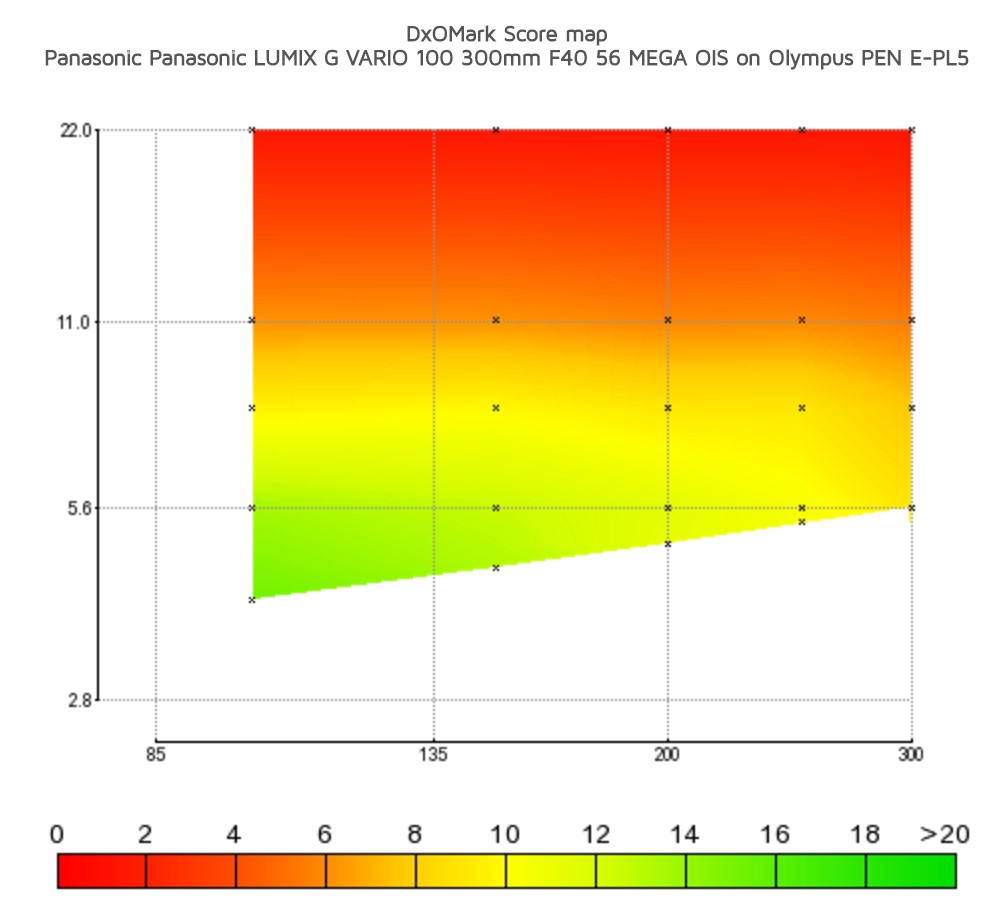
Due to the low pixel count of the micro four thirds system you cannot expect outstanding results when looking at the charts but I use it primarily to find a good range to stay within. I also always select the camera body as an Olympus E-PL5 because that seems to be the best 16MP sensor on DXO that covers most of the lens tests. This helps me see the good vs. bad a bit better. I have no idea why that camera is the best but I am sure it is the maths and assumptions.
Picture 7 – The E-PL5 score
Picture 8 – And below is the Panasonic GX7 heat map
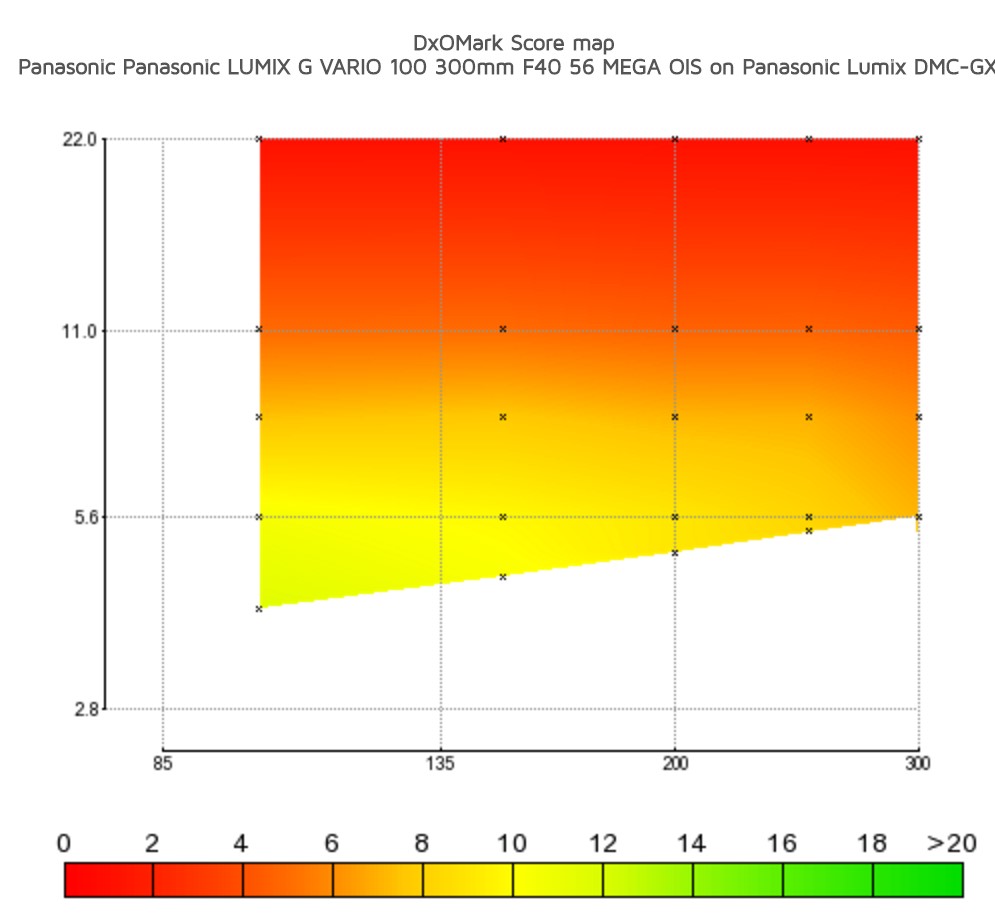
If we just used the DXO scores we would choose the E-PL5 over the GX7 every time so take the scores with a pinch of salt.
Picture 9 – Above is the sharpness heat map for the E-PL5
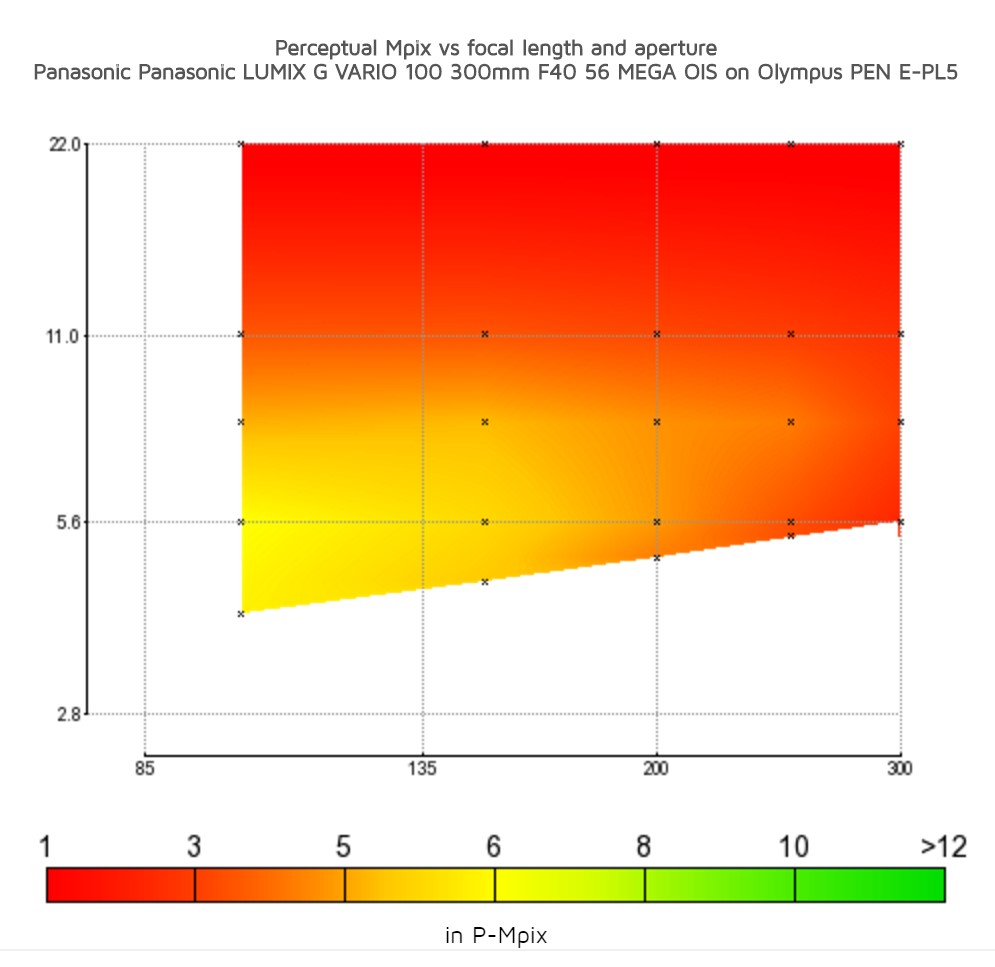
Using the E-PL5 here really helps because the GX7 one is mostly red…
So after looking at these numbers I set some guidelines that I follow 90% of the time. They are as follows:
Max focal length I use is around 250mm. According to the charts it degrades pretty rapidly after that and I must admit I do see this. I try never zoom all the way and if I hit the end I dial it back a bit.
Aperture-wise I try shoot as wide open as possible but once I pass 180mm I set it to F8 and compensate with ISO and as a last resort; shutter speed. I have only used this lens in 30 to 40 degree (86 to 104 degrees Fahrenheit) African weather so there was never a shortage of light which is handy.
With these somewhat tight settings shooting in manual is recommended and I had to use my ISO a lot more than I am used to in order to get the settings right.
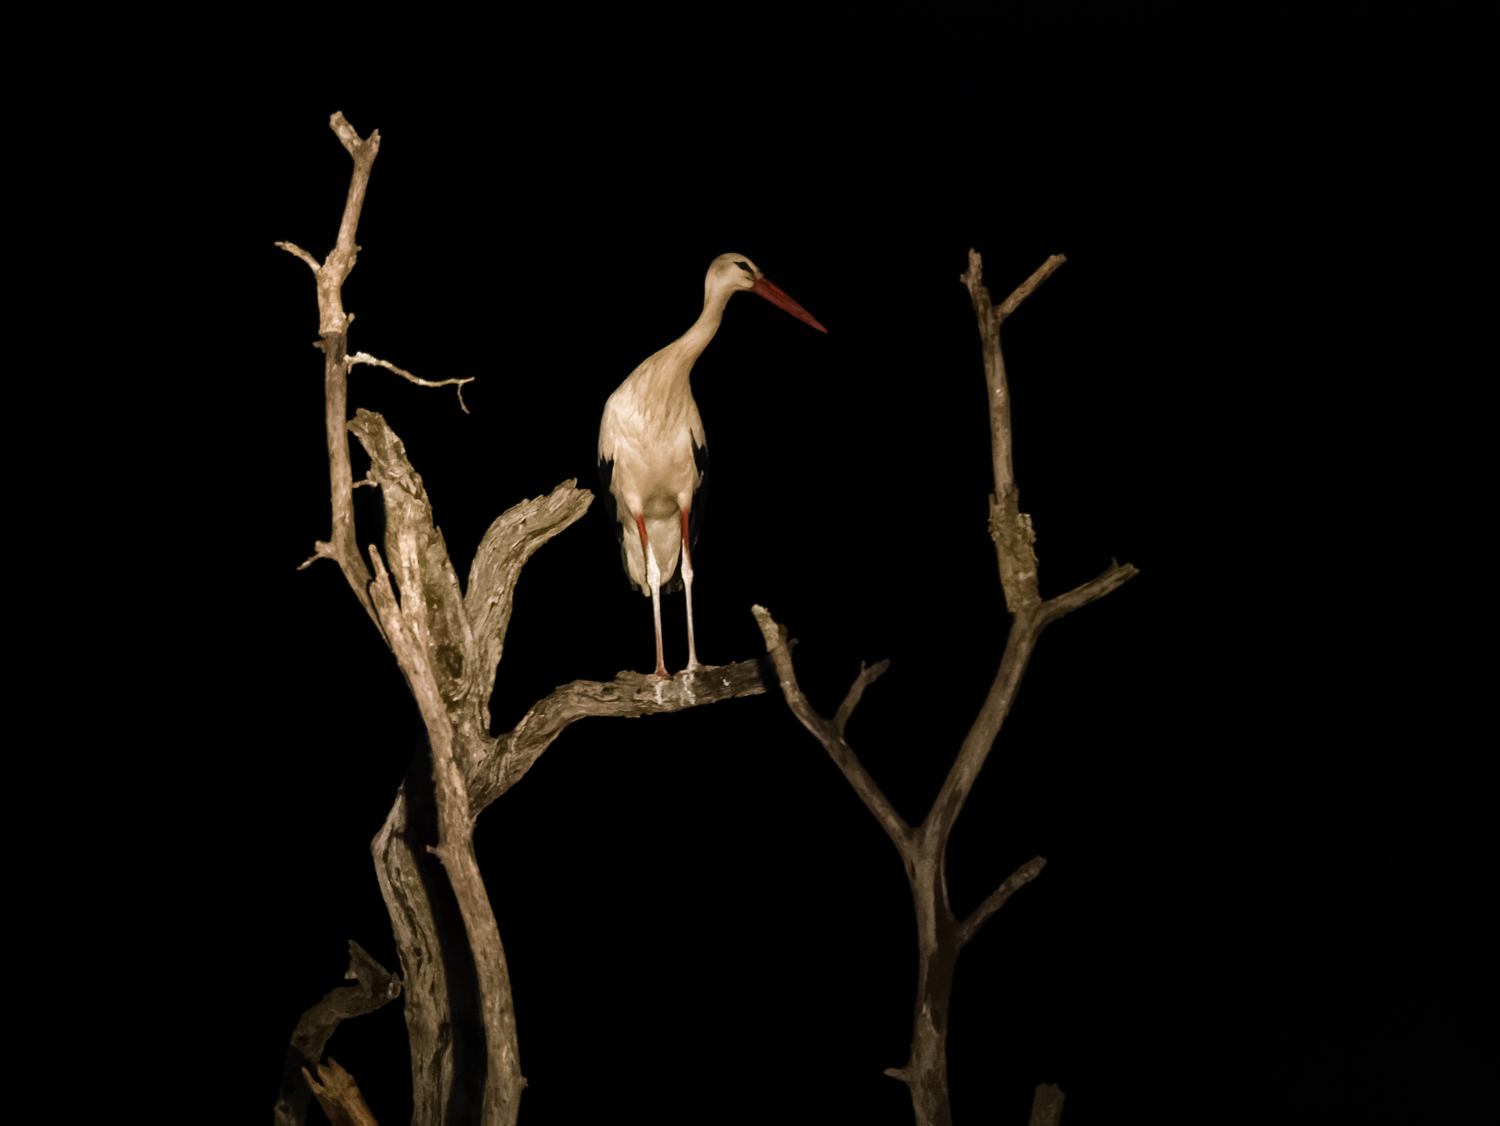
Picture 10 – Hand held night shot with a spotlight! 1/40 sec | f/4,5 | 150 mm | ISO 6400
My Body choice
I own a Panasonic GX7 and a G7 and I love the GX7. The GX7 is a beautiful body that is small, compact and built like a tank. Panasonic did a great job in designing such a compact camera that is so functional and it is always the camera that feels best in hand for me, but with this big lens the G7 is a far better stablemate. I bought the G7 for video but I find with the deeper grip and the bigger body the lens works a lot better on the G7. The lens also has stabilisation which will trump in-body Panasonic stabilisation every day of the week so the G7 is perfect.
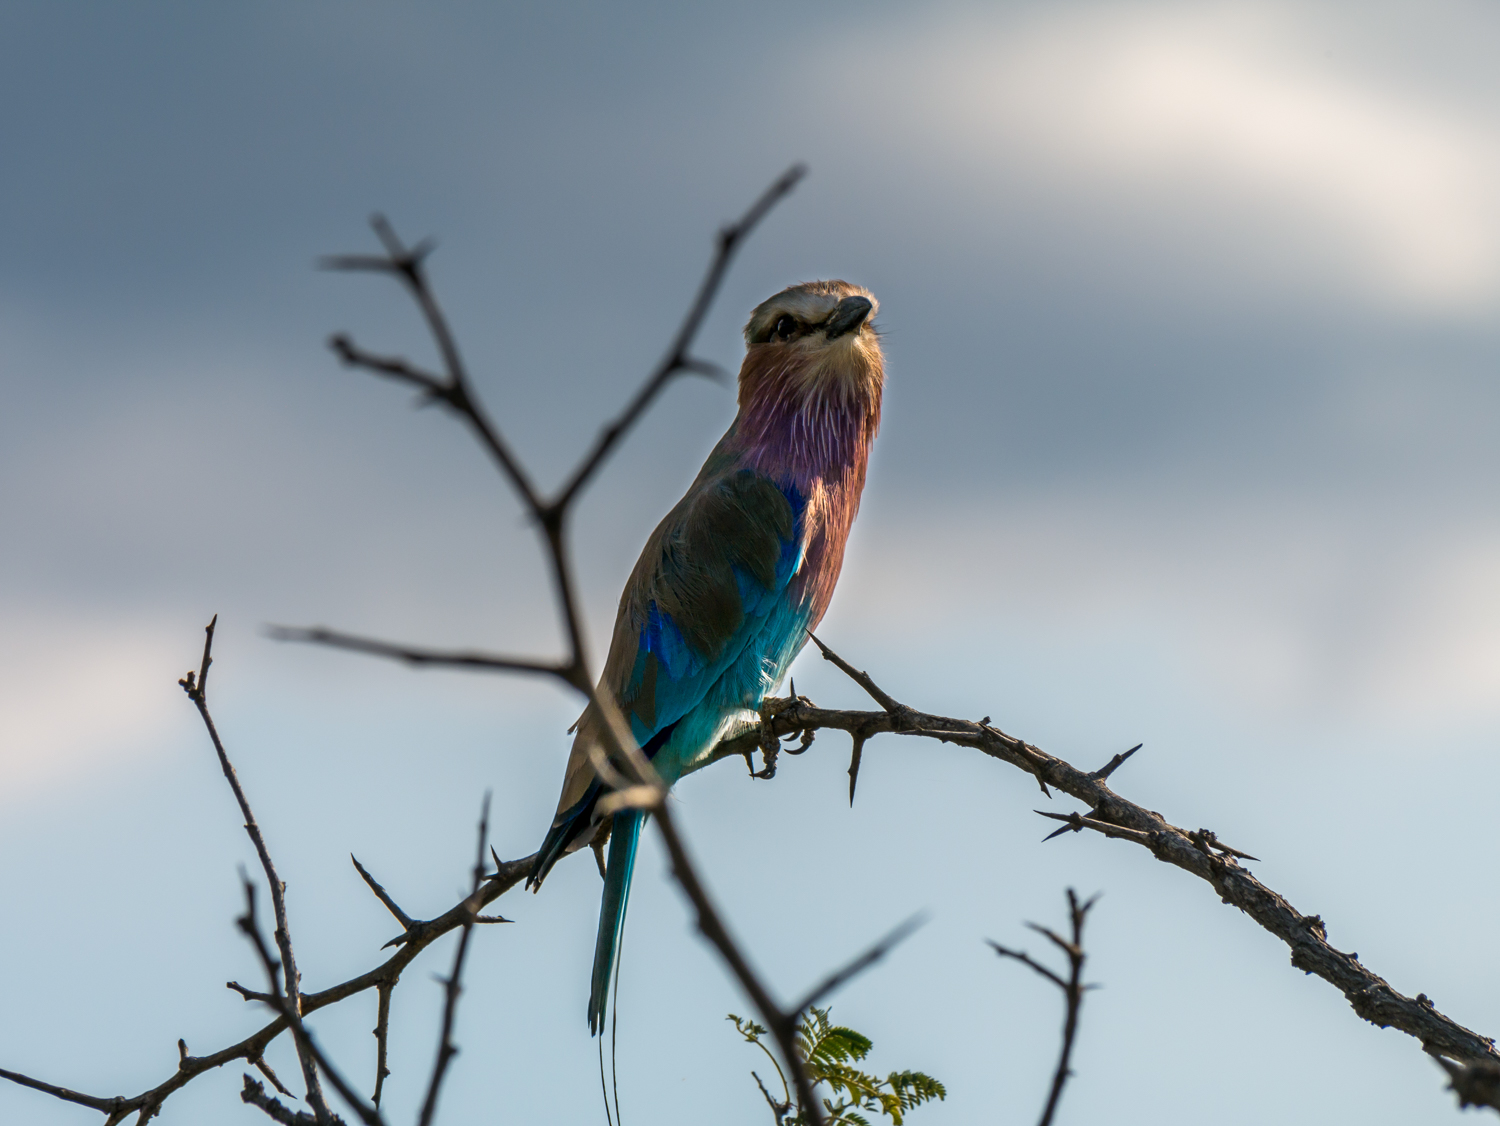
Picture 11 – Hand held 1/1250 sec | f/5,6 | 205 mm | ISO 200
Use the EVF
The next thing is that you have to use the EVF to shoot with this lens if you are not using a tripod. The extra point of contact really helps and using the LCD to compose pictures is bound to give you soft images. If you don’t have an EVF I would not recommend this lens for you unless you want to use a tripod most of the time. If you wear glasses it gets a little tricky because you probably don’t want to press up against the EVF but you do get those EVF cups which could help.
Picture 12 – Hand held 1/400 sec | f/13 | 252 mm | ISO 200
The electronic shutter is magical!
Try use the electronic shutter. Obviously there are times when you shouldn’t (e.g. loads of lateral movement in the scene) but in most cases it really helps to minimise any shake. Turn it on and it is a very still shooting experience.
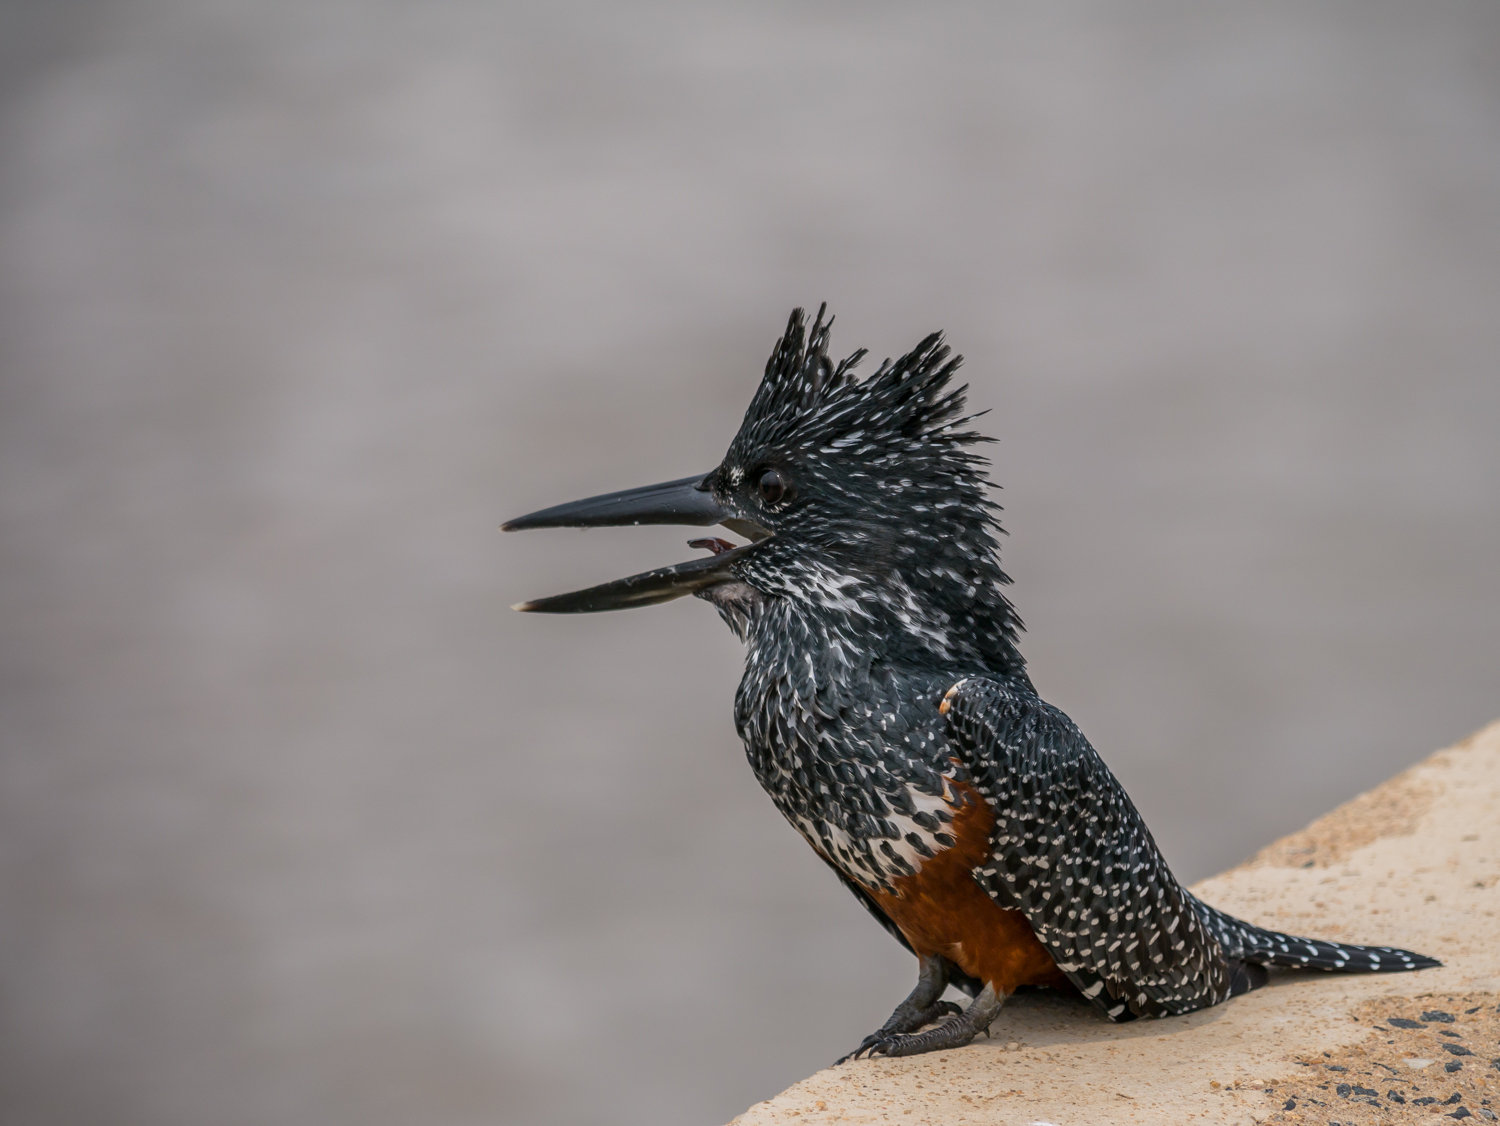
Picture 13 – Hand held 1/500 sec | f/5,3 | 246 mm | ISO 1600

Tripod collar
I took most of my pictures (more than 95%) handheld but it goes without saying that you should use a tripod if you can. If you do think that you will be using a tripod often then think about buying the third party tripod collar. I read about this German guy that makes tripod collars for the lens and even though they are a little pricey (50 euros or so) they are well worth it. Once mounted the lens sits a lot better on the tripod and this is especially the case when using a monopod.
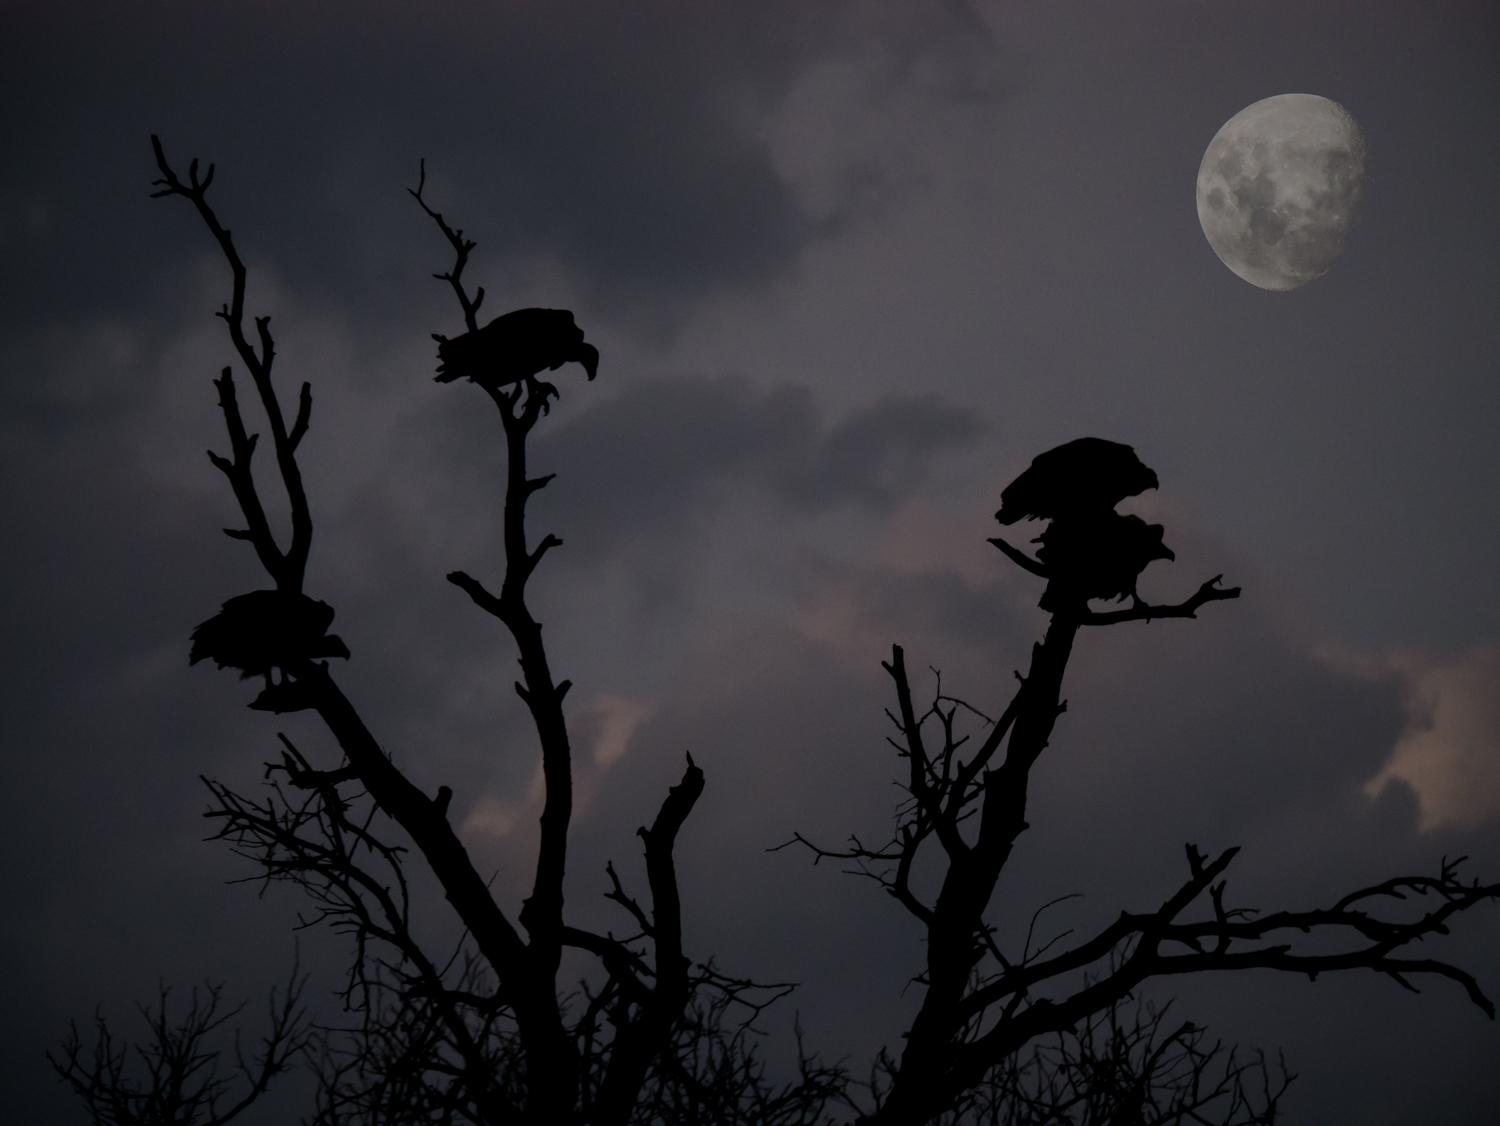
Picture 14 – Photoshopped picture with the moon and the vultures. Both shots (vultures – hand held 1/400 sec | f/4 100 mm | ISO 1600 and the moon – hand held 1/125 sec | f/8 246 mm | ISO 1600) were taken with the lens and I put them together in Photoshop as a “supermoon” joke.
Shutter speed
This is not a new trick but many people recommend doubling your focal length when using long lenses, so if you are shooting at 100mm then use 1/200s and at 300 then use 1/600s. Obviously the doubling multiple is for the micro four thirds system, if you use full frame then just use the focal length (100mm at 1/100s and 300 at 1/300s).
Picture 15 – Hand held 1/500 sec | f/8 | 269 mm | ISO 200
Take your time
Modern cameras are so good that you really just compose your shot and fire away, and most of the time it is tack sharp and in focus. In more technically challenging situations we are used to taking our time with shots but outside in the sun I caught myself taking one picture and expecting it to be perfect. With this lens you cannot do that, you have to pay attention to all your settings and check your pictures post every shot. I found that many times my pictures were not as sharp as they could be and I would recompose them to get better ones.
Picture 16 – Tripod 1/200 sec | f/5,6 | 300 mm | ISO 200
Post Processing
I edit all my shots in Lightroom and I did try taking a few of them into DXO Optics Pro 10 to check if I could eke any more detail out of the pictures. I found that DXO Optics Pro 10 does work better than Lightroom when using this lens but the improvement was, in my view, so minimal that it did not justify the increase in workflow. I am still trying to decide if I can justify the price of DXO Optics because if I question the extra time I definitely cannot justify the capital outlay. I am still new to the program so maybe I have not got it all figured out.
Picture 17 – Hand held 1/400 sec | f/13 | 258 mm | ISO 200 – No idea why I chose f/13 here…
Conclusion
Overall I love this lens, it is far from perfect but the reach and the quality that you do get is fantastic. Given unlimited funds I would go with the Olympus 300mm prime or the Panasonic Leica 100-400mm but for the more frugal amongst us the cheaper 100-300mm is a great performer. At the end of the day if you can afford a lens and the pictures you take with it make you smile then it is a great lens, and for me this lens is certainly that!
On a final note, not all these pictures are mine, my girlfriend and I share the camera so if I am driving she is shooting and vice versa. My favourite picture of the Rhino and Bee-eaters was taken by her unfortunately.
—————–
You can take a CLOSER look at the 100-300 lens, or purchase at Amazon or B&H Photo.

I agree – this is an underrated lens – and value for money talks to most of us!
If you are shooting slow and setting the camera parameters at each shot – then remember that old legacy MF 200mm & 300mm lenses can be had for low prices (there is an excellent HOYA 300mm on eBay today at GBP £15.00 – I have both the 200mm and 300mm Hoyas and both are great on M4/3 – if heavy).
You loose the zoom but you gain in image optimisation from having a prime lens. Also – the edge of field softness and vignetting at wide apertures of “generic/3rd -party” lenses is cropped out of a M4/3 image – so they perform surprisingly well.
In the end – going the “low tech” route permits a lot of photographers to get shots they cannot otherwise afford. What we need is for 3rd party lensmakers to make M4/3 versions of their popular amatuer lenses for Nikons & Canons – an affordable Sigma/Tokina/Vivitar AF 75-300mm would be in many of our camera bags!
How do you turn the stabilisation off in the g7 body?
The G7 has no stabilisation in body so I use the lens stabilisation. The G80/85 has in body stabilisation so there will be a menu setting. The latest In body stabilisation is so good though and from what I heard it is better to use the in body stabilisation instead of the lens so rather turn the lens stabilisation off if you have one of the newer cameras.
Really nice prictures and indeed an informative review.
I have the Oly 75-300 and very much enjoy the lens as well. Doesn’t always have to be expensive to be good and enjoyable.
A 300mm prime is not really what I want and although I do lust for the Pana 100-400 I am waiting to see if maybe Oly would release one as well and give me dual IS, might be wanted at 800mm.
Great tip on the tripod collar maker, I’ll check if he does one for the Oly lens as well.
Thanks Luna!
Very Nice pictures. I have gotten good color and sharpness using this lens hand held on an E-M1 for sitting birds. Thanks for the shooting tips.
Could you please add the reference to the German tripod collar manufacturer?
Thank you
Achim
Hey Achim
Google ROESCH FEINMECHANIK and it is on there.
Cheers
Keiron
Keiron,
Thank you for your informative review.
I have this lens as well and it is terrific. It is grossly underrated.
Thanks Eric!