

The Leica M10 Monochrom in Oslo. A review.
By James at bat-photo.com
I’m going to begin this – my first camera review (thanks to Steve for publishing this) – with some context. I’ve always loved photography, and I still have fond memories of, as a teenager, using my father’s old Olympus OM1. As a means of learning photography, I’m not sure much has eclipsed that camera. With the advent of digital, my enthusiasm waned (perhaps as it all seemed to be about megapixels and not photography), but gradually grew again – firstly with wildlife photography (latterly using a Canon 7Dii and EF 600mm), then acquiring a Fuji X100 when it came out, and adding an X-Pro when that was launched. Having read good things about the Sigma DP Merrills, I tried these, on my journey to full frame mirrorless and the Sony A7S and A7Ri-iv inclusive.
I can’t say there isn’t part of me that hasn’t always wanted a Leica – there is a certain romance associated with them, both because of the great photographers who have used them in the past, but also because of the positive reviews I have read over the years (not least on this site, which I think I’ve been reading regularly for about eight years now and continue to enjoy – so I’m partly blaming Steve for wanting an M; his enthusiasm is infectious). But I had always resisted, partly because of cost, and partly because I was concerned that I would be sacrificing absolute image quality by moving to a Leica (lower resolution sensors than the cutting edge). Then along came the M10M, with its high resolution sensor, and that objection was gone.

My “main” setup now consists of the A7Riv, primarily paired with (listed from most to least used) the Zeiss Loxia 25mm f2.4, Voigtlander 65mm f2, Voigtlander 40mm f1.2, Sony 12-24mm f4 and Zeiss Batis 135mm f2.8. I’ve come to this combination after substantial experimentation, and buying and selling my way through most lenses made by Sony as they have been launched for the FE system. The set up I have is by any measure excellent – covering most important focal lengths with sharp to very sharp lenses plus some with character (in particular the 40mm f1.2). I certainly have a system that can outperform my photographic skills, and needs, and which can save me when I make an error – from needing to crop to adjust the exposure in post-processing, the A7Riv’s resolution and depth enable a workable image to be created from what could seem like unusable or just poorly composed shots. I have also ended up with a bias to manually-focused lenses – not by design, but because they are typically small and light compared to autofocus lenses, and because they seem to on average to suffer less from sample variation.
So why would I change my system – and particularly, why would I consider paying more to get what on any paper comparison would appear to be substantially less for my money? You might think – looking at the long list of cameras I have tried – that I think more equipment, or at least more expensive or newer equipment, is better. I do not. Perhaps most importantly, I have taken images with all of these cameras that I am happy with, and I don’t expect a change or ‘upgrade’ to improve the end result as from a technical perspective all cameras in recent years are more than good enough. What is relevant to me – and what in part has driven my changes in equipment – is the user experience of capturing an image. In this regard, my favourite camera, at least since the OM1, was the Sigma Merrill DP1, to which I added the Zeiss 25/28mm optical viewfinder (which cost almost 50% of the camera’s price at that time, but transformed it for me in terms of the pleasure of taking photos). Locked to ISO 100, f5.6 (close enough on APS-C to ‘f8 and you’re there’ when suitably pre-focused), this combination was a joy to use and produced photos of a quality that were certainly good enough for almost any use (in good light and for static subjects, and if you could put up using Sigma’s software to process the images, of course). Indeed, by accident rather than design, I vacationed in Venice in two successive years – the first with the Sigma, and the second (believing it to be better) with a Sony A7R with 35mm 1.4 lens. Whilst the Sony afforded me many more options (and indeed some great night-time and shallow depth of field shots), the ‘shooting pleasure’ was missing. I loved the photos, but not the time spent taking them. Unfortunately, the Sigma proved itself unreliable, and after a couple of corrupted SD cards (and lost photos) I decided that it had to be retired from use. I was probably just unlucky, but I concluded however much I enjoyed using the Sigma, it was no longer worth the risk of ending a vacation without photos.
My reason for (somewhat on impulse) buying an M10M when it launched was therefore simple – I felt I was spending my vacations seeing amazing sights through an electronic viewfinder. And however much EVFs have become remarkably good, they are not reality. If I’m going to travel around the world sightseeing, and then see much of it on an electronic viewfinder, I could just have well watched a travel show on television in HD or 4K. That might not be quite fair, but there’s no escaping the fact that as photographers we experience so much through a viewfinder – so it needs to be the right viewfinder. Better photographers than me have written about the arguments for and against EVFs, OVFs and ‘bright line viewfinders’ (as Leica like to call theirs), and they unequivocally all have their merits. But it is only the latter – that gives the opposite of what in computing they call WYSIWYG (‘what you see is what you get’) – that consistently keeps you ‘there’ rather than removed from reality. With a bright line finder, I can see the world with a natural perspective and my own depth of field, and imagine what the camera’s image will look like. I am there, and indeed ‘in the moment’ – and when I’m photographing on a vacation I want to be both creating memories with my photographs and experiencing what will become memories. The latter seems – after years of not entirely realising this – best achieved through a bright line optical finder (or, indeed, a simple OVF such as that that used to be found on cheap compact film cameras, although of course here quality and size were lacking).
So that’s an amazingly long preamble before I even discuss either using the M10M, or the images created using it. But it’s important because I don’t think you buy an M camera simply for its output. You might buy an M as a luxury status symbol (I suspect many do – although probably not those who come to Steve’s site in the first place, and if those who do help keep Leica in business, we need to be grateful for these motives), or alternatively you buy it because of how you want to use it – the sort of ‘shooting experience’ it offers. Because the M is a near-unique experience, and with the M10M that experience can be achieved at close to industry-leading resolution. I know Steve’s view is that a good, full frame 24MP Bayer sensor is the sweet spot, and I don’t think he is wrong for most photos most of the time. But as someone who likes to print his ‘better’ photos at 150cm x 100cm (around 5 feet x 3 feet 4 inches – the printing company I use is in Germany so resolutely metric in their thinking), more is more in terms of resolution, and the M10M’s 40MP does – at least in theory – rival a 60MP or greater Bayer sensor (my experience of the non-Bayer Sigma cameras certainly gives me confidence in practice to back up the theory that non-Bayer sensor images can be enlarged far further than Bayer ones with the same perceived image quality).
Lenses
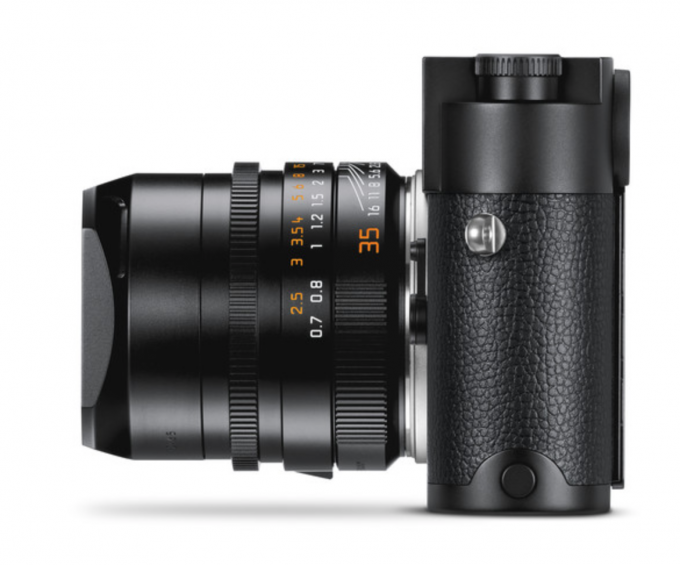
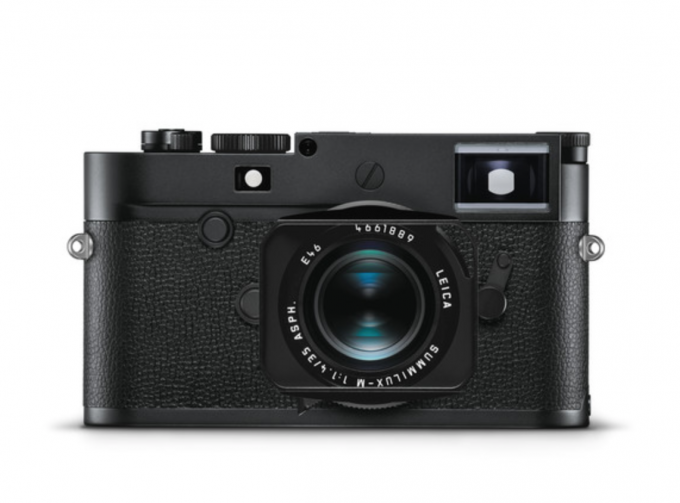
I decided to settle on two lenses to try out my new Monochrom. I wanted everything to be usable through the Leica’s viewfinder (as its existence was so central to my purchase decision in the first place) – so no additional OVF or EVF. That ruled out anything wider than 28mm, but as someone who wears eyeglasses I soon realised that it’s hard to see as wide as 28mm whilst wearing them, so 35mm became my ‘wide’ option. As focusing Ms is often considered to be an issue, I worried that longer than 50mm risked too many focus errors for a ‘newbie’, so 35 and 50 it was. I agonised for a while over which lens to get for each focal length, and concluded that the 35 Summilux and 50 APO Summicron made a good pairing (and Steve’s reviews clearly helped here). A combination of the two ‘Lux lenses might seem a more usual duo, but if you want a fast 50 with creamy bokeh then you’d choose the Noctilux (cost aside), so I thought instead I would favour absolute image quality which according to almost all reviews the 50 APO excels at. For most photos you will see here, I had a Leica orange filter on the Summilux, and – for protection – a B&W clear MRC filter on the Summicron. I would like to have experimented with colour filters on both lenses, but with a tight deadline between buying the camera / lenses and a long weekend’s vacation in Oslo, this was all I could assemble in time.
When forming a view on lenses, I think you have to start with the fact that the laws of physics are immutable, and so every lens design simply tries to optimise within those laws in different ways. Clearly cost constraints – and a willingness to have tight tolerances and the effective quality control required to maintain those tolerances – are additional driving factors in any lens. And simply coming up with the ‘best’ design, at the highest cost, doesn’t necessarily produce the greatest lens. The Voigtlander 40mm f1.2 I use on my Sony is a fundamentally flawed lens in many technical respects, yet it often produces truly beautiful images, and I could be happy probably 90% of the time if this was my only lens. In fact, a Sony A7 (non-R) at 24MP and this lens would for many be an ideal 1-lens set up (since the higher resolution of the ‘R’ isn’t fully taken advantage of by the 40). But to contradict this ‘perfection isn’t everything’ argument, I then tried the Leica 50 APO. Now, of course, it isn’t perfect, because that would defy the laws of physics, but it is so close to perfect – so well optimised – that it is truly amazing and in and of itself a compelling argument to consider a Leica M. I have no doubt there are lenses with more attractive bokeh (albeit this is subjective), but ‘dreamy’ bokeh isn’t in this lens’s nature (the even more expensive 50 Noctilux 0.95, or its predecessor, should deliver on this front). In fact, the only fault with the 50 APO is that it left me liking and appreciating the 35 Summilux, but not loving it. That’s a pity because the ‘Lux is a great lens – it’s just not, quite, the 50 APO. So as you will see (after reviewing a series of at home, walkabout shots before I left for Oslo) I disproportionately used the 50 over the 35, even though I’ve always considered myself more of a 35mm field of view photographer.
Size
I’m about to start commenting in detail on the camera itself, but it’s worth just thinking about how small this set up is versus even the Sony I had previously (and even more so compared to a DSLR or medium format system). The difference isn’t so much in the cameras, but the lenses – I thought I had gravitated to small lenses with the Zeiss and Voigtlander options for the Sony, but the Leica lenses – even these which are by no means the smallest options – are unbelievably small. I bought a Peli 1200 case, and hollowed out the foam interior to fit the camera and two lenses, enabling me to transport the equipment safely inside a box that will easily fit even in the smallest of carry-on hand luggage. This bag-within-a-bag approach might seem like overkill, but it both keeps the equipment safe and conceals the fact there might be something valuable inside (why else would you be carrying a Peli case?).
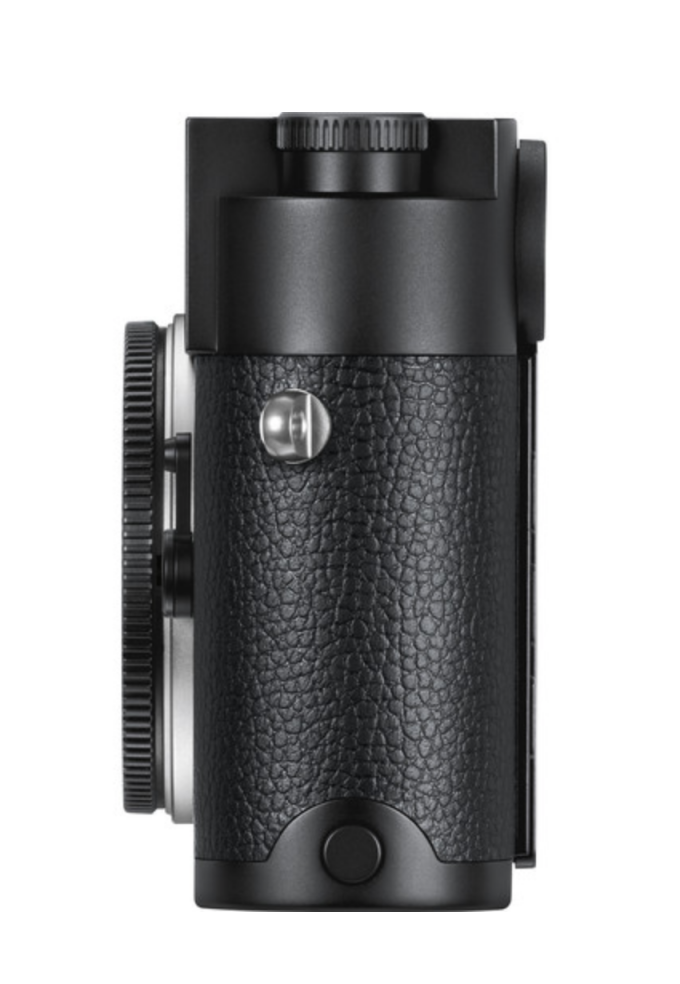
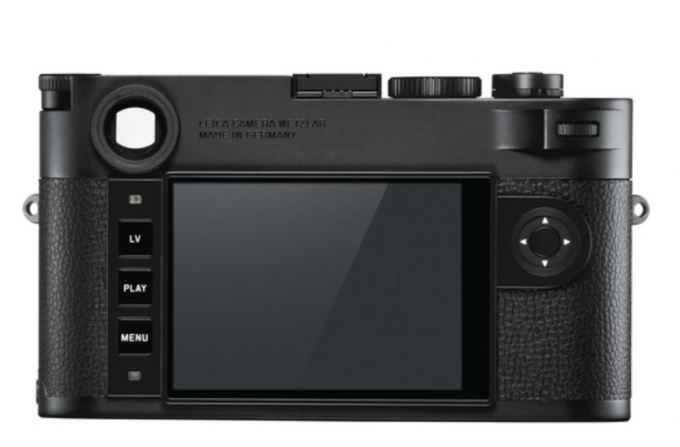
On the subject of subtlety, the M10M’s all-black exterior, with black lenses attached, simply draws no attention. The lens I’m not using also fits easily in a trouser pocket, so I can always have both lenses with me. Only my Sigma rivalled or exceeded the M10M’s ability to draw minimal interest from the average passer-by, and indeed portability. Walking around with the Sony and the FE 35 1.4, as I did in Venice, or any of my current lenses, is far more noticeable. I kept my M10M in the Leica-made half case in black leather, with the (thin and not great, so needs to be replaced) black neck strap supplied with the camera. It’s small and nondescript enough to go unnoticed by all but camera enthusiasts, and I suspect most people who did notice it assumed it was an old film camera and not a modern piece of expensive technology (that the Leica half case has a flap to conceal the rear LCD clearly helps here). So for all that I find the aesthetic of the chrome and black Leica Ms very pleasing, I’m delighted that the M10M comes in such a plain guise. This understatement also pays dividends when photographing people (either portraits or just passers-by who happen to be in shot). The one guarantee when pointing a large lens at someone is that it changes their behaviour; with the Leica’s small lenses this doesn’t seem to happen. How much this matters to you depends on your subject preferences, but it’s a not insignificant positive to have such great image-making ability in a package that can go unnoticed.
In use
One area of practical concern to mention is metering. Compared with the complex, sensor-driven metering available on most modern cameras, the Leica’s is very simple, and while it has stood the test of time in that as I understand it, it hasn’t changed significantly in decades, the reality is that it feels to me to be prone to underexposure and far happier with portraits (or something with a principal subject) than landscapes. That said, looking at the DNG files, I can’t find an example where any underexposure left me with unrecoverable detail – i.e. the overly-dark areas, when brightened, gave a good image. This wouldn’t be the case with overexposure, as blown highlights are details lost forever (and based on my experience so far, I would tend to slightly underexpose for this reason). It may therefore be that Leica has taken a conscious decision to favour underexposure and assume correction in post-processing when needed. I did find myself checking images on the rear LCD where I was concerned about exposure, and re-taking them with dialled-in EV correction if necessary (the thumbwheel can be set to EV). This isn’t ideal – particularly the reviewing on the LCD as you shoot, which I try to avoid as much as possible – but I sense the exposure behaviour is reasonably predictable and so already I have a sense of when I’d want to correct before shooting.
One other area of perhaps near-inevitability is the inaccuracy of the framelines, and so the inability to precisely frame an image. Now, with that high resolution sensor, cropping at the margin doesn’t matter, but at the same time it’s a meaningful frustration (and one Fuji have done a better job of trying to offset with their OVFs and the moving framelines – but of course, they have the advantage of an electronic connection to their lenses so the camera knows where it is focused). I can accept it as a necessary trade-off for the advantages of the brightline finder, but nonetheless it does complicate composition (particularly when you find you have accidentally missed part of the image you wanted to capture). But at the same time, I had noticed myself become overly-preoccupied with precise framing with the Sony, and I’m unsure that this actually created better images.
For anyone who hasn’t used an M before, the rangefinder focusing experience is certainly different, but being honest in good to moderate light, I found it entirely natural and was comfortably using it, achieving a good hit rate within 100 or so shots. Portraits aside, where Sony’s eye AF is to my mind class-leading, I’m not certain AF actually improves my number of correctly focused shots, as the camera can only lock onto whatever it thinks you have asked it to focus on. Manual focus on Sony cameras is well implemented with the automatic zoom to the focus area, but whilst this makes focusing accurate, the zooming by definition both disrupts composition and breaks any sense of palpably ‘being there’ in reality rather than observing through a viewfinder. I can certainly say that by the end of three days of photography with the M10M, I no longer even thought about focusing and in general this would take under a second. I doubt I could say this if I was using longer lenses or wider apertures – but equally I didn’t find myself regularly wishing for either of these.
I have read a lot of negative reviews on battery life for the M10 and by association the M10M since they use the same battery, and compared with the latest Sonys the battery doesn’t last long. However, in my use (and bearing in mind I switch off things such as auto-review, so the LCD panel almost never came on) I was comfortably getting through a day at a time without recharging the battery. Now my Sony would probably be at 70% or more at the end of the day (and for a three-day vacation somewhere, I’d often not need to recharge it at all), so this is a substantial gap, but not one that will matter to many users. I kept a spare battery, fully charged, in my pocket every day, but never had cause to use it.
A lot of Leica users, apparently, like to set their own ISO, aperture and shutter speed (so work fully manually). I am not one of them. With the risk of possible bias to underexposure noted, I simply left ISO and shutter speed on Auto (A) and only adjusted the aperture to suit the image. As with most cameras, the set up menu allows you to constrain shutter speed to a minimum value – I selected 1 / (2 x focal length) which felt like fast enough to eradicate the risk of user-created movement in the shot. Clearly this is where IBIS can make a real difference – I am comfortable handholding my Sony at 1/15 with a 40mm or even 55mm lens. But whilst useful, the reality is that often subject movement creates blur with slower exposures, so if your aim is absolute sharpness I’m not overly-concerned with the lack of IBIS. I’m also sure that with practice I’d be able to hold the M at slower speeds and indeed in at least one of the sample images, should have done so to reduce ISO and stop down the aperture for greater depth of field.
I have long used depth of field calculators to optimise a shot in terms of balancing aperture with the needed area of sharp focus. One thing I have noticed with both the recent Sonys and this Leica is that the ‘acceptable area of sharpness’ is noticeably smaller than the traditional calculations tell you. So in other words, stop down further or accept a shallower depth of field. This is the price you pay for such high resolution within the 35mm format. Of course, diffraction becomes the enemy of sharpness after a point, again compounded by higher resolution on a given sensor size, which meant I was reluctant to go smaller than f8, and where feasible I preferred f5.6 for my ‘high depth of field’ shots. But if you really care about maximising depth of field at high sharpness, you would want to focus stack – which I certainly don’t have the patience to do, and goes against the very reasoning for my purchase of the M10M.
Oslo itself
I’d visited both Sweden and Finland on business, and had enjoyed both, so was keen to expand my Nordic experience by visiting Norway at some point. In short, Oslo is a lovely city – a great location on a Fjord, with friendly people, very good food, and a surprisingly large number of tourist attractions for what is a small city. There is a great deal of 1970s architecture, along with early 20th century and some very new and cutting edge buildings, and a wealth of history and culture. Despite a packed schedule across three days, we only scratched the surface and in retrospect the city deserves a longer stay than three nights, and I would also like to explore further north, towards or into the arctic, if I returned to the country.
Early February in Oslo has fairly short days (although much longer than mid-winter) but a very low sun throughout the day. This provides a very attractive light, but does mean that any southern-oriented images are looking directly at the sun, because it never moves ‘overhead’, remaining fairly close to the horizon. This probably helps build drama in photos on balance, and it was certainly a very attractive light to view things in real life.
With so much to see, I didn’t want to be delayed by photography, and indeed my philosophy on photos and travel is that the act of photography must not disrupt the enjoyment or timings of the holiday. Put another way, I’m happy to take a photograph of something if it’s on our way somewhere, but I won’t cause a delay, or venture somewhere specifically for a photo. This might sound counterintuitive for someone who values photography, but much as with my comments on the drawbacks of EVF in terms of the experience, I want to maximise forming memories of the holiday, and not of using a camera.
Images
A note on all photographs shown here: all images were captured in DNG format and ‘developed’ in Adobe Lightroom. I have applied my usual ‘no more than a minute’ rule to processing – so typically basic adjustments to levels, with occasionally some changes to contrast as well. I have intentionally undertaken virtually no processing on some images, and more on others, to give an idea of the quality and flexibility in the files coming out of the camera. Other changes have been specifically noted. Aside from the numbered photos below, I have included several photos that Steve will have placed within the review – these are on balance photos I’m less happy with, but still think add something to an assessment of the M10M.
- The obligatory test (and bokeh) shot (50mm APO)

My hotel room had this vase of white roses, conveniently side-lit by south-facing windows through which the sun streamed in for most of our stay. There’s nothing special about this as a subject or image, but it demonstrates the sharpness of the small in focus area (almost at minimum focus distance), and what I view as an attractive bokeh (although I’m sure a Noctilux would be more ‘dreamy’). Note that I added vignetting in Lightroom to obscure the table the vase stood on that was otherwise slightly distracting.
- Harbour Building (35mm Summilux, orange filter)
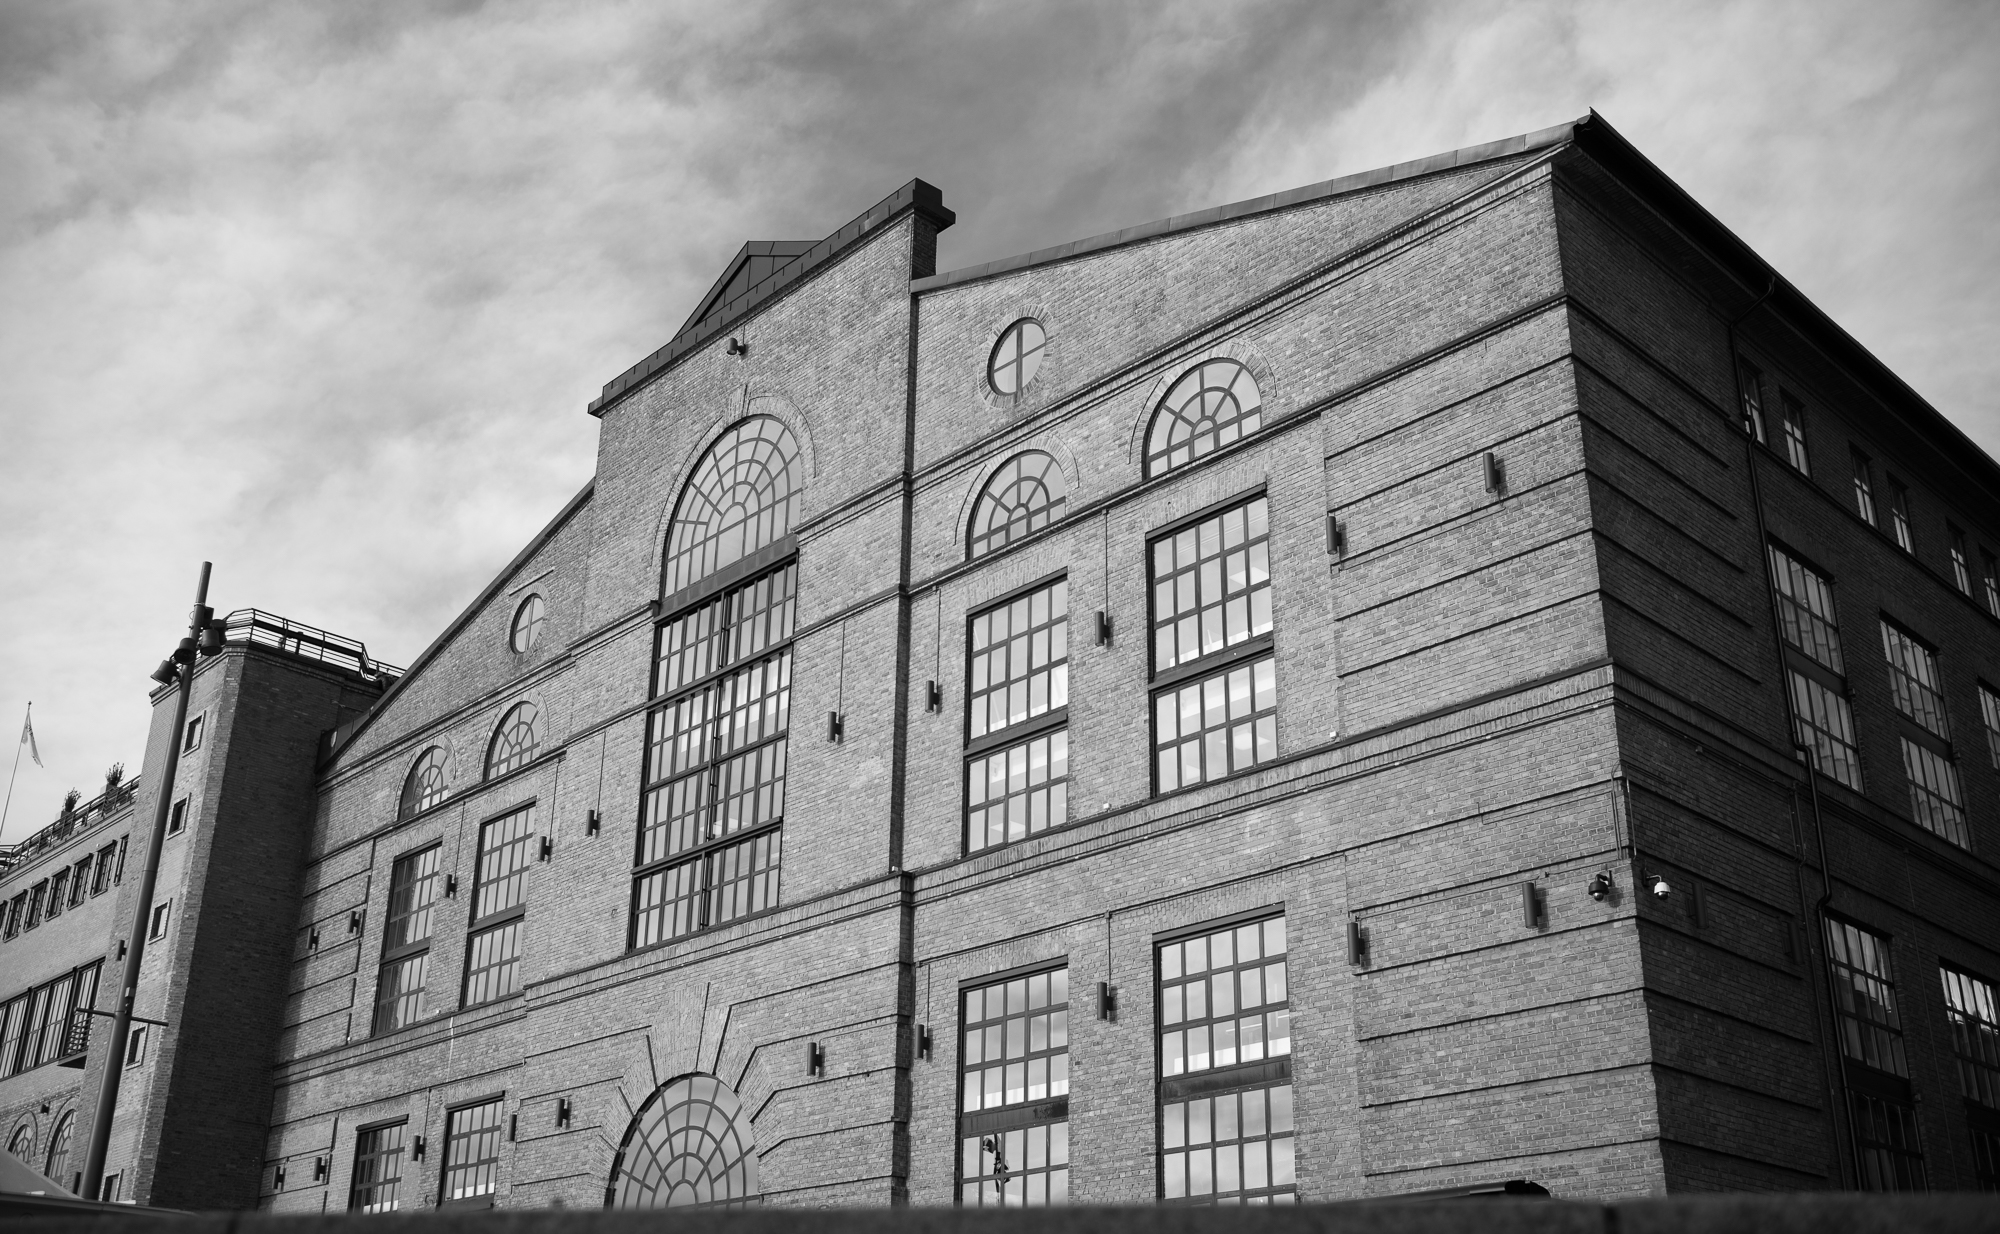
Walking from the city centre towards Aker Brygge, we passed several beautiful brick buildings. Most if not all had restaurants or bars on their ground floor; fortunately this one also had a low wall close to the water’s edge that I could keep in the foreground to hide the restaurant whilst preserving the building. I had tried including the restaurant initially, but the architectural styles jarred to me. Whilst most of our stay saw clear blue skies (the enemy of good B&W photography), this morning was characterised by thin and wispy clouds, creating a dramatic look in B&W without any need for processing. Other than a small bit of cropping and a boost to the exposure, this is an untreated image – so a good representation of the native output from the M10M. Whilst I only show a couple of examples in this review, the M10M seems to create really good images of brick-based structures.
- Looking across the fjord into the sun (35mm Summilux, orange filter)

I struggled how to best capture this view in black and white. In colour, the distant land is covered with striking green trees, peppered in places by snow, and the deep, dark water refracted the sunlight into an array of colours. With my Sony, I would probably have either built a panorama from several Batis 135mm shots, or gone wide taking advantage of the colour from the sun’s reflection. With none of this colour relevant to the M10M, I went for drama, treating the greenery as essentially a silhouette, and emphasising this in Lightroom with a cut to the highlights and a boost to the shadows. Of all the photos I took, this is one where I think I would have preferred a colour image, although I’m not entirely dissatisfied with the result.
- Lone canoeist (Summilux 35mm, orange filter)

Looking out from Aker Brygge, I spotted a lone canoeist in the freezing water. This is a bright, daytime image but I kept it quite dark to capture the cloud tonality. This is moderately post-processed – some cut to highlights and boost to shadows to add to the drama.
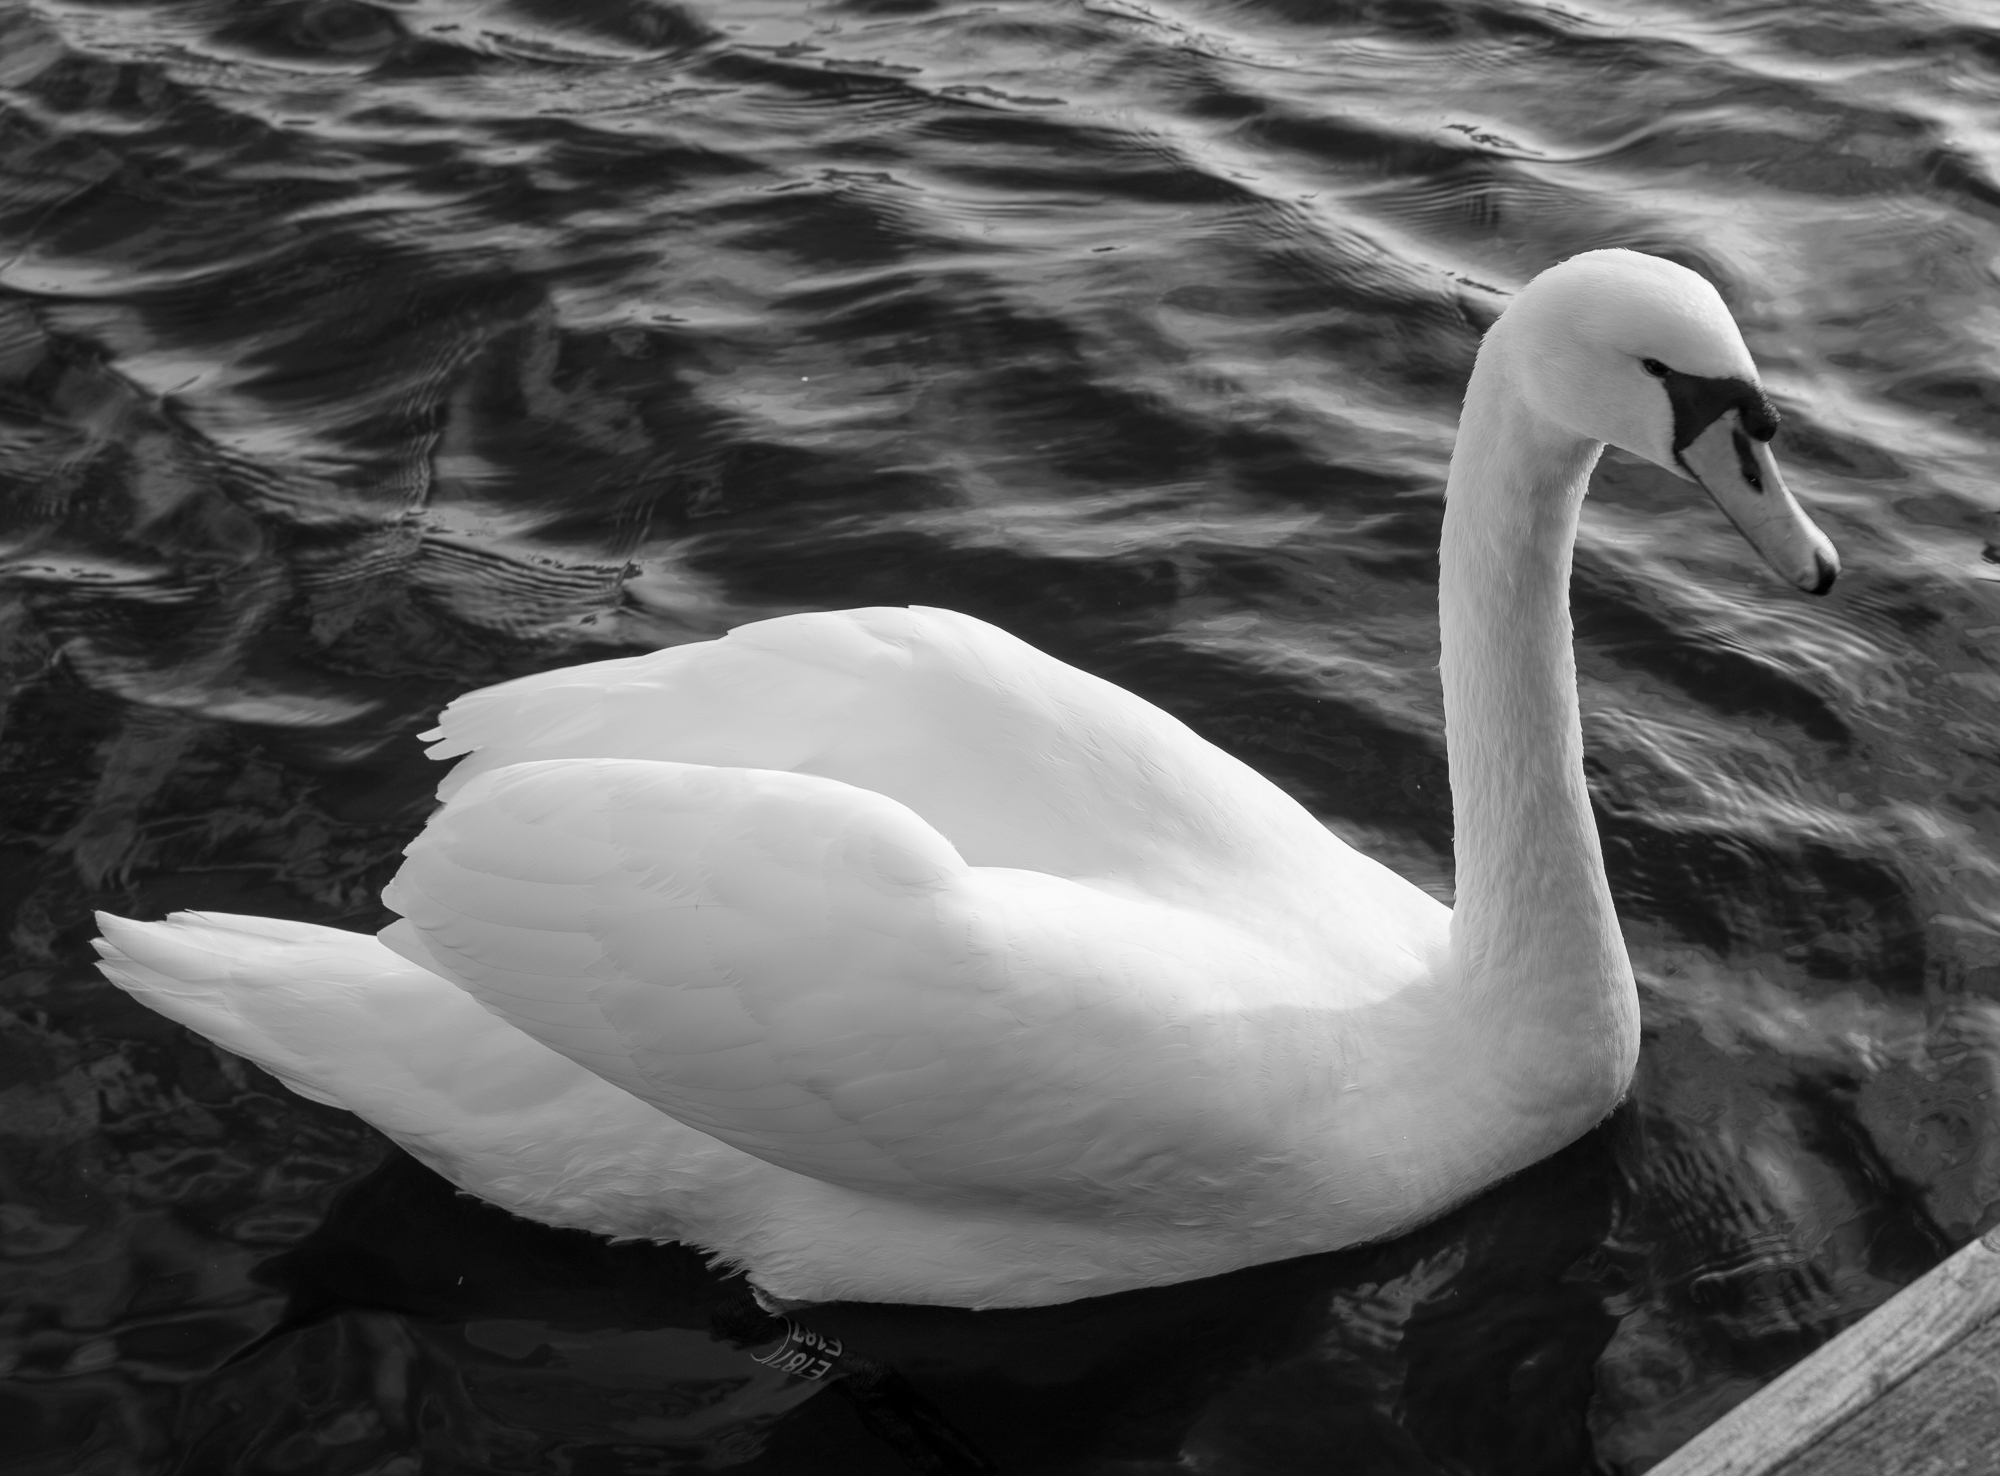
- Seagull (50 APO)
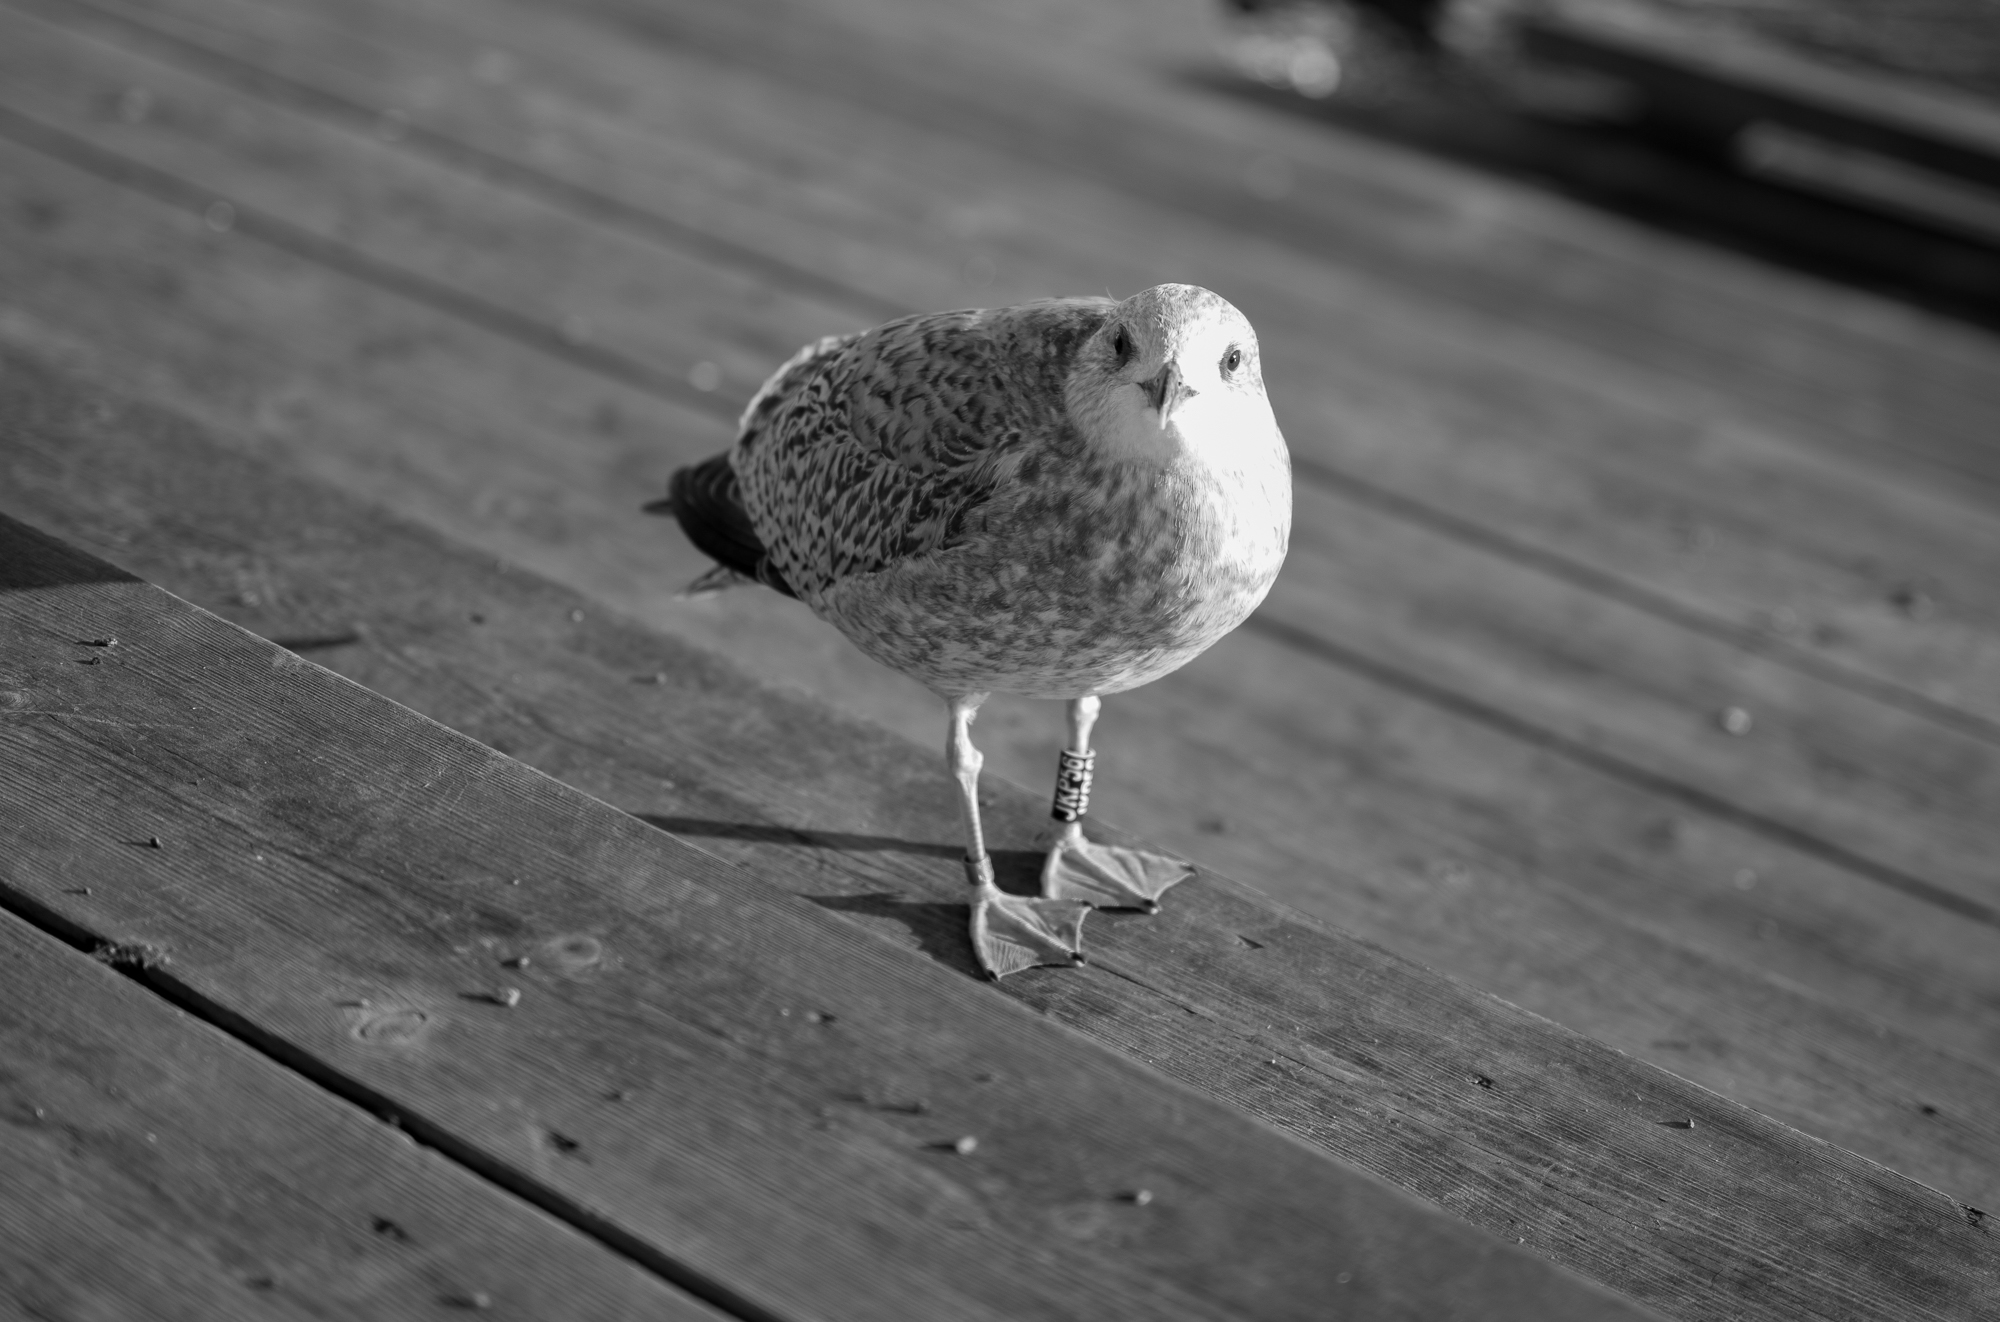
This is far from a perfect image, but demonstrates that it is possibly to rapidly capture an image with the M and get a decent result. I had to approach close to the seagull to capture this with a 50mm lens, and so it flew off soon afterwards. With time, I’d have stopped down as f2 gave too shallow a depth of field. The strong sun from the right meant that the highlights are slightly blown (and in post-processing have been heavily dialled down) but despite those issues I’m actually quite happy with the resulting photograph.
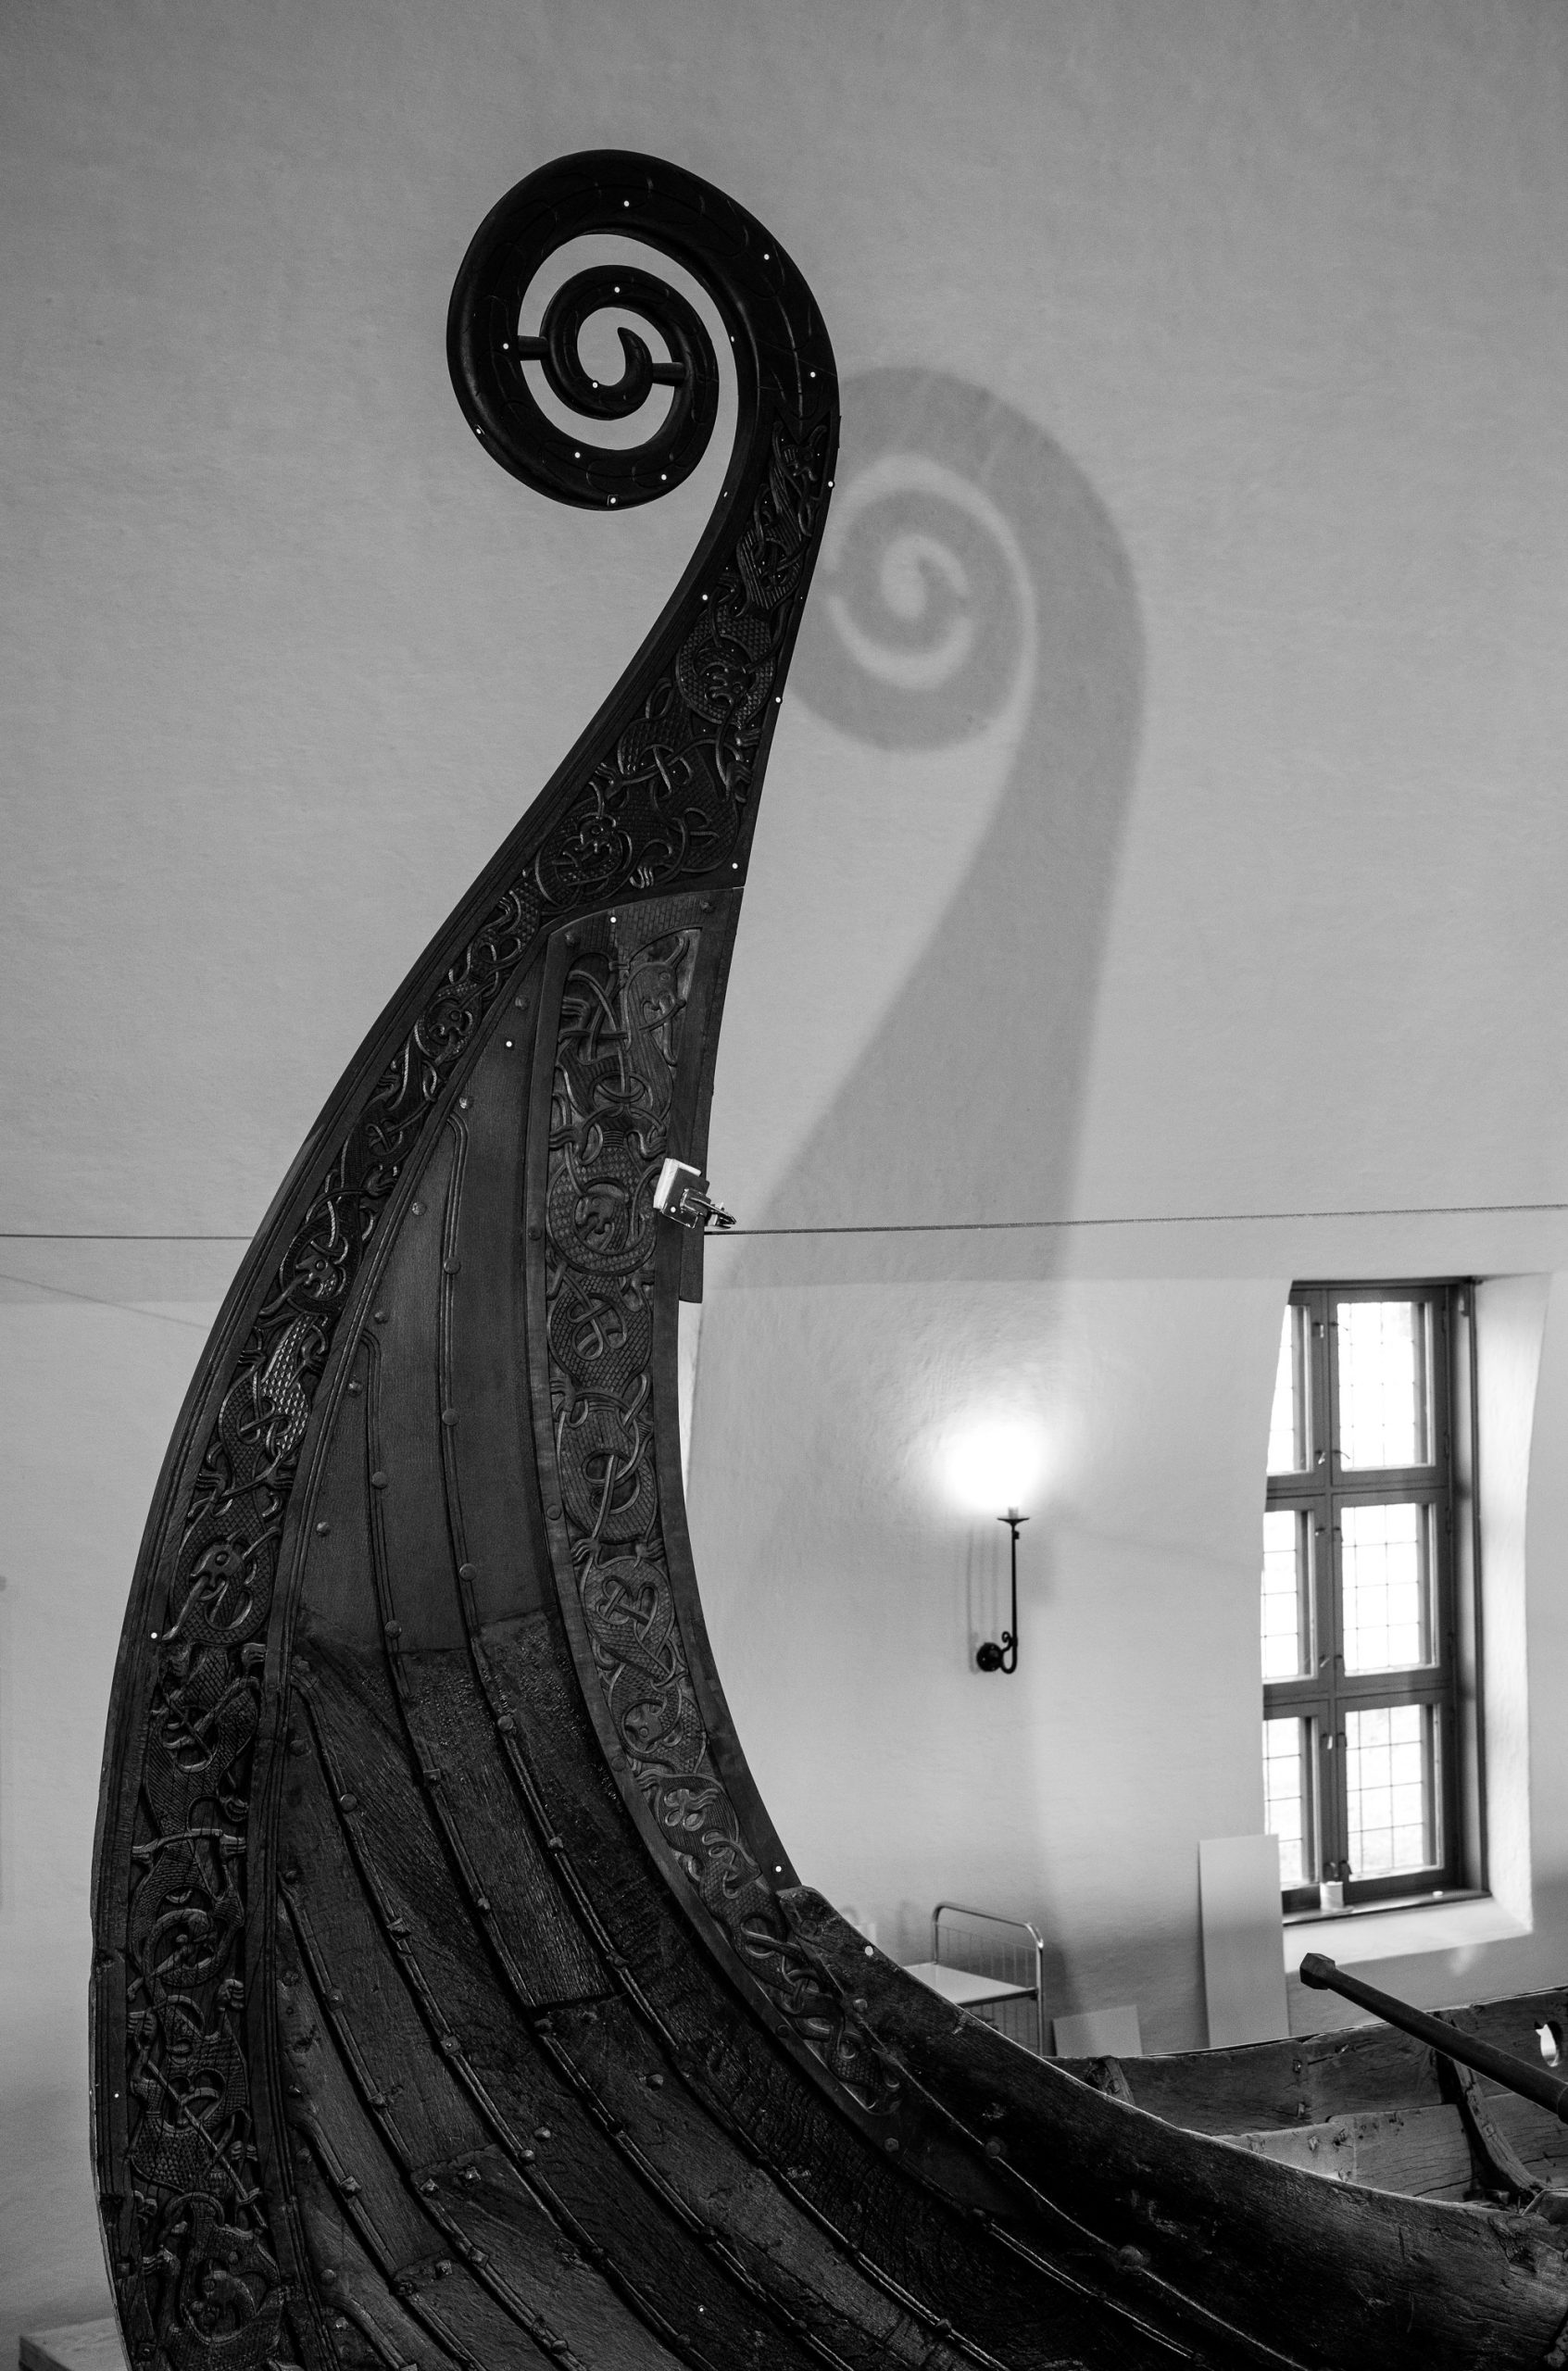
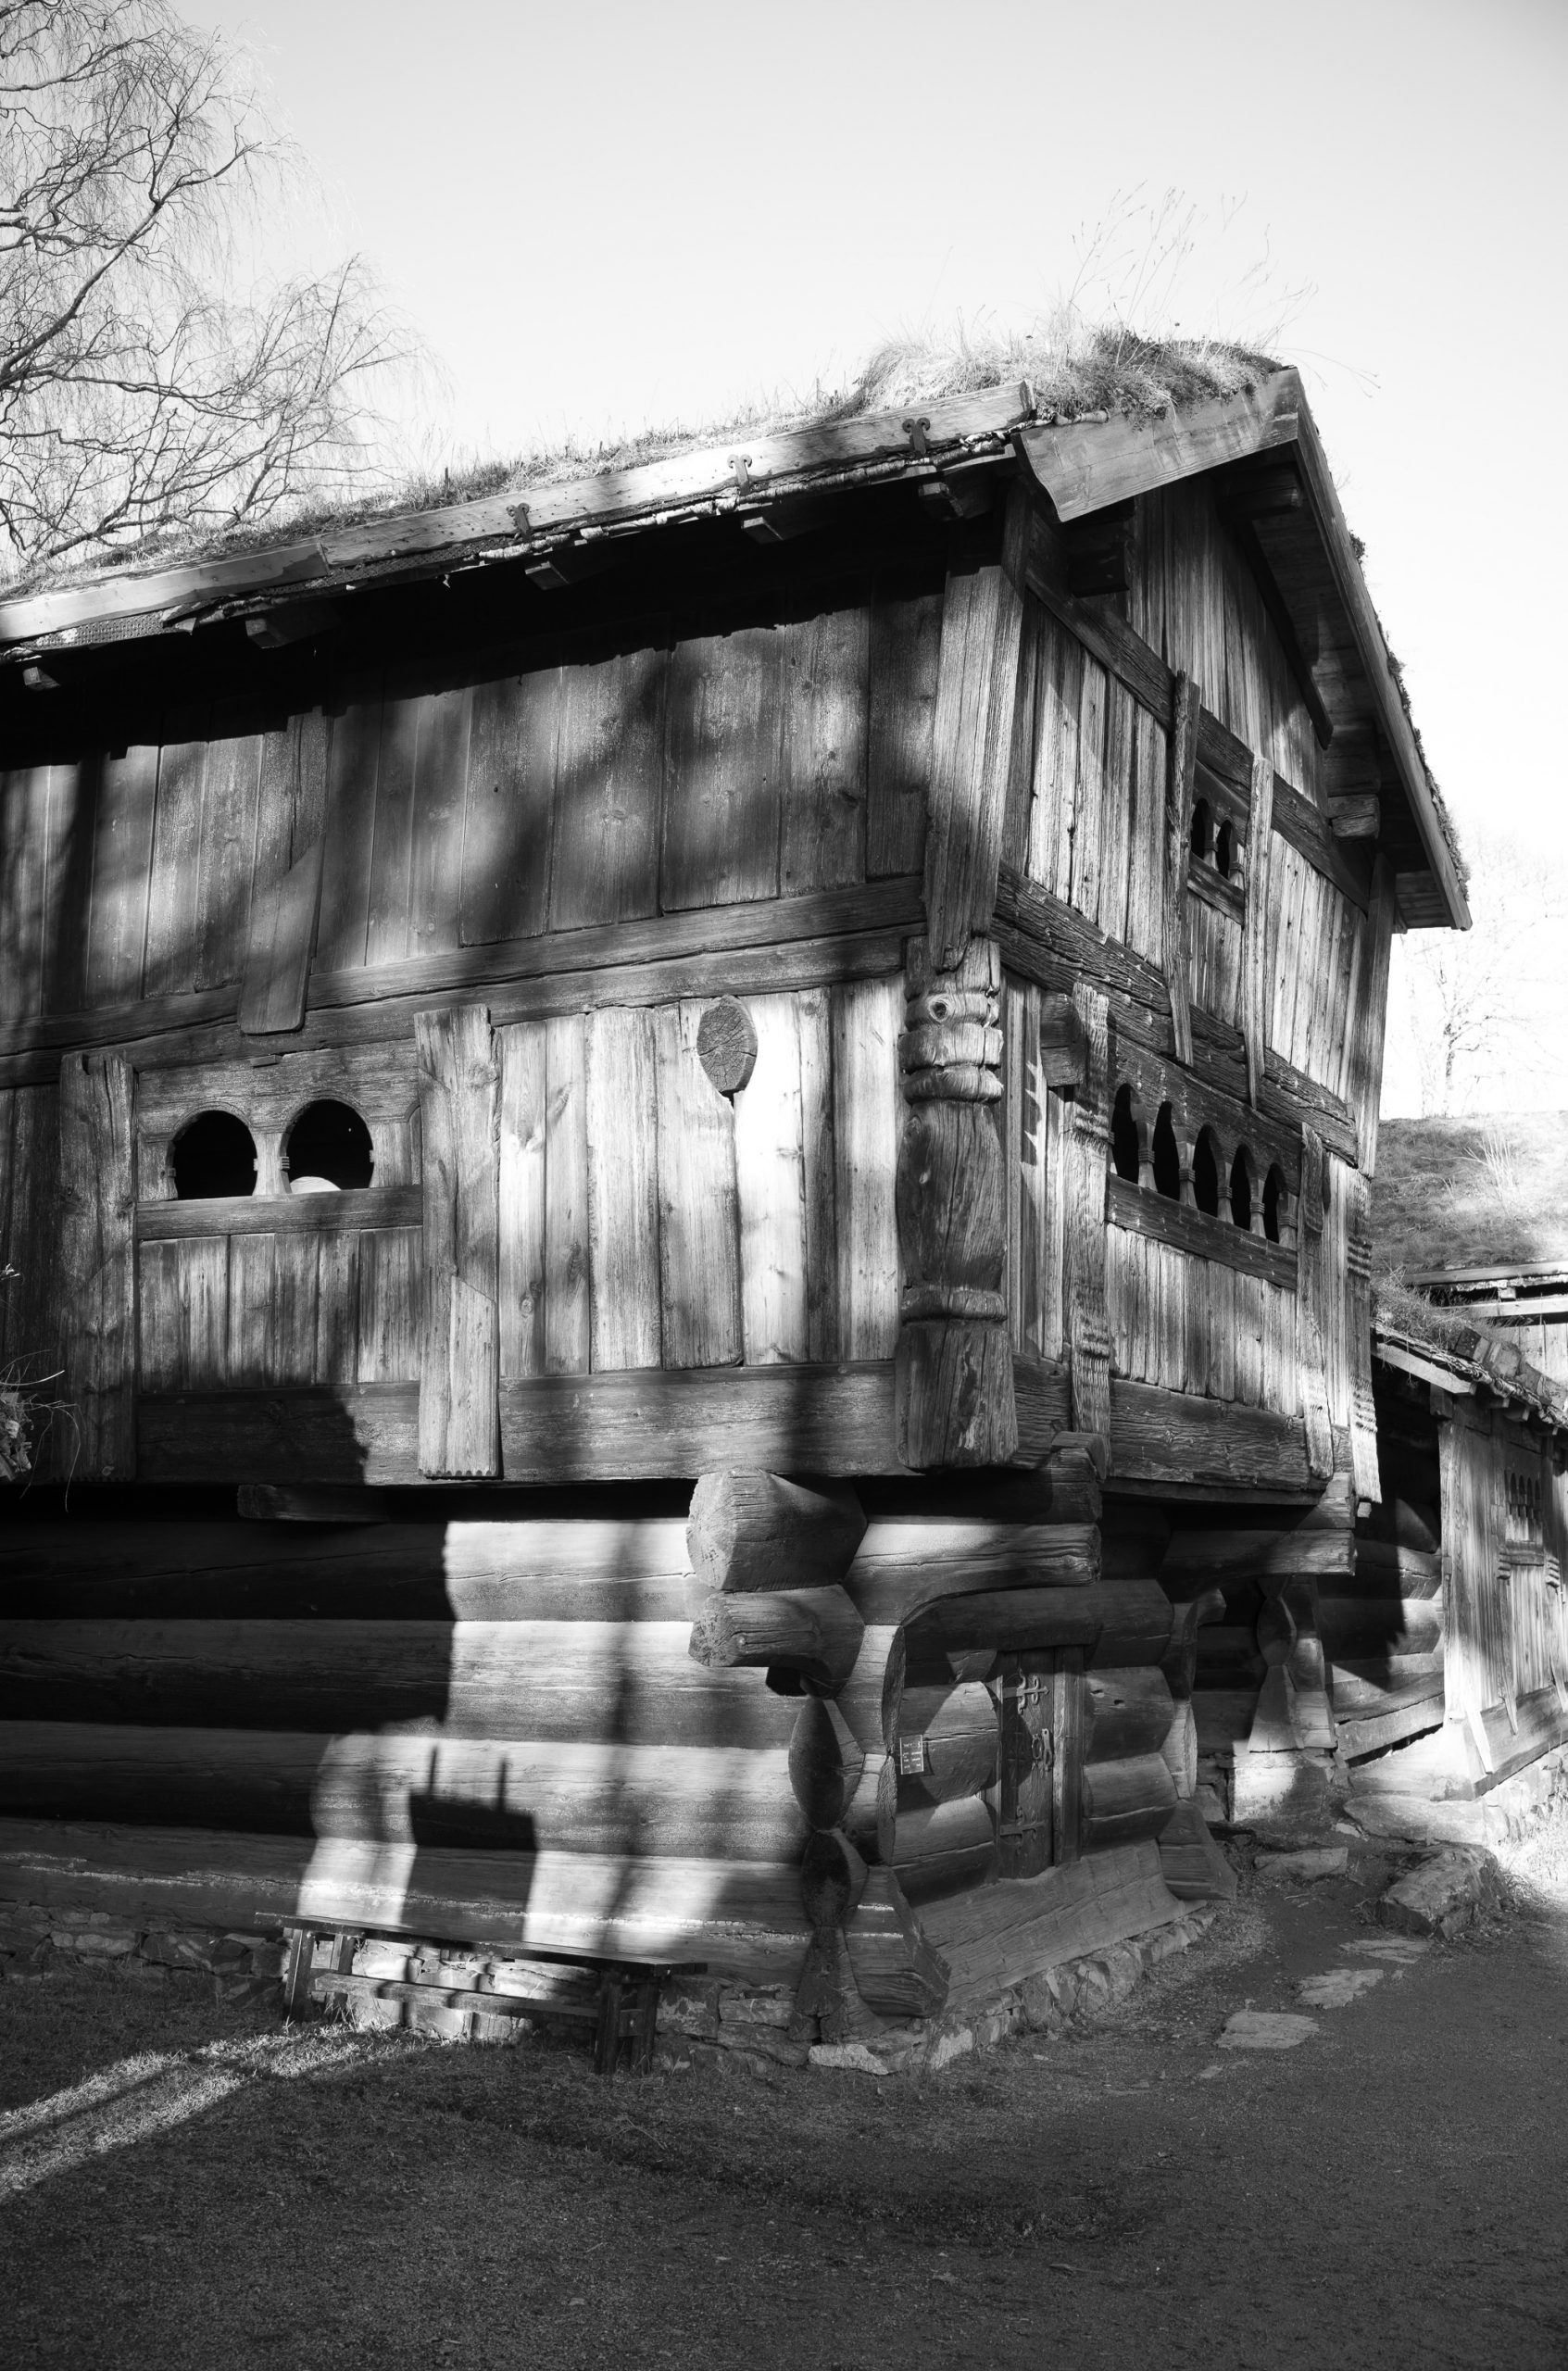
- Oak church with moon (50mm APO)
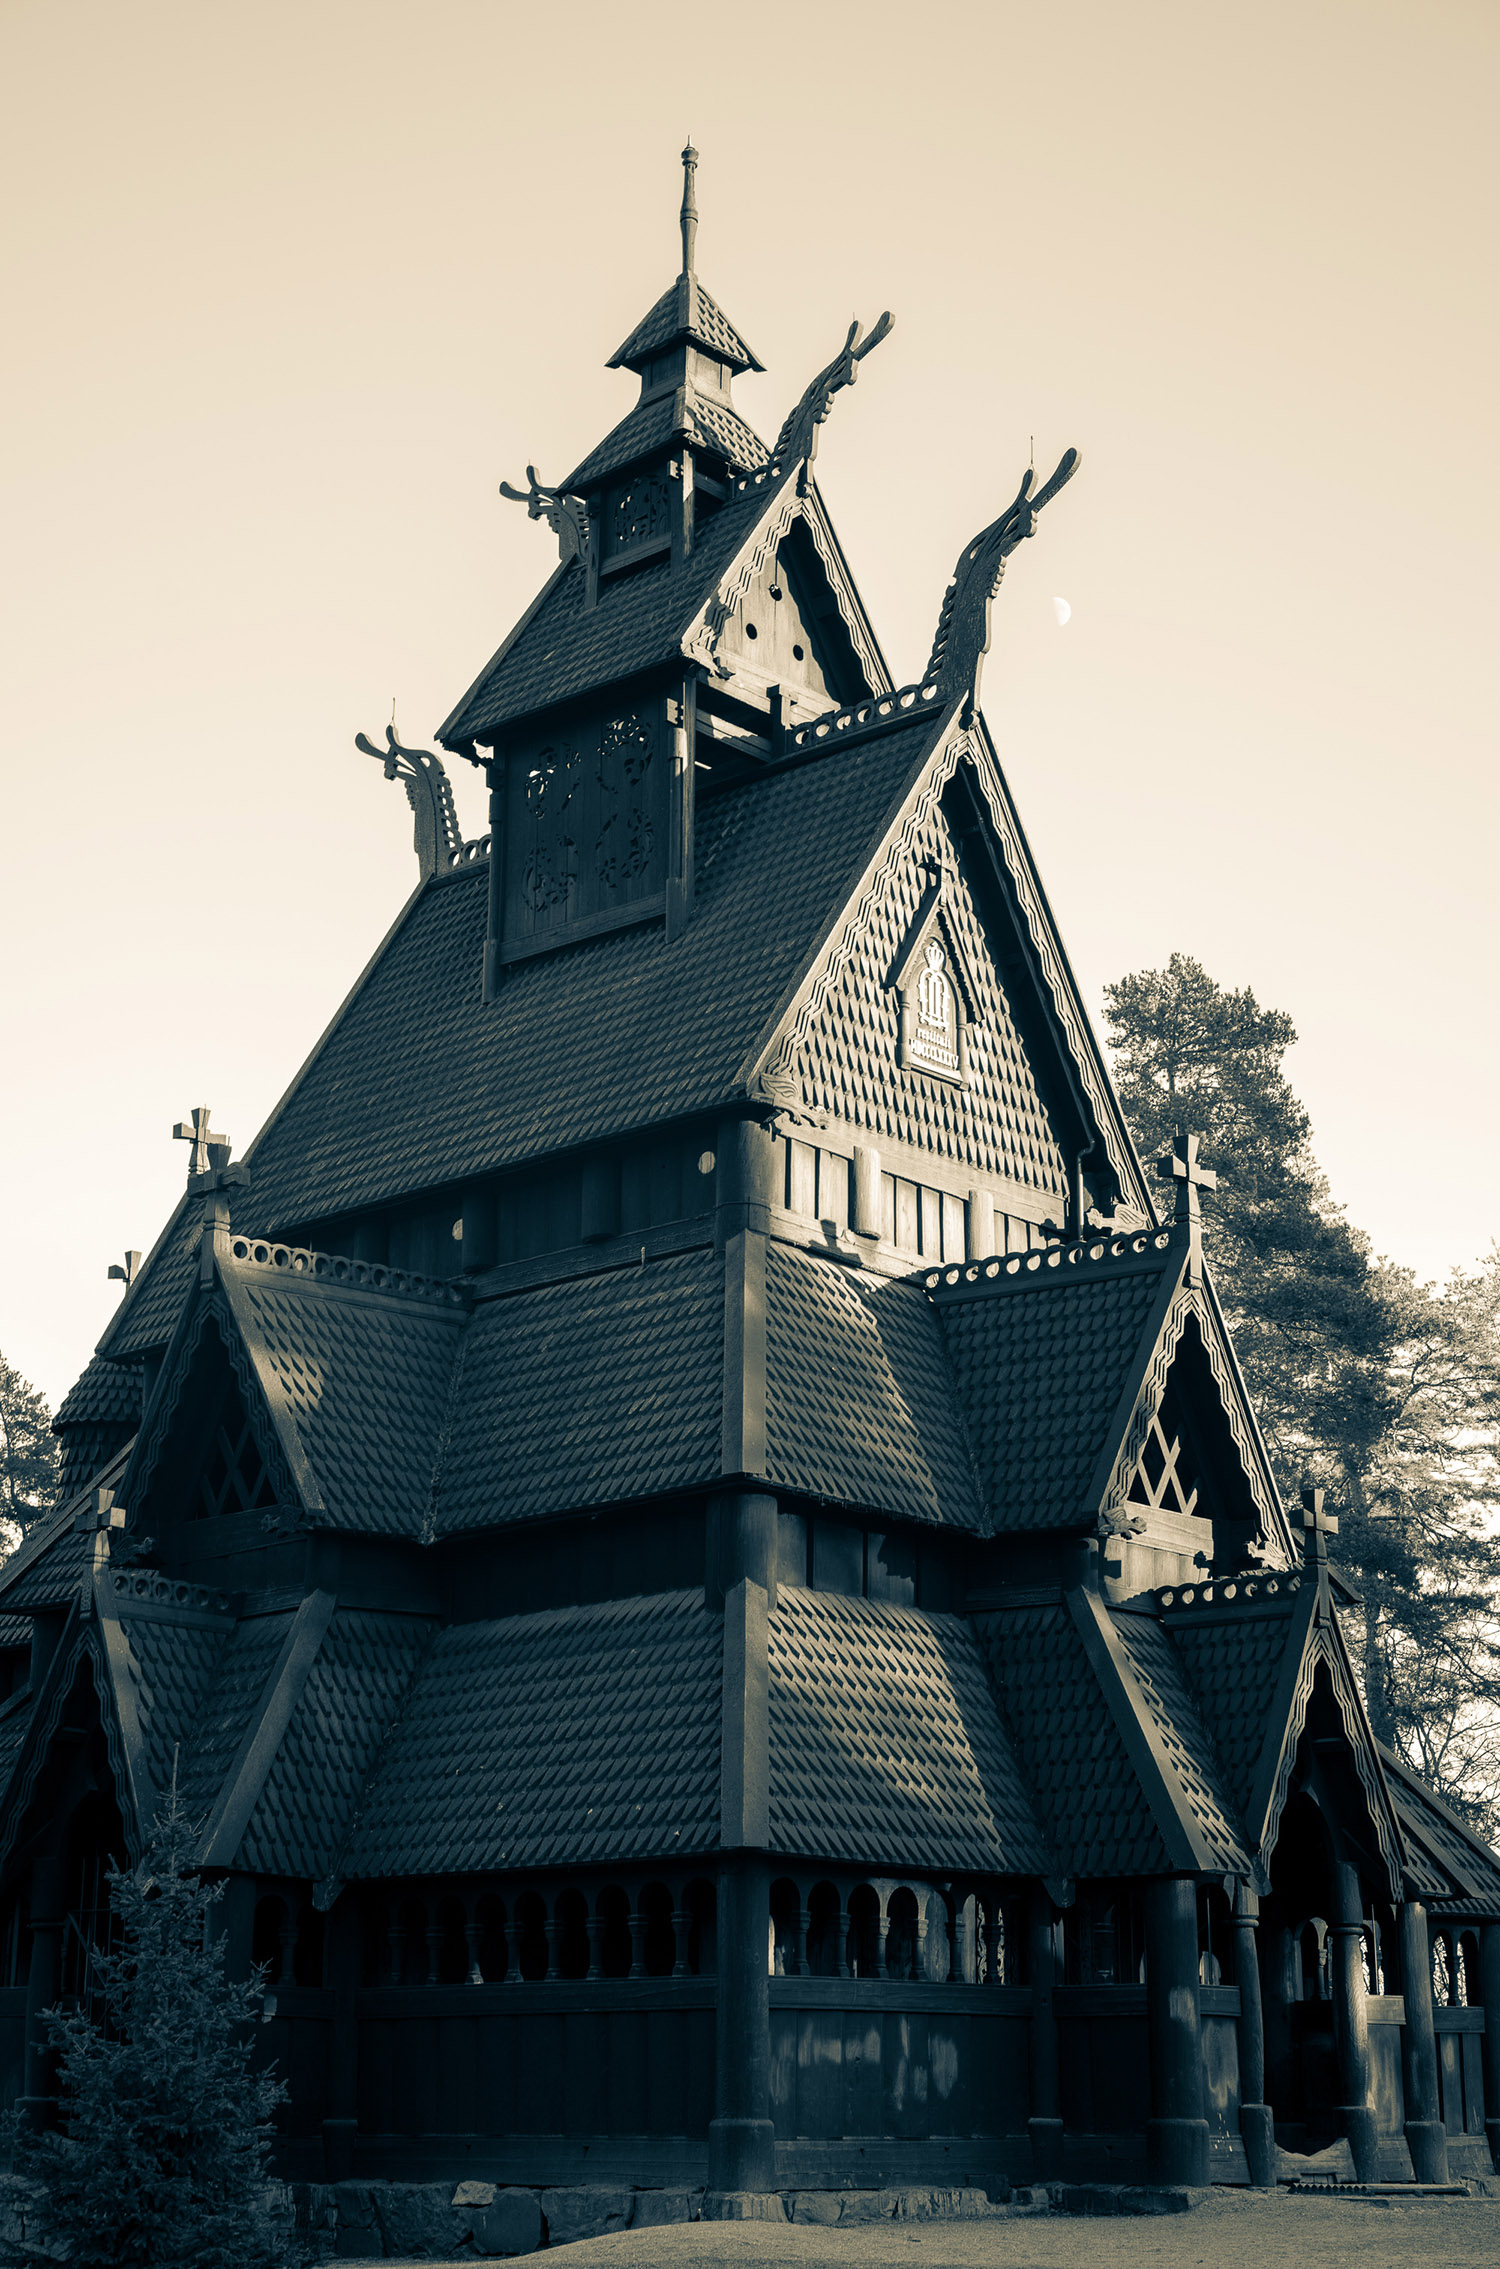
In the afternoon – by now, from a photographic perspective, with clear and so dull blue skies – we went over to Bygdoy and to the Folk Museum, an amazing collection of historic wooden buildings moved and reassembled in a spectacular wooded landscape. One of these is the church shown here, which whilst visually impressive from every angle proved difficult to capture in a photograph. This is the only occasion with the M10M that I felt the need to colourise the image – just a basic B&W split tone effect in Lightroom – which gives it a visual boost that, to me at least, works.
- Oak church altar (50mm APO)
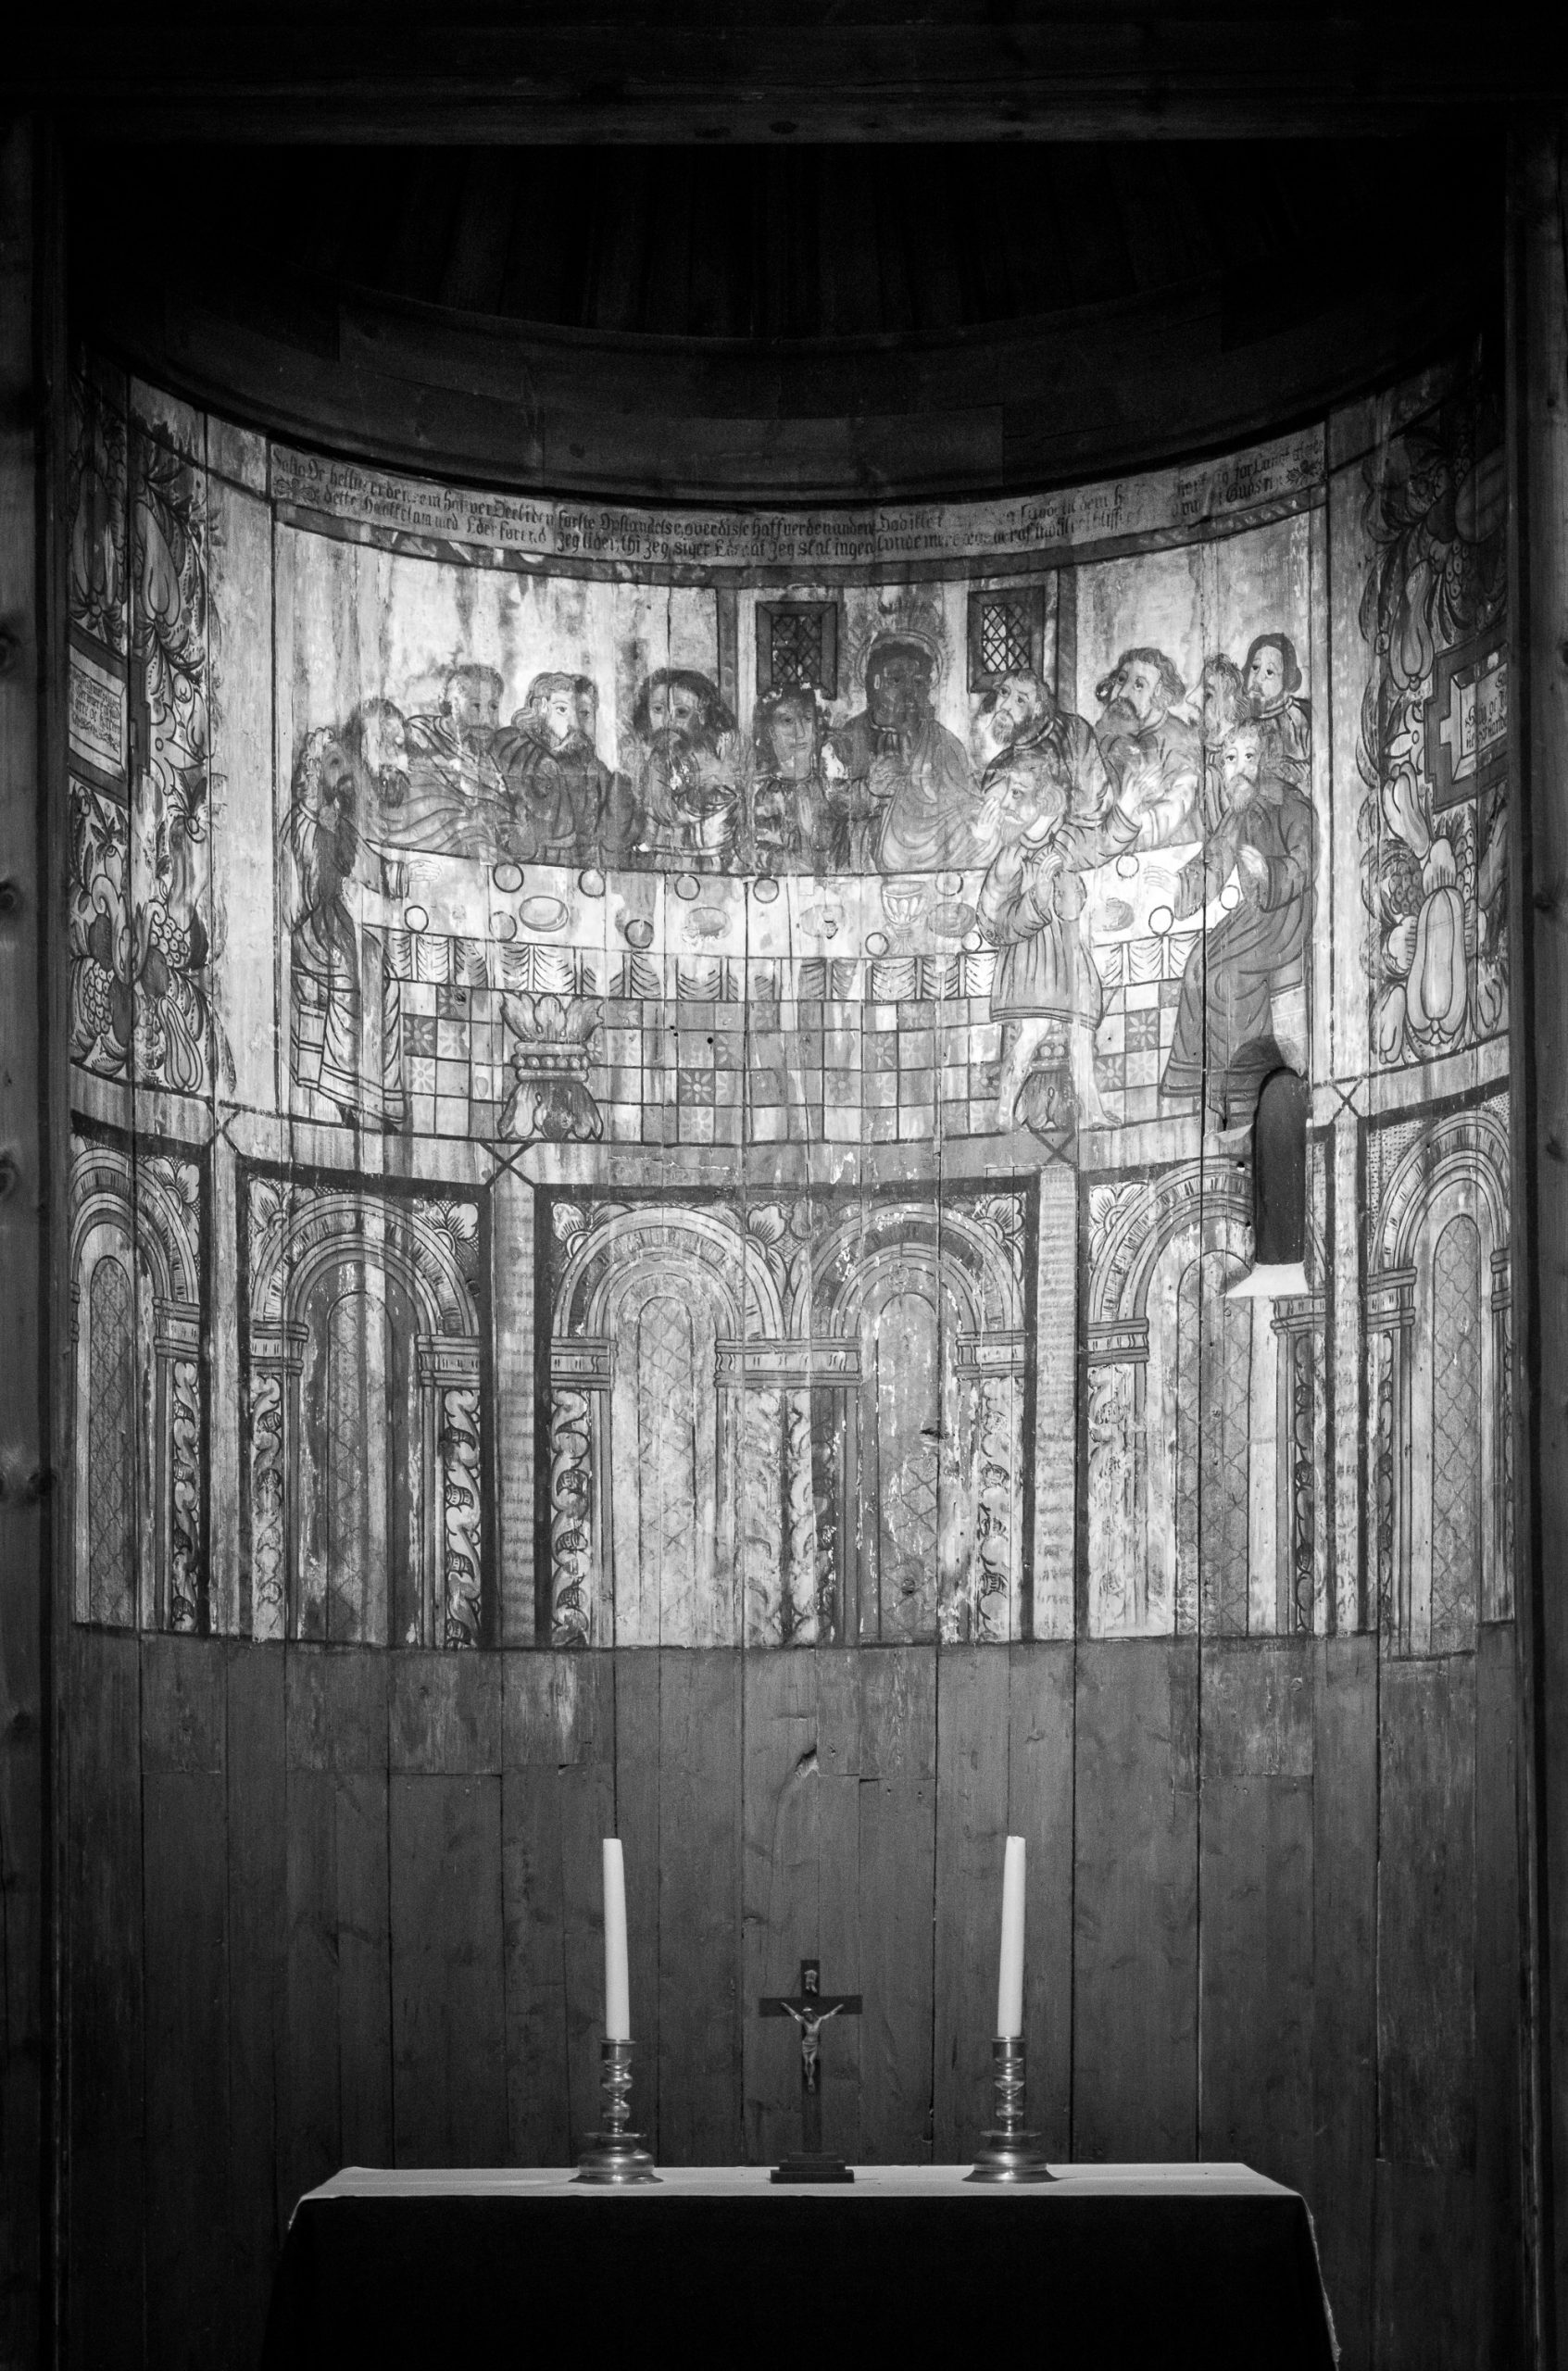
From a technical perspective I wanted to see how well the M10M fared in very low light – the interior of the church is barely lit and this image is far more vivid than the reality. I shot wide open at f2, possibly slightly sacrificing depth of field and critical sharpness to maintain ISO at (only!) 12,500. Focusing in such low light was clearly a challenge, although I suspect most autofocus systems would also have struggled. I did add a small amount of luminance noise reduction in Lightroom, but my conclusion is that ISO 12,500 is completely usable whenever needed, even for large sized prints, and from other photographs (not shown) I would feel similarly about ISO 25,000.
- Implausible discovery (35mm Summilux, orange filter)
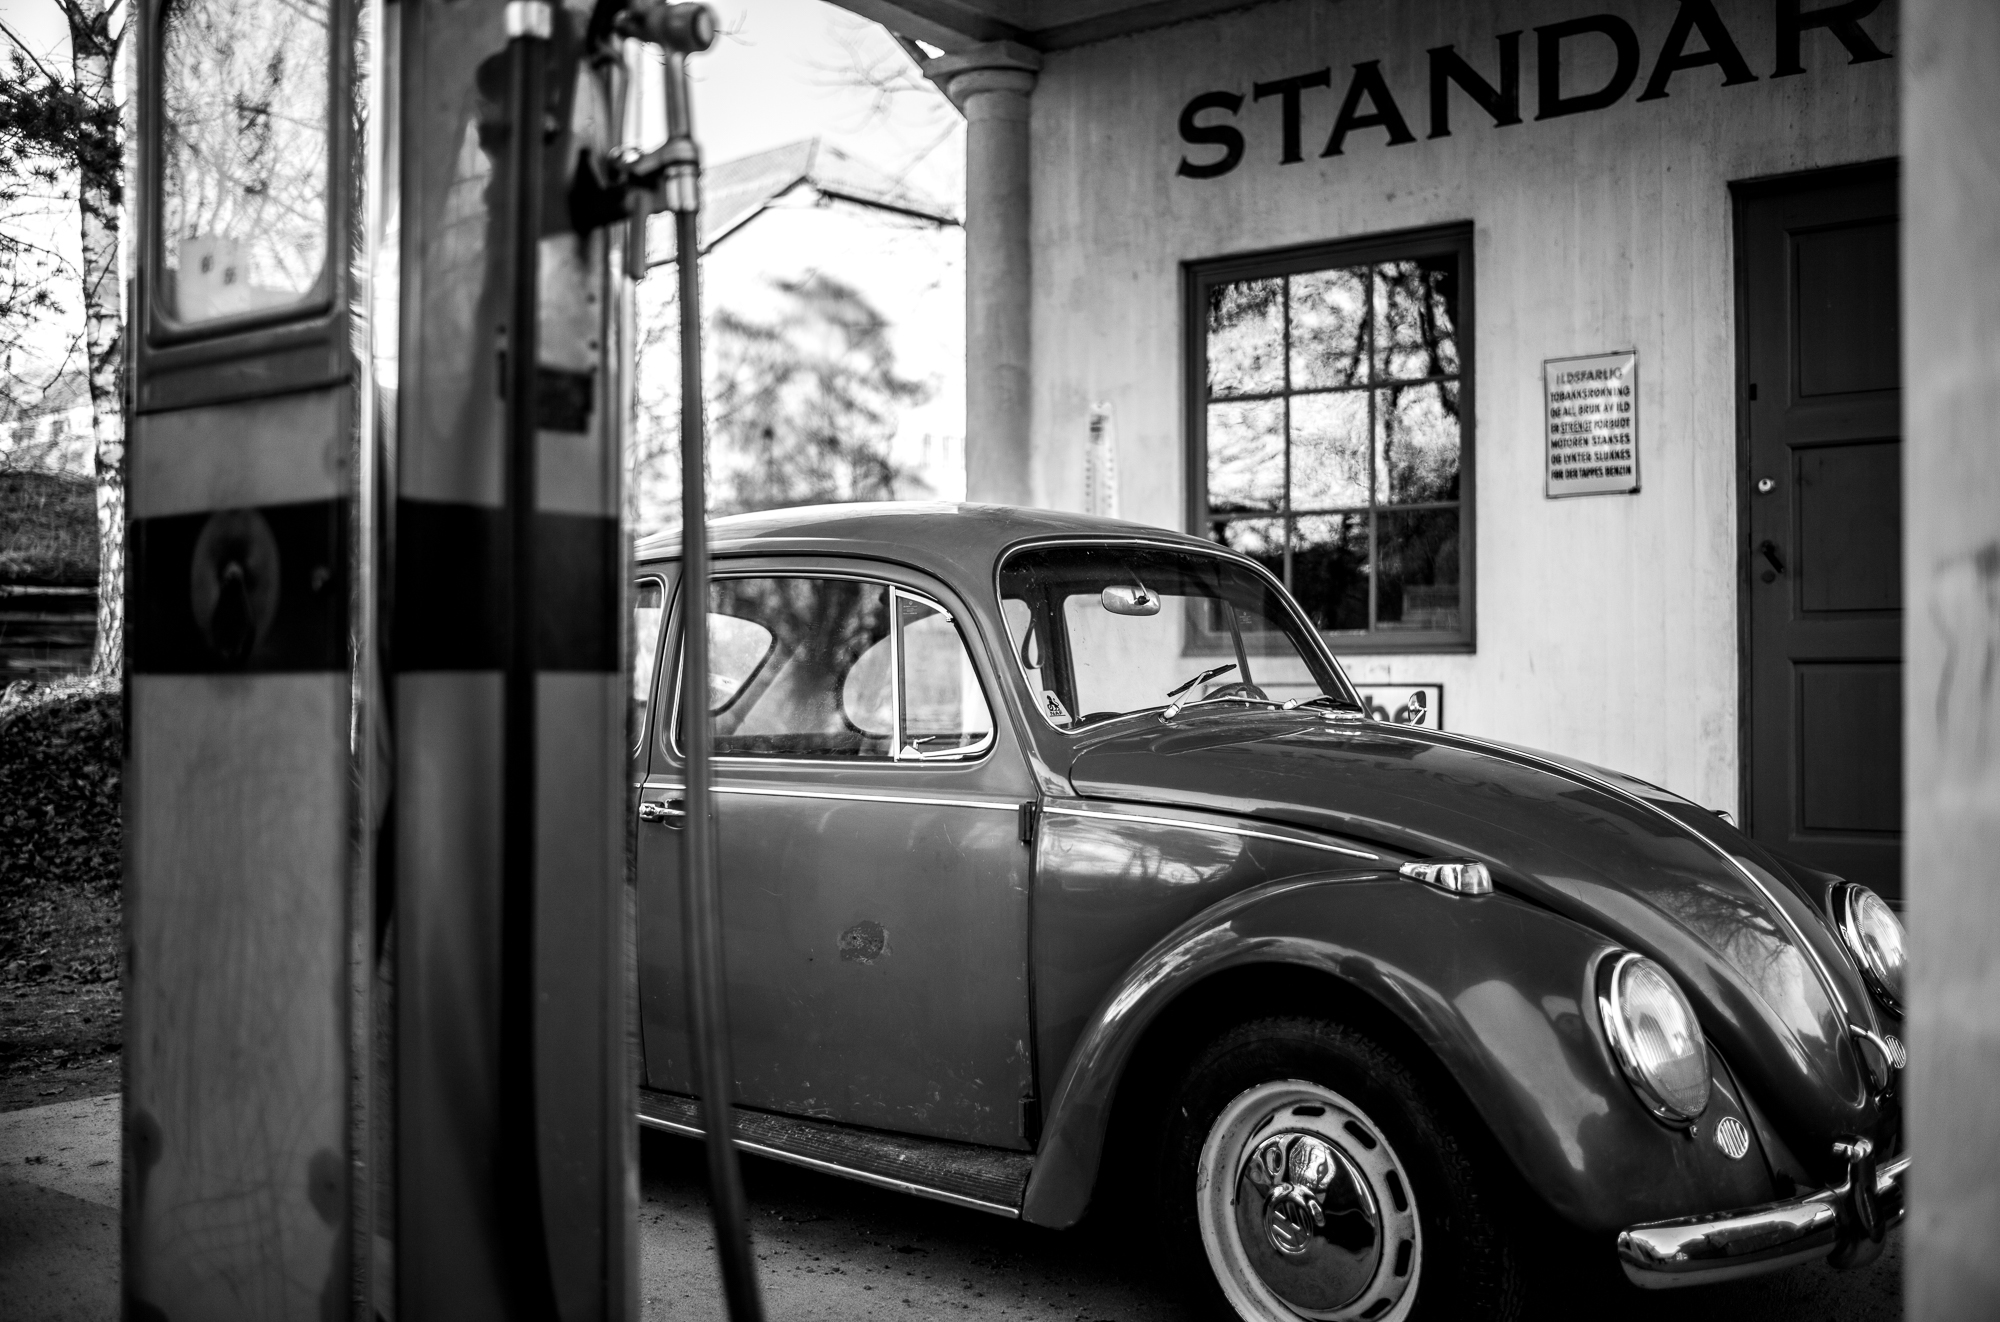
Clearly Norway has built a lot of its wealth from oil extraction, but I was nonetheless surprised to find an old-fashioned petrol station and VW Beetle on display at the Folk Museum. This is a classic example of where you would expect an image full of punchy, saturated colours, but I’m pleased with this black and white representation, including the vibrancy of the chrome areas. I have post-processed this image to emphasise the period feel, but hopefully not to excess.
- Shop sign (50mm APO)
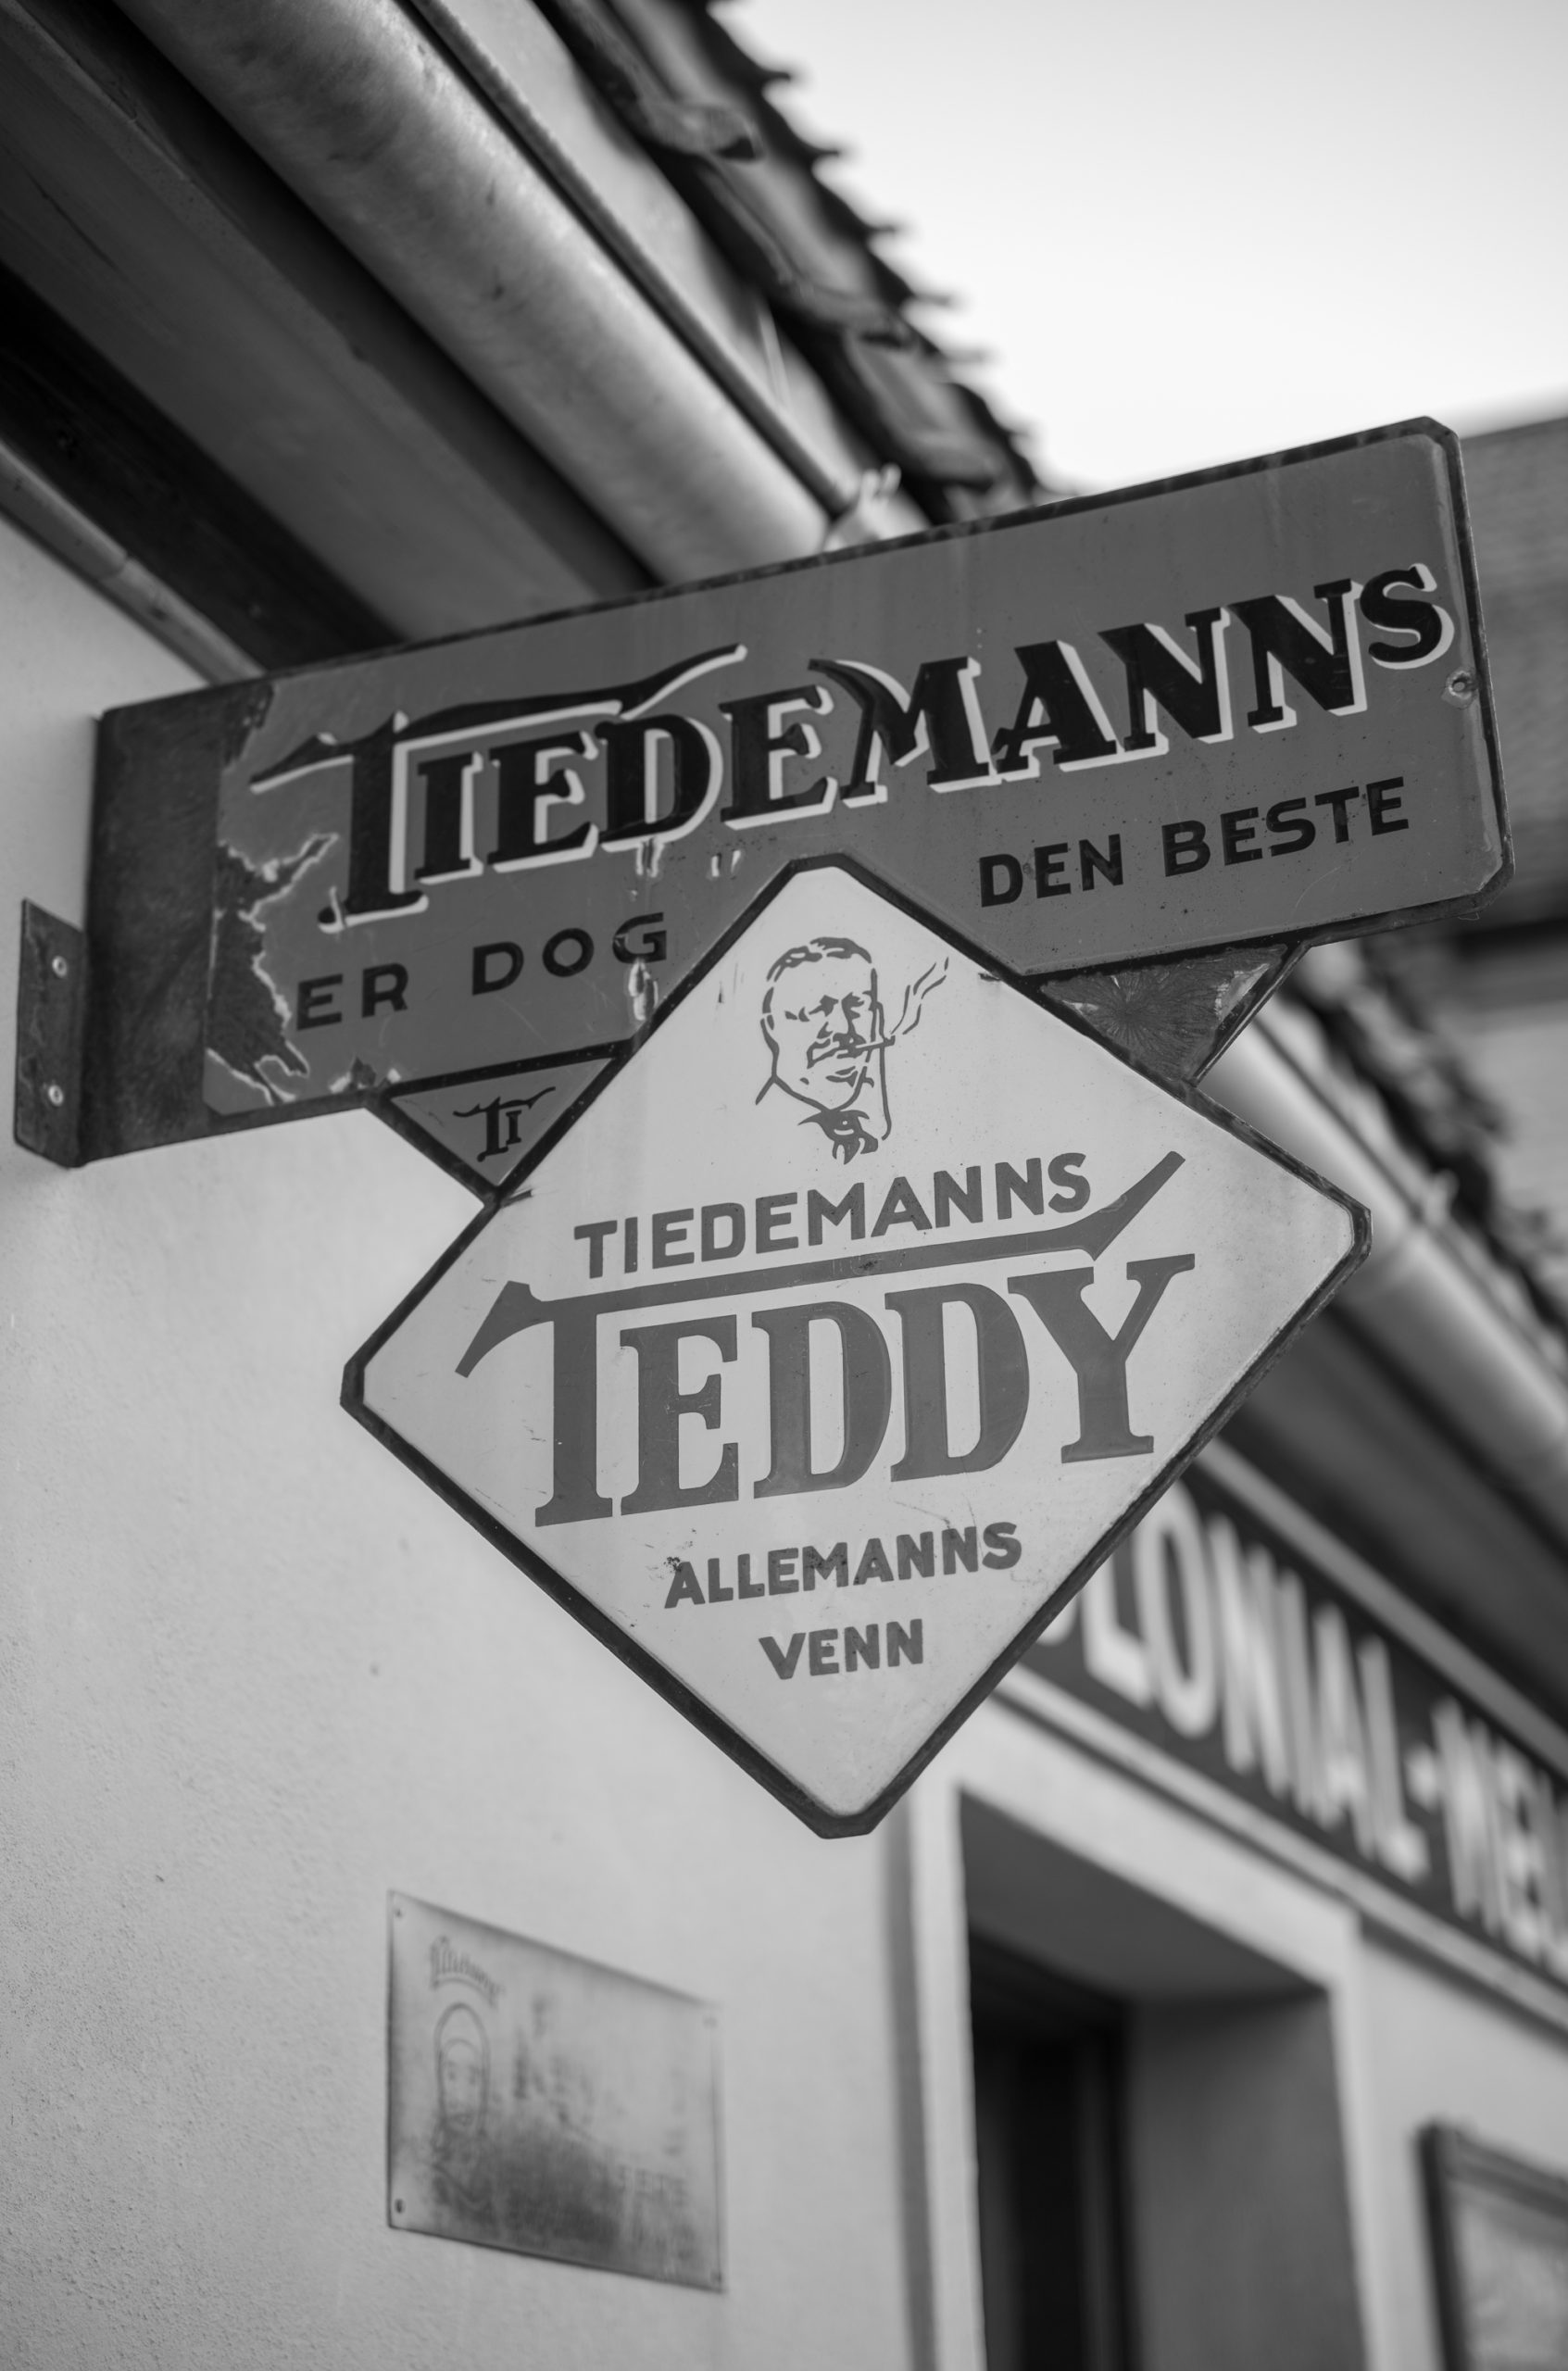
Another surprise were replica shops, some of which were open to go inside. Photographing vintage signs at an oblique angle is certainly a cliché, but nonetheless I’m happy with this image, albeit in reflection I’d have stopped down slightly as not all of it is in sharp focus (only really noticeable when zooming in to full size).
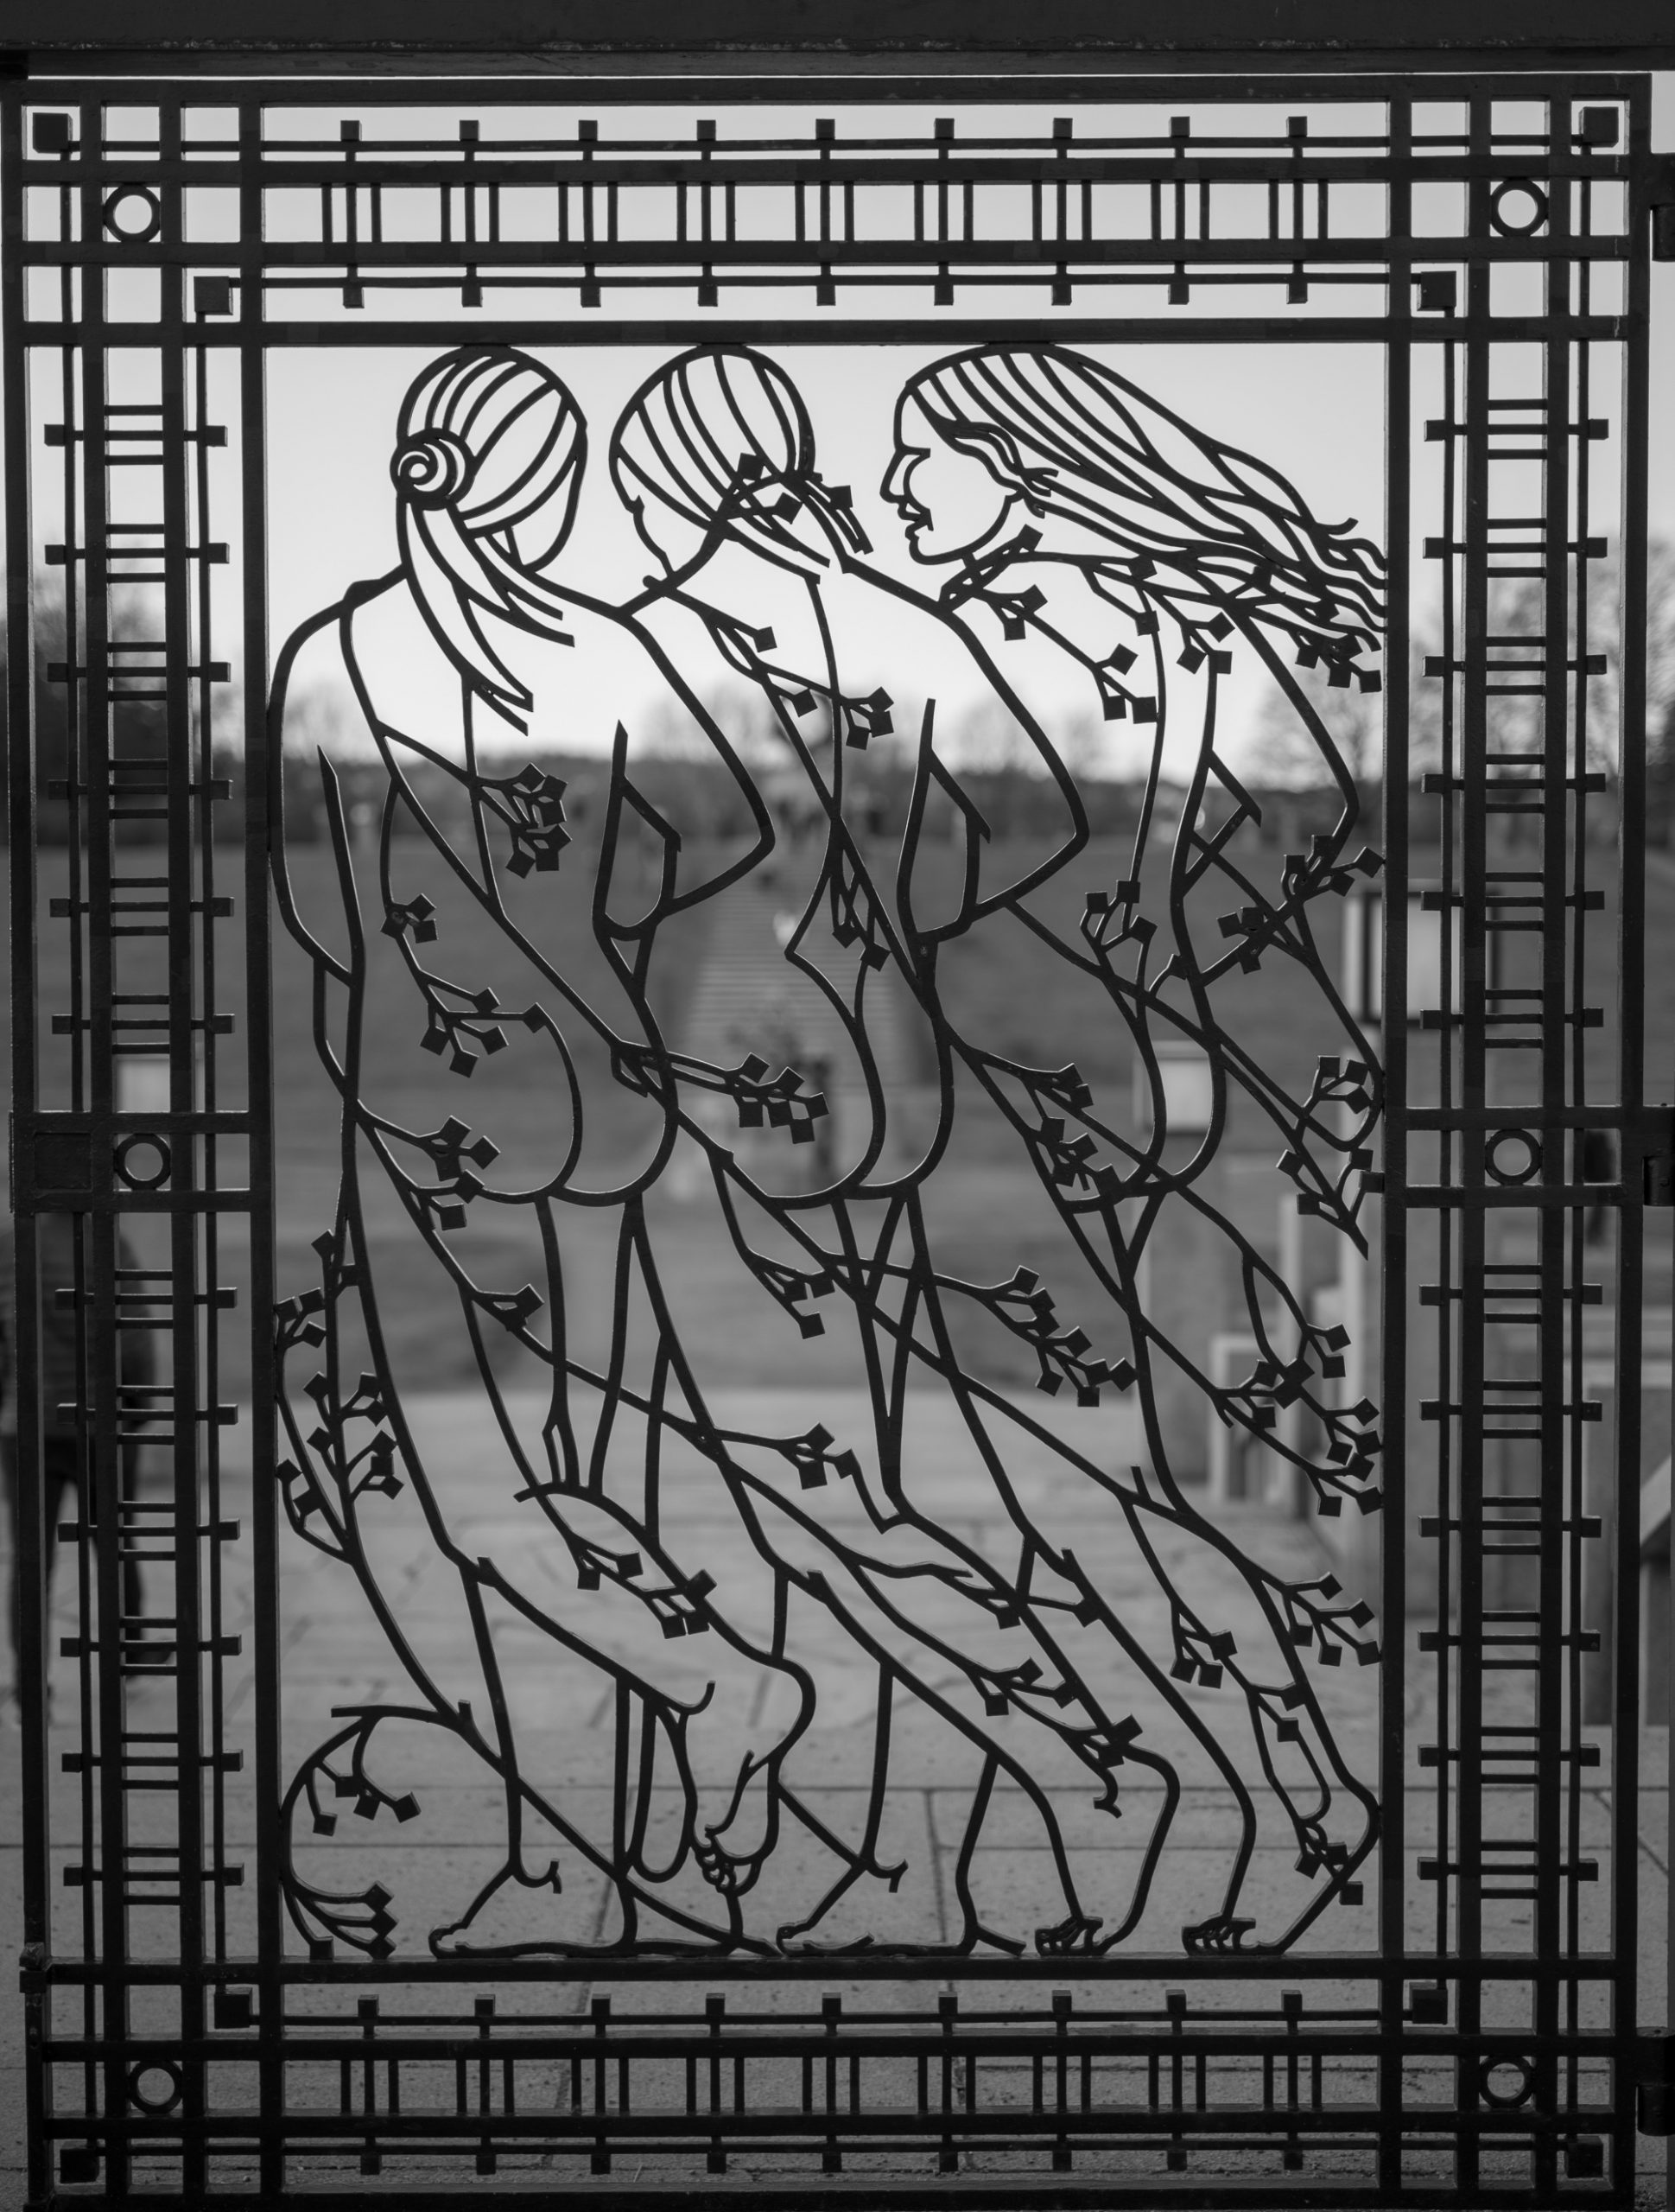
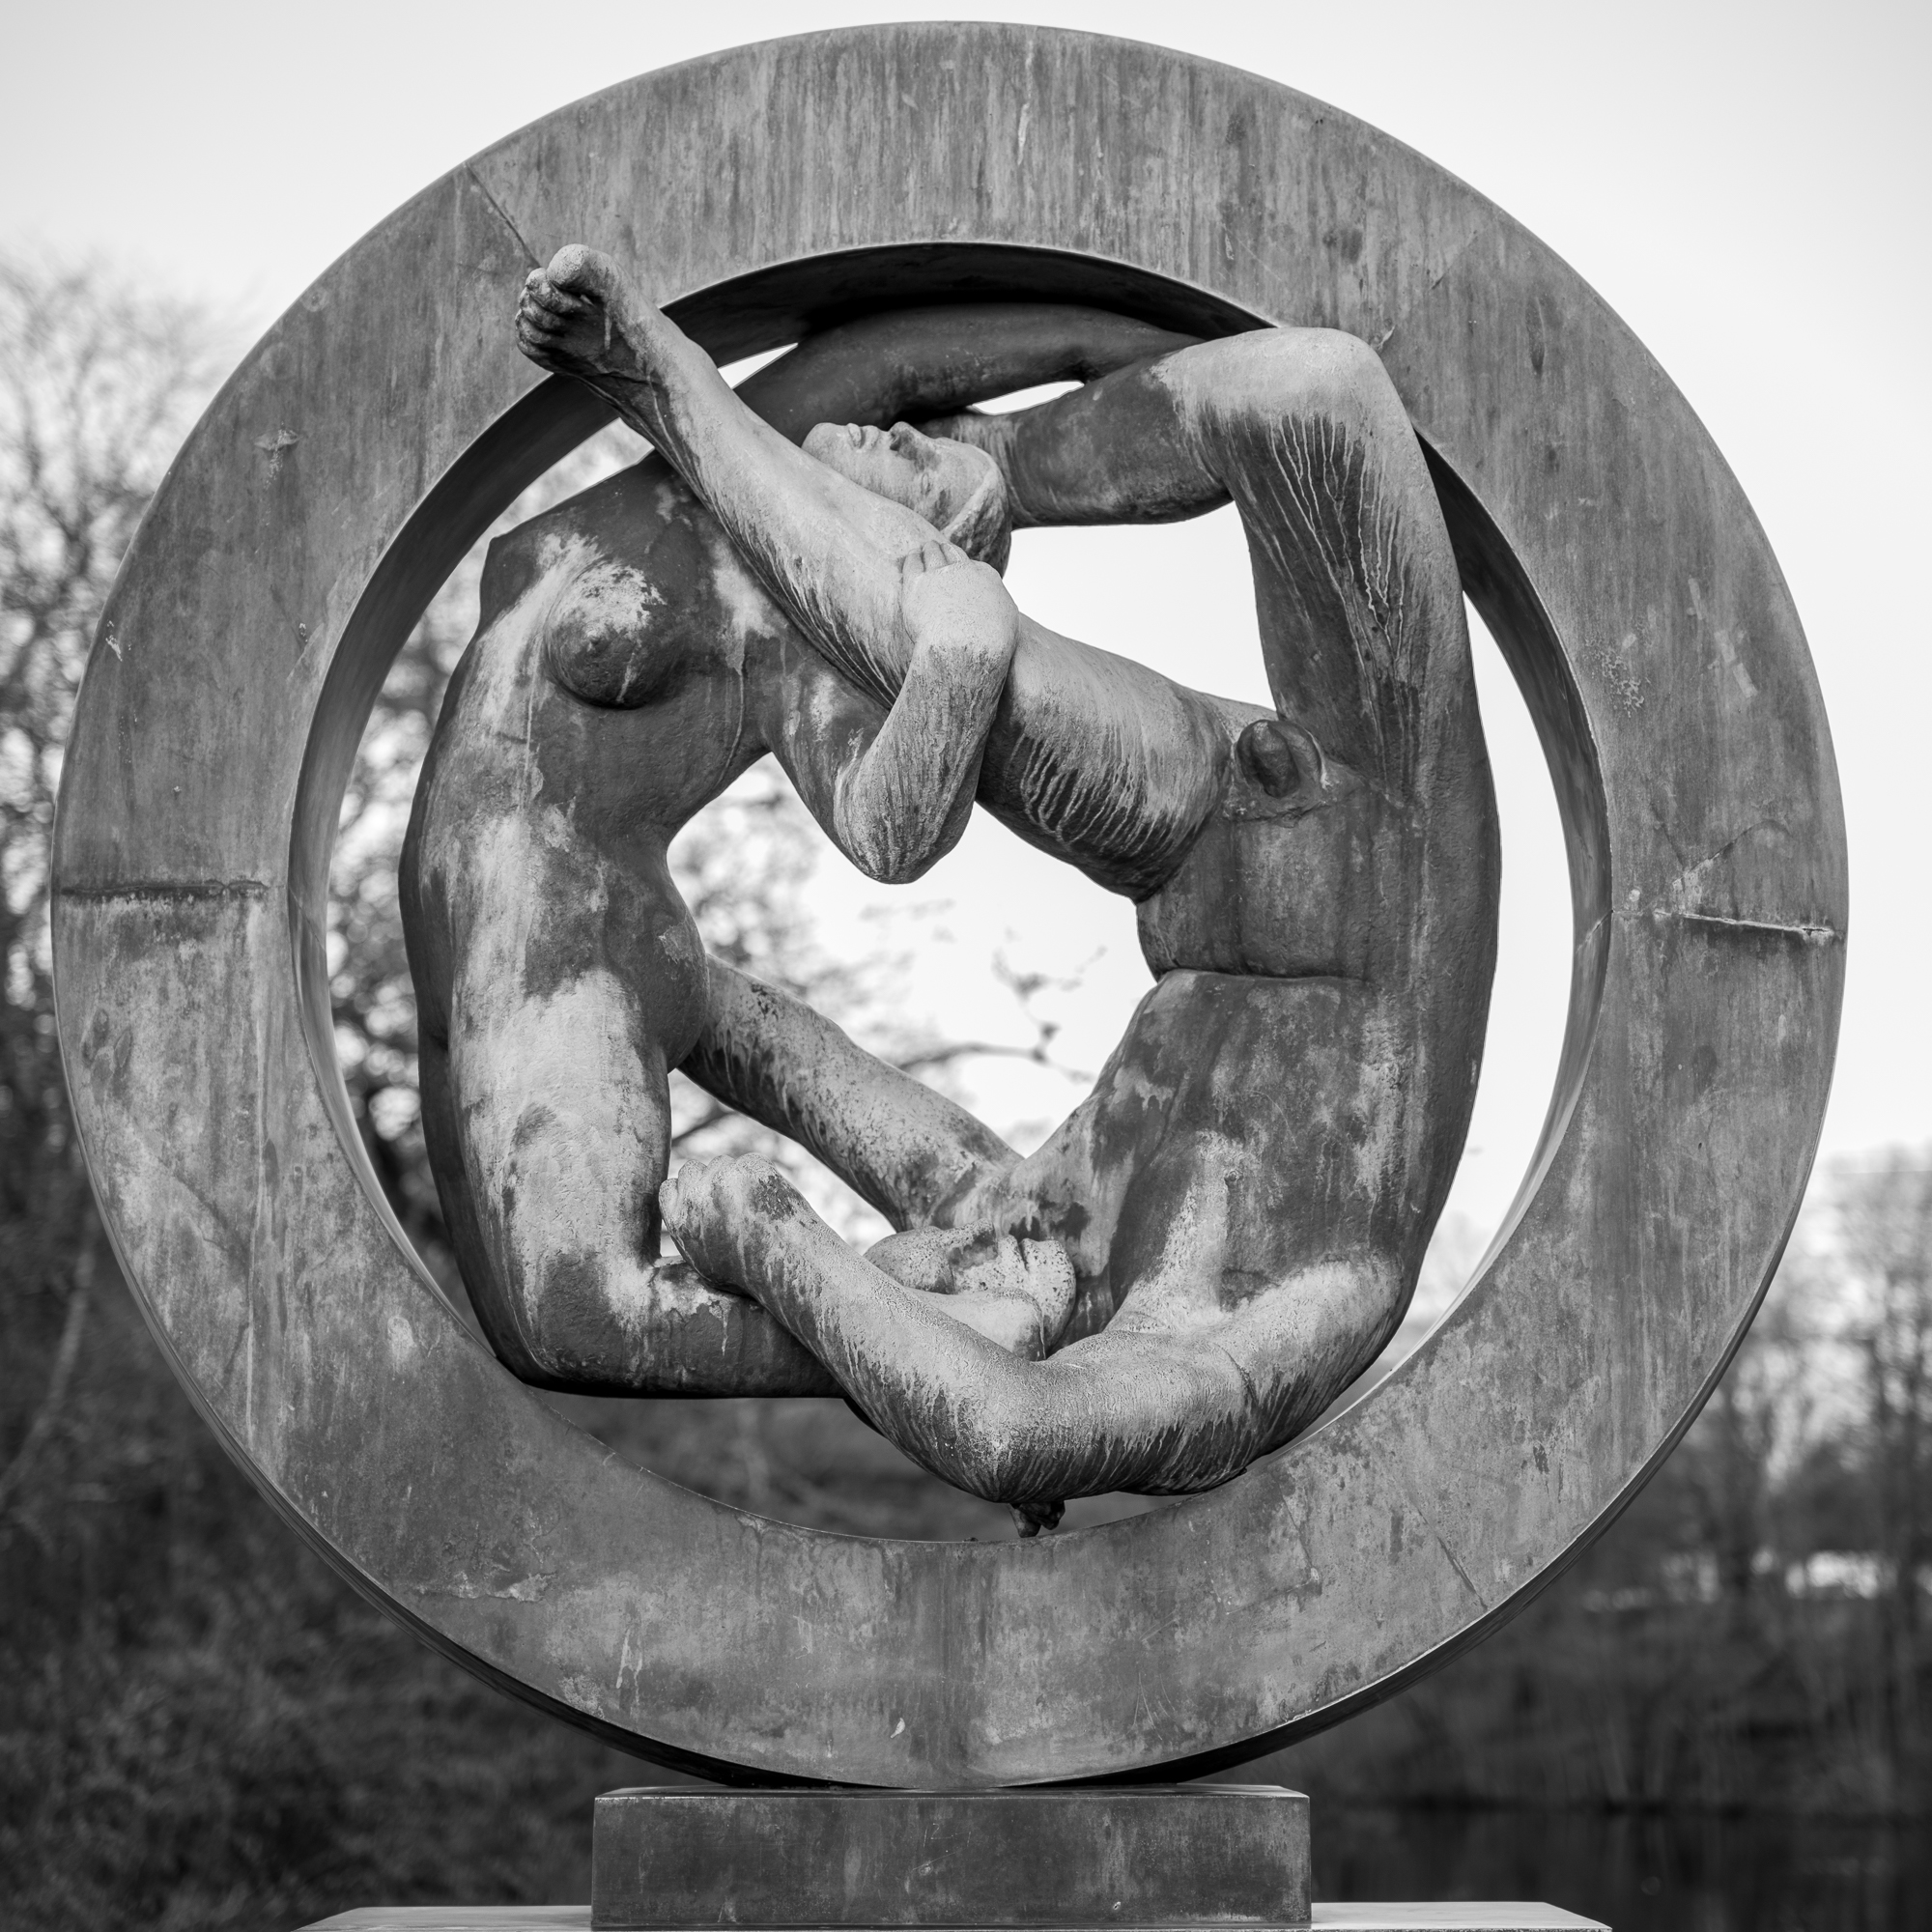
- Vigeland Park (50mm APO)
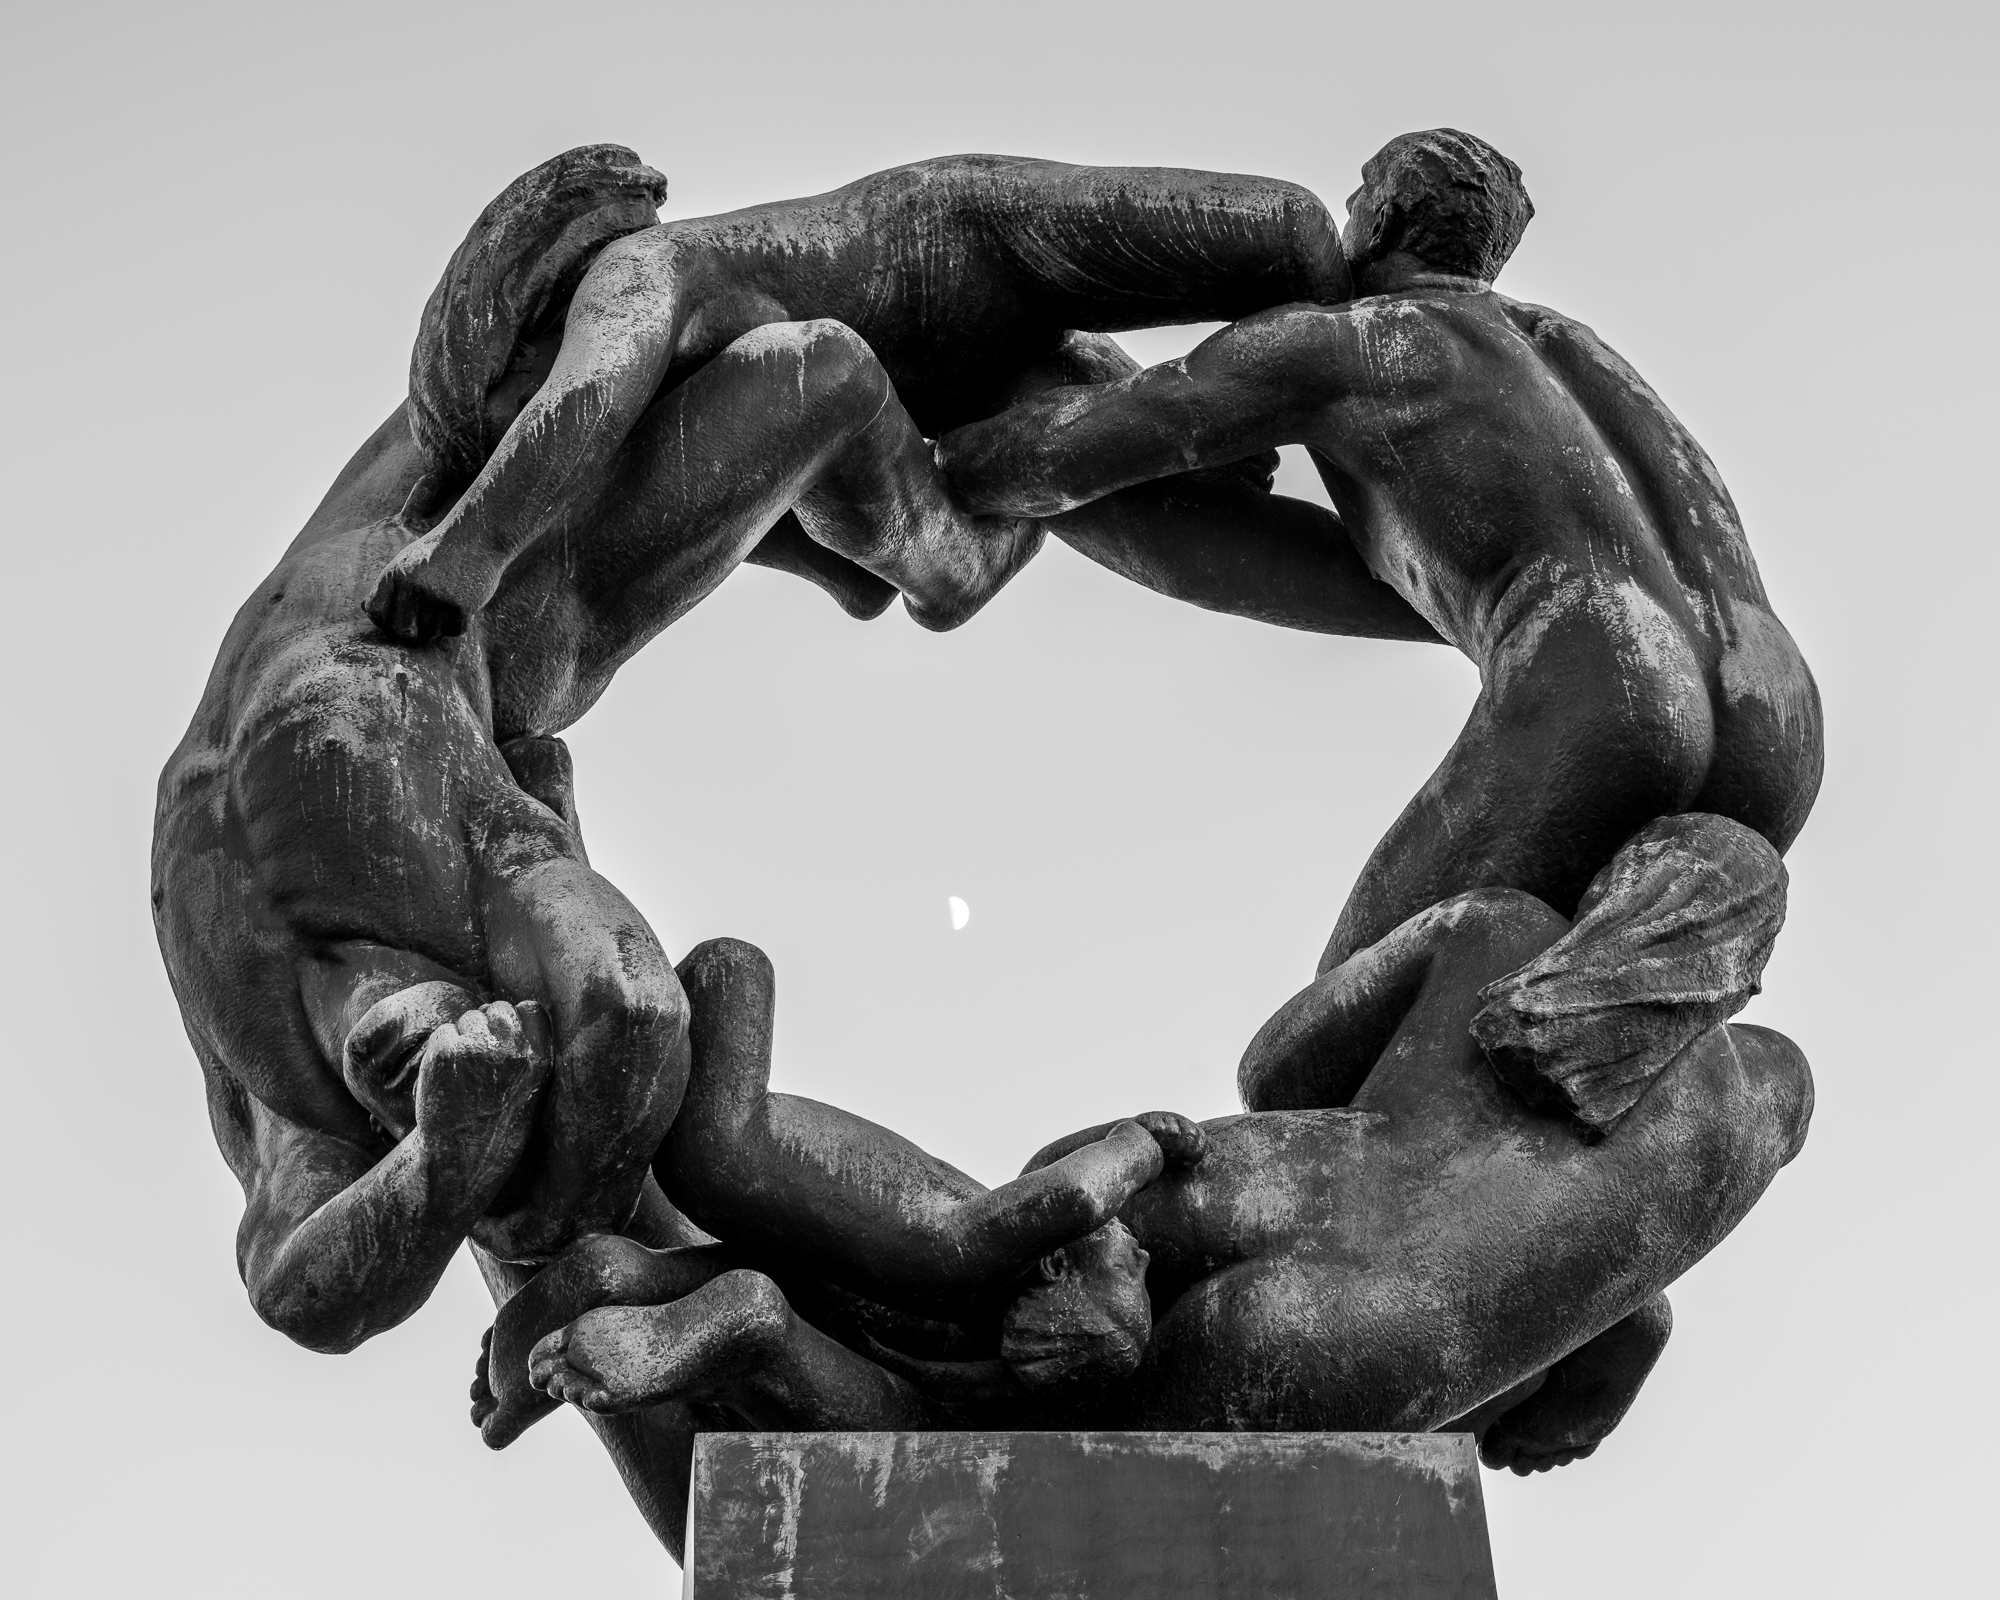
Seeing much of the life’s work of a sculptor collected in a tranquil park to the centre of a city is very impressive, and definitely worth a visit. The blue sky and fading sun at this point didn’t make for the best photographs, however, but I went with this image as it caught the textural nature of the sculptures well. I’d have had to stopped down too far to get the moon fully in focus as well, and risked compromising the crisp focus on the sculpture.
- Police horse in paddock near Akerhus Fortress (50mm APO)
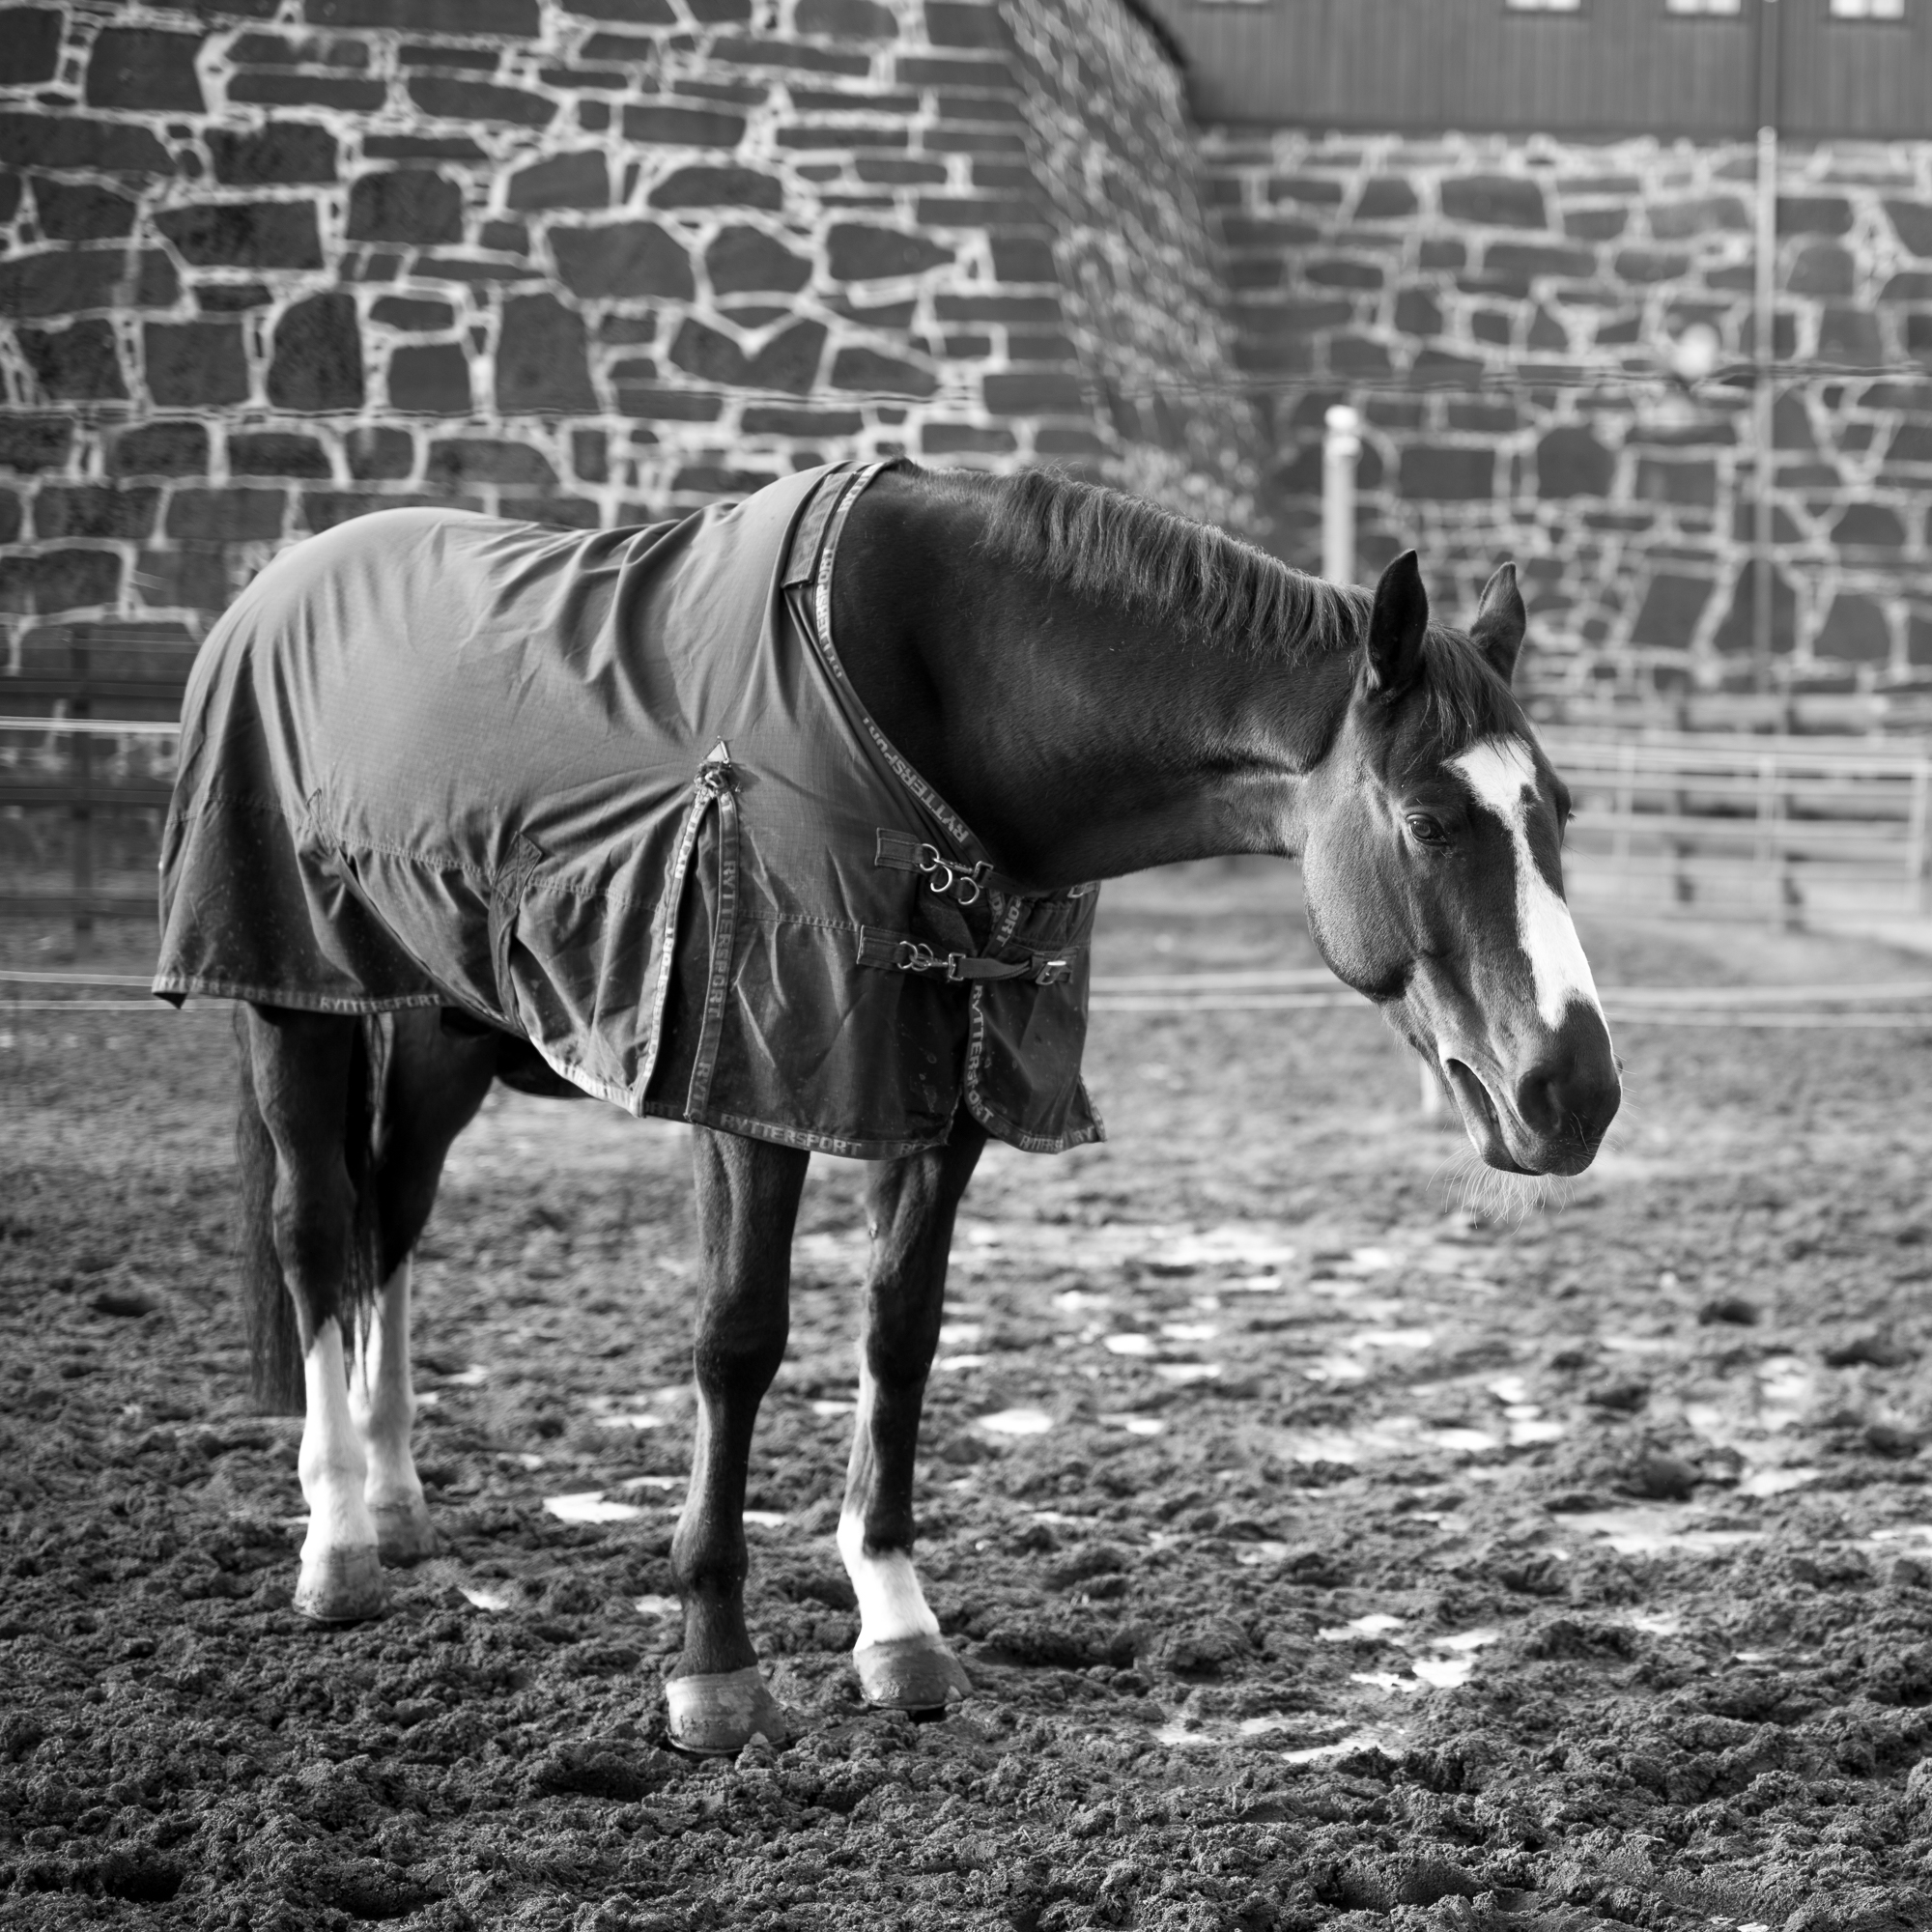
I’m sure this area is popular with tourists during the day, and so the horses probably become quite nonchalant with visitors. However, we were among the first in the area this morning, and so this horse seemed quite interested in our arrival. It was a dull early morning light here, and I think black and white captured it better than a colour photograph could have. Behind the horse are the outer walls of the fortress.
- (B&W) and 13. (Selenium Toned) Panorama from Akerhus Fortress (50mm APO)
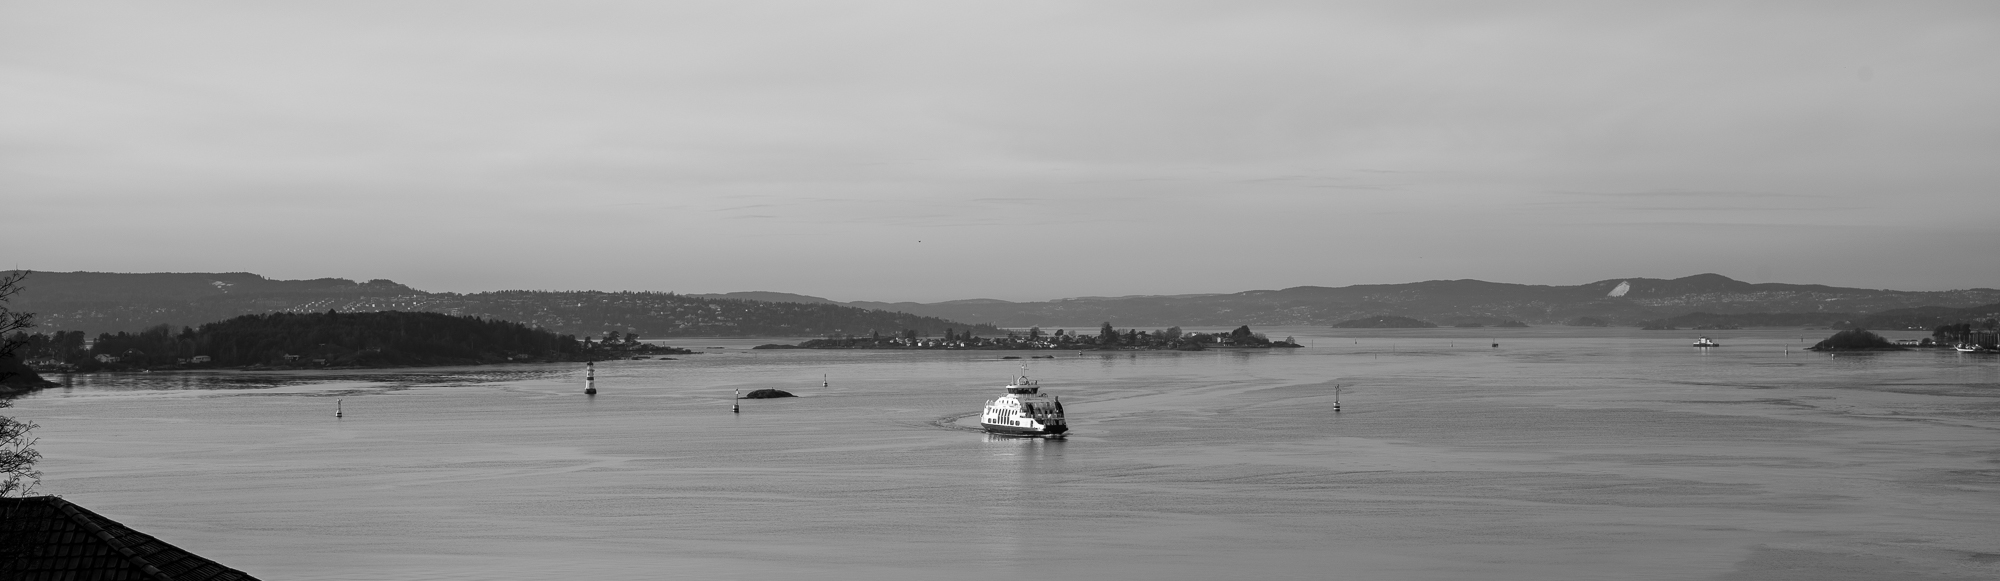
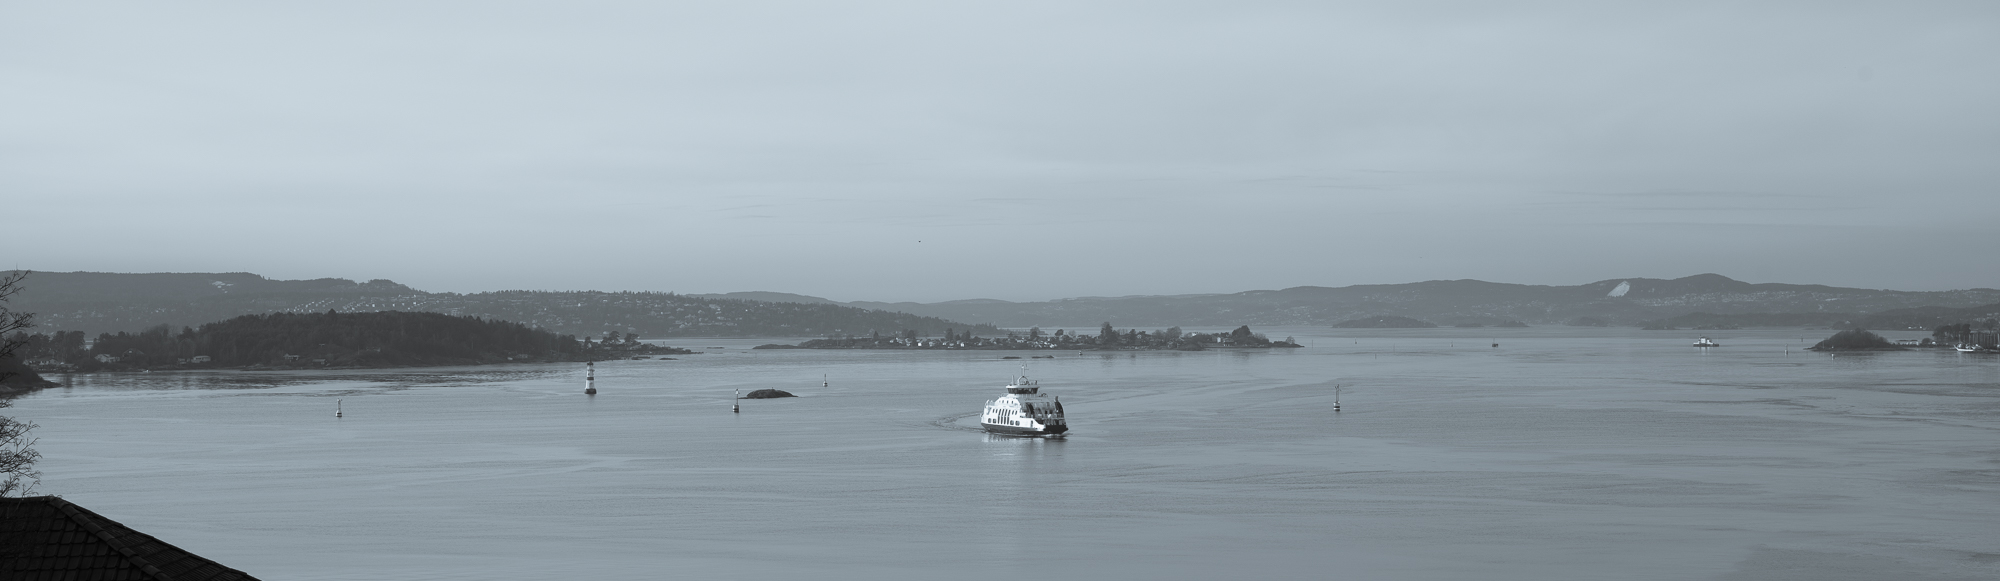
This is cropped from a single 50mm image, as the area below is still in military use and not photogenic. It does however demonstrate the advantage of such a high native resolution. I couldn’t decide whether I preferred a conventional B&W or a selenium toned effect in Lightroom, so am presenting both here. I think if the sky had been more interesting (and if it had been, if I’d had a colour filter for the 50 APO) then I might have had a preference for B&W, but without the drama of the sky I wonder if selenium toning adds something.
- Akerhus Fortress Building (50mm APO)
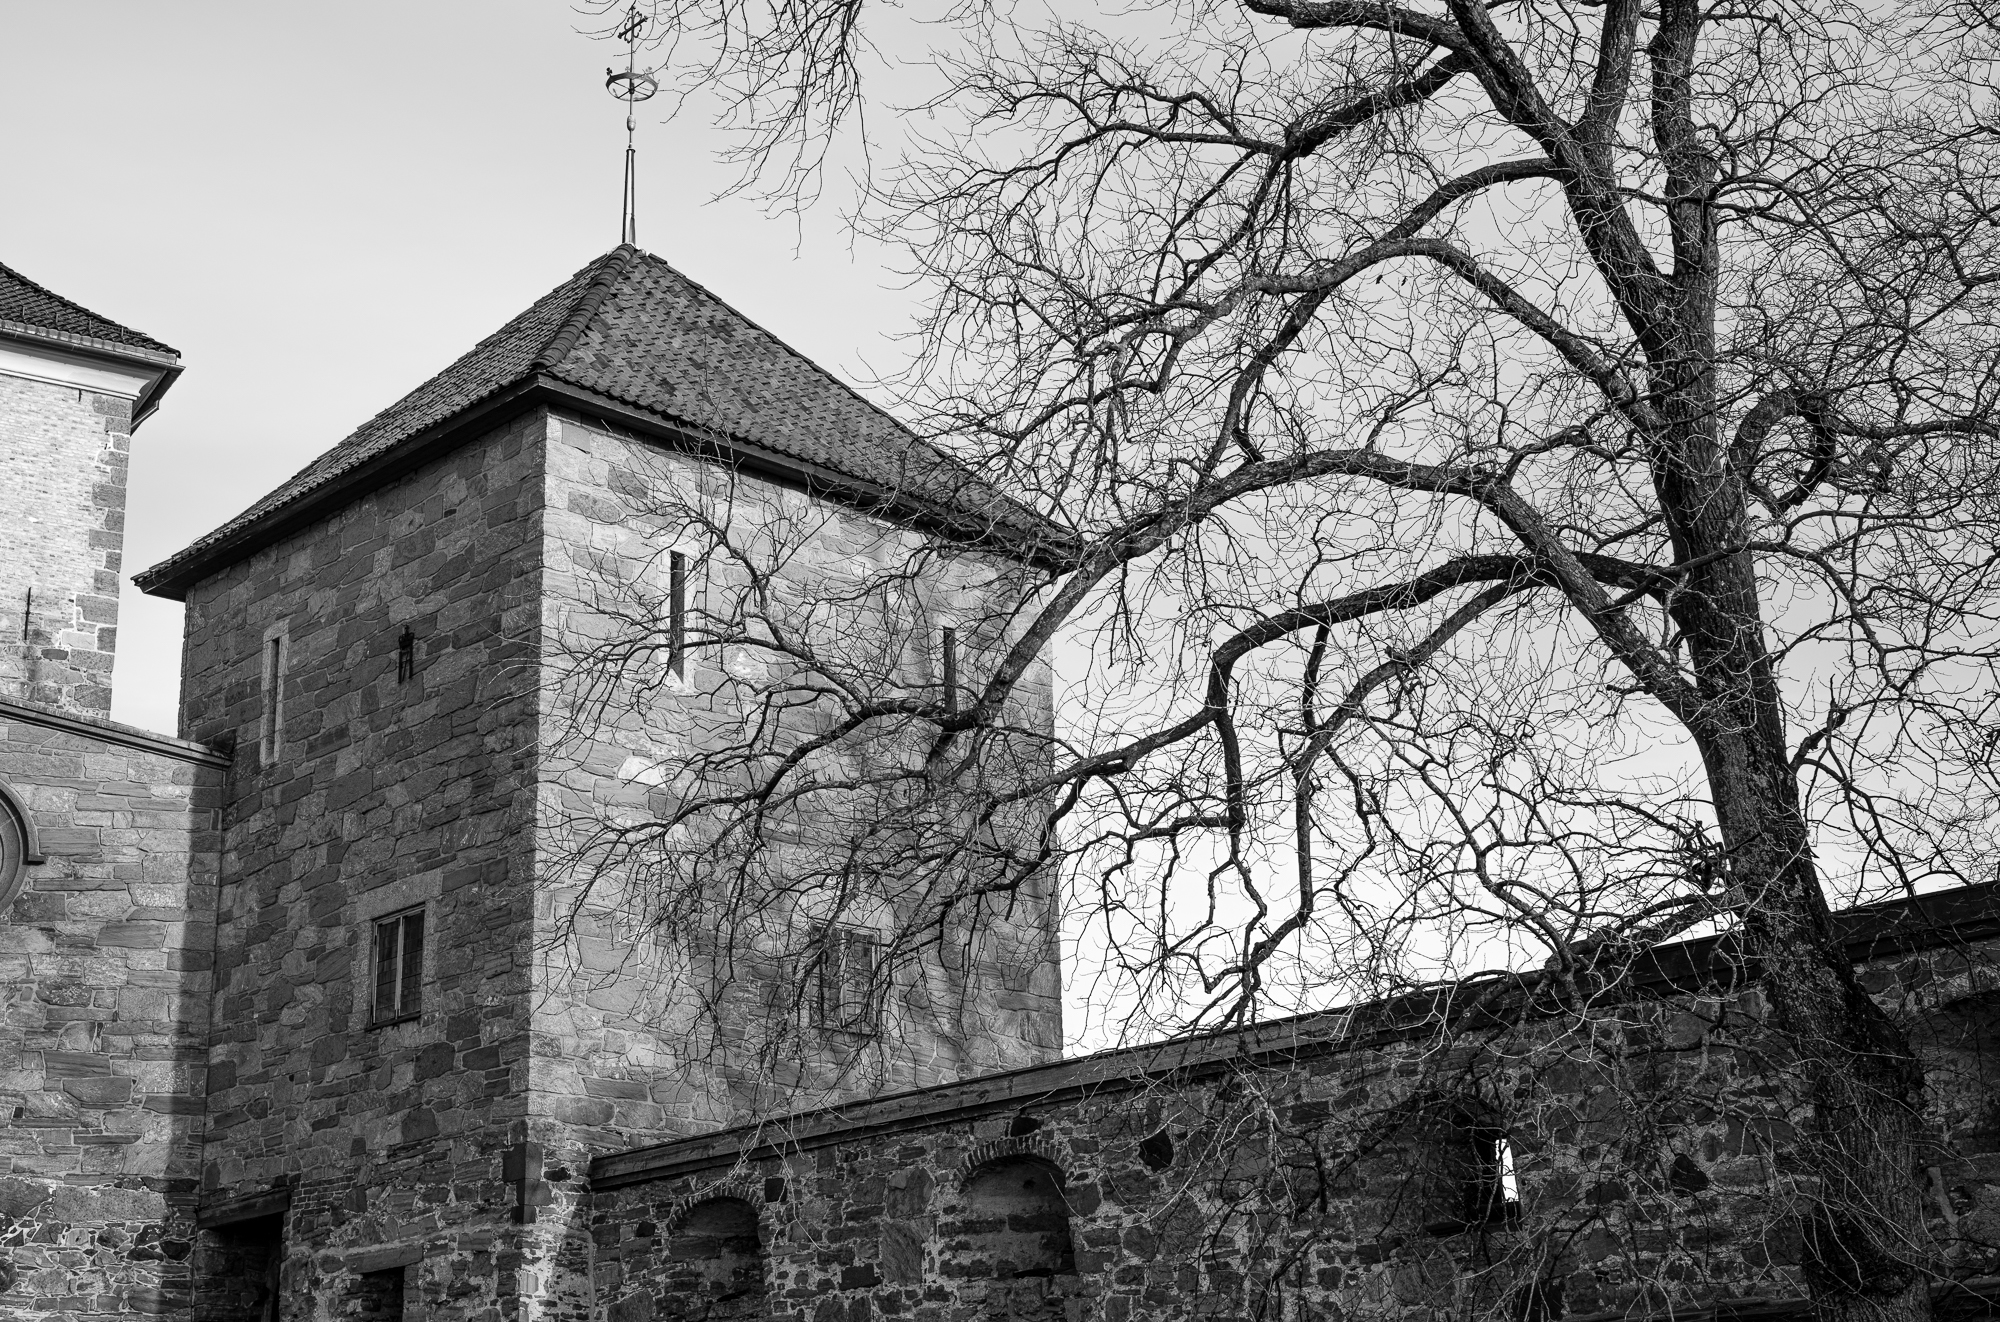
This image again highlights the M10M’s synergy with bricks (although somewhat older than those in the Harbour Building). It’s a (photographically) dull sky, but the tree conveniently distracts from this.
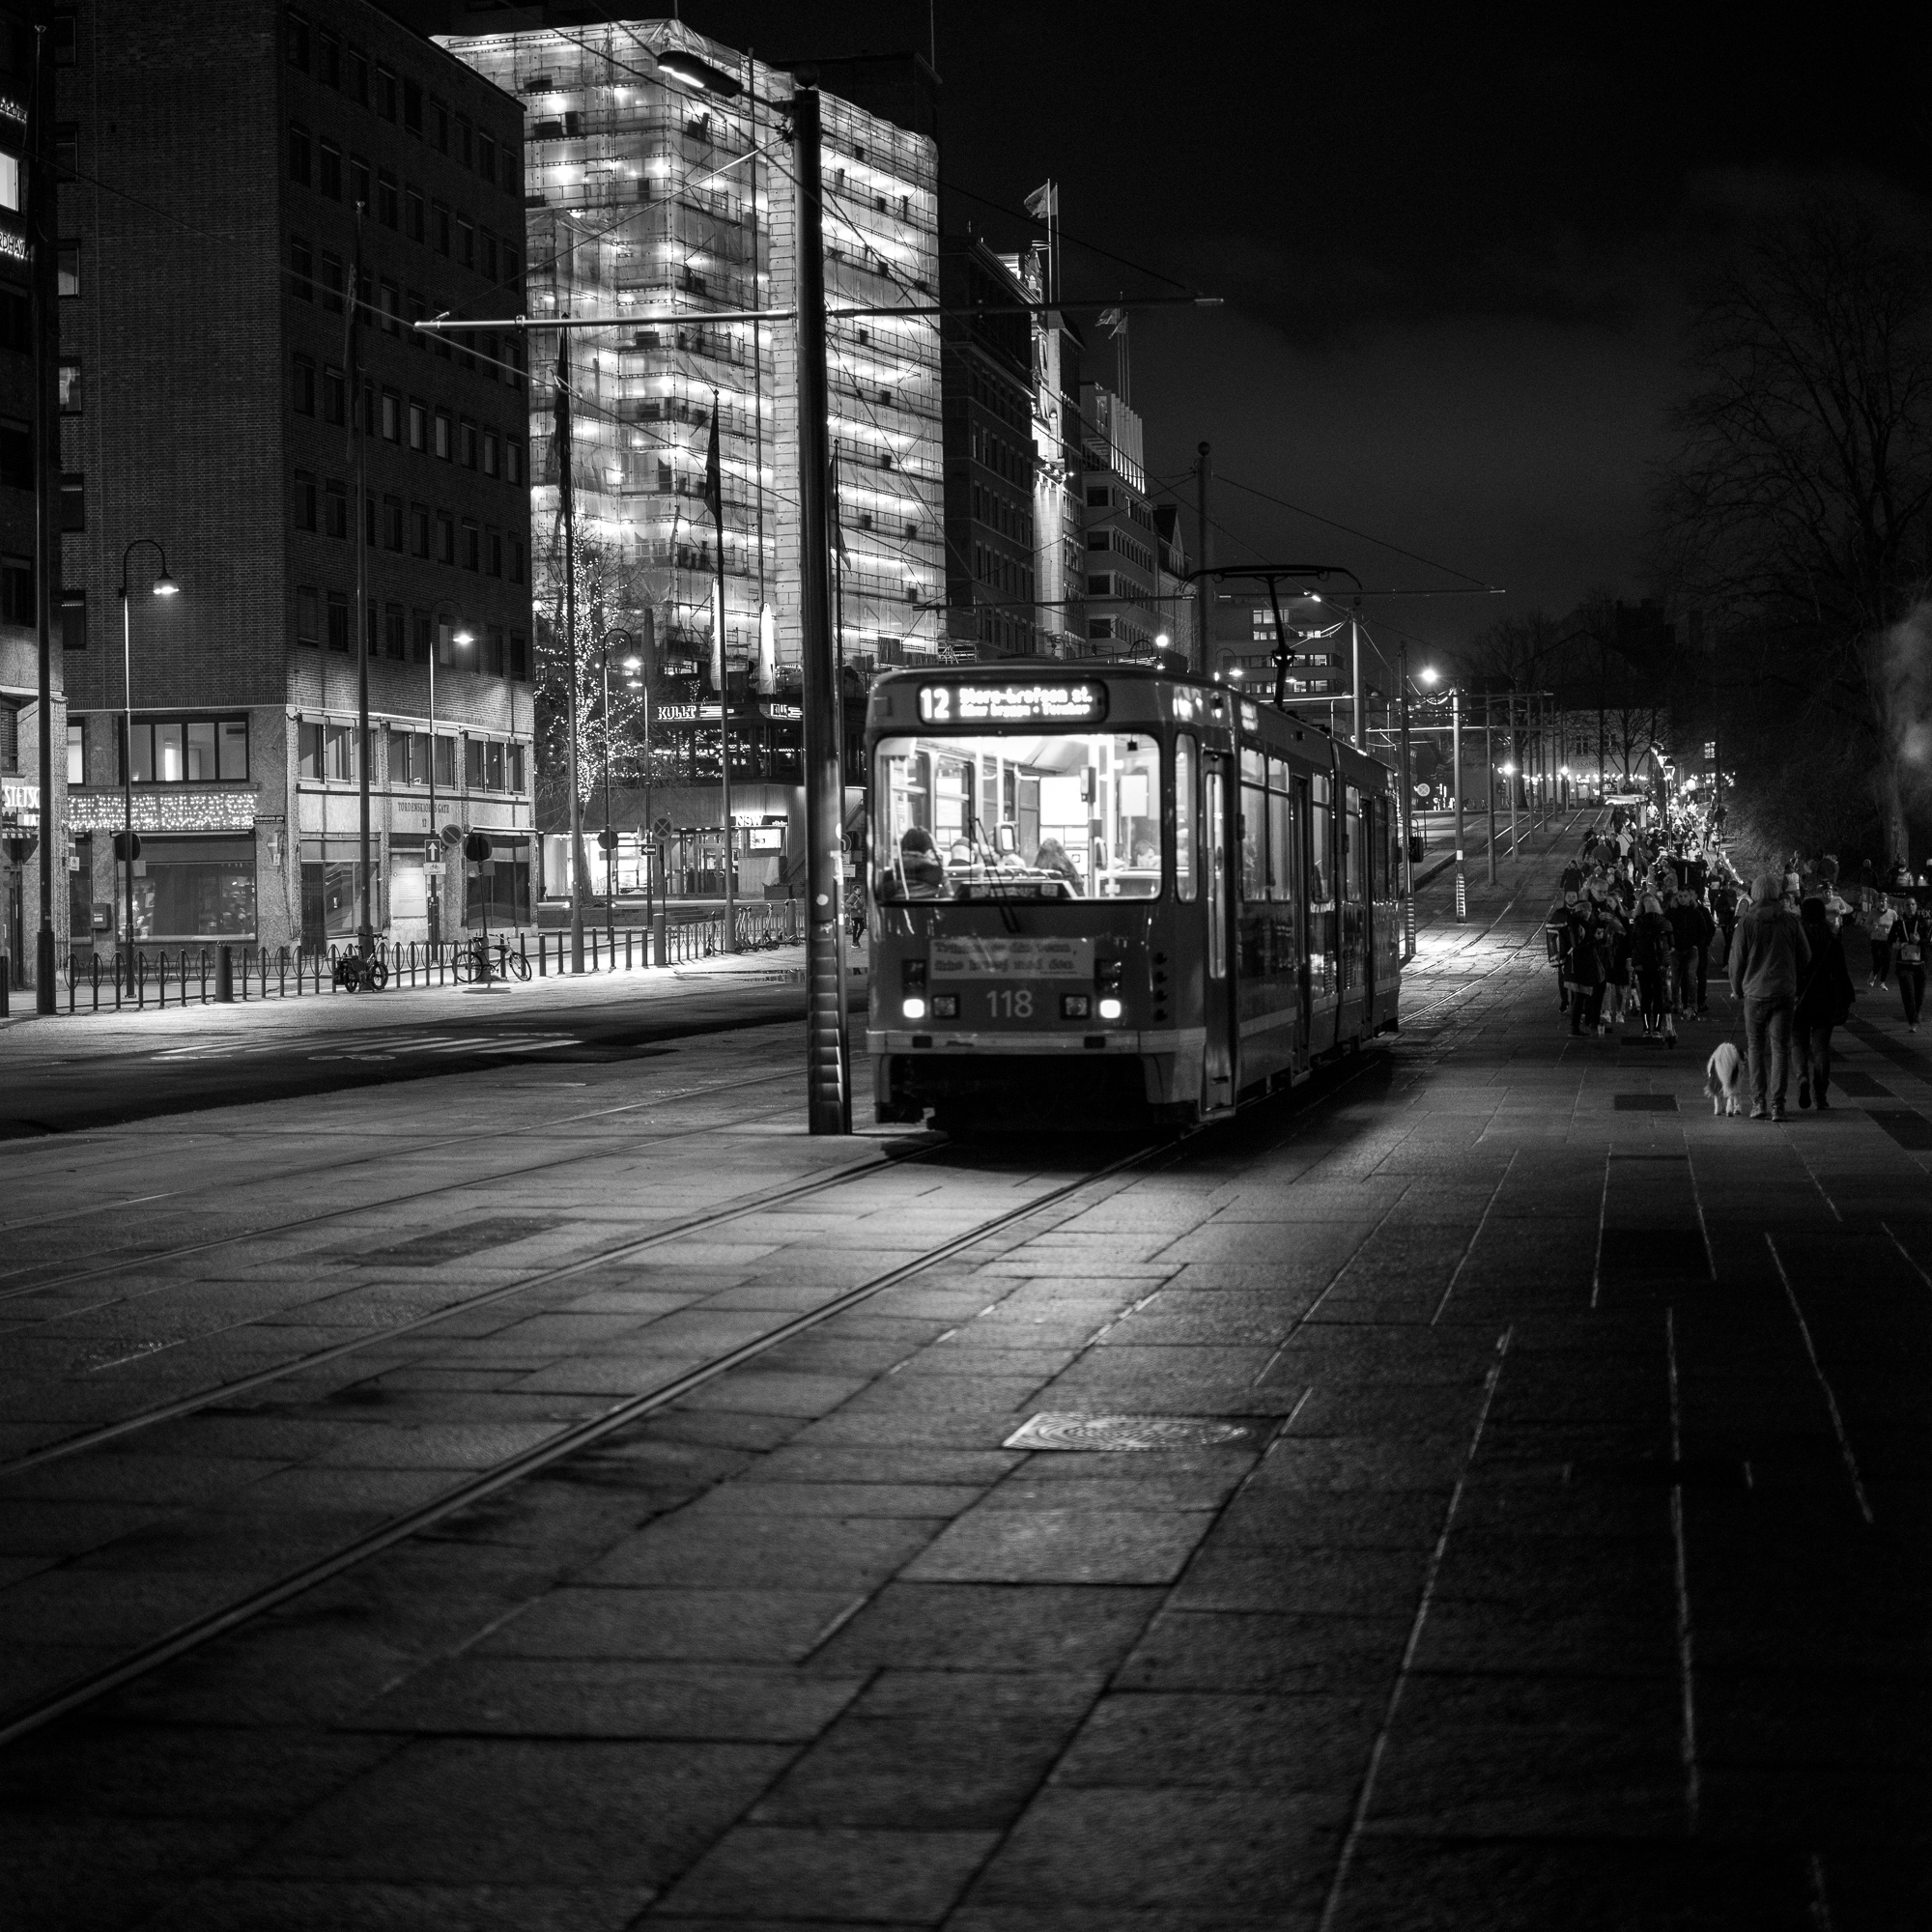
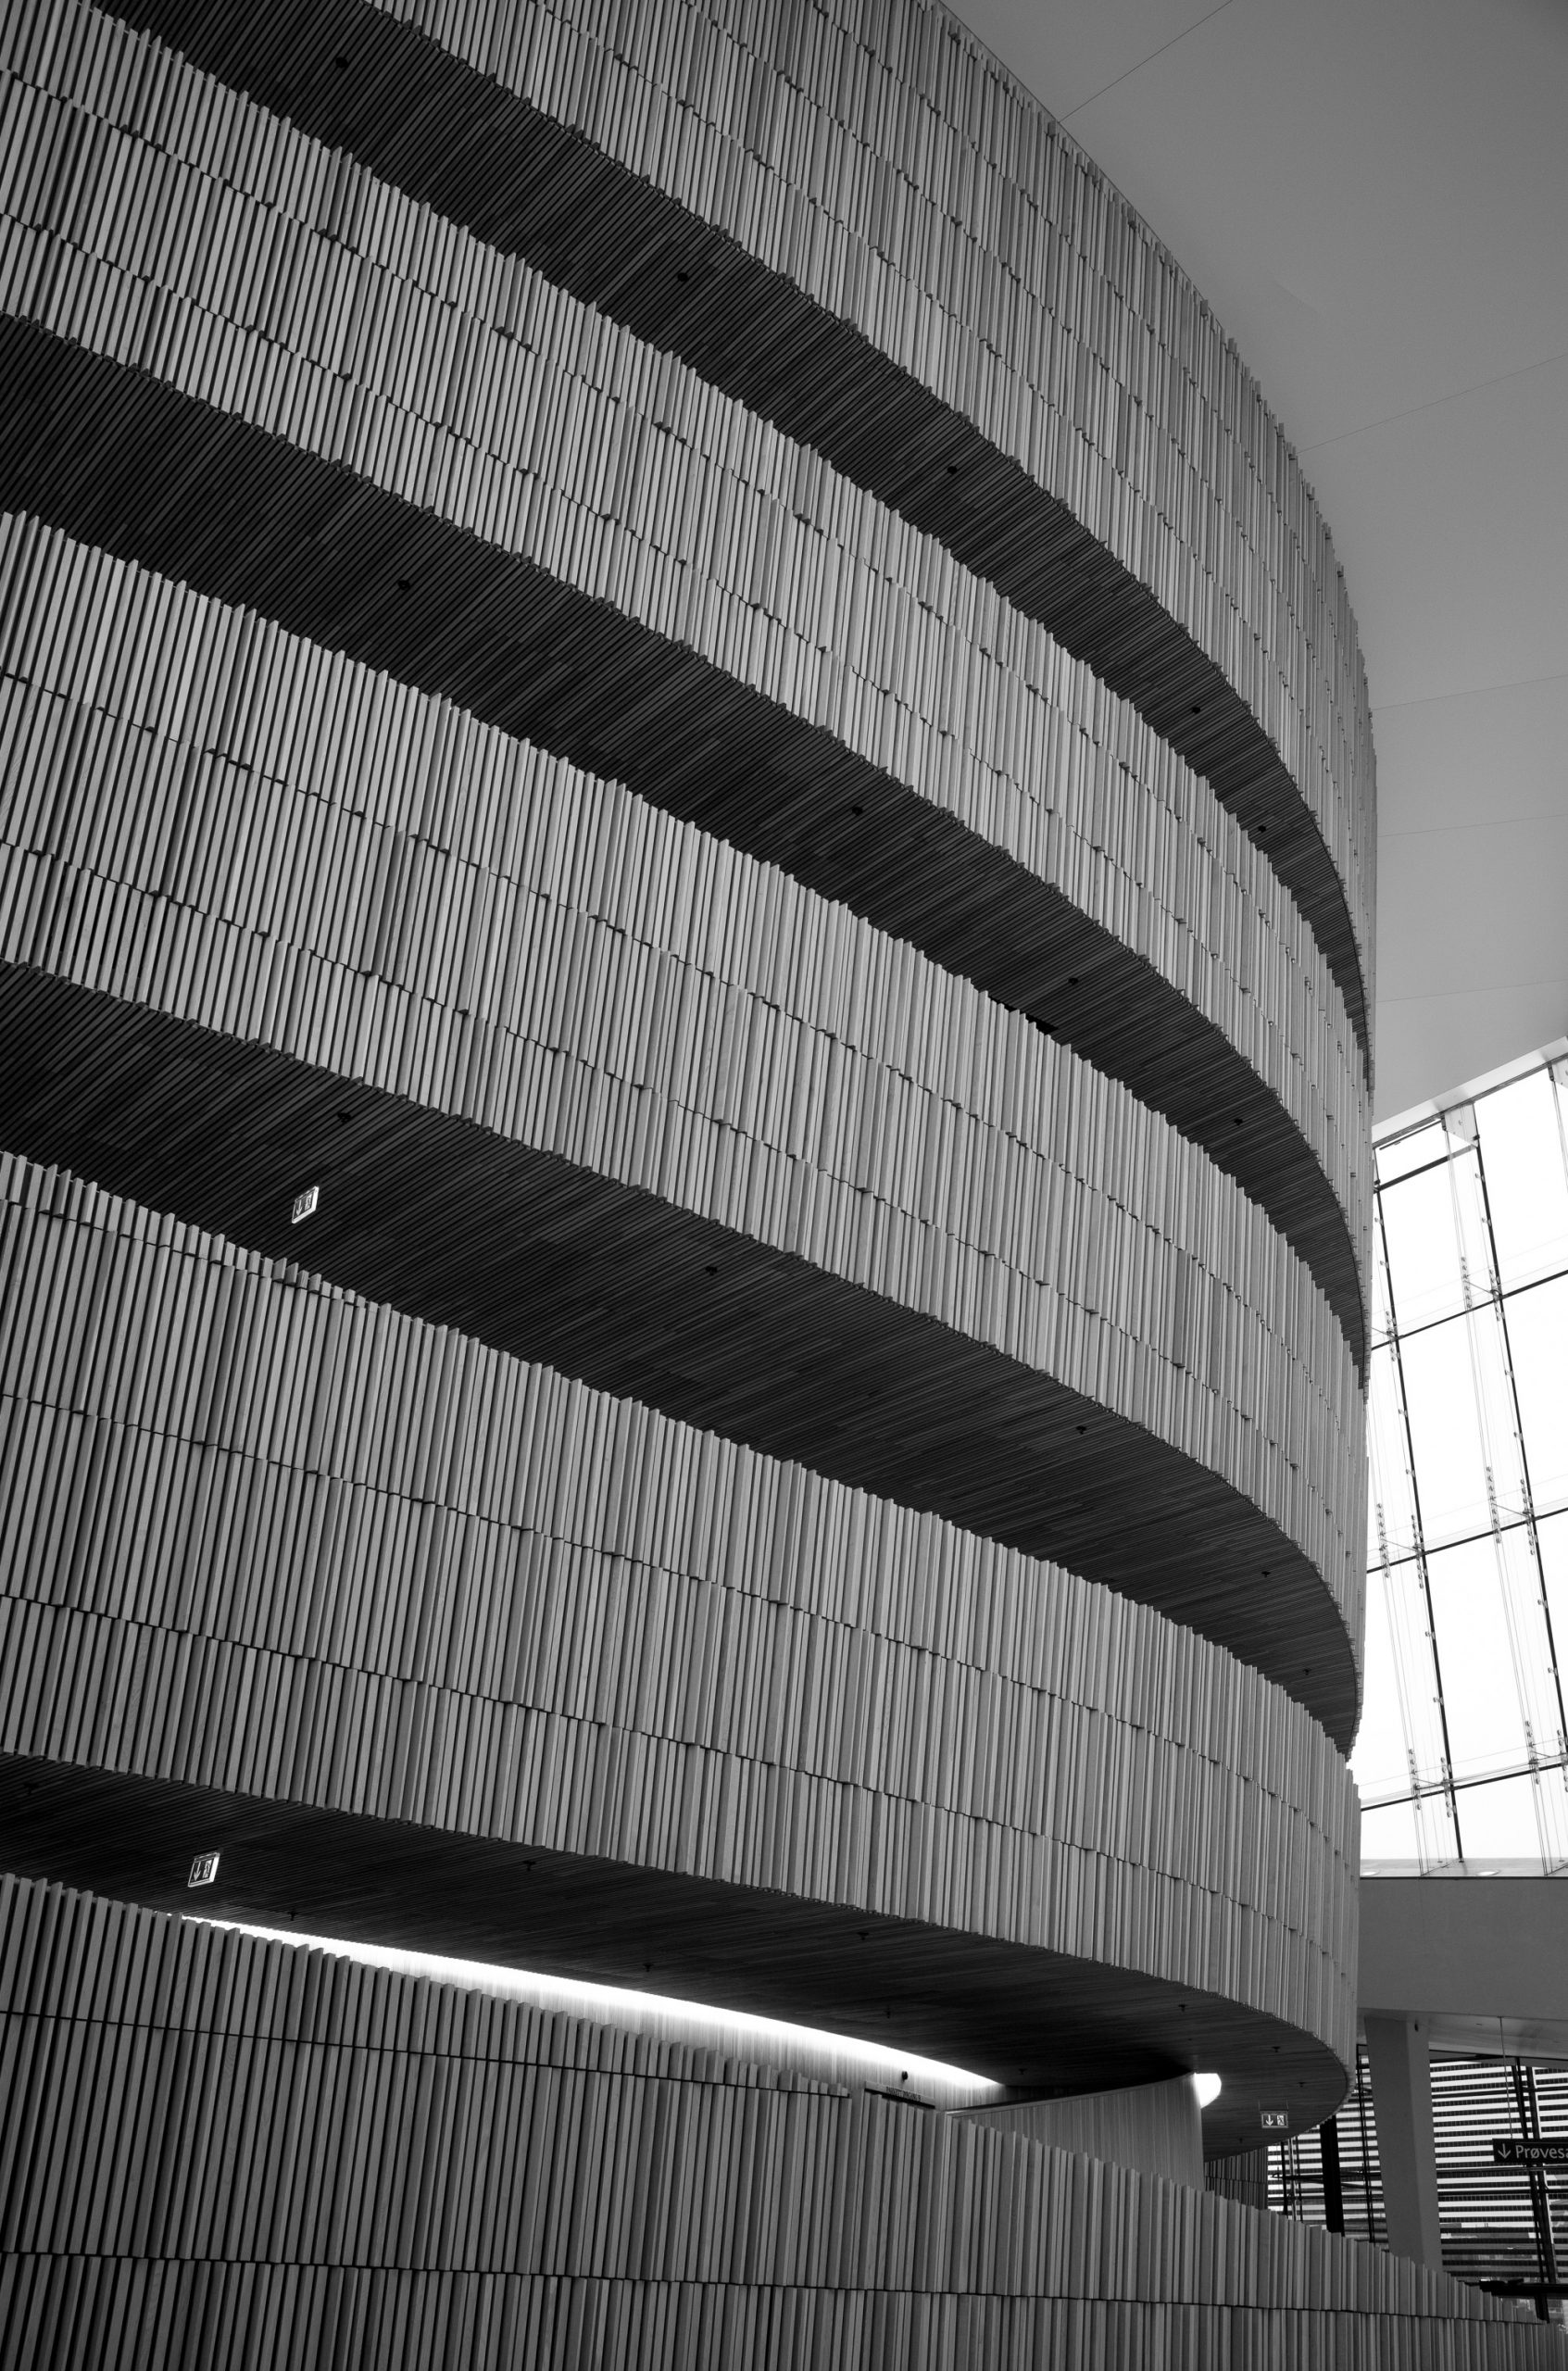
- View from the Opera House (35mm Summilux, orange filter)
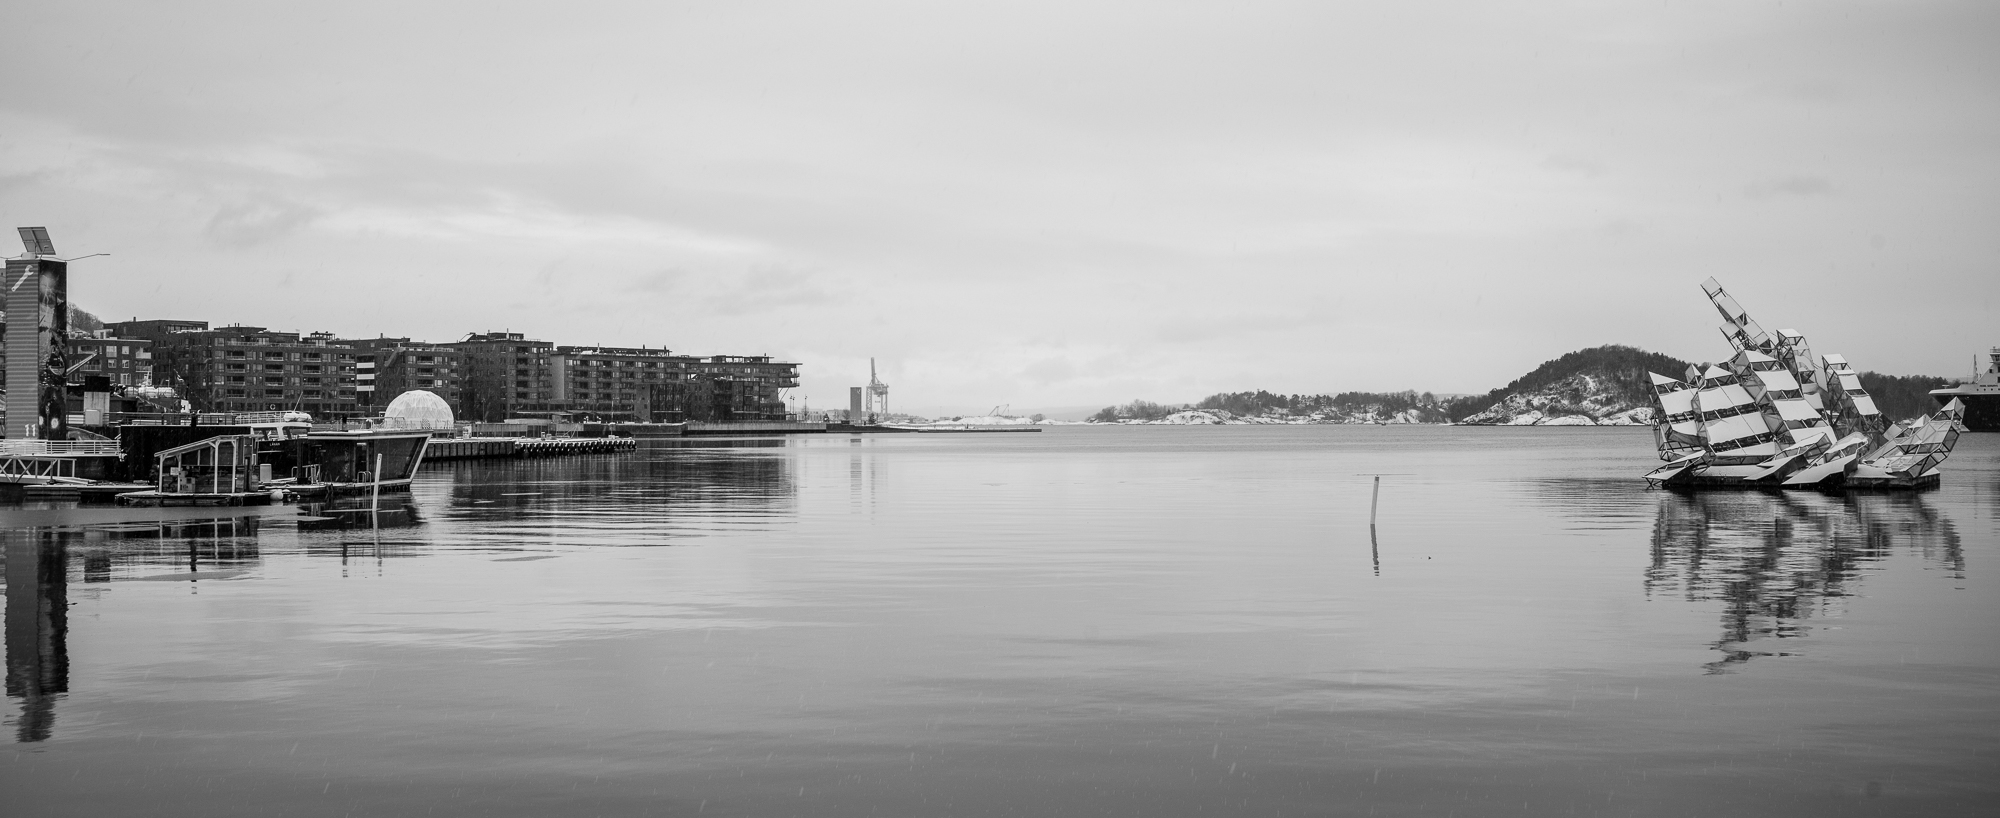
It was snowing reasonably heavily when I took this – with small amounts of snowfall visible in the immediate foreground. Despite the snow, it’s actually a very calm image, which I cropped to remove too much water and sky. No doubt a stitched panorama with two 75mm captures would have give higher resolution, but I’d be comfortable printing this image at a reasonable size given the already very high resolution of the sensor.
I’m going to add a slightly frustrating (for the reader) comment on portraits – I think the 50mm APO is one of the best portrait lenses I have used. I enjoyed it as much or more than the Canon EF 85mm 1.2 (never owned, only hired) and the Sony FE 85mm 1.4 which for a while was my default portrait lens on the A7R series. Clearly both of these lenses offer shallower depth of field, combined with a naturally closer perspective, but 50mm works well as a portrait lens, and the reality is that at f2 you have a face essentially fully in focus with rapid softening in front and behind. As Steve would say, this makes the subject “pop”. I enjoy wide apertures and shallow depth of field greatly, but I’ve also realised that most of the time I don’t want just one eye in crisp focus, and so increasingly stop down a bit with longer lenses. So what’s the frustrating comment? I’ve only taken portrait photographs of my family, which I don’t want to include here, so you will have to look to other reviews for examples. But I will say again – for what it’s worth – I’d happily use the 50mm APO as my only portrait lens.
Lack of colour
I haven’t devoted much space to a discussion of black and white versus colour. The reality is that if you are considering the Monochrom, you will – hopefully – only be doing so after having decided you could be happy with a (or perhaps your only) camera providing B&W images. That’s a subjective decision, and if I’m honest I’m not sure I could ever be happy with only the ability to shoot in B&W – some scenes (and some memories) just cry out to be in full, vivid colour. But I might just be persuaded that a black and white camera could be my main camera.
There are of course those who would say that the Monochrom is inherently a gimmick, because converting a high resolution colour image to B&W yields a good B&W image with more post-processing flexibility in terms of mixing colour channels etc. And this isn’t an unfair critique: I’ve never had trouble producing B&W from a colour sensor, and no one needs a dedicated B&W camera – colour can do both. As I’ve said, the resolution benefit of a non-Bayer image cannot be ignored, but in most instances – except for very large prints – doesn’t particularly matter. There are also unsurprisingly noise reduction benefits, both as the lack of a colour filter array means that the sensor simply receives more light, but also because there is a general consensus that luminance noise is less irritating than chroma noise, and by definition the Monochrom will not exhibit the latter. I certainly, as I’ve indicated, found myself unworried about using almost any ISO level.
What does also matter, although this may seem like a poor excuse for the Monochrom, is the shooting discipline. Knowing your image will be in B&W changes what you shoot and how you shoot it. More importantly, it means in post-processing you don’t have to compare colour and B&W versions of photos and decide which you prefer. As I’ve said, I have a distaste for anything but very brief editing and so having that question removed – and the image ready to see in B&W – makes some sense. But ultimately you will know if a B&W only camera is right for you – if you already print many or most images in B&W, you have little to lose and some gains – otherwise an M10 – or perhaps a higher resolution successor – would make more sense.
Concluding thoughts
Ultimately, I couldn’t say any photographer needs the M10M, and the colour versus black and white question aside, I would struggle to argue the case for owning the camera if you relied on your photography for your income. I could have achieved very similar results with a host of other cameras – not least the Sony A7iv that I still own, and could have done so with substantially lower cost and lower risk (as I would have known what I was capturing in the EVF before I did so). But the question to me is, could I have enjoyed the process of taking the pictures as much with another camera?
I’m a natural cynic, and probably the biggest reason I hadn’t tried a Leica until now was a view that there is so much myth and hyperbole surrounding their cameras (and lenses) that the reality was bound to disappoint (and it’s always easy to be disappointed after spending a large sum of money). I am in fact slightly surprised to conclude that I am not disappointed. Yes, the price is too high. Yes, your ‘hit rate’ with focus won’t come close to well-implemented eye AF for portraits. Yes, the M10M is black and white only. And yes, using one does risk you being considered as having ‘more money than sense’. But I can, I think, live with all of these issues.
I can’t compare it to previous M cameras, but the M10M is a delight to use, is capable of producing amazing images, and – however cliched this sounds – gets out of the way and lets you take a photograph. If it’s the end result you care about, most modern cameras will deliver something that’s more than good enough (and in many cases as good or better than the Leica for a fraction of the cost). In most circumstances a Hasselblad or Fuji medium format camera will outperform this Leica (and offer colour when desired) – and would be cheaper than the Leica as well. And a perfectly reasonable version of an OVF camera that will give much of the ‘shooting experience’ of a Leica M is available from Fuji, and although I’m still not convinced by the merits of their X-Trans sensors versus Bayer, the X100V’s refreshed lens makes it a compelling – and unequivocally high value – proposition.
I’d prefer that Leica cameras and lenses cost less, and don’t like the restricted practical focal lengths (I’m pretty much constrained to 35/50/75 without an additional viewfinder), but more than anything I’d prefer that I’d tried one sooner. I’m still not sure I could live with it as my only camera, but the thought of selling most of my other gear and keeping the M10M now seems less like a moment of madness and more like a sensible decision. The Leica lets me see the world differently to most other cameras, and that is a good thing. My biggest struggle now, I sense, will be trying to not also buy the next colour M, when it’s launched.
You can buy the M10M at B&H Photo HERE
You can check out the 50 APO lens HERE (Steve’s review of the lens is HERE and HERE)
PLEASE! I NEED YOUR HELP TO KEEP THIS WEBSITE RUNNING, IT IS SO EASY AND FREEE for you to HELP OUT!
Hello to all! Since 2008 I have been running this website and it has grown beyond my wildest dreams. Running this site costs quite a bit of cash every single month and on top of that, I work full-time 60+ hours a week on it each and every single day of the week (I receive 100-300 emails a DAY) and am only a one man operation. Because of this, I could use YOUR help to cover my costs for this free information that is provided on a daily basis.
To help out it is simple, and no, I am not asking you for a penny!!
If you ever decide to make a purchase from B&H Photo or Amazon, for ANYTHING, even diapers..you can help me without spending a penny to do so. If you use my links to make your purchase (when you click a link here and it takes you to B&H or Amazon, that is using my links as once there you can buy anything and I will get a teeny small credit) you will in turn be helping this site to keep on going and keep on growing.
Not only do I spend money on fast hosting but I also spend it on cameras to buy to review, lenses to review, bags to review, gas and travel, and a slew of other things. You would be amazed at what it costs me just to maintain this website, in money and time (200 hours per month, and about $3000 per month).
So all I ask is that if you find the free info on this website useful AND you ever need to make a purchase at B&H Photo or Amazon, just use the links below. You can even bookmark the Amazon link (not the B&H) and use it anytime you buy something. It costs you nothing extra but will provide me and this site with a dollar or two to keep on trucking along.
AMAZON LINK (you can bookmark this one)
B&H PHOTO LINK – (not bookmark able) Can also use my search bar on the right side or links within reviews, anytime.
Outside of the USA? Use my worldwide Amazon links HERE!
You can also follow me on YouTube. 😉

A very nice review. Thanks! However I really enjoy shooting with my old m8 and a bunch of old and not too expensive Leica lenses. The poor men’s monochrom…. Camera-equipment does not need to cost a zillion thousand euro’s (or dollars…) to satisfy….! No APO, no 47MP. But still nice photo’s that I enjoy looking at.
Enjoyed your write up and review
But photos lack tone and seem underexposed and dull
Possibly a creative decision
“(…) since the higher resolution of the ‘R’ isn’t fully taken advantage of by the 40 (…)”
This reasoning is fundamentally flawed. System MTF is a product of lens and sensor MTF. Thus no lens, discounting a imaginary perfect one, can take “fully taken advantage” of the sensor used. A higher MP sensor will give better resolution to the system with any lens (and a better lens will never “outresolve” the sensor). Even though somewhat soft lenses won’t match the result of sharper ones, greater sensor resolution will yield captures with more detail, which can readily be seen in large prints. The lack of an AA filter on the a7r et.al. also increases resolution, and the higher MP count reduces the risk of aliasing, especially with a softer lens.
“[I]f you want a fast 50 with creamy bokeh then you’d choose the Noctilux (cost aside).” Not to mention size and weight!
If size is not an issue then the Zeiss zm 35/1.4 is optically and – IMHO – aesthetically superior the summilux 35mm asph (which is, of course, also excellent!).
As a former Leicaflex owner and user in days of yore, I can say with absolute assurance that the Olympus PEN F satisfies just as well, in every conceivable way under any and all shooting conditions, including infrared and long-exposure, with the dial-up instant option for dedicated monochrome fine JPGs (with RAW on the SD card for later). This monochrome is SUPERB for urban photography but, of course, is not really suitable for large-format printing. The RAW images blow up beautifully to 11×14 after processing with the Olympus Workspace software, which is very handy for adjusting horizon, perspective, etc. The PEN F at 20.3 MP is a “photographer’s camera” (at a fraction of the cost of the Leica) and is still available (and still unexcelled by any competitor) brand new from the Olympus Store and from online retailers at 15% off original price.
I love these occasional posts that try to compare film to digital. Oh my beautiful imperfect film scans, your perfect digital images will never compare.
You’re all wet.
Very nice article and lovely photos
I used the M9M, 246 in the past and now rebought the M9M again which I love.
In my opinion the best thing about the M10M is its ISO
Enjoy your beautiful new camera 🙂
Great review and I really enjoyed your photos. I have both a Leica M240 and Q, but have always wanted to try a Monochrome Leica. I agree with you that the conversion to B&W has become so sophisticated that it has been hard for me to justify another purchase. Though, articles like this one are very tempting….
The portfolio of photos is nice, not great, but OK.
In spite of all the hoopla regarding Digital images from a Leica M10 Monochrom,
I personally would never go that way!
I used a friends earlier Monochrom soon after sensor replacement.
I couldn’t wait to see them on my screen..
“Is that all there is?” was my voice.
Truly disappointed in the results.
My Film scans have character, maybe even gross faults that give character.
The OP waxed about the 50mm APO lens, not all that better than any previous Summicron..incl. my pristine Collapsible-Summicron!
They flare as does my vintage
One minor thing..depth of field scales are really only correct to 5’x 7″ prints!
That was the original design of Barnack and the optics guy!
Sure they shrink as one gets bigger..
Personally carrying a small camera(Leica M is small) and looking at a small image in viewfinder of back screen, I myself,never see HUGE prints..
I love Steve Huff’s site with great reviews and experiences.
At the end a really interesting review of one opinion.
https://www.flickr.com/photos/148006815@N08/
I just got the M10M today but used to own the CCD Monochrom, and no real difference in terms of looking overly digital to me eyes. I love film so my editing is focused on bringing the files closer to the film (in this case Tri-X) output. The above shots are from my first day with the a and the Summicron 8 elements from 1962.
This is a truly excellent review of the MM. Thank you, and I also enjoyed the images you created.
A beautiful creamy feel to those in softer light (e.g. the overcast shots). The “digital harsh” comment above is uninformed. That’s just from those shots done in direct light (and the tack sharpness of those is a beauty to behold also).
To add to Steve’s comment on calibration – it’s incredibly important if you’re an M shooter to understand and recognize how calibration works.
The simplest test anyone can do is check a point at infinity to see if the patch aligns (for “infinity” distance, a rule of thumb is focal length x 100 yards – but its easier to pick a tower or building 1-2 miles away). If the patch does not align you have 2 choices – use a 2mm allen wrench and make the adjustment yourself (it’s not hard, and I highly recommend learning to do this yourself) or send to Leica.
There is of course more to calibration than that, but in my expense, that’s what you need 99.9% of the time when shooting an M. Learning to do this yourself can help you feel much more comfortable with the camera (its a mechanical design mechanism that hasn’t fundamentally changed for decades).
Assuming the camera arrives to you calibrated, this is still something that is very rare (perhaps once in 5 years through extended abuse of the camera 🙂 ).
I appreciate these pictures. I find most of them excellent!!!
James this comment is about the M10M and not your photography.
M10M photos look so digital so harsh they are a turn off for me.
There is no way on earth im wasting $xxxx on harsh digital looking produced by M10M.
Ive used old digital cameras from 2000-2004 look far more natural :
eg Olympus C2020, Canon G2, Sony F707/717; Sigma SD9, SD10;
(Im preparing an article to highlight this).
If you could not get an image in focus with a fast lens then either the rangefinder or lens was out of whack. Happens even with new cameras. When this happens it is frustrating beyond belief. But a rangefinder is easier to focus sharply than using an EVF. When the camera and lens is calibrated it is stunningly easy, even with an f/0.95 lens. Anyone who has issues, it’s not the Leica experience but rather an issue with calibration. ; )
Thanks Patrick!
I always get gooey when i see and read MM reviews and articles. Ive always wanted one. SO last year i stopped by my local camera store and low and behold they had a used M-E for sale. My wife new my obsession and let me get it. I used it for a week and during that time i wasn’t enjoying the rangefinder experience. Its really over rated and very difficult to use with fast glass. It has its place I’m sure but i just couldn’t get anything in focus and i have 20/20 vision (Ok, i know its something that needs practice and learn) Thankfully, i was able to return due to unforeseen by the store corrosion issues.
I got over my leica craving as a result. But if they ever brought out an evil MM with an electronic viewfinder and a tilt screen ill be first in line. Until then, ill just drool over the to be released hassy 907X
Outstandig pictures. Thank you!
Thank you for this article!